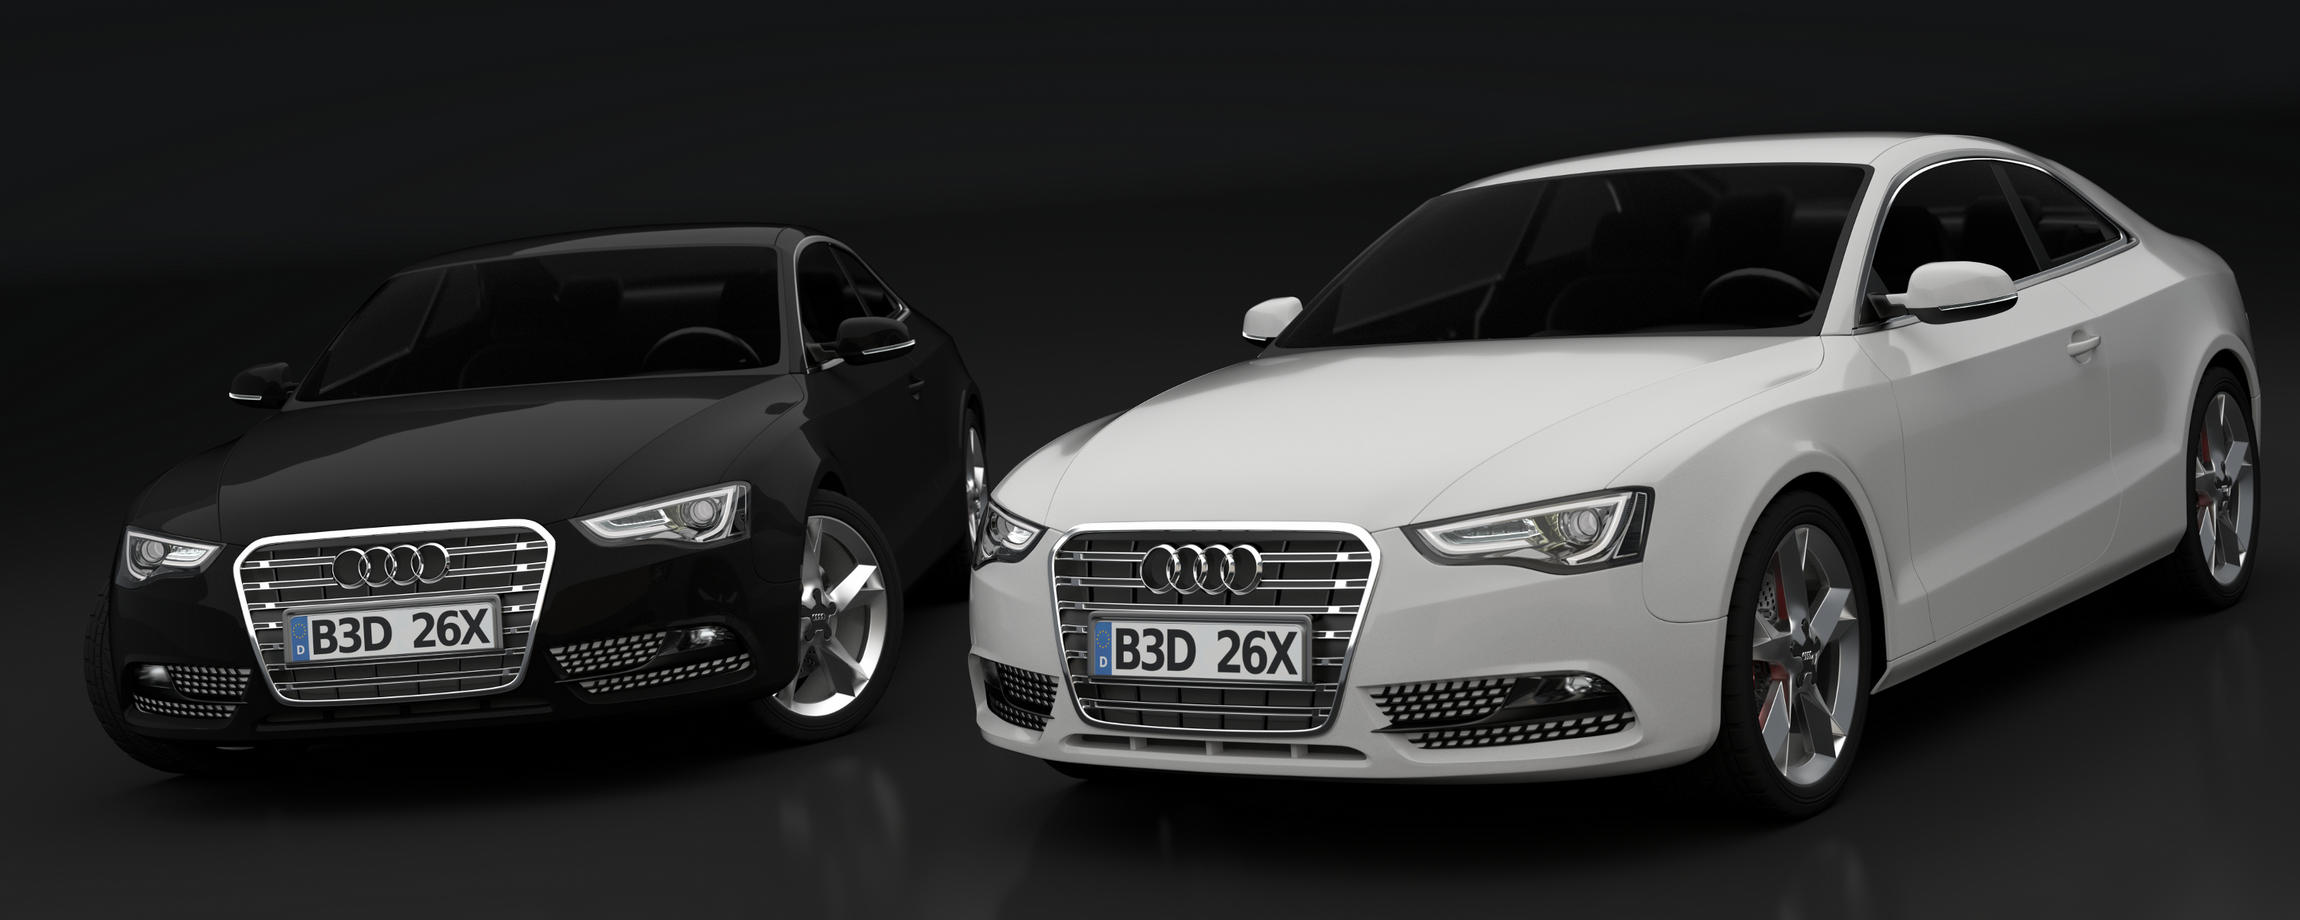
So, after posting about this car model in Finished Projects, I got some good constructive criticism on the modeling and materials.
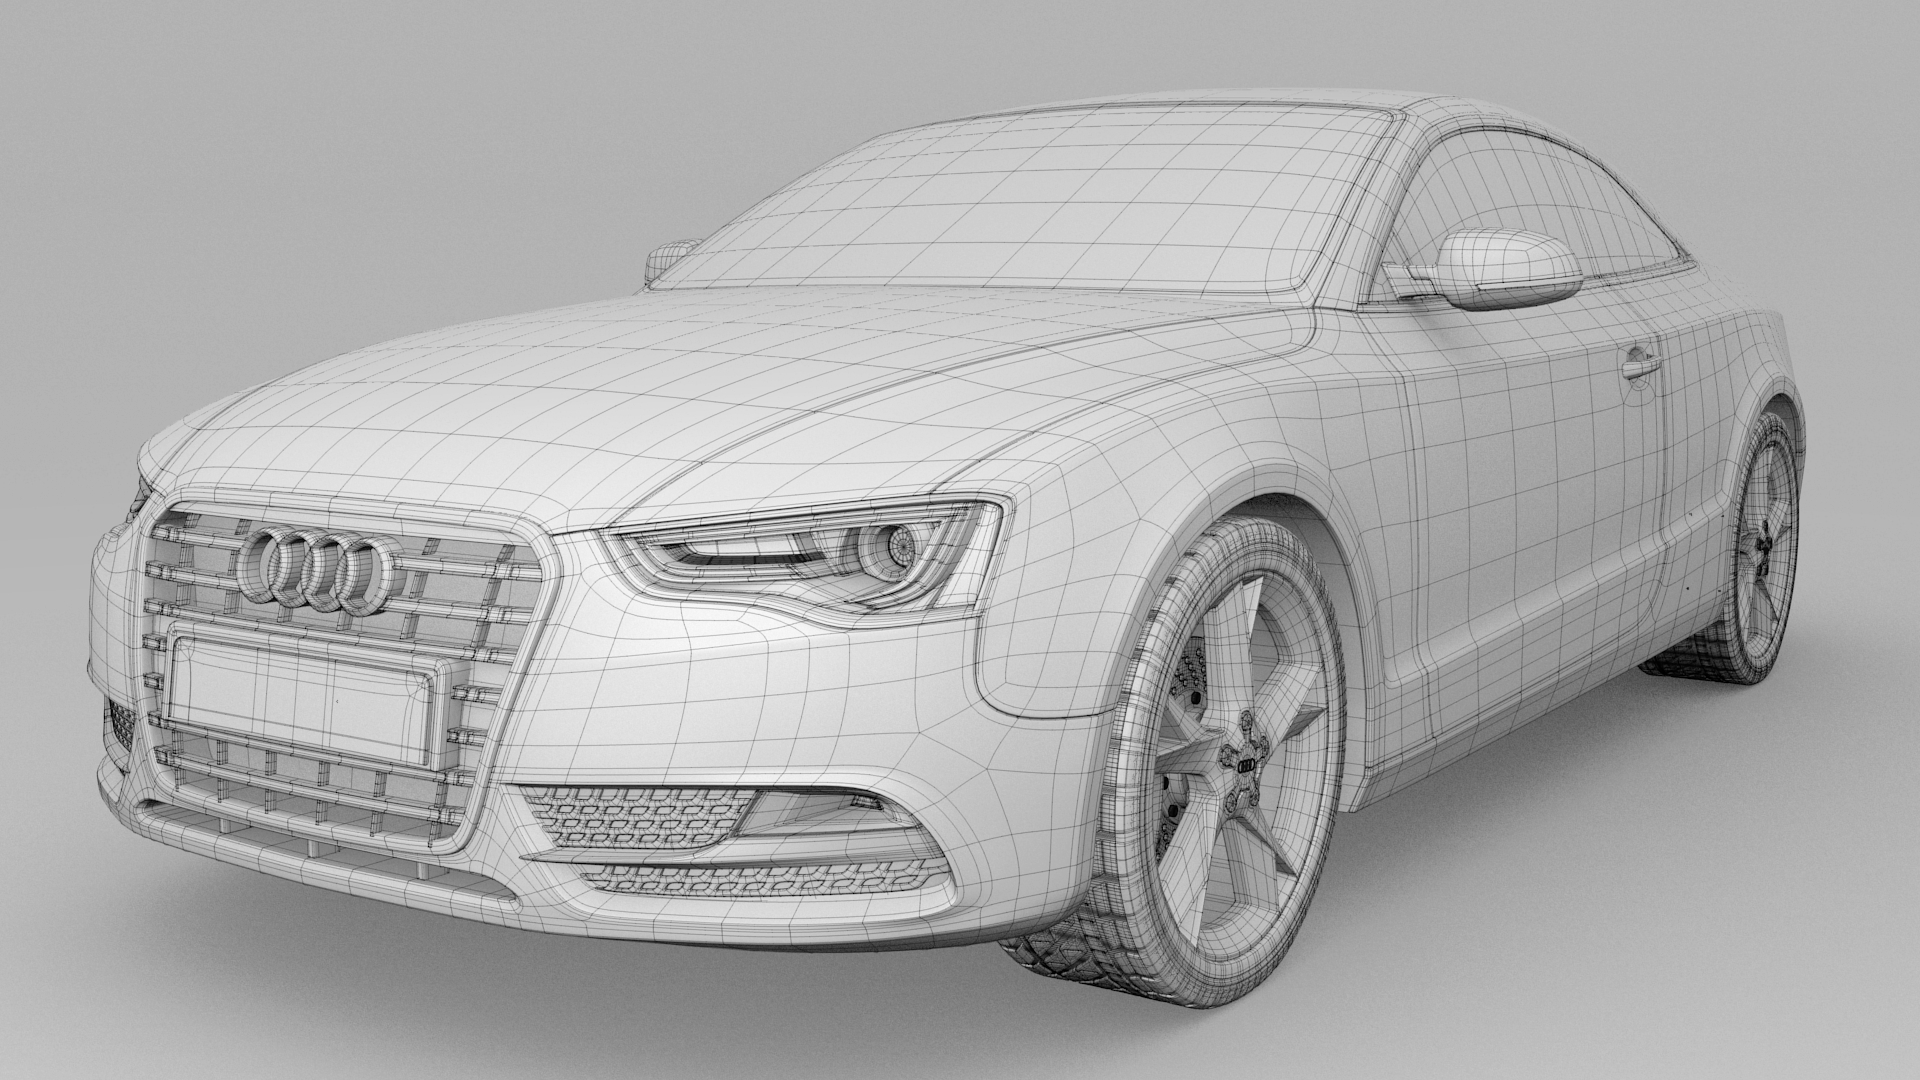
In this particular situation, I’m looking more for modeling-focused critique. I’ve already sharpened up several key edges that I’d missed and added in a few details that I’d accidentally overlooked, as well as merging certain objects and remodeling the brake discs (they were Curve-based in version 1)
Now, I’m planning on selling this one in it’s current state (plus any tweaks) on 3DExport.com, so I’m not going to be including Cycles materials, just a *.blend file and maybe a 3ds/obj exported mesh.
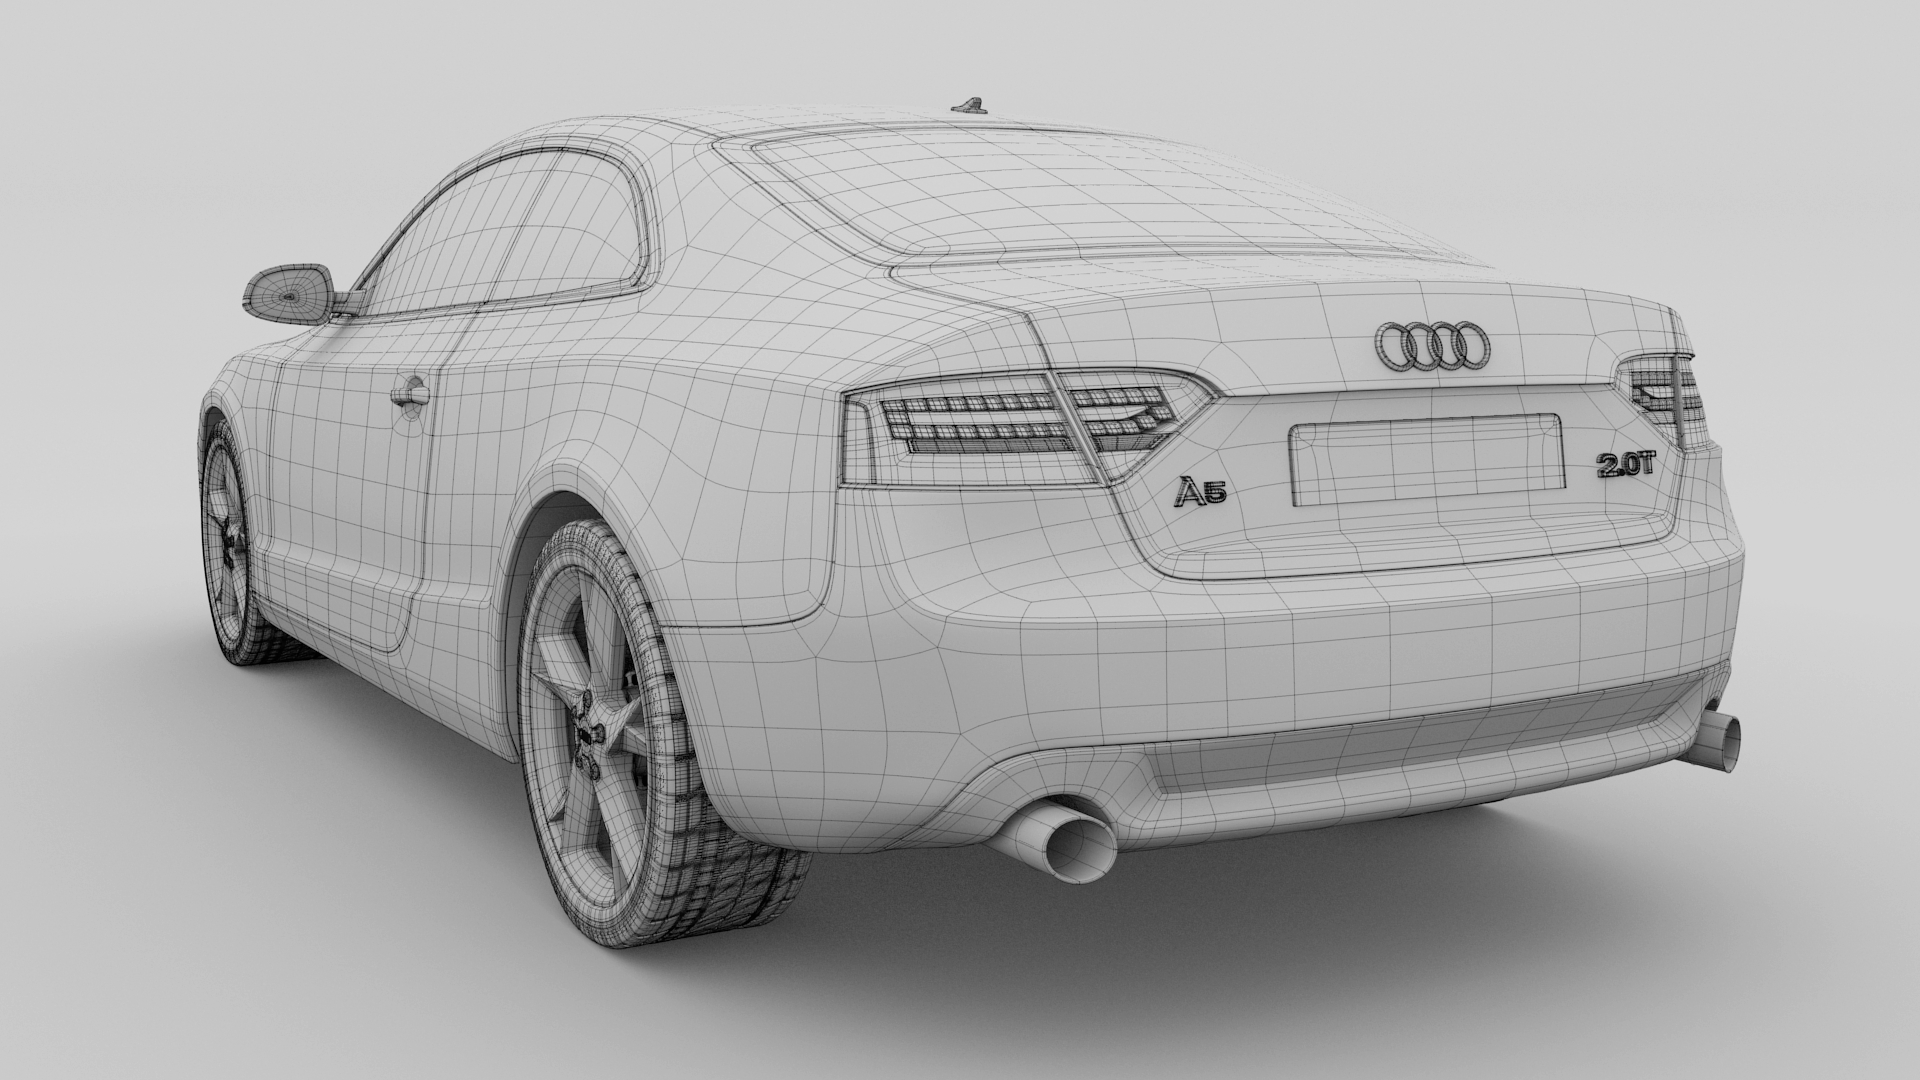
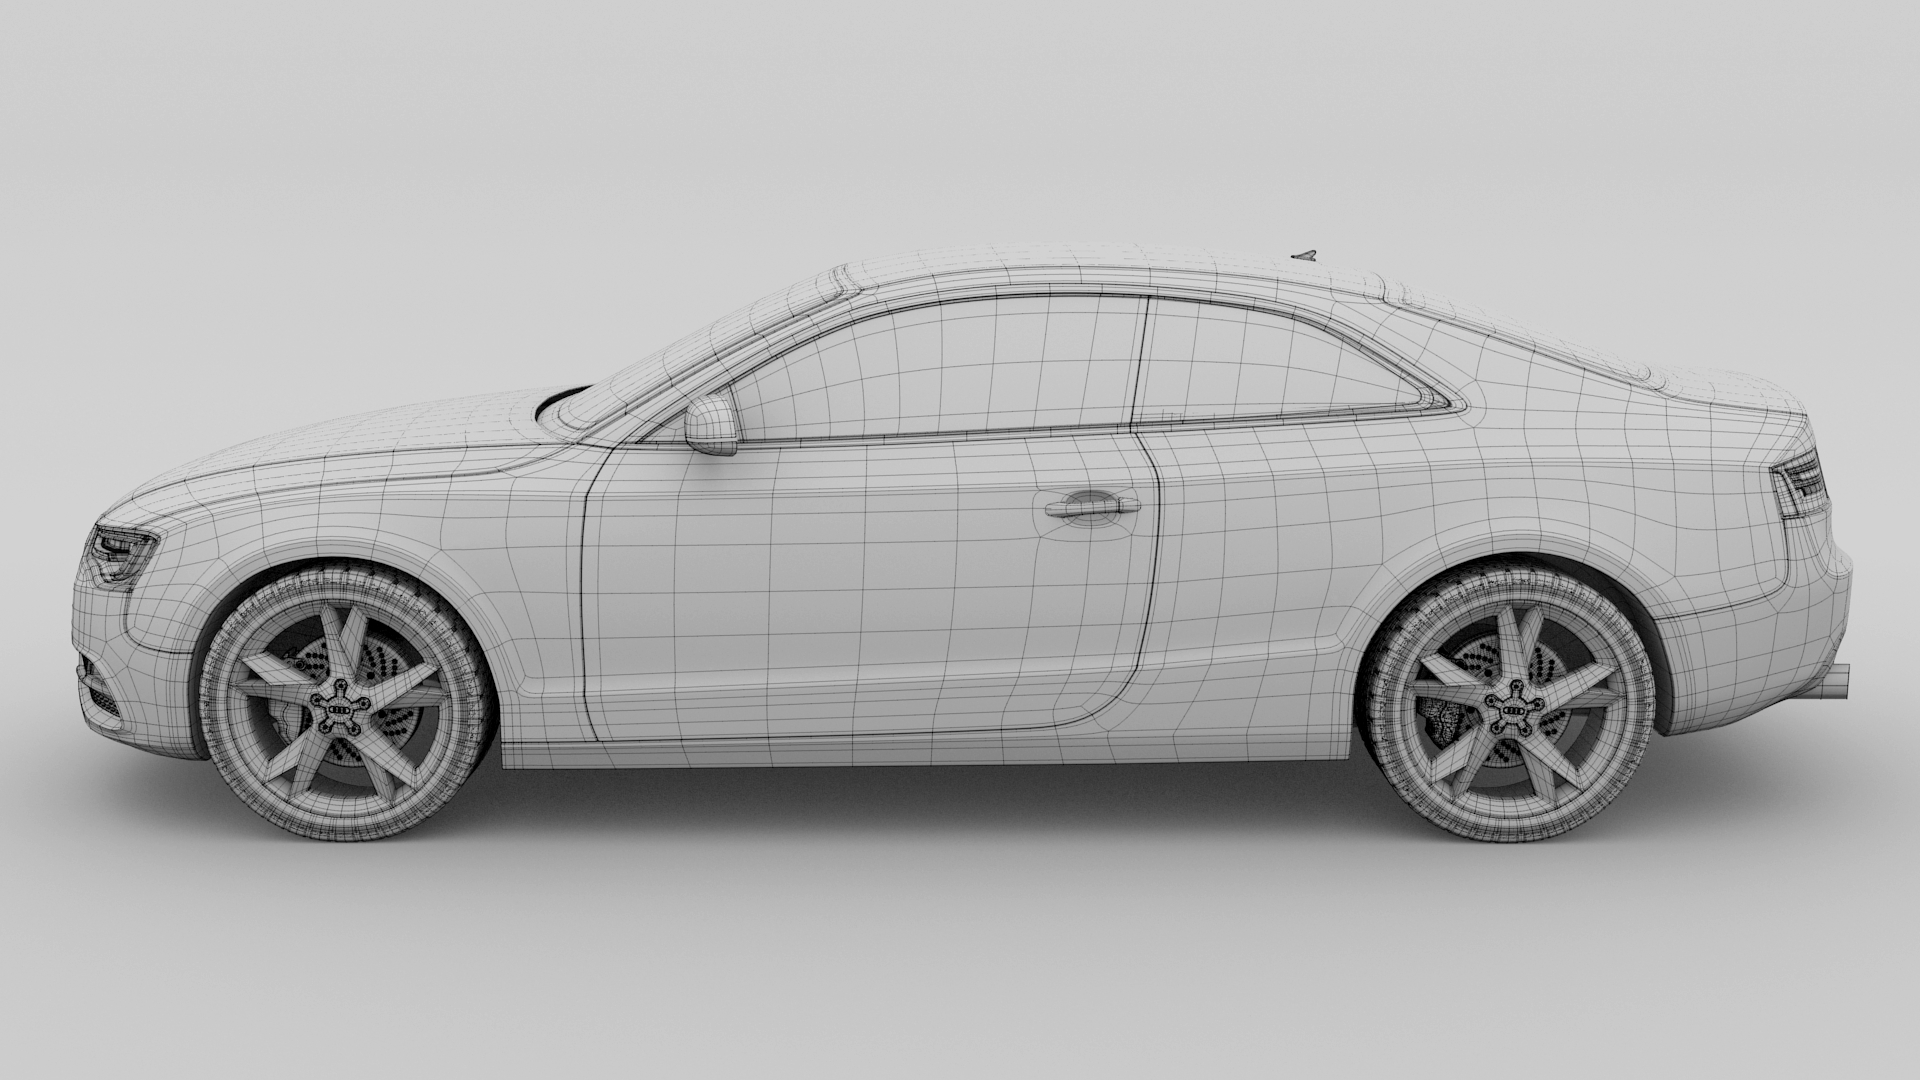
New render, with tweaked body-materials and a few other adjustments, including adjustments to the door panels (still one thing left that I’m about to get to), tweaked topology around the back wing, and I’ve also merged a few objects and fixed Mesh-sharing data to make things more consistent. I’m still working on making a brushed-texture for the brake discs, so there’ll be another update once I get that working.
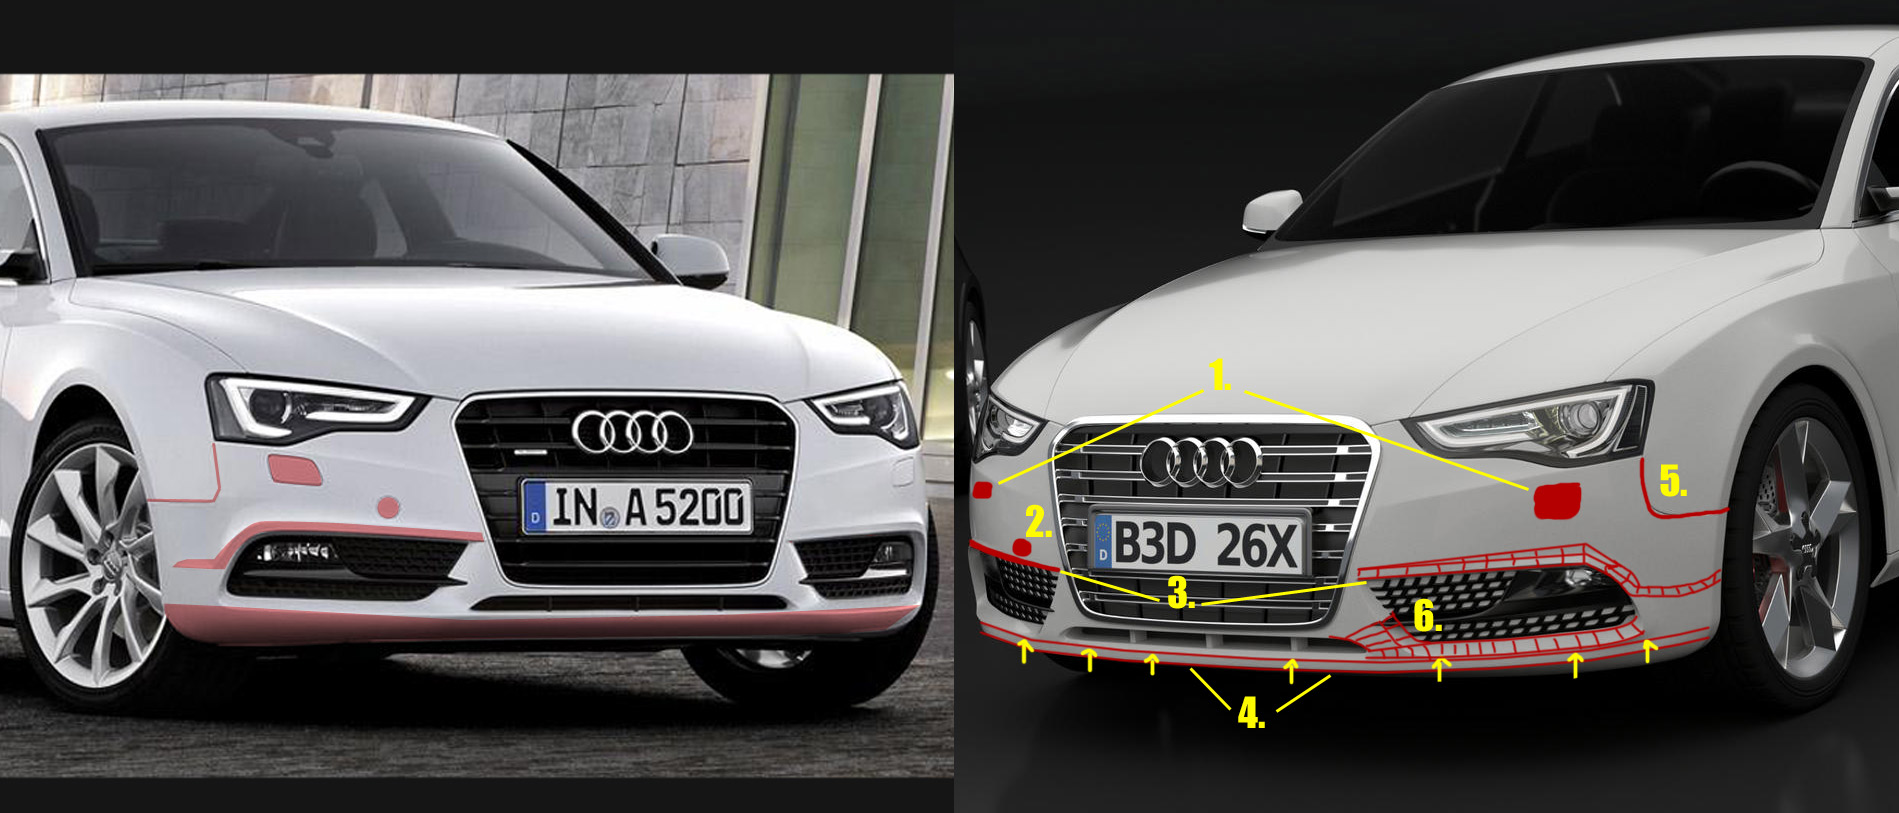
EDIT: Since your license plate contains the german country sign you wanna go for german standards, german license plates contain 1-3 letters for the city they’re registered in, followed by 1-2 letters from A-Z and followed by only numbers. All chars not exceeding 7 chars.
Wow, thanks a lot! I can’t say that I’m going for 100% precision, but there are a few elements that you’ve mentioned that I obviously overlooked. I’ll see what I can do to incorporate those holes for the headlight-covers and the tow-hook…a few other notes:
@#3 - Duly-noted!
@#4 - That’s mostly the camera angle’s fault; it does actually round out nicely on the bottom part I’ll tweak it though.
@#5 - …Could that be variations in reference images? I’ll have to double check :yes:
@#6 - I knew something was bugging me about that area! Again, duly-noted!
For the plate, thanks for the info! I couldn’t seem to find any consistent images of the license-formats in Europe…
@Wakarius - I’ll post an updated version of the file in the first post in a few minutes
I’m trying to completely remodel the bumper-panel. The current mesh is too simple, makes the process of adding in those overlooked details much too complicated, so I’m starting over from scratch :yes: And it’s all your fault, chop_suey! :evilgrin: Ha, just kidding, feels good to be modeling something again, I was starting to miss it (IMO model tweaking and actual modeling are two completely different processes, and I definitely prefer the latter)
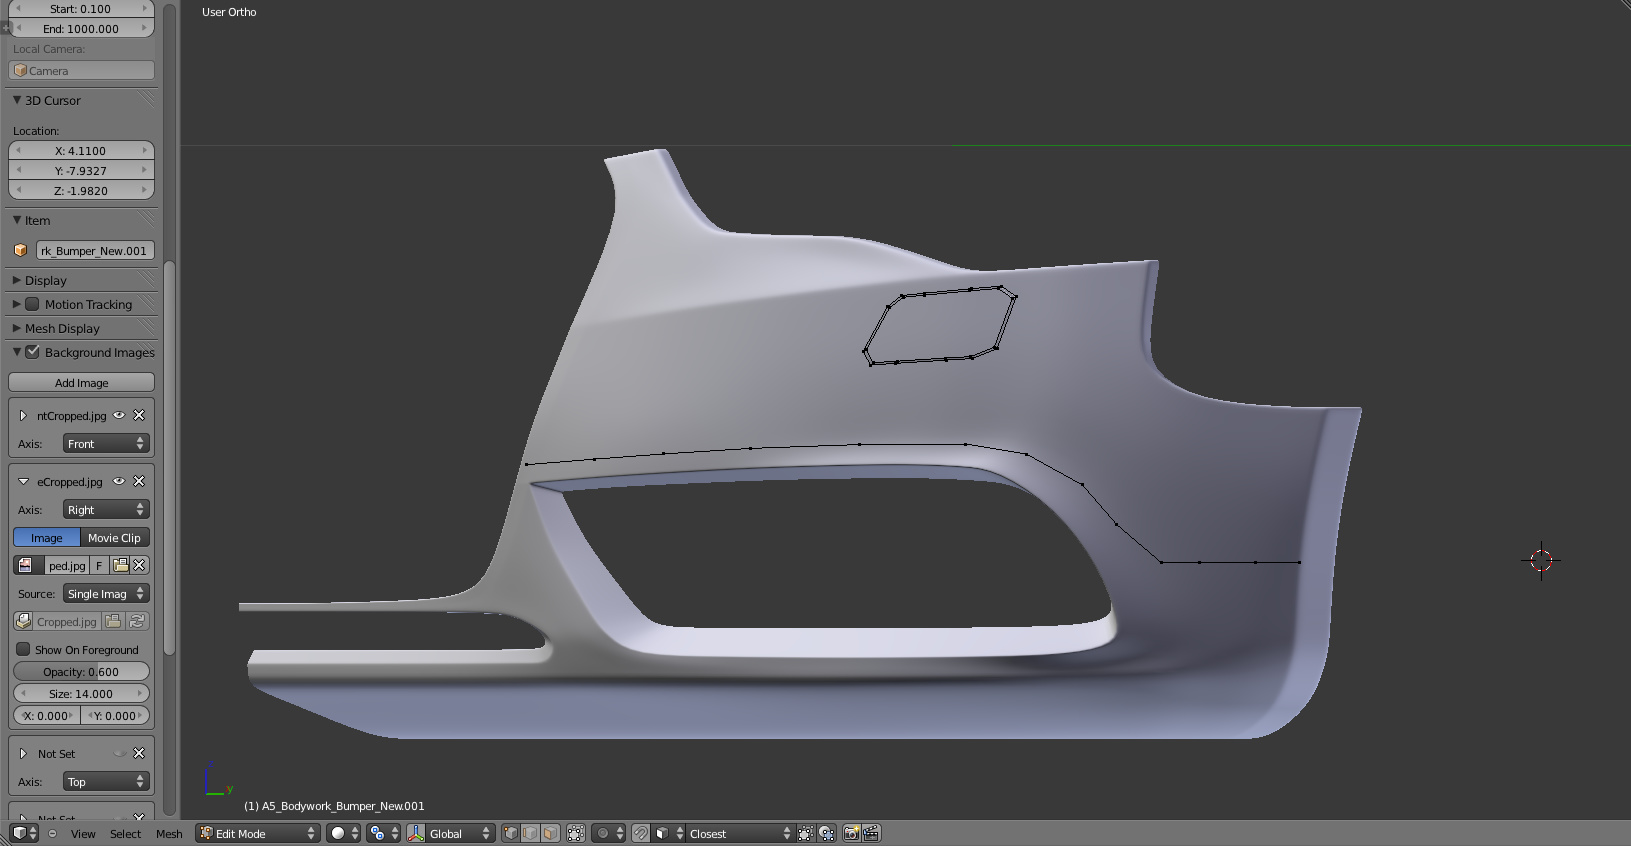
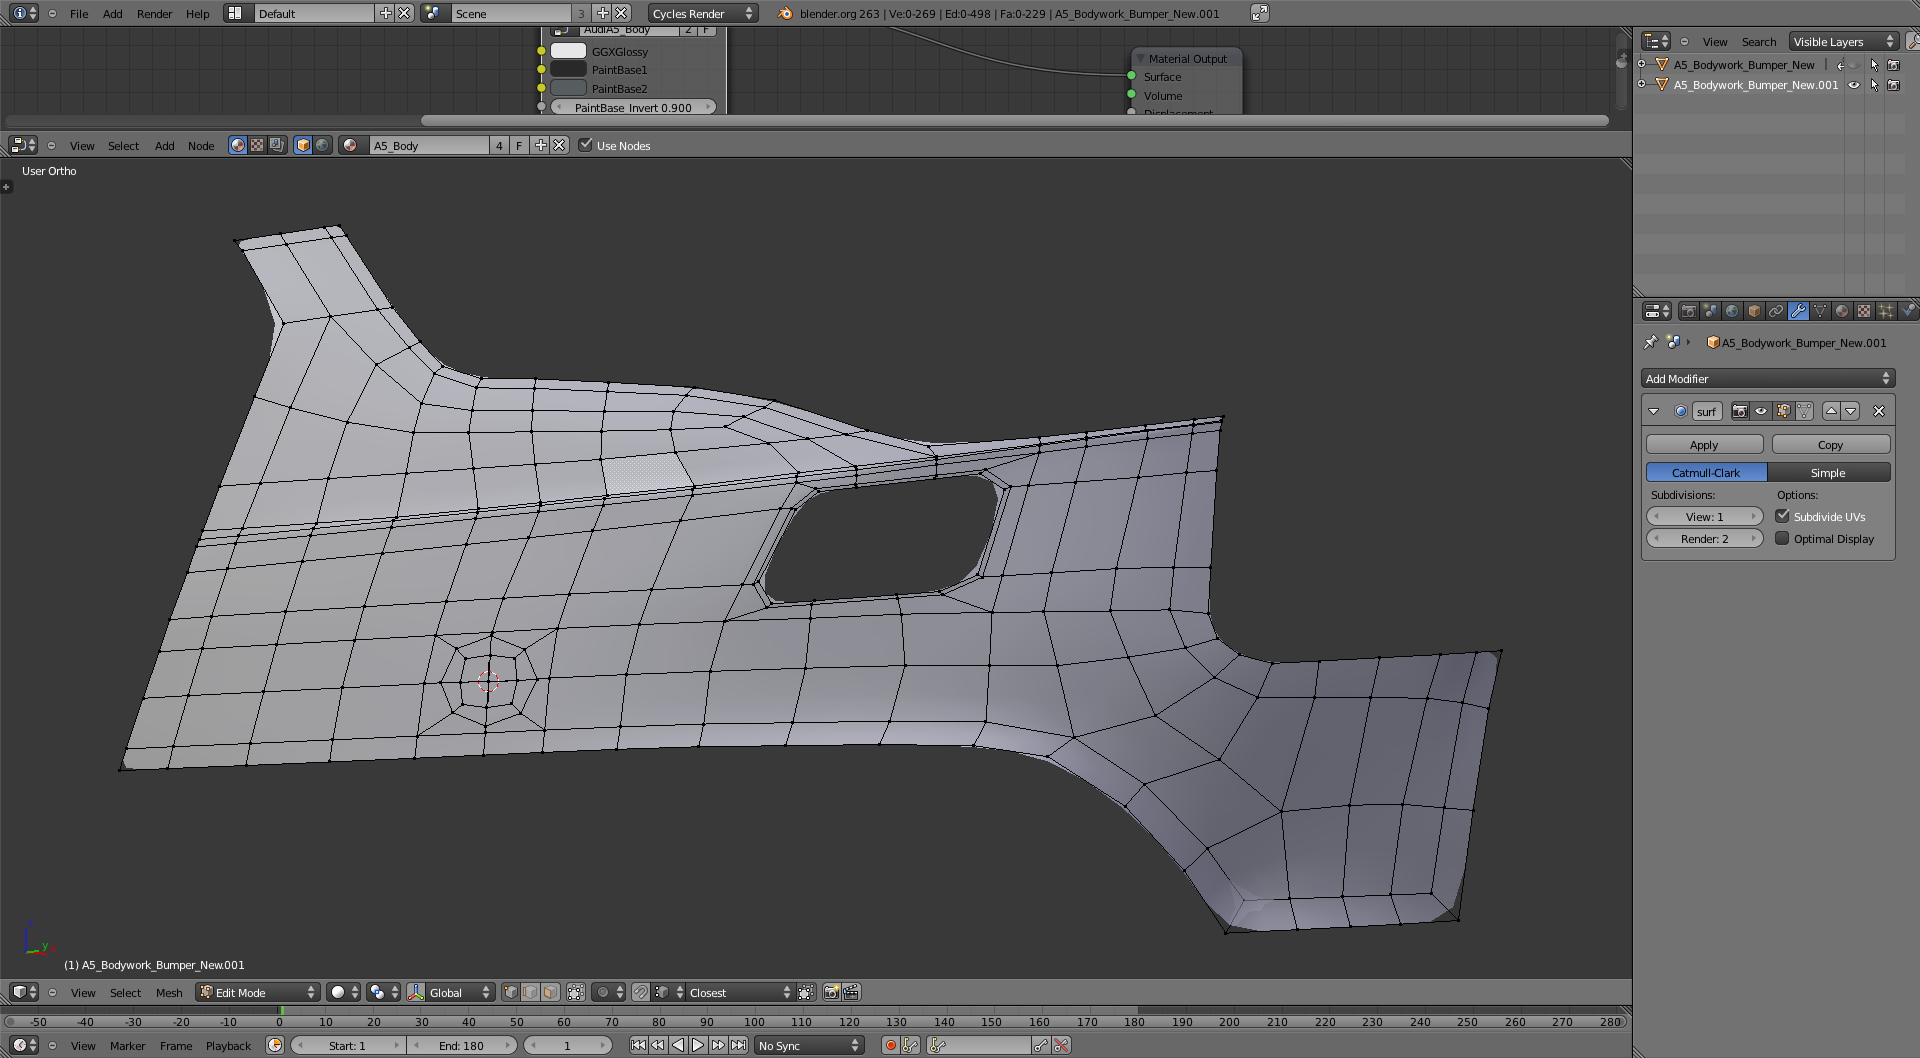
I’ve actually finished about half of the new version - took a while to get the circular spot in without causing surface problems, but the advantage is that now I can mirror it and have the circular area ready to cut out on the right side of the bumper, right from the get-go
This is with Object Wire-display, with a non-optimal-display-subsurf enabled at Lvl1 in viewport (quite a mouthful)
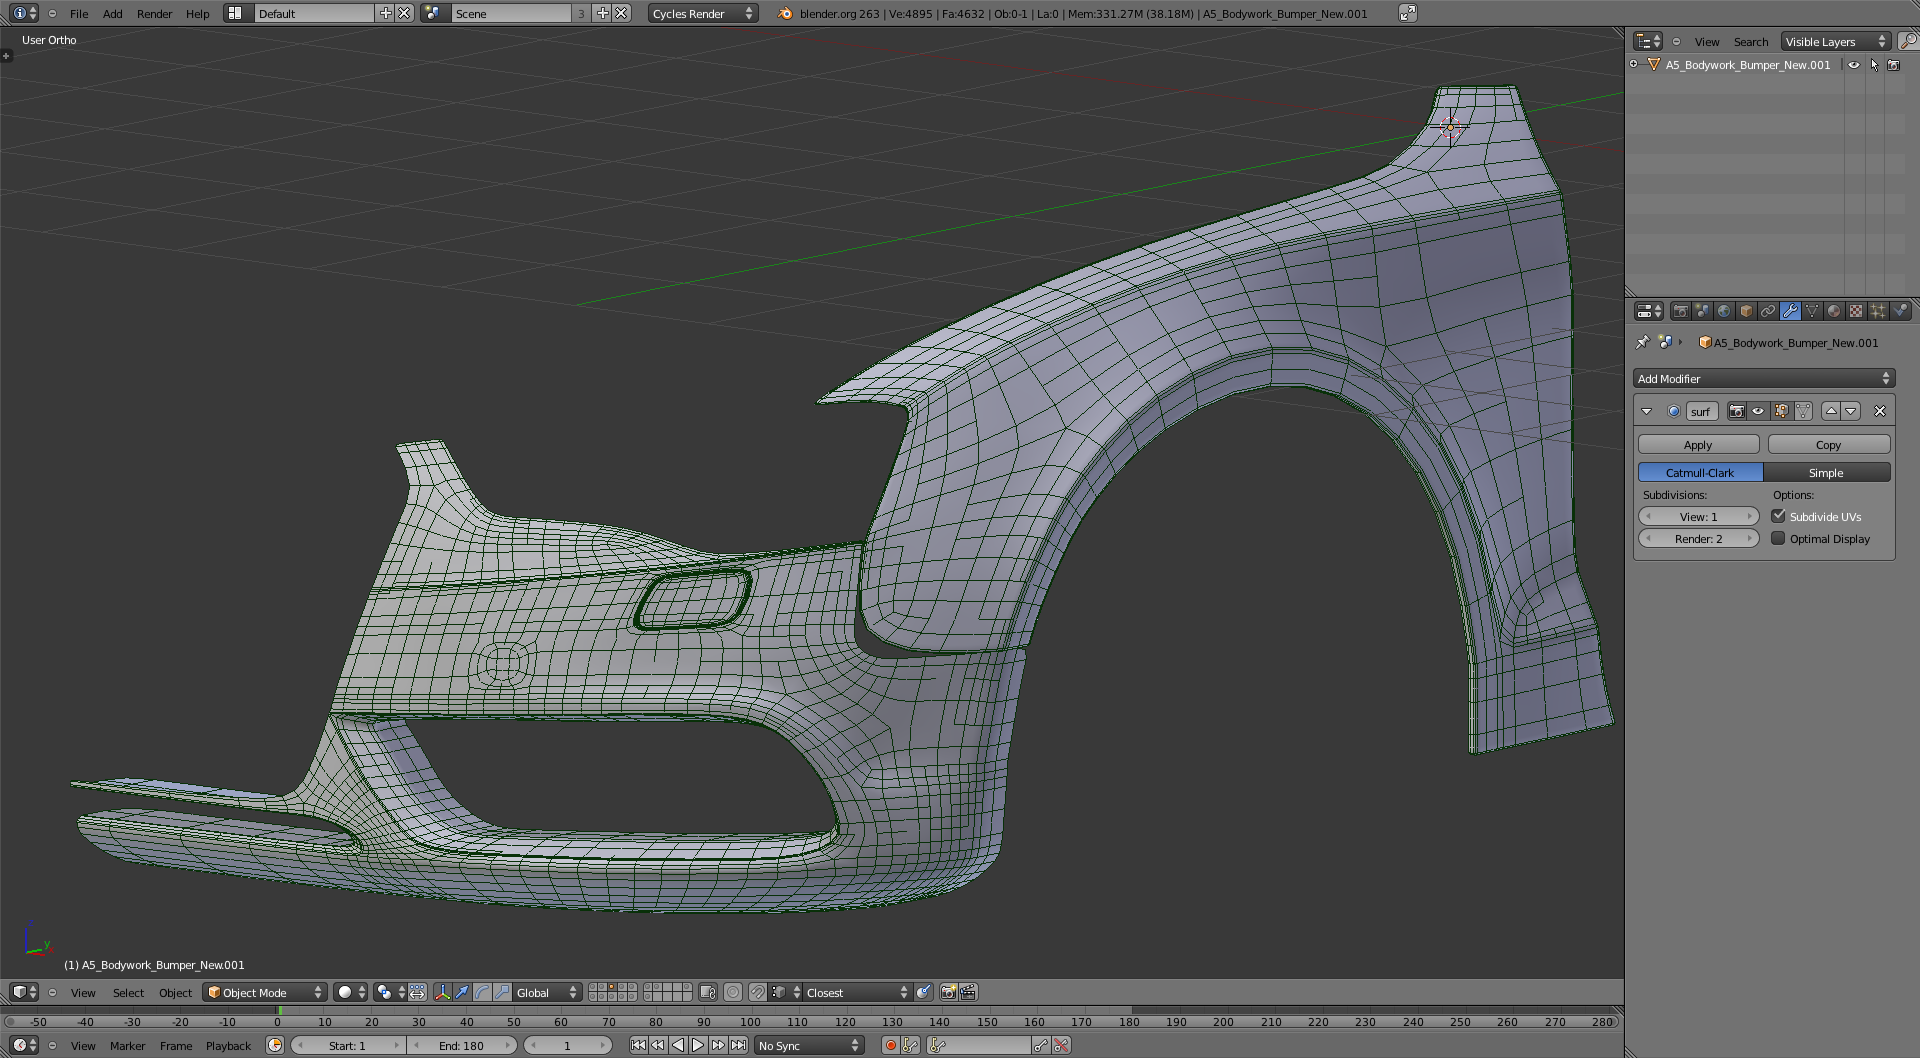
After a few more hours of tweaking, modeling, Skyping and iTunes-ing, I’ve almost finished the front bumper panel (I’m going to mirror it, so I only need half). I still have to sharpen it up and whatnot, but that should be relatively quick.
This process, however, has created a problem - I now have to remodel about a third of the front wing in order to match the new shape. I don’t know if I should be dreading the prospect, or looking forward to it
Looking much better. It’s a great way of learning, starting again.
Plus, starting again, means one has the shape close to how it should be (in theory), so the second (third etc:) ) attempt allows for more emphasis on topology and geometry.
Thanks a lot! I wouldn’t say “perfect”, but at least closer to reality than it was
@Writer’sBlock - Thanks man! Yeah, it helps to have the original mesh there, gives me a better idea of how to reshape the various pieces, as well as knowing which mistakes to avoid. Not to mention I can sometimes reuse certain parts if they don’t need tweaking
Hey guys, I’m back with an update of sorts. Took me a while…I blame Minecraft and a sudden lack of motivation - I need a new project FAST, this one’s starting to burn me out :o
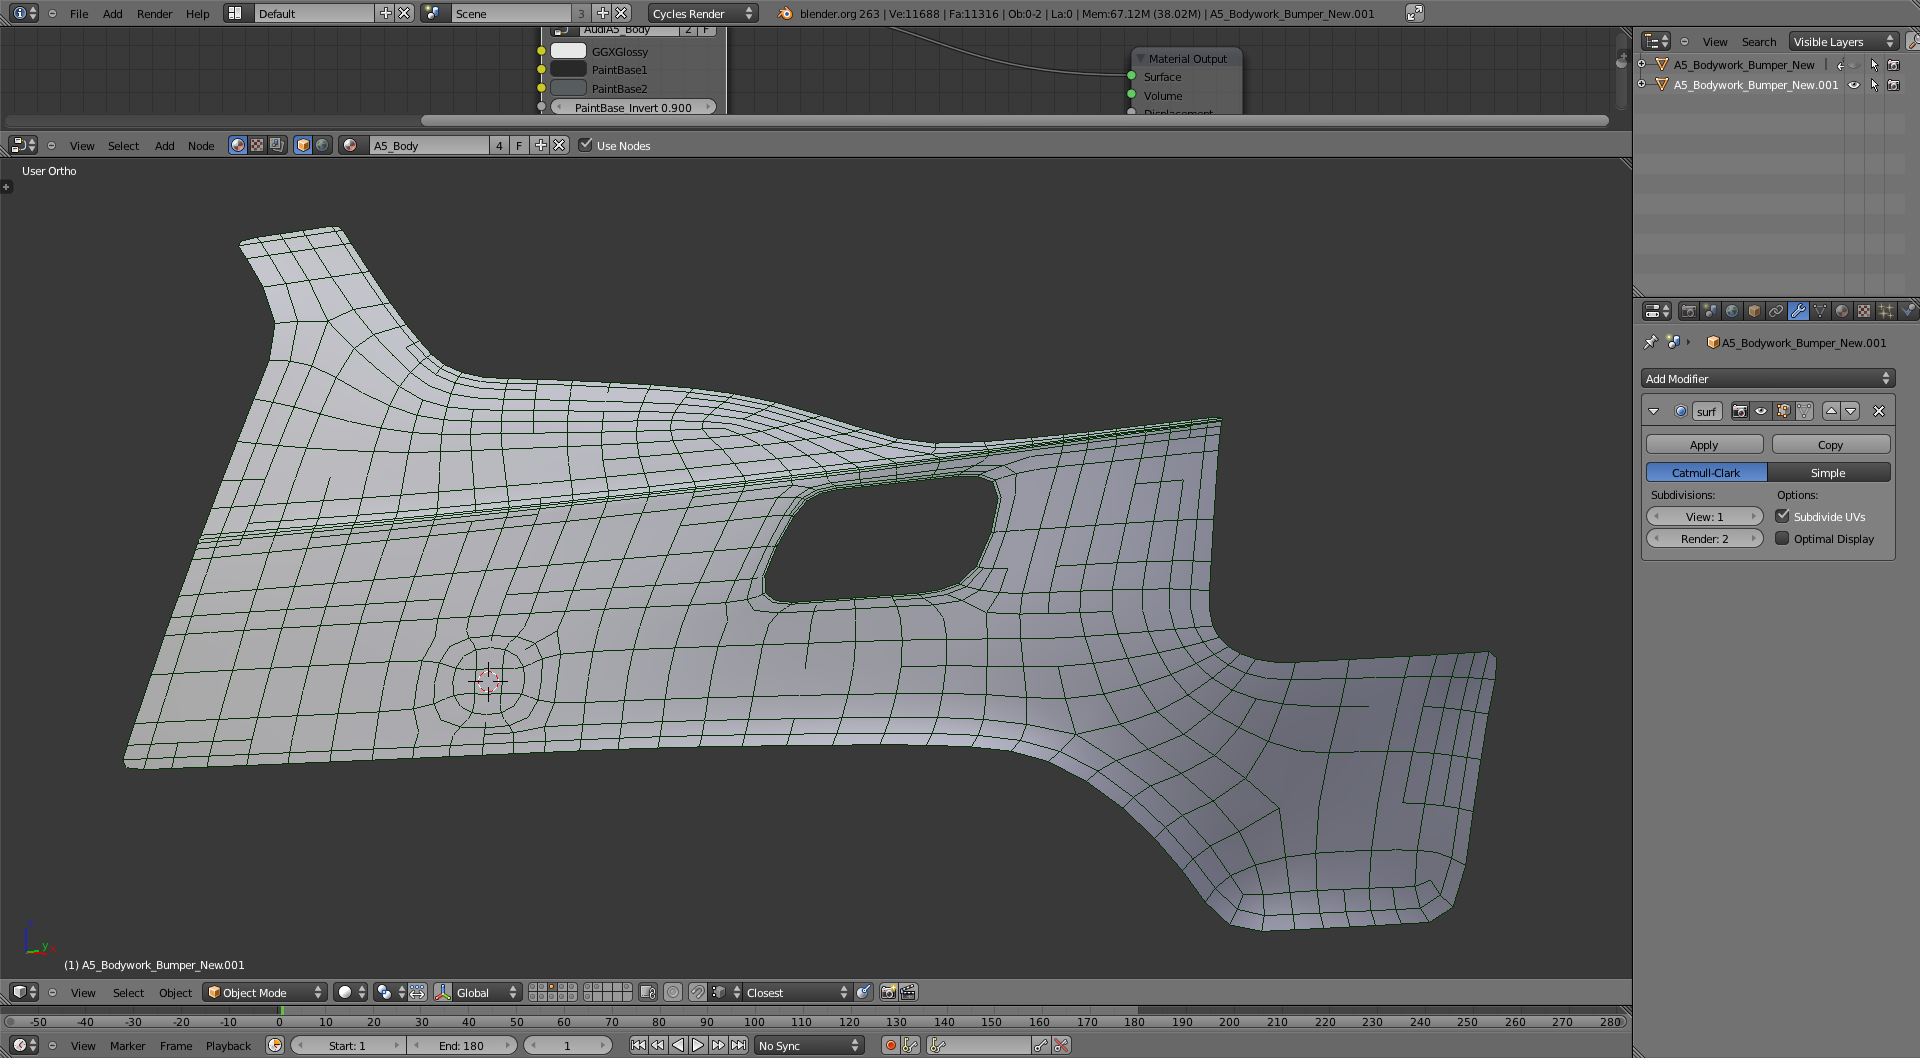
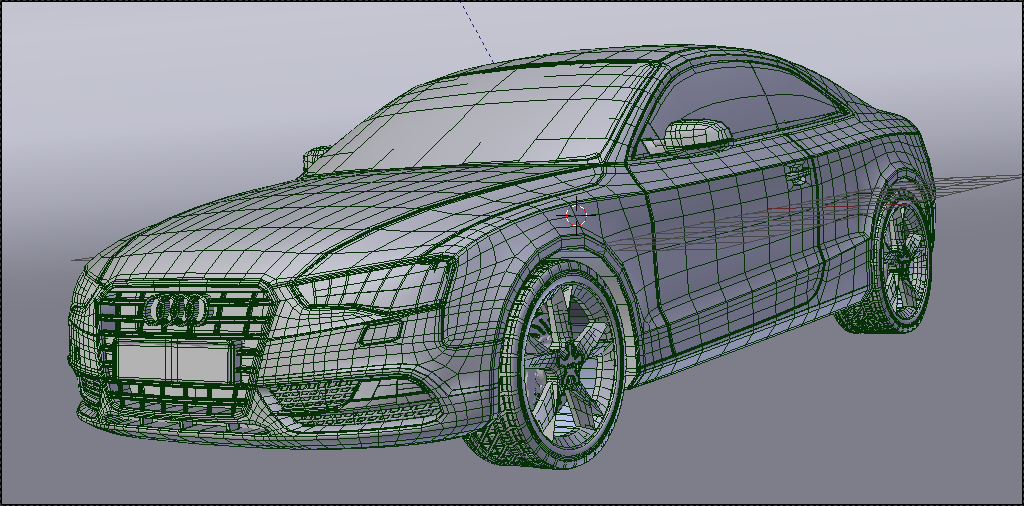
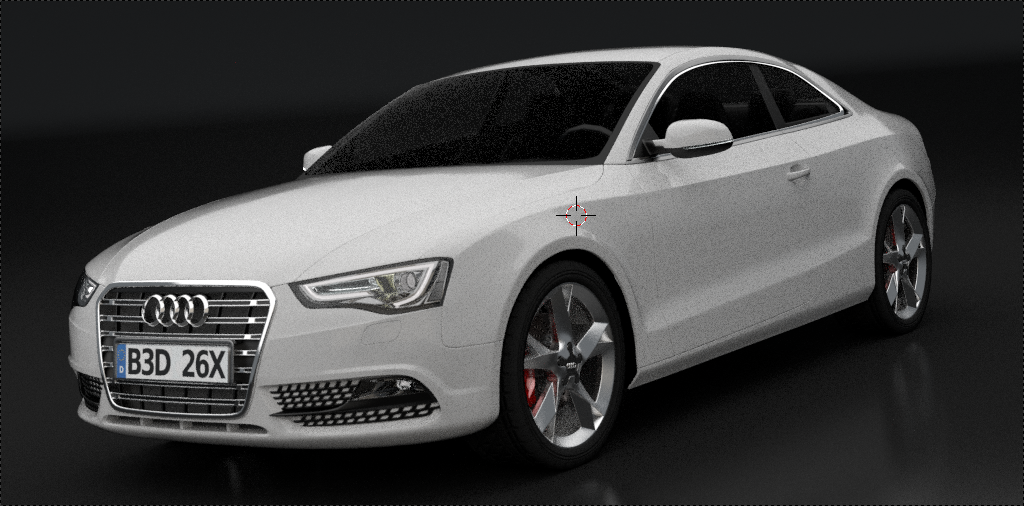
Anyway, I’ve finished up the front bumper, and modified the front wing. Below are three snaps, with the new topology, overall wire snapshot and a quick 50-sample viewport preview. (Yes, I know the materials kinda suck, but they won’t be in the final files)
While I’m here, does anyone know how well the Blender-to-3ds/OBJ exporter works? Or the proper settings? I don’t have 3DSMax or Maya so I can’t test it out (just to reiterate, I’m planning on selling this model so I need to know it’ll work properly once exported. I know I have to get rid of the constraints and whatnot)
P.S. I’m also trying to figure out a way to thank those of you who helped me out (Yes, I’m looking at you, chop_suey and GrandeP :p) - I think a previous version of the model, even in Creative Commons, would maybe interfere with the licensing on 3DExport…I’ll have to look into it. Would be rather unfair to (maybe) profit from your pointers and help
If you’re trying to sell it, then attention to detail can only be of benefit. Ask yourself, how would you feel if after having bought the model, there were a number of details missing? Small, admittedly, but important details.