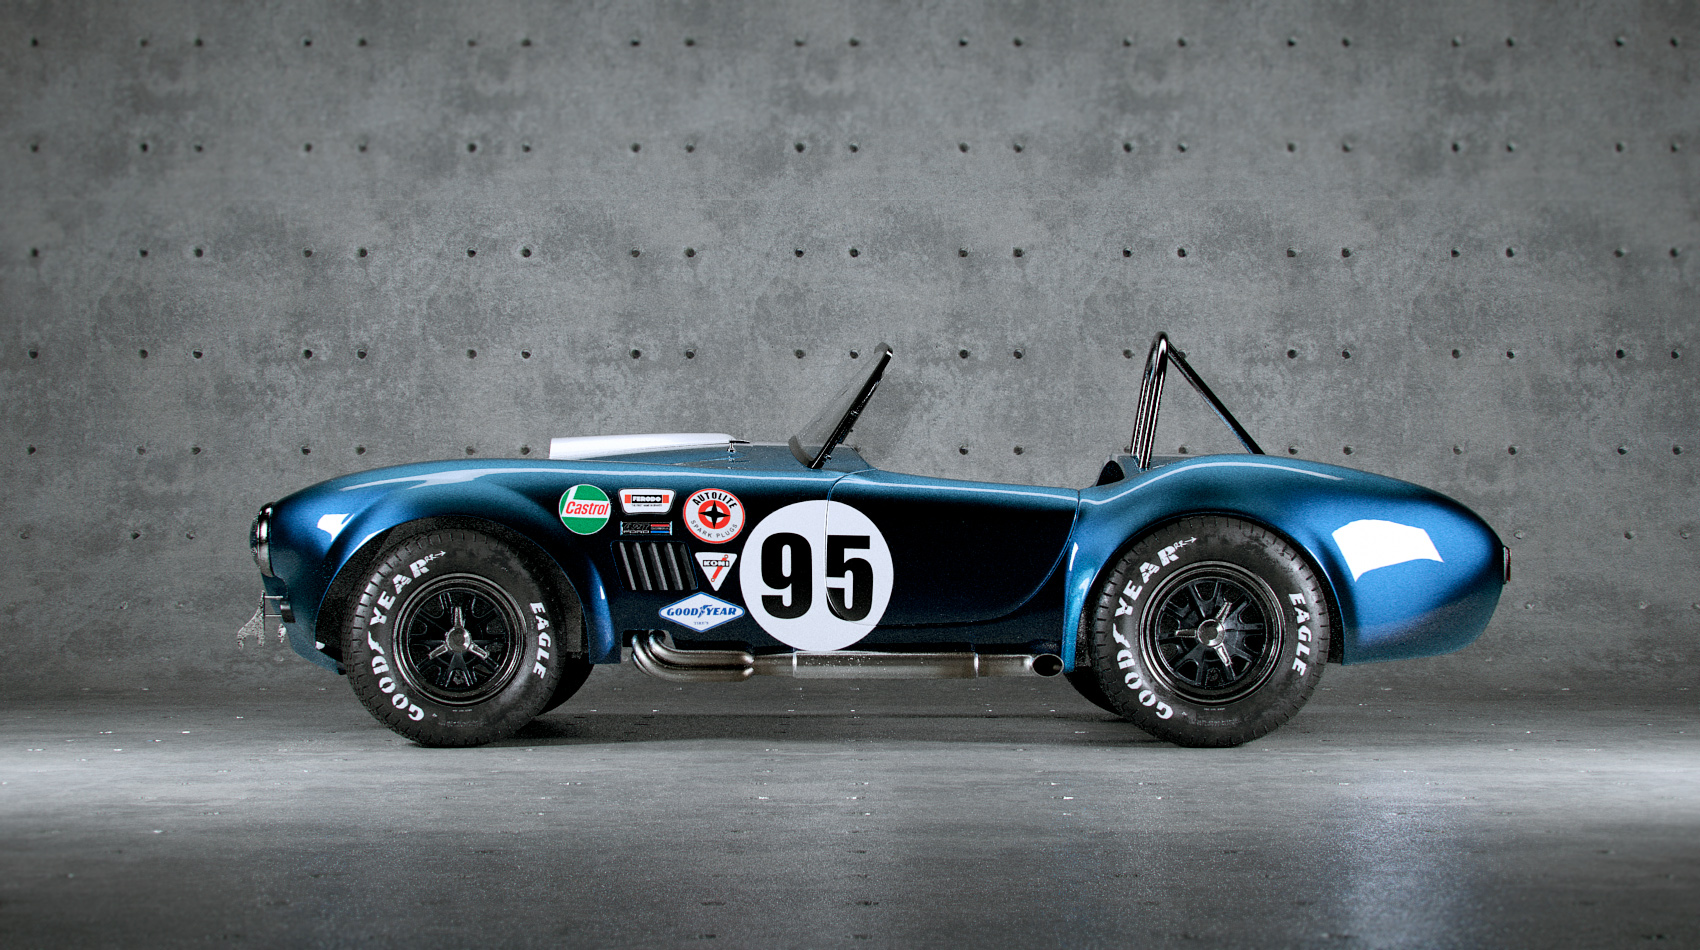
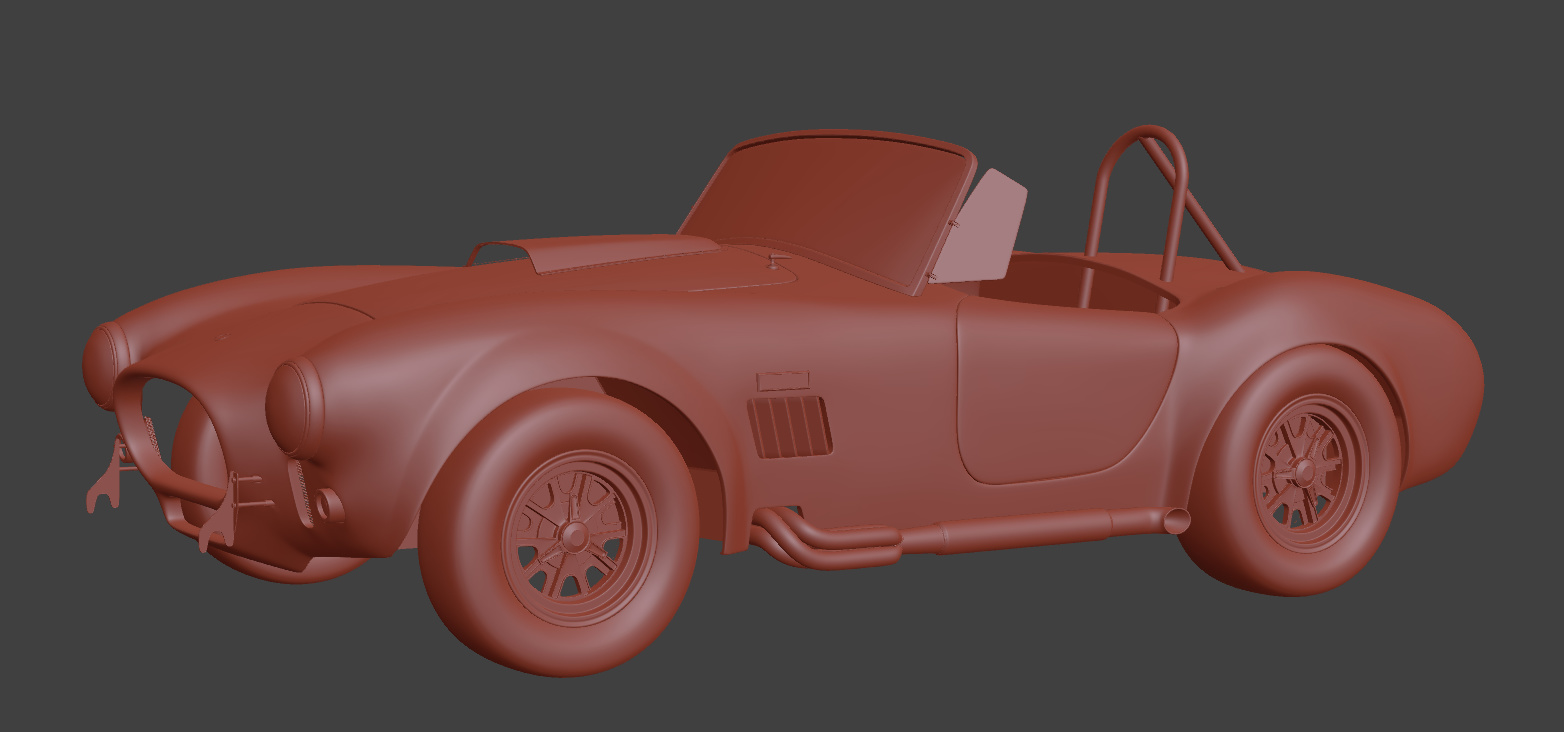
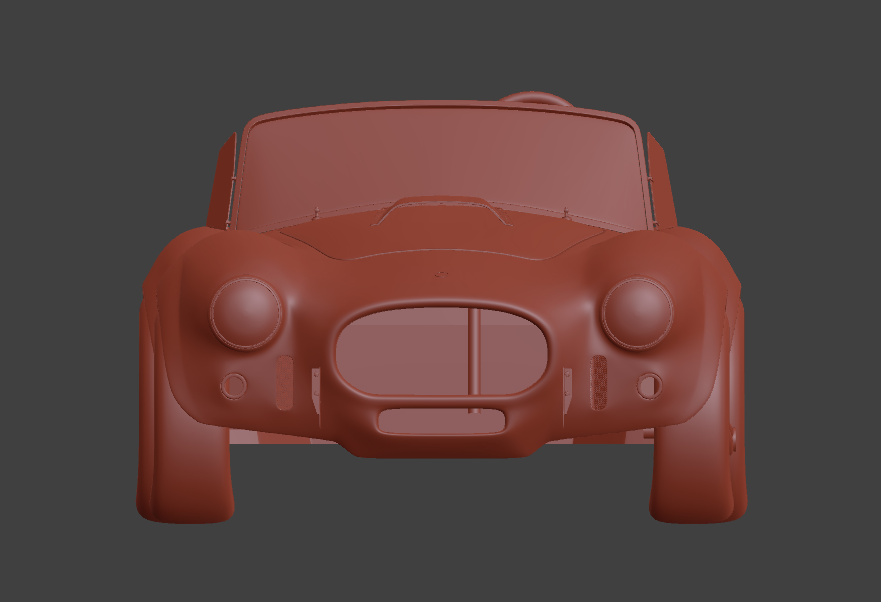
ive been stumbling with blender for couple years but only watched tutorials and did some small stuff, not really much to show here. I was thinking of modeling a car for ages but never got started till i noticed this model of a classic, the Shelby Cobra 427. I had downloaded one from blendswap to try and test render it in Thea Render but didnt like the model and tried cleaning it. I was getting annoyed of a lot of thing so i started from scratch.
Ive learned quite some new things. I had never really done difficult UV mapping and have asked tons of guys here but never got proper answers. The hull of the car is almost one complete UV map, i had to cut a small part in the front section or else i would get some weird stretching. I needed this weird shape cause i used a anisotropic material in thea and seams are visible in this material.
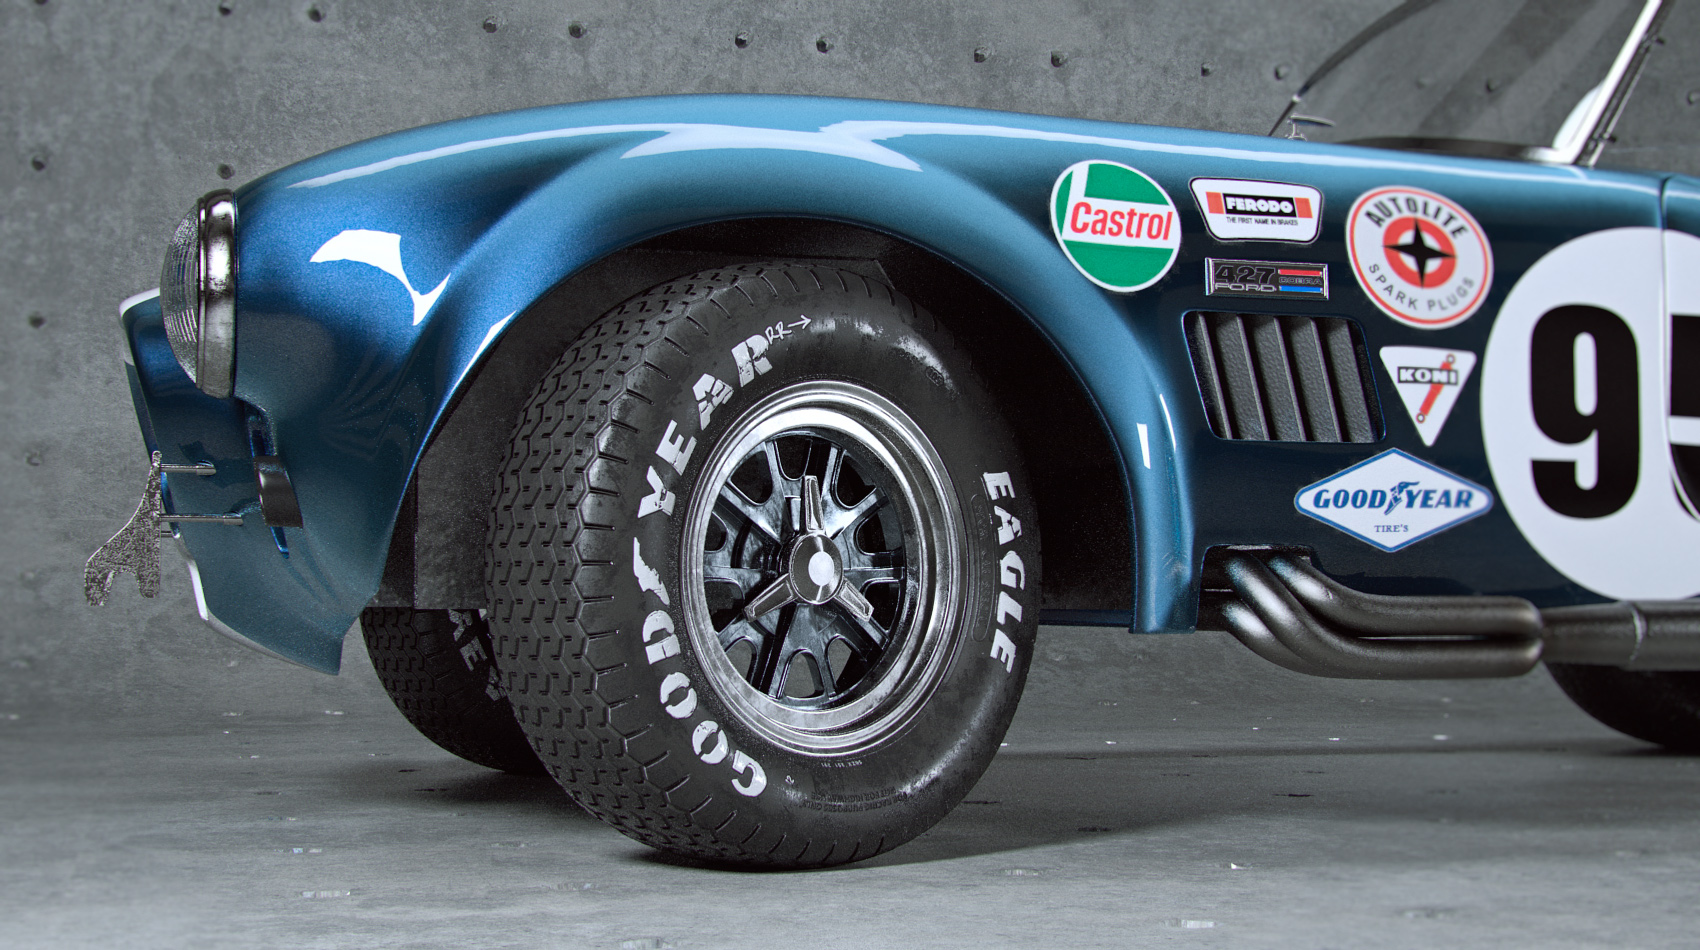
I had never done baking till now, the tires are baked into 1 map so i can switch between displaced or normal map tires.
Im still long way from completion but ill hope ill do
Ive progressed pretty far but i will post some shots here from my WIP though.
Its no cycles but i think ive seen a lot of images here which where made using different engines as well as modeling apps.
Nice work,man. I personally loved the tire mats.The modeling is awesome.I am no blender expert butThe one thing that distracts me are the black spots around the car body.Overall it looks nice
Thats probably the lighting and a bit post production i did on the images. The material itself also acts a bit like this ive given it a metal kind of finish to mimic those 2 tint paint jobs. I also added a small flock to have some specular effect not really visible here. I’ll show some work i did on those tires, i need to sort out the images first. Have made tons of test images on those tires and tons of normal maps
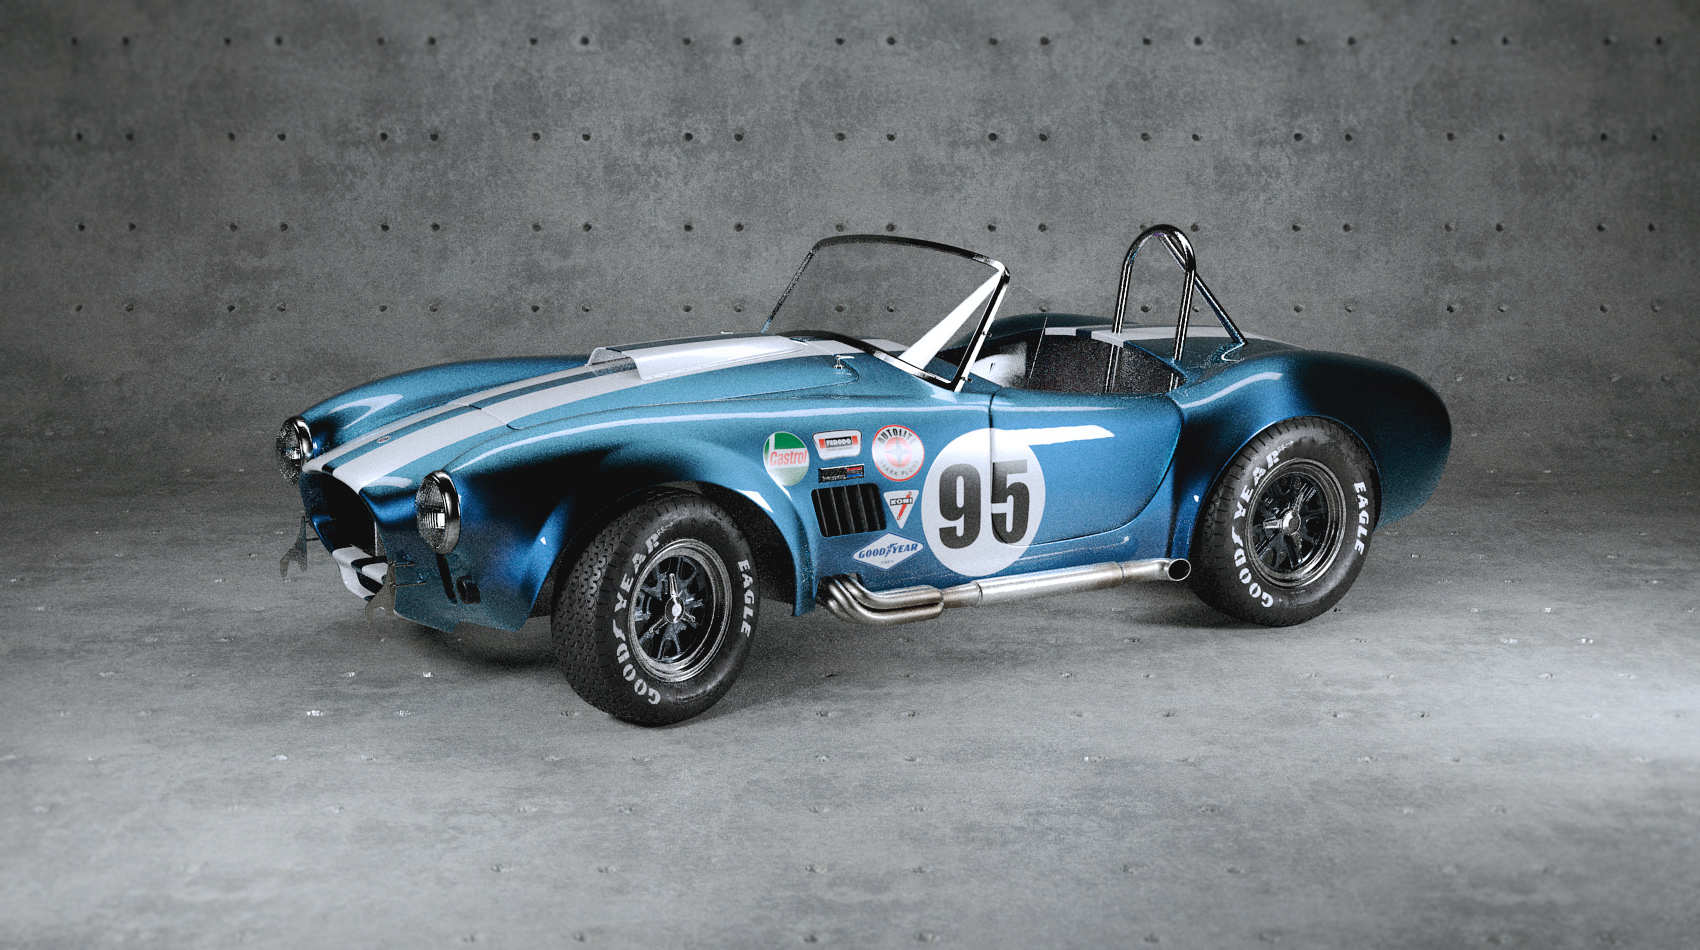
I redid one of the shots with less low key effect on it. Image is a much better and clear now. For the final image i think ill use much less contrast.
Made a closeup of one front tire so you can see more detail i put in. Still need to put a air valve in the tires. Saddly i didnt payed to much attention which render effect i set in thea render so the images are a bit difference in color
Maybe you can show some comparison between that other cobra mesh (that I think was the first blend file I looked at after the cube) and yours. I am kinda into one-piece NURBS-surfaces, so I am fascinated by your one UV map approach. I did not know that BI can render such nice images, but that aniso seams problem can easily be avoided by cycles (as it seems when looking at some cycles car renderings).
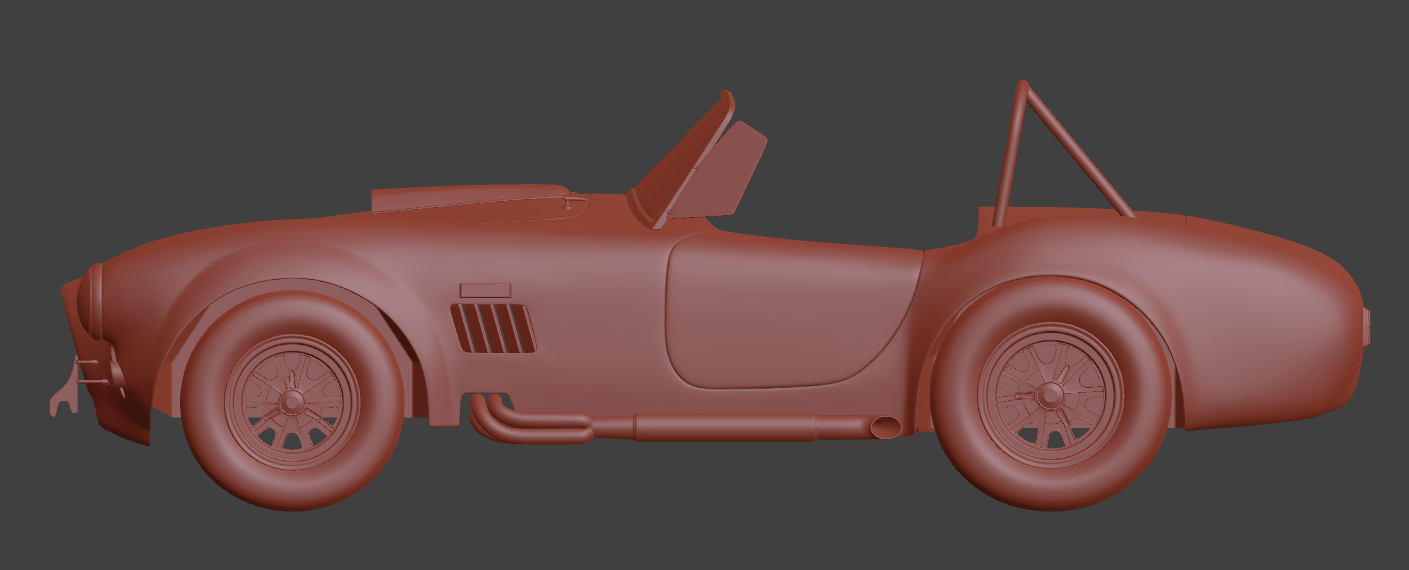
PS here’s the example of my UV map and a view with the checkered pattern. some parts are unavoidable and get some stretching. First i had better maps in parts but the seams would show up in the in the render
yes pinning and the live unwrapping is super great. But i dont like live UV unwrap in the viewport. It does help in the beginning, but when im fine tuning you need to pay attention that you dont accidently unwrap parts you already did. Happened couple times so i turn it off in the viewport and just use it in de UV editor only
After leaving the model rest a while on my HD for couple weeks i tried doing some work on the interior yesterday. Started with the middle console and tried to do the chairs. Im not happy about the chairs yet and i think im going to adjust them.
After checking some references i noticed the transmission gear is a bit to far to the back, ive adjusted it already but havent rendered it yet. Also i noticed my doors are to much forward compared to reall shots. The dashboard is at the wrong position when i place it. Really need to figure out here what to do. Cause it will take quite some time adjusting the model and all the maps i already made.
Here’s a preview of the dashboard and the wrong location. When looking from the side and when doors are open you can look behind it. The doors need to be at the same level as the start of the dashboard cover at the top
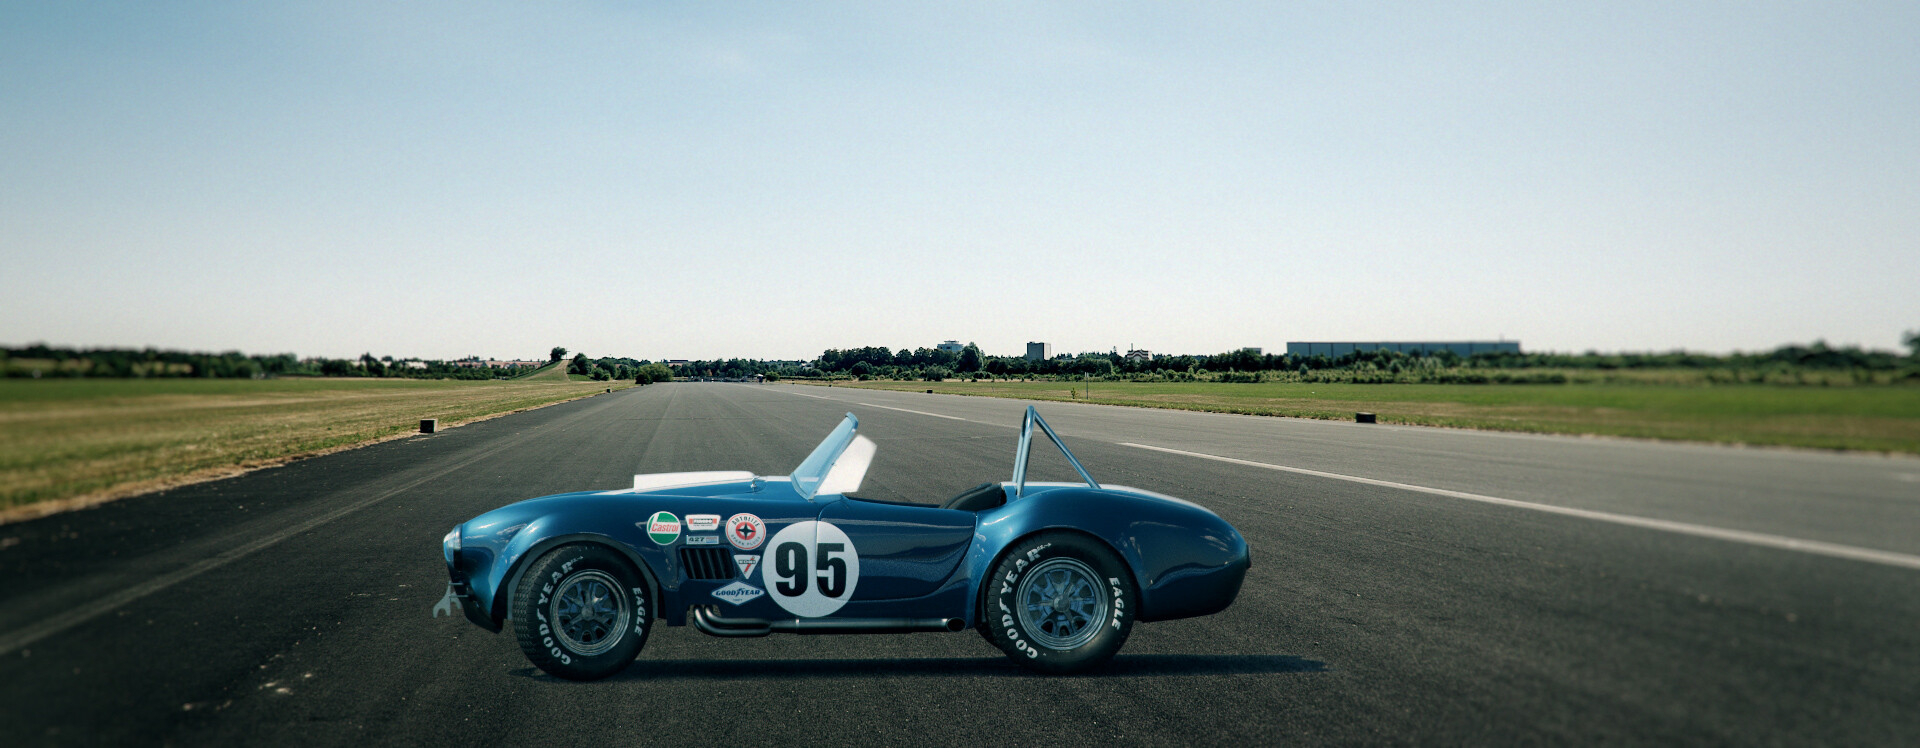
Ive also find a nice site, hdr-sets.com, with some great free HDR images with backplates and even a 3d scene with matching camera position. Ive done a quick testing using the on of the plates
Hi joseperez, i think you misunderstood my last post. The image used is a HDR with a backplate provided by hdr-sets.com check the link ad you’ll find the image I used for the airstrip shot.
haha no, I think you car is very well integrate on the enviroment, I know is a HDRI, you render is very good that looks like how a photo!
where you buy that car?