I’m writing my script, to improve it, while working on my project to camera projection, currently only with blender and photoshop.
both the script and the project are unfinished.
I’m writing my script, to improve it, while working on my project to camera projection, currently only with blender and photoshop.
both the script and the project are unfinished.
@ofuscado: So many thanks for this valuable addon. Its really a great tool for matte painting workflows. You have done a great job so far, I hope you’ll continue making it more awesome. 
And is there any documentation on how to use this, a video demonstration or something? I do matte paintings, and there is really not much information about how to employ camera mapping in Blender. Then I saw your script and I tried somethings but couldnt understand fully how it works.
What functionality does it currently offers? And what more are you planning to do? Im really interested in this project. I can help in the testing too. Looking forward to this really. Thanks.
Yes, I have thought about creating a tutorial. But my English is not very good… I think I will create in Spanish. If any of you understand and want to translate to English… Would be grateful. I am also an amateur programmer. If someone you know has more knowledge wants to help or participate with python, also be welcome. Tanks!!
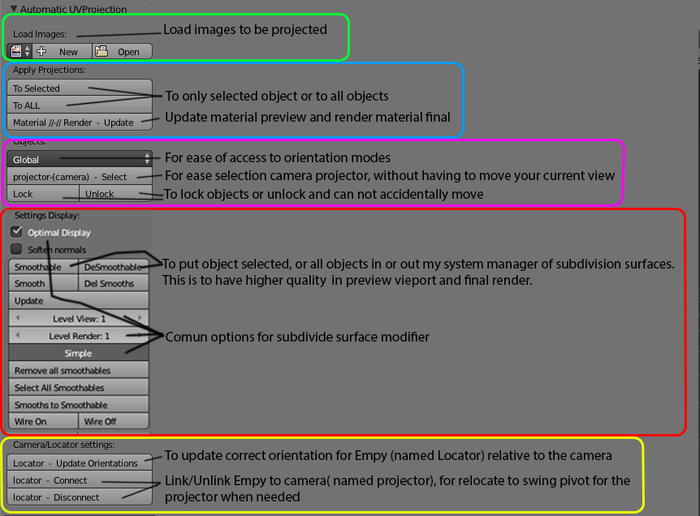
New updae for my Addon. And associate an image with a brief explanation for use:
https://github.com/zebus3d/UvProjection
And in tooltips “help popups” each button is an explanation of what this makes…
smooth options to take effect must be given to the Update button.
To use this technique correctly you have to set the camera values:
Focal lenght and Sensor size with the same values or as best similar as possible to the original values of the camera with which the photo was taken.
In metadata exif info you can watch the camera model and some additional information.
and you can also find the camera model here: http://www.dpreview.com/products/cameras
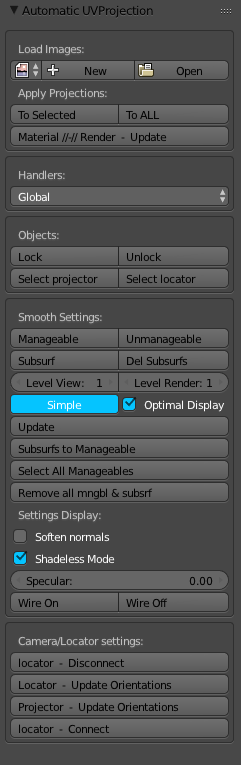
I have added an option to be optional shadeless.
Great work mate…loving it…
Hi ofuscado,
Congratulations for your big job for this addon, I love it too.
I have a idea: place the “Locator connect” and “disdconnect” on the same line and under the “Locator update orientation” line with “Locator link” + “Locator unlink”(must understandable), please.
And for “Apply Projections” : one line with “to selected” and “to All”
Bye
Friendly.
Spirou4D
Thanks for the feedback and comments. When i have time, I have to update and resume the project.
Hey ofuscado i can translate a tutorial, or help you write one…
But first i would love to know how it works.
drop me a line
hola ofuscado puedo traducir un tutorial o ayudarte a escribirlo
gracias por el ADON
muy bueno para matte painting
Thanks!! Gracias, pues sí la verdad que tengo q hacer un vídeo tutorial en condiciones.
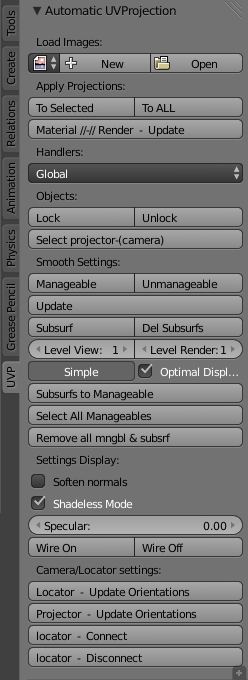
I’ve updated the addon 1.9c for 2.71 and it works again!!
when it is loaded, you can find it in the last tab (UVP), in the toolbar.
Now it is only thought to blender internal.
[https://github.com/zebus3d/UvProjection
For install:
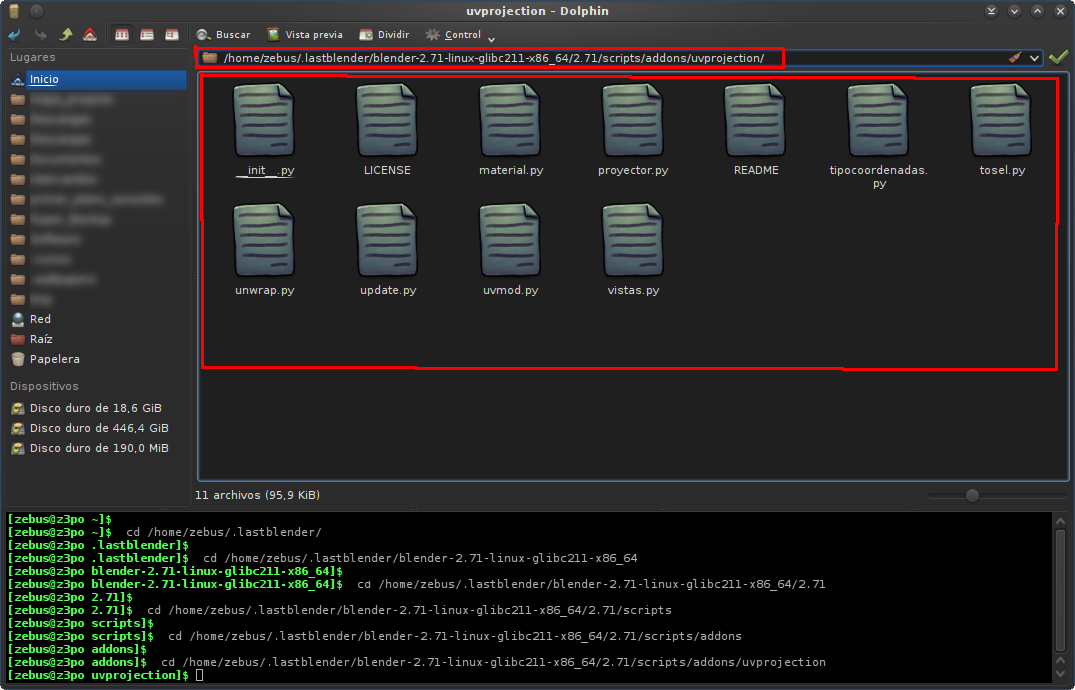
1 Download the .zip file: https://github.com/zebus3d/UvProjection/archive/master.zip
2 Decompress as in the attached image (i am in linux), and rename folder UvProjection-master to uvprojection
(I think renaming is optional)…
3 paths:
In win7 try in C:\Users%username%\AppData\Roaming\Blender Foundation\Blender\2.71\scripts\addons
In winxp try in C:\Documents and Settings%username%\Application Data\Blender Foundation\Blender\2.71\scripts\addons
In mac try in /Users/[username]/Library/Application Support/Blender/2.71/scripts/addons
Or in linux you also try /home/$user/.config/blender/$version/scripts/addons
4 Enable addon in preferences
5 Enjoy!!
if anyone has the chance to see the video tutorial “Digital Tutors Camera Projection in Maya and Nuke”, the concept of my tool is similar.
Does the newest addon work in 2.70b?
Yes, it should work without problems