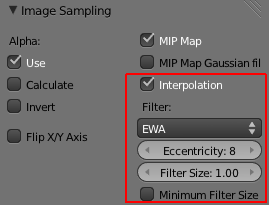
Today in IRC someone asked about how to disable the texture interpolation in Cycles.
But the thing is, texture interpolation settings are currently not exposed in the UI.
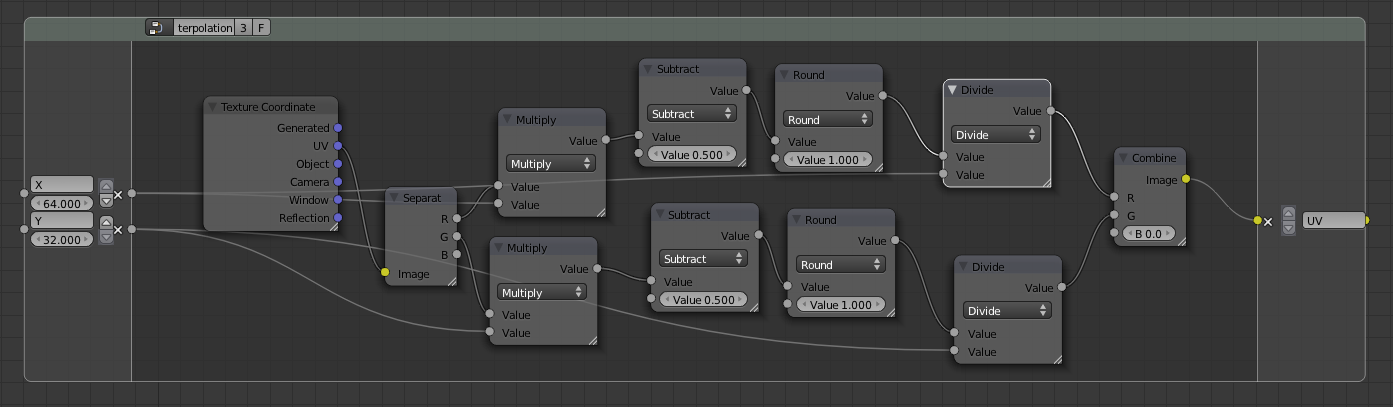
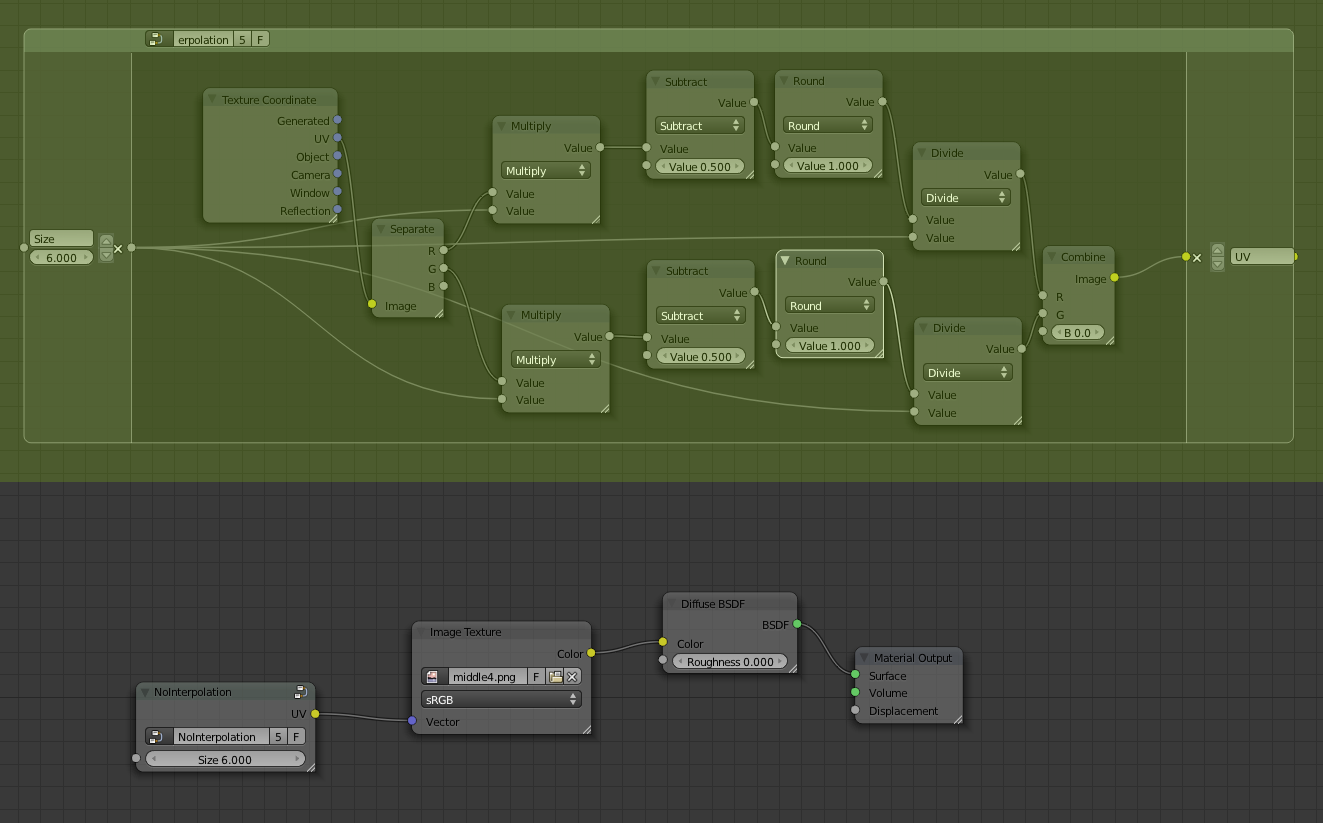
I came up with a Node Setup which scales the UV coordinates accordingly,
so that it appears as if there was no interpolation happening.
The usage of this Node Group is realy simple, just add the Group to your existing material and connect it to your UV inputs on the Textures.
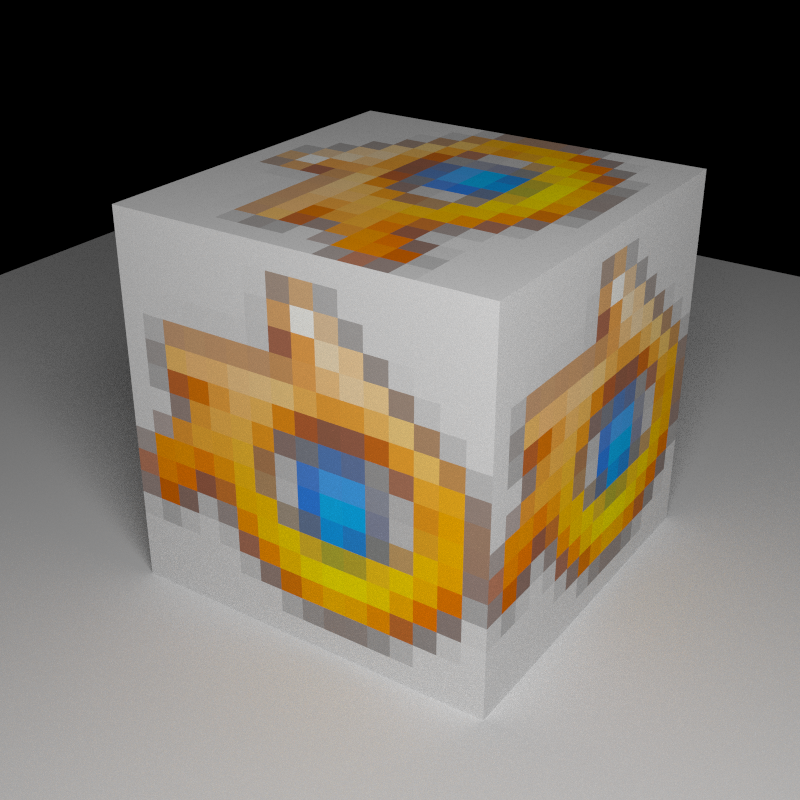
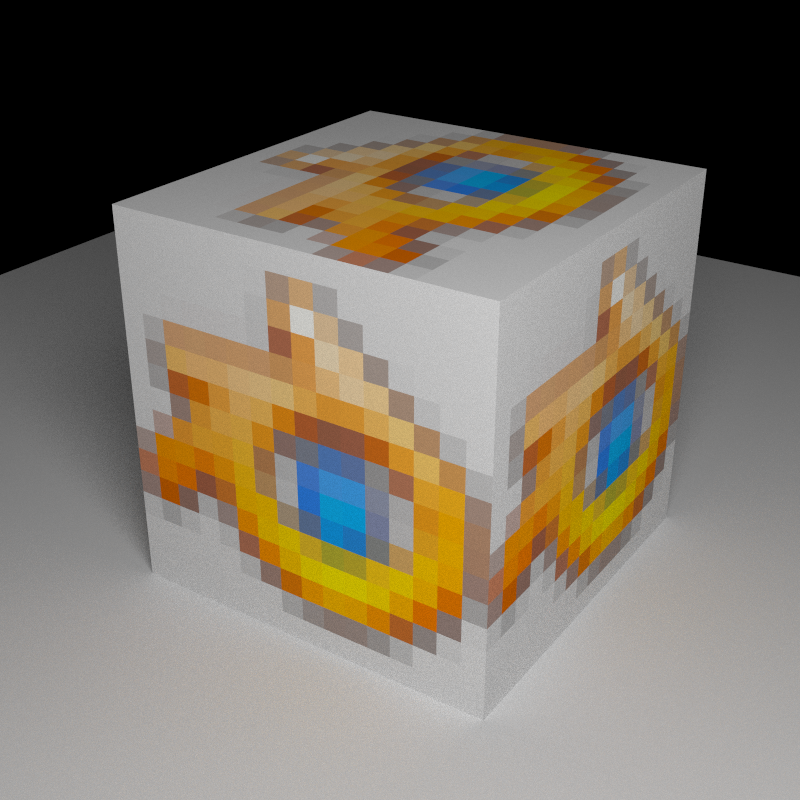
Here’s my results: whitout/with my node group
The used image textures were 3x3, 4x4, 5x5, 6x6 pixel big
Very interesting!
I can see that you are using the color separation node to split the Texture Coordinate Vector output into separate U and V values…
Do you know, if it is planned to create a more adequate node for splitting Vector values? It would be just more readable…
BTW. Do you know, if they (Brecht or other devs) are going to add to Cycles Textures similar image sampling functionality like in BI?
yes i use the rgb splitter to split the uv’s, it works because internaly they’re both in the same format (array of 3 floats?). while it’s not to be considered “safe”, it still works, you just have to know about it. You could even use such a setup to generate your own coordinate system (like the generated uv’s in blender internal: cube, cylinder, spherical, flat and so on).
I tried few times to get some info about Texture Sampling in #blendercoders on IRC, but haven’t gotten any response. I even got the code from svn to look into it, but not sure if i’m able to help out there. So we may have to wait some time until someone else diggs into the code to port those settings over. Maybe the code used by cycles is the same as BI, so there’s just the settings missing in the GUI.
I tried this but it didn’t seem to work (Using the development build), instead I got some wired results. I am just wondering if you guy’s know if it doesn’t work in the newer versions if blender or if something else is going wrong .
The material preview doesn’t work any more after I packed the PNG but, for the rest, no problem at all.
This trick is pure mathematics. I think that the devs would have noticed if Blender started counting with its fingers. Are you sure your node tree is correct? Did you unwrap? Is the size of the mapped image correct? Etc, etc…
is a zoomed version (accurate) of kaluura’s pixelator.blend texture and it’s not the same than the render result. The node group worked fine with 2.64 but not with 2.65
I should have mentioned that the node tree replaces the alpha of the icon with some white color… altho it’s not important. What is really important is the result you get. Use my blend file and show us the incorrect result. Attach an image! (Damn it! In what language should I say it?)
Show us the result!
Montre-nous le résultat !
Zeig uns den Ergebnis !
¡ Mostrar el resultado a nosotros !
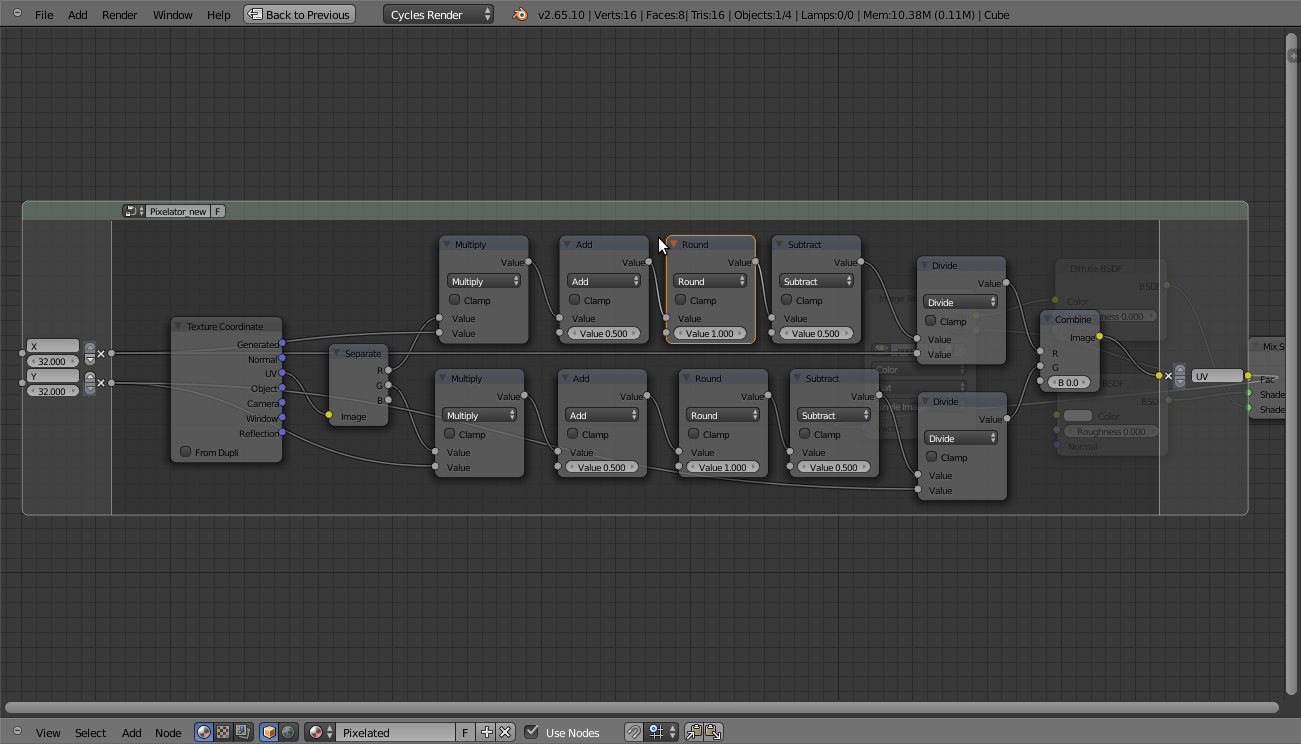
it seems something with reading the image (half pixel offset, which i complained about in the first post) has changed, so the image is no longer shown half a pixel offset anymore.
The node setup just has to compensate for that change now, so the operations to do is now: multiply by x/y, add 0.5, round, subtract 0.5, divide by x/y.
There’s a slight difference between 2.63 and 2.65_new (download them and switch between them to see the difference), i think the way alpha is treated has slightly changed too.
Oooops! I didn’t get it. That’s right, the icon wasn’t correctly pixelated in my render. I should have compared the icon and the rendering before affirming it was correct. [Facepalm]
Thank you so much for making this node group, it’s very helpful. But right now I’m wanting to use a Minecraft texture as a background for a world. I’ve tried tweaking your design but I can’t quite get it to work. Is there anyway to do this?
Thanks!
The green area is a node group. You create the nodes (the ones inside), select them, then press Ctrl+G to Group them into one node, you can open the group with tab to edit it and adding the outputs and inputs by dragging noodles into the areas on the sides. You can also create a new group via shift+a->groups, and add the “inner workings” afterwards. One thing to be aware of is if you change input Values inside the node group, then you change the default values this node has when you add it via the add menu, if you want to change a value for this instance, you must change it outside of the group editing.
Don’t be discouraged, Cycle’s node materials are a wonderful thing to experiment and have fun with once you understand the principle behind them.