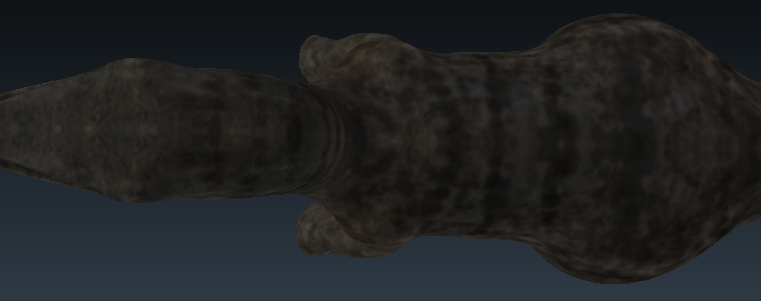
Hi, I’ve been using blender for a while now and haven’t exactly got into texturing until just a few days ago. I am making a raptor and I’m almost done painting the texture for it. Problem is, even though the UV maps look fine, when I zoom further away from the model, seams appear where I placed my seams before unwrapping. I read that bleeding the texture or something like that would solve this problem, however I have already painted the texture. My question is, is there a way to bleed an already-made texture outside the seams a bit?
This is still troubling me, does anyone know a solution? I re-created the texture with the texture painting mode with bleed set to 8, but the problem persists.
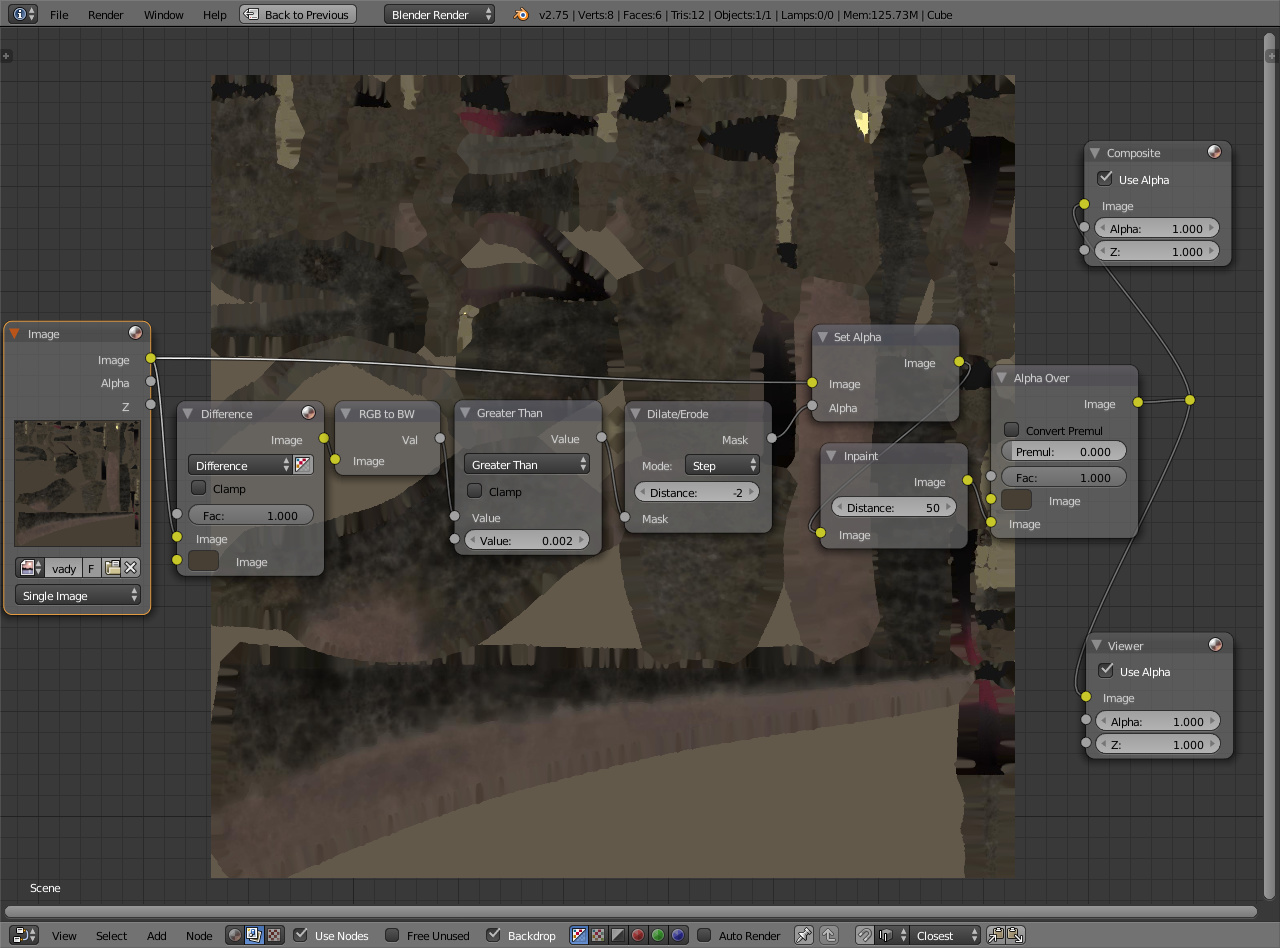
You can use solidify plugin in photoshop to blend the colours inbetween the uv islands, or you can duplicate your model, apply the texture to the duplicate and then bake it back to the original mesh and increase the bleed value.
Unfortunately I don’t have photoshop or know how to bake the texture. If you could briefly explain how to do that or maybe link a tutorial that would be great.
Wouldn’t recommend doing that on the image you posted though, it’s a bad quality image. UV map could be used as a mask by exporting the layout to an image and bringing that back to Blender.
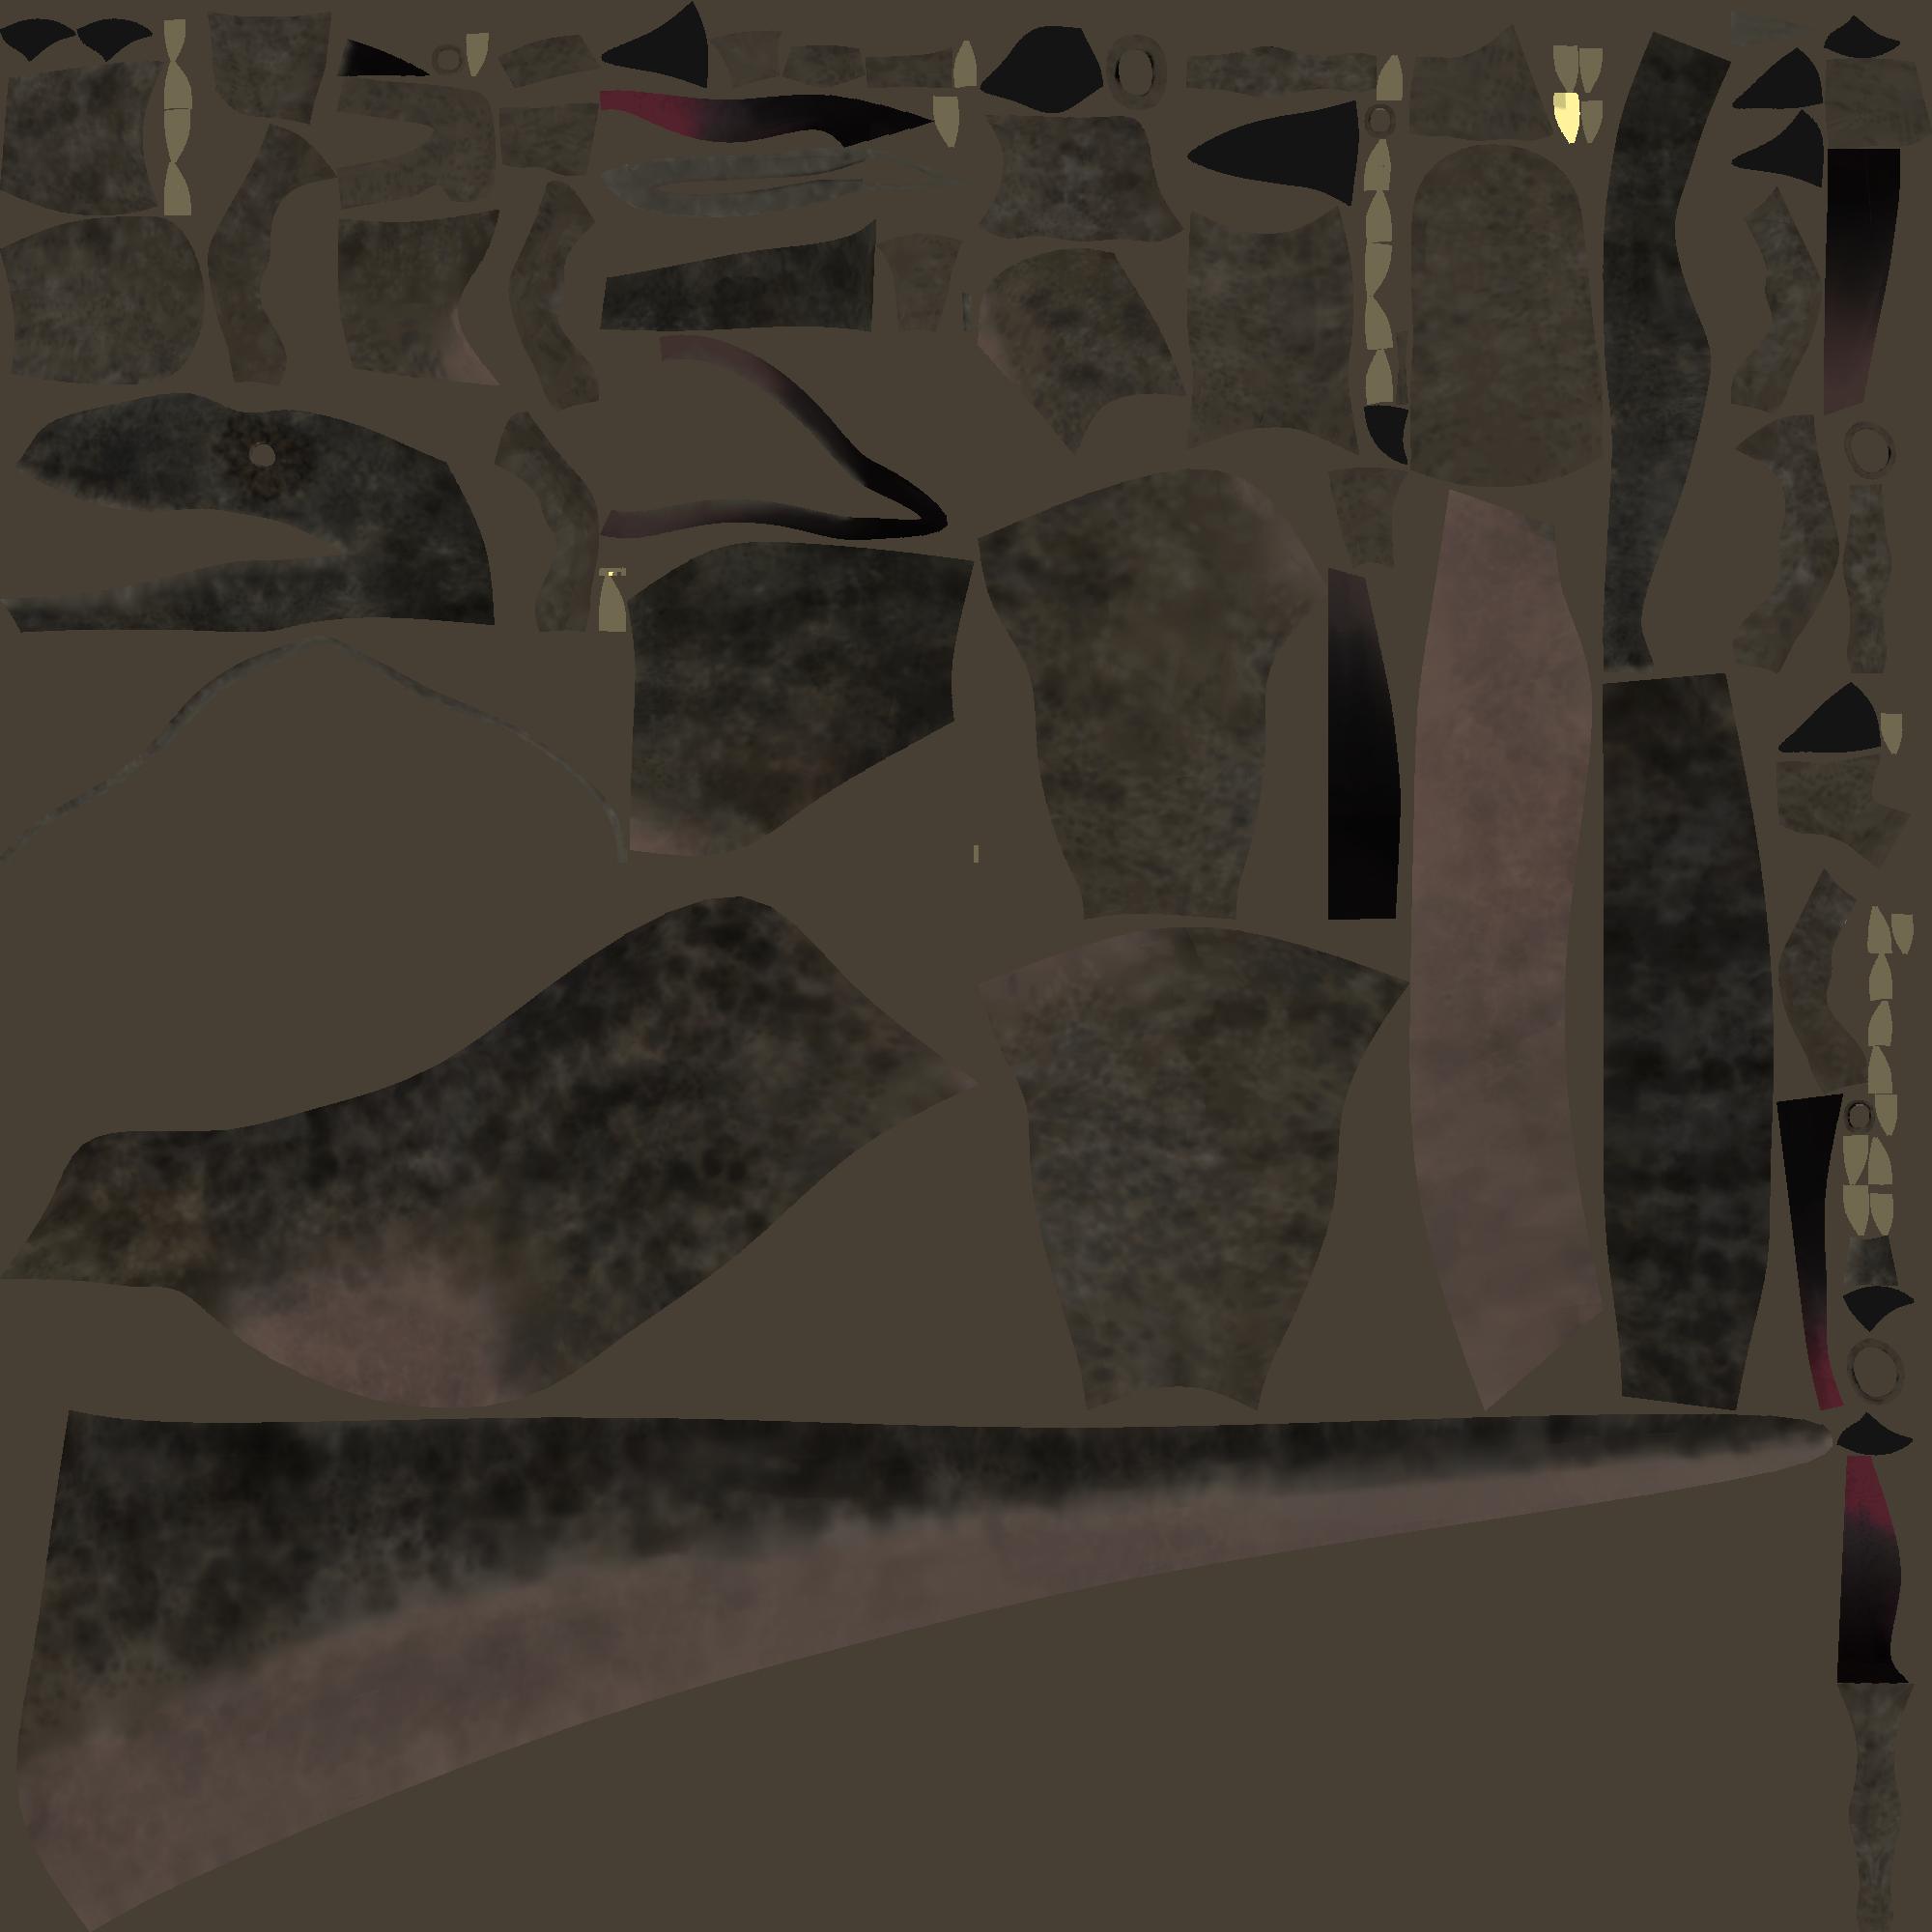
Speaking of which, the image you showed is not an UV map but an image texture. Looks like a diffuse texture map. UV maps are coordinates
About to start texturing again. The new layout has less UV islands and more space, so there’s more room to bleed the texture out further. I will try what you did with the compositor, thanks.
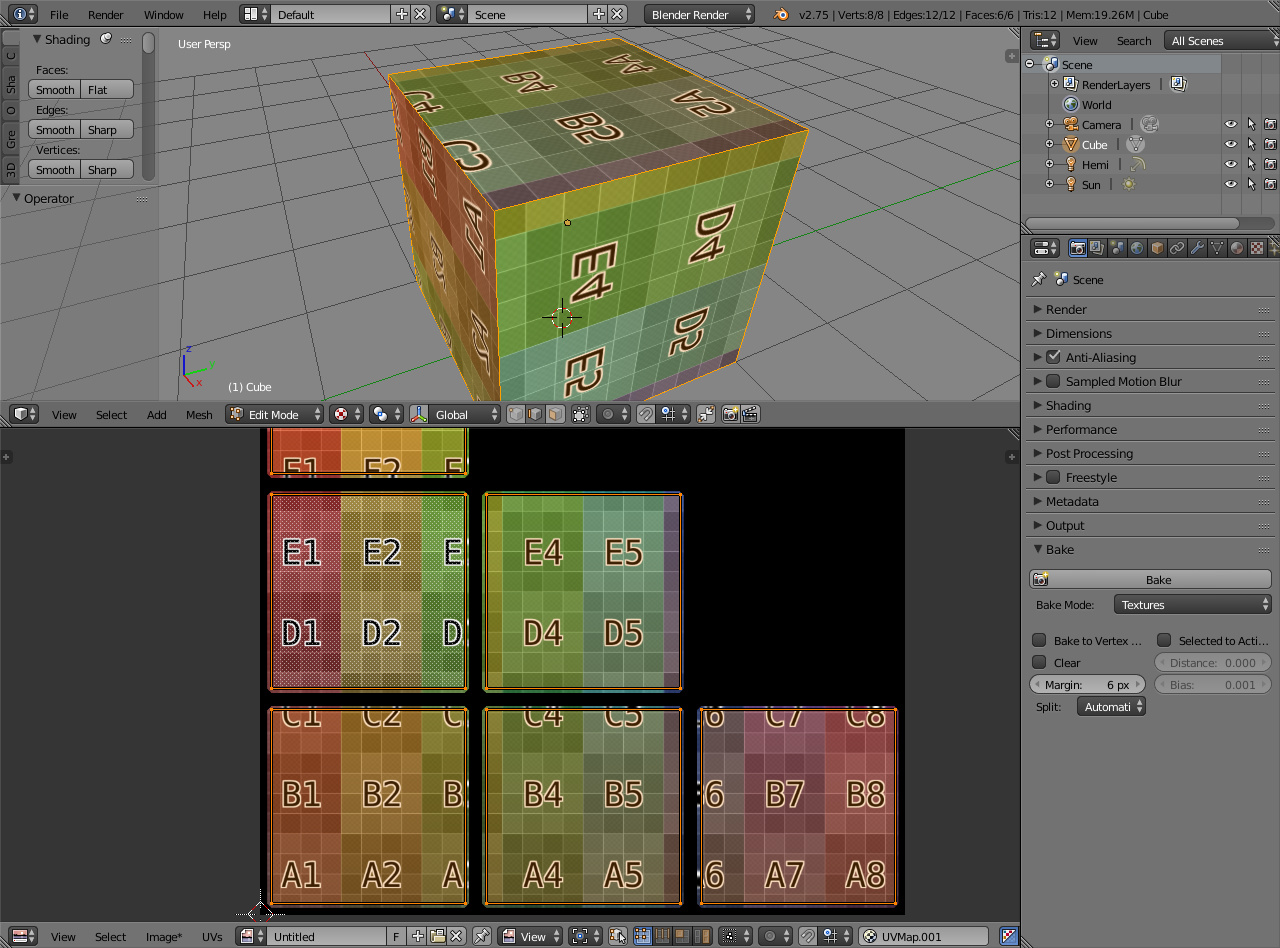
That’s too much. You’re wasting a lot of texture space, using only 34% of it.
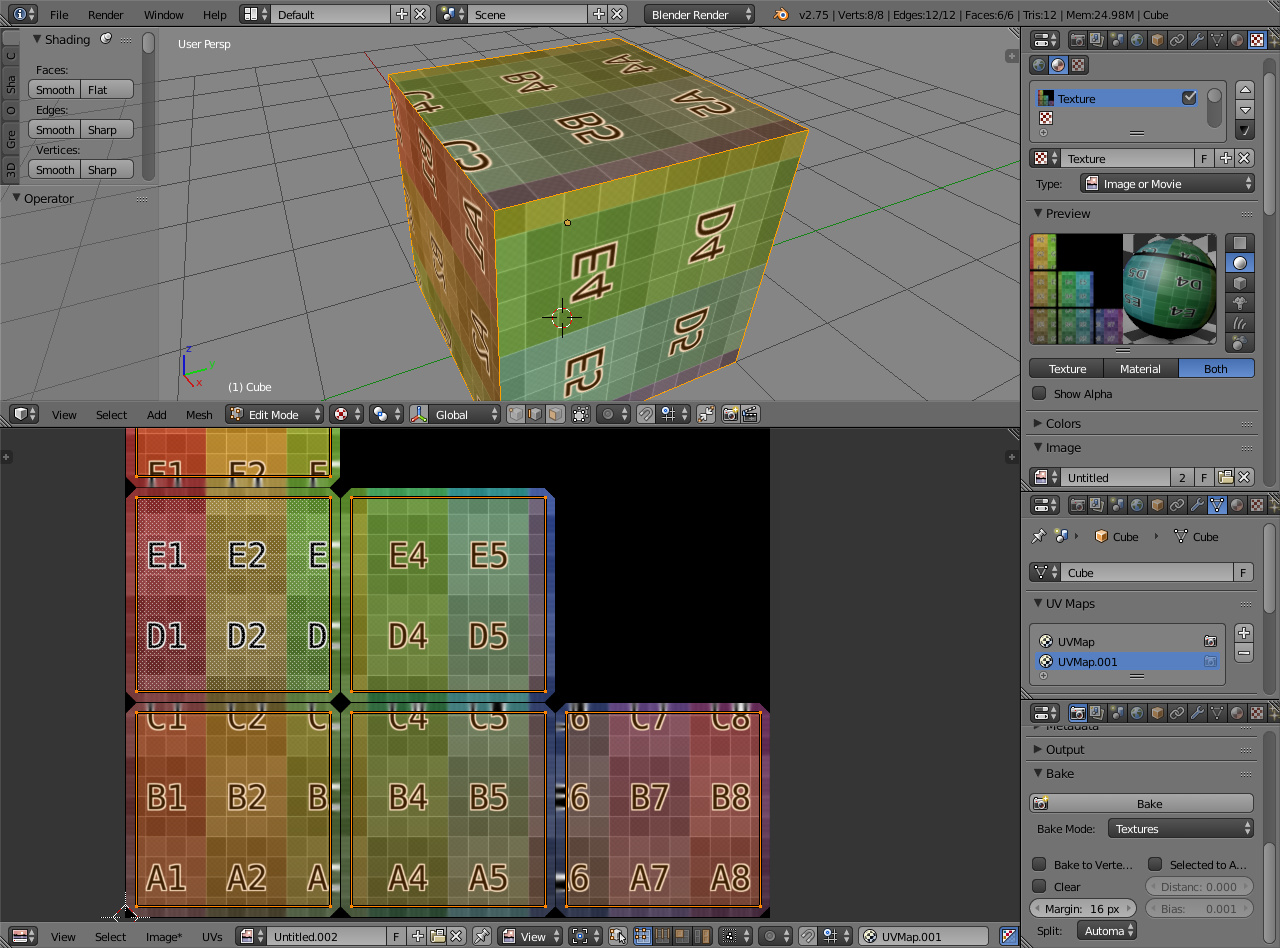
If it’s caused by mipmapping, 16px bleed over an UV area should be enough to show the degraded textures without edge artifacts within the viewable distance.
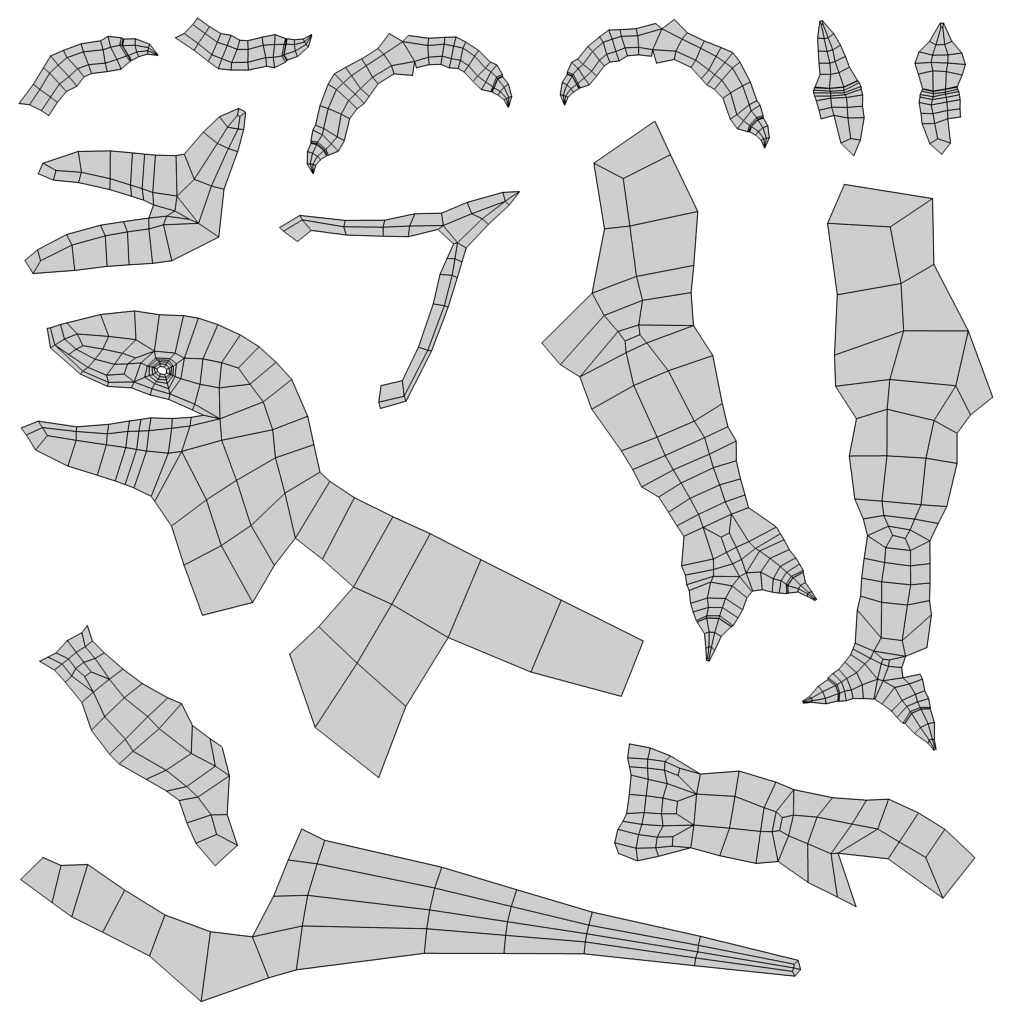
Green: UV areas, Red: 16px bleed. Using 54.7% of the whole texture area. Should get more of it covered by scaling all UV islands up a bit and reorganizing them.
Doing the bleeding by editing the image texture or by baking was to prevent the need to paint everything all over again.
Baking the textures on another image is quite easy and fast but somewhat complex to explain. In a nutshell, you would set the image as material assigned texture, add another UV map or unassign existing texture image from UV faces, assign a new image to the UV faces, and bake the textures on that
Nothing says the images need to be the same size, so that would allow using larger image size for working and then baking to new size once done. Could also use another UV map and reorganize UV islands, and then bake the colors to that configuration.
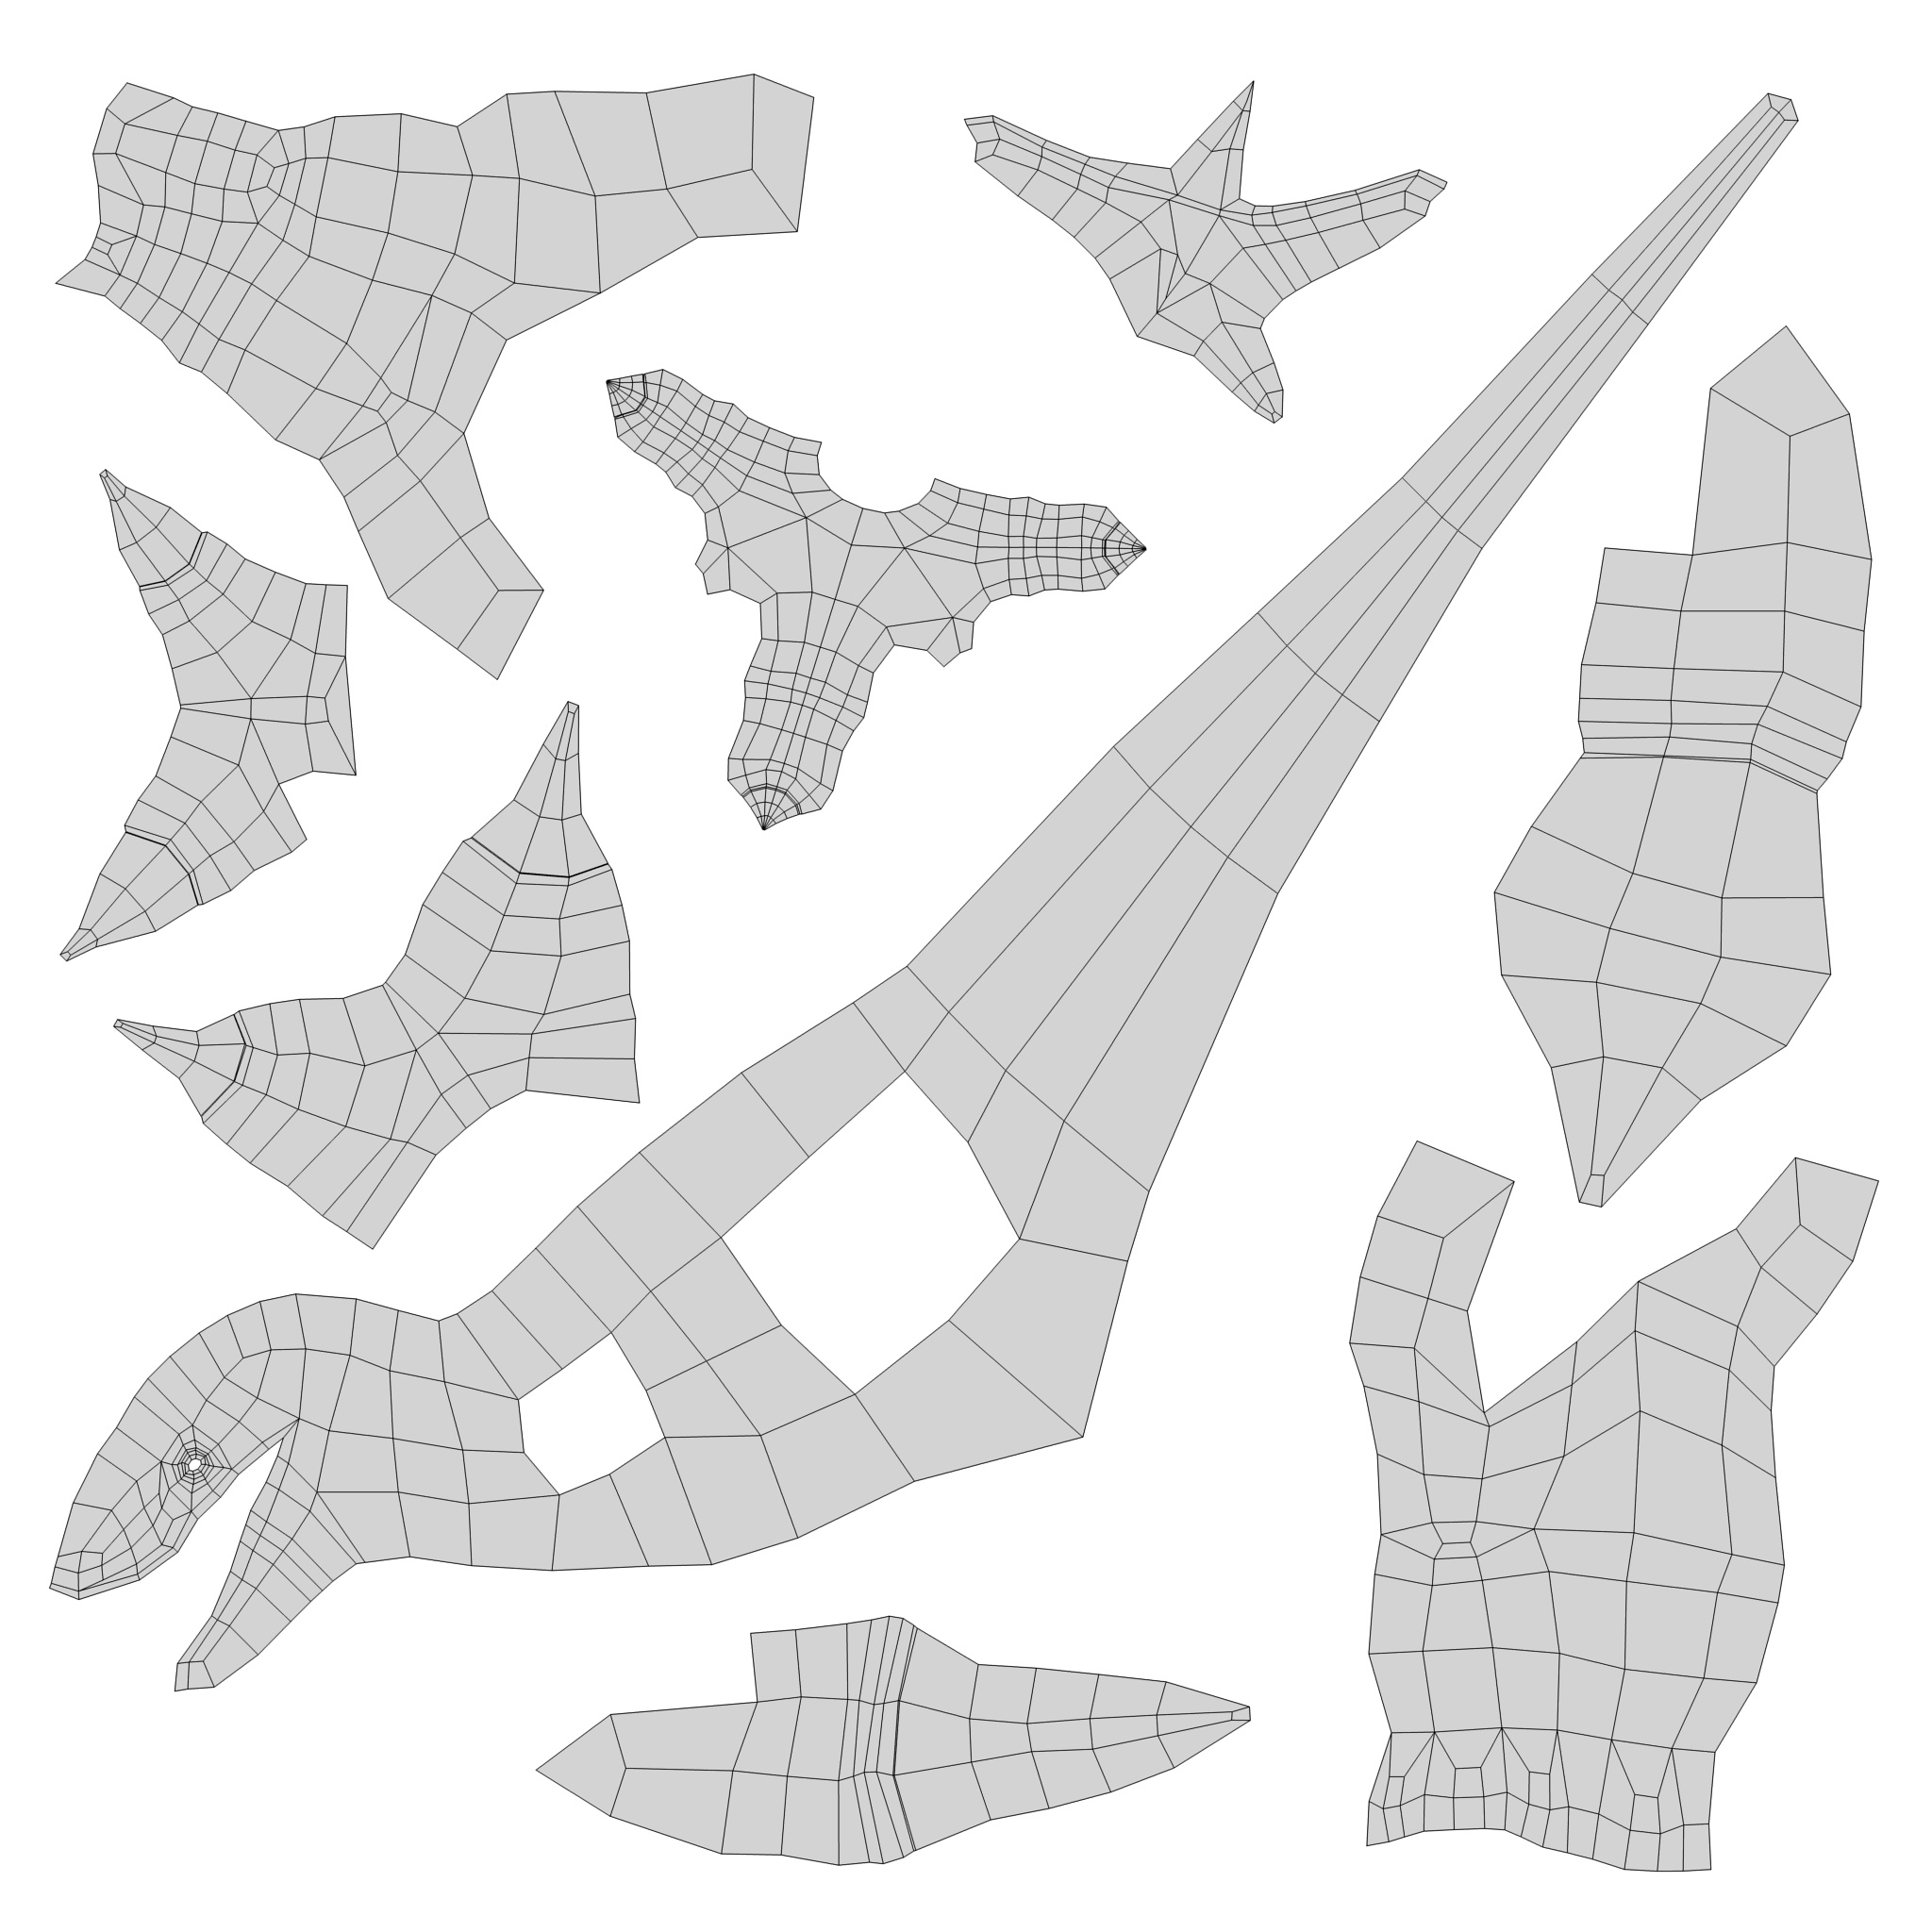
What I did was draw the thin line across that area, but for some reason those other spots showed up as well while I drew it there. I also re-did the UV layout and seams on the model to try and utilize more space. I checked the UV layout and there is nothing overlapping (to my knowledge,) so I’m not really sure what’s causing it.
Sometimes I get similar artefacts too. Seems like they are only present in blender viewport but not when rendering with cycles/lux/whatever. I’m pretty sure its a mipmapping problem and thus no amount of edge bleed is going to completely fix it. See, with every increase in mipmap level the resolution drops by half and eventually the islands will blur together. But since the proper renderers don’t use mipmaps anyway (they raytrace and use AA instead?) it doesn’t really matter. I recommend just ignoring the artefacts unless you’re making a game. Then try tweaking mipmapping settings i.e. give some bias so it doesn’t switch mipmap levels too aggressively.
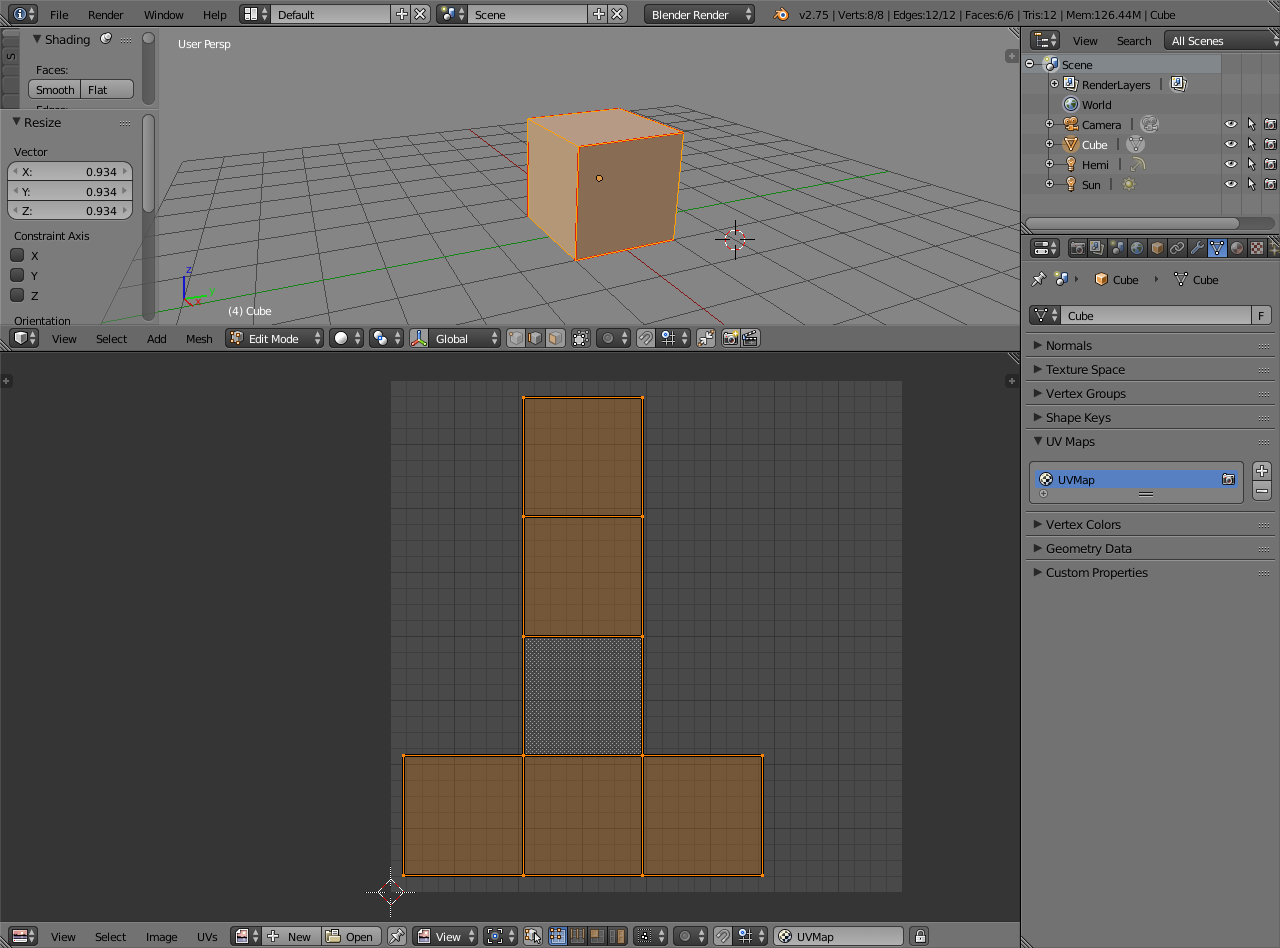
Would need an example .blend to inspect further and try it but it might be hidden geometry (alt+H to unhide in edit mode).
Instructions on how to prepare a .blend for upload linked in my signature. Of course could also take a piece of the model that contains an example of the issue and delete other faces. Should be quite a light file to move around, just make sure it still shows the problem, the related textures are packed in, and that the compress is enabled.
The problem was fixed by simply re-doing the seams and re-unwrapping, I started texturing again and haven’t ran into any issues yet this time. Thanks all for the help.