Not sure what it is about this section, but nearly all threads seem to end up with a lot of hardware comparisons going on, like jocks in the showers lol. So searching for terms hasn’t yielded me anything useful.
During my Cycles renderings, everything is pretty speedy for the most part until I include a hair system. Generally these are human hair “wigs,” 100-400 parent strands and 100-250 children. My hair shaders use SSS, a known CPU strain, but some are much faster to process than others.
The step that really seems to bog things down is “Packing BVH nodes,” which for a simple image and a thick hair system,
can take 8-15minutes and bogs down my entire system to a very slow crawl. Are there settings I can try to optimize this step? I run things pretty much @ default, using CPU because my GTX950 is under-RAMmed for the images I make. Win 10 64 home, 8GB RAM.
BTW, I tried the link in the sticky about rendering with GPU in Cycles, but it requires an authorization process I’m not interested in getting involved with.
Currently I use B-Spline enabled with the Steps set to 9, probably overkill, but in the past I have had some angular curves showing up in renderings, especially when using Kink options for the Children. If this affects the “Packing” step I will certainly try fewer. BTW most of my parent strands have 4-6 keys for the thick, wavy hairstyle shown above, if that is any consideration.
TY for the quick reply!
EDIT: WOW! Just tried the same image @ 4 steps and it sliced through that step like a hot knife through butter. WHOOT! I’ll compare this rendering to an earlier one to see if the hair is affected adversely.
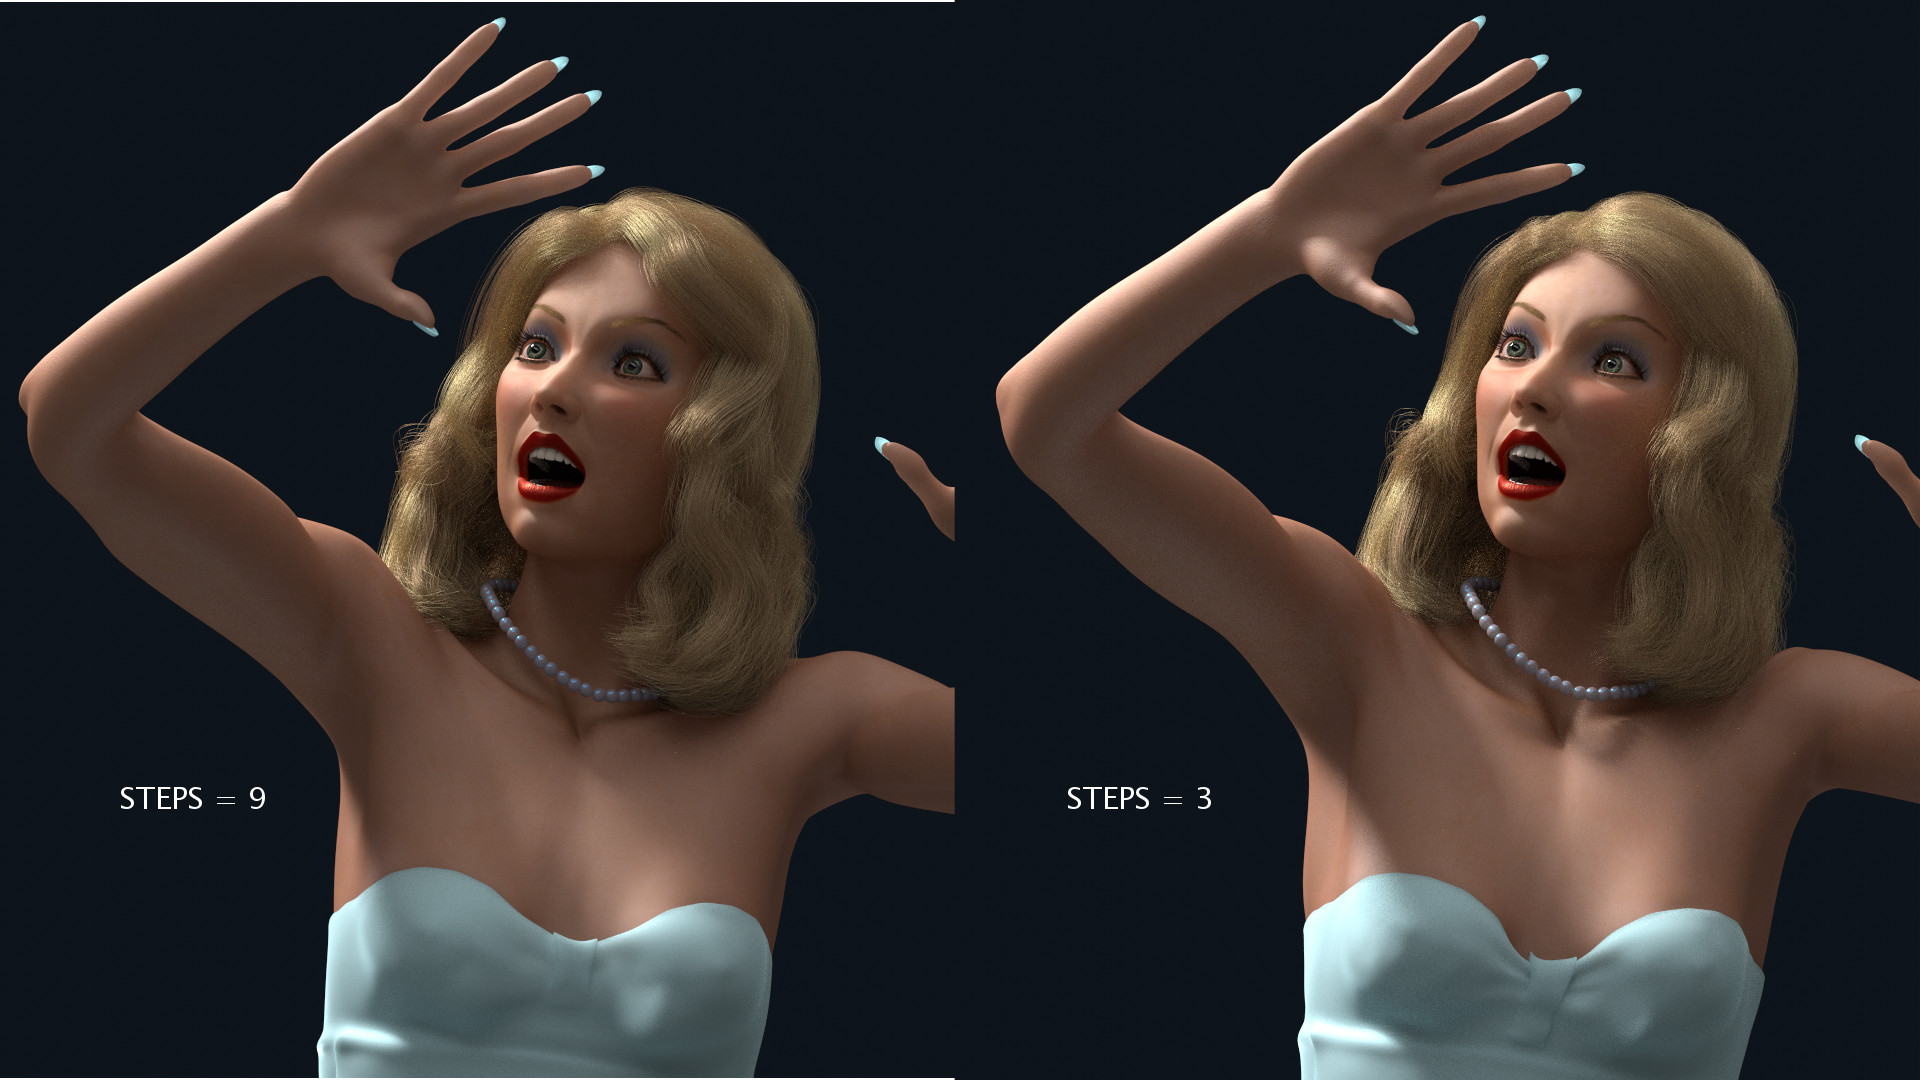
Results comparing Steps = 9 & Steps = 3:
The lower Steps value results in a less detailed structure to the hair system – waves and curls are less numerous and the overall shape of the hair has changed somewhat. Not all that much of a problem, as the differences can probably be accounted for by editing the Kink parameters (Frequency & Amplitude). Be sure to set the Display Steps to match the Render Steps or else what you see in the UI is not what you’ll get in the rendering.
A decent trade-off if it can be compensated for to a degree, because now the “Packing BVH Triangles and Strands” and the “Packing BVH Nodes” steps go by so fast they cannot even be recognized as happening. Not sure if it shortens overall rendering time but if so it is not by a huge amount, other than the minutes saved in the processing steps (and a computer that does not get very drowsy!).
TY again, IkariShinji, an excellent solution.
Final Note: By adjusting the Kink parameters in the Children section of the Hair system panels, I was able to compensate nicely for the loss of detail from reducing the Steps value. However, I found that I had to use a minimum value of 5 to get a decent display in the Particles Editor, with smoothish curves instead of jaggy strands. I matched that value in the Render and Display panels of the Hair system, and initial processing was still very fast.
“Steps Set the number of subdivisions of the rendered paths (the value is a power of 2). You should set this value carefully, because if you increase the render value by two you need four times more memory to render. Also the rendering is faster if you use low render values (sometimes drastically). But how low you can go with this value depends on the waviness of the hair. This means 0 steps give 1 subdivision, 1 give 2 subdivisions, 2→4, 3→8, 4→16, … n→2[SUP]n[/SUP].”
So, steps set to 9 means 2[SUP]9[/SUP] = 512 subdivisions, which is a ton of geometry you create that has to be organized by the BVH core before rendering.
Given the performance difference going from 9 to even 5 steps, I knew it had to be an exponential factor, so that confirms my slightly edjicated guess. But “Steps” doesn’t really convey that kind of subdivision, so it can seem harmless, eh? I’ll have to visit that Wiki, it seems to know its stuff.
I recall now the reason I had set the factor to 9 in the first place was to improve the curvature of the strand structures in the display (too many angular strands!) and then found I had to match it in the Render field as well to get what I saw in the UI. Little did I know the hole I was digging for myself lol.