So, this seems like the simplest thing in the world, but under no circumstance can I seem to mix one texture ontop of another using an add, multiply, or any form of channel.
I’m using blender 2.78
Working in cycles. (Obviously)
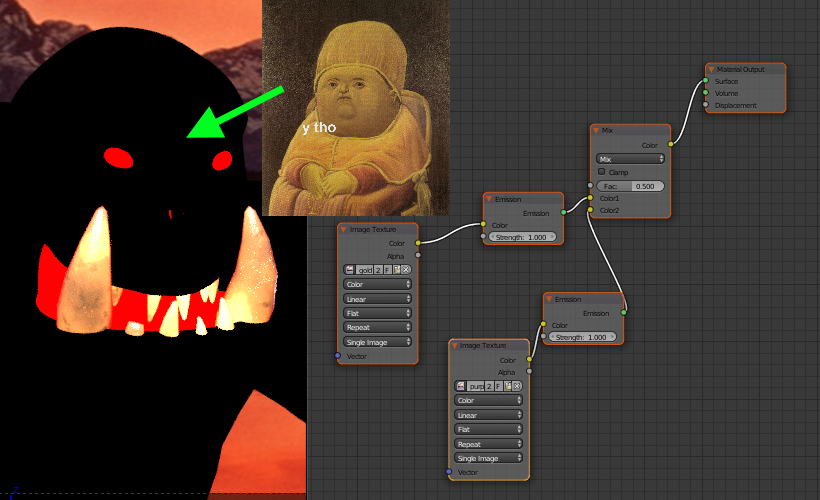
The pure black material is in rendered mode in the veiwport.
Rendering the product returns the same image.
I’m betting I’m using the “Mix RGB” node wrong…
Right?
P.S. I know the other mix node will blend the two images, but I want to blend the first image ontop of the second with an “Add channel” Effect, or whatever the heck it’s called.
Bonus points: What is it universally called when you mix images with like, a multiply channel, or an add channel or difference channel. I’ve never known that this process is called.
But I don’t simply want to blend them together, each with like, a set alpha value.
I would like to mix two textures, one over the other on an add channel.
You’re mixing two shaders with mixrgb. Green socket only connects to another green socket. Mix the images, image alpha as the mix factor is the easiest.
Each of your textures plugs into an emission shader. You are then trying to mix the output of these emission shaders using the Mix RGB node.
The problem is - the output of the emission shader (gree dot) is not a colour. It is a complex description of the shader, and as such the mix RGB node doesn’t know what to do with the output and so renders black.
What you should do is mix the textures using the mix RGB node first - then plug the output of this (which will be a colour) into the colour slot of the emission shader.
In general - only like coloured node points should be connected. There is a little flexibility with yellow, grey and blue node points to some extent, as long as you know what you are doing - but green cannot be connected with any other colour under any circumstances. In your node setup you have green node points connected to yellow…this simply cannot work.
If you want to combine two shaders - use the Mix or Add shader node as MartinZ suggested above.
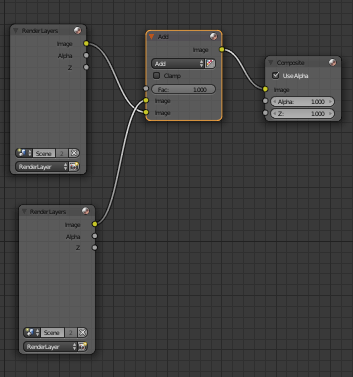
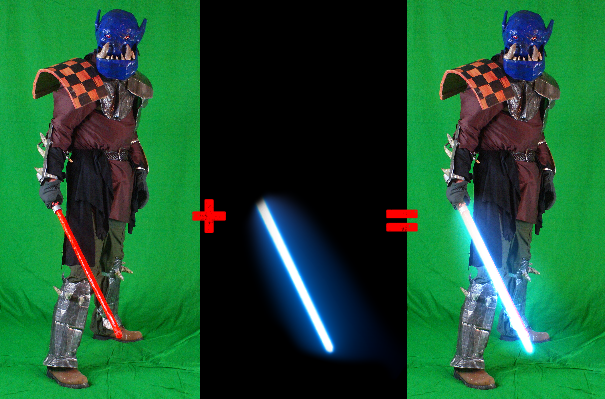
If you want to composit shots like your green screen image - use render layers and compositor.
Sounds like you’re wanting to do some compositor stuff rather than direct material settings stuff. May need to add separate passes like emission, etc. in render layers. Then enable nodes for the overall compositor. Works much like the nodes in Cycles, but you’ll have more control over stuff like how lighting and various post process effects are mixed in. (I think some people new to Blender may confuse the two, because they’re just one or two toggles on the same screens, and the way the nodes are presented looks the same.)
@moony
Hot darn!!! Thanks a ton. I’ve been struggling to wrap my head around this for a bit. You’ve made it really simple. Thanks a ton.
@pauljs75_
I’m not actually rotoscopeing a lightsaber on an orc. (yet. XD) That was just an example, as I was unsure if some of the users here understood my question. (And in fact, the example I showed was done in the compositor, using vector path to auto add contrails and all that good stuff.)