(2.53) Keyframes not matching visuals... HELP!

Not sure what happened. I’ve been working on a project in Blender 2.53. I cannot get the keyframes in the NLA Editor, Dope Sheet or Graph Editor to match up with what is actually happening when I play back my animation. It’s as if they are offset by 100 frames. This completely stops me from progressing. I’m guessing it’s just a general trick I need to learn since making the switch to 2.53. But dang!

Look below. I am in “edit mode” for the selected strip…mainly because it’s the only way I could figure out how to get the strip to extend to the length of the actual animation inside of it. (I know…sad…my current knowledge of 2.53 that is). This was working fine until I added some more parts to my robot. I tried deleting that strip from the timeline and re-adding it. The animations/keyframes are all there, but the character won’t move when the playhead is scrubbing through the keyframes. I mean, it still moves the way the animation should, but not anywhere even close to when I scroll over the keys that cause the motion. HELP!

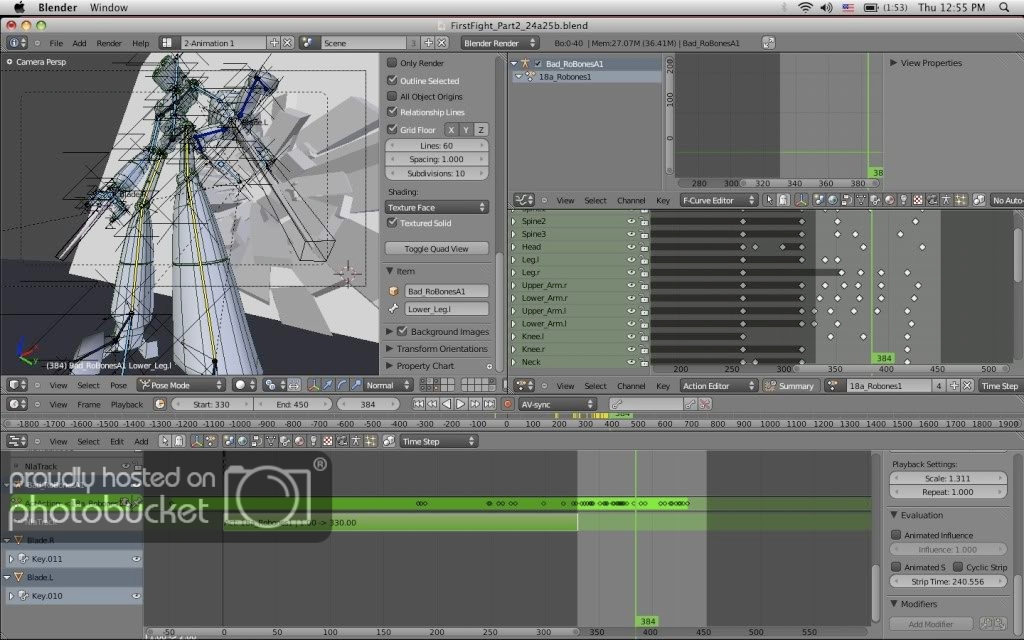
Look. I know, right about now, you’re seeing me at my worst. It was easy work in 2.49b. But now (2.53 later) I’m I’m practically drunk and homeless. I just haven’t had the time to read up on how 2.53 animation works since the change.

Anyway thanks for any help you can grant me.

I had this exact same problem while trying to correct an issue that I had that is currently affecting playback speed (I am still using 2.49b). I finally found out that the “Map Old” and “Map New” values will jump the playhead to the wrong place along the timeline if they are not both set at equal values, so take a look at those values and see if this can address your problem.

I will be looking back here from time to time to see if your problem is solved, so please let us know :slight_smile: Good luck :slight_smile:

Map old, map new? Never heard of that before. I know 2.49 had a feature to recalculate the scale. Is that similar?

I will give the instructions to find the “Anim” window in 2.49b as I have not yet tried using the version you have - hopefully the instructions can be followed in your version without too much trouble.

If you hit F10 to access the “Scene” controls, you will see 4 buttons on the top of the control panel bar at the bottom of the screen. The 3rd one is a squiggly line with an arrowhead attached - Click that, and it should reveal the “Anim” panel.

The anim panel has two controls at the top of it - “Map Old” and “Map New”. Now, apparently these controls can be used to re-map your keyframes so that your entire animation is stretched or compressed so that it will play faster or slower while still maintaining the exact same frame rate, no matter how fast or slow you play the animation.

The way it was described to me was thus: The values are like percentages, meaning that if you set the “Map Old” value at 100 and the “Map New” value at 150, the animation would then be stretched out over time by a third.

However, in my case, I am currently having problems with the animation that I am working on. What these controls seemed to do was keep the animation running at exactly the same pace when I tried to re-map the keyframes, and the only visible effect I noticed was that the playhead jumped WAAAAAY out of synch with the actual frames being played, making it a total nightmare to edit the animation in any way.

I’m quite sure that the controls actually work fine and I’ve somehow screwed up my animation without knowing what I did, but… like I said, my problem was very similar to yours, and I fixed it by returning the “Map Old” and “Map New” numbers to values that were equal to each other. This made the playhead move back to its correct position and allowed me to continue editing the animation as normal.

I’m still looking for a solution as to why I can’t seem to re-map my animations using these controls - for the time being, all they seem to do is jump the playhead away from where it’s supposed to be :frowning:

Anyway, I hope all this helps you, and I’m sorry I couldn’t be of any more help :s

Wow. Your issue sounds even more insane than mine. Thanks for filling me in on that stuff. I never knew about that panel. I don’t think I have a reason to adjust those settings yet, but it’s good to know about.

I did end up figuring out my problem…kind of. I got it working, but without full understanding. I watched one of the BlenderCookie videos on animation:

learning-basic-animation-and-a-walk-cycle

Something as simple as seeing how he extended the clip in the NLA editor helped me figure it out. So simple it hurts to think I was stuck on it. I adjusted the “Action Extends” end frame in the NLA Properties panel instead of pressing TAB to ender edit mode (where the clip turns green). I think it’s similar to 2.49b where you click the little icon in the NLA editor to switch the focus between NLA and Action Editor. When NLA is the focus, the Action Editor will display keys in their position according the clip’s position on the timeline. When Action Editor is in focus, the keys for that Action will start at frame 1. That was always a little confusing. Now in 2.5x you press TAB to change focus. So the actual key frames stay where they were originally placed, but if you move the clip around, the whole thing is offset to play from that position. Still a little tricky but I think I’m getting it now.

Man, 2.53 is way more efficient. I’m love grows for it as my knowledge increases.