Question #1
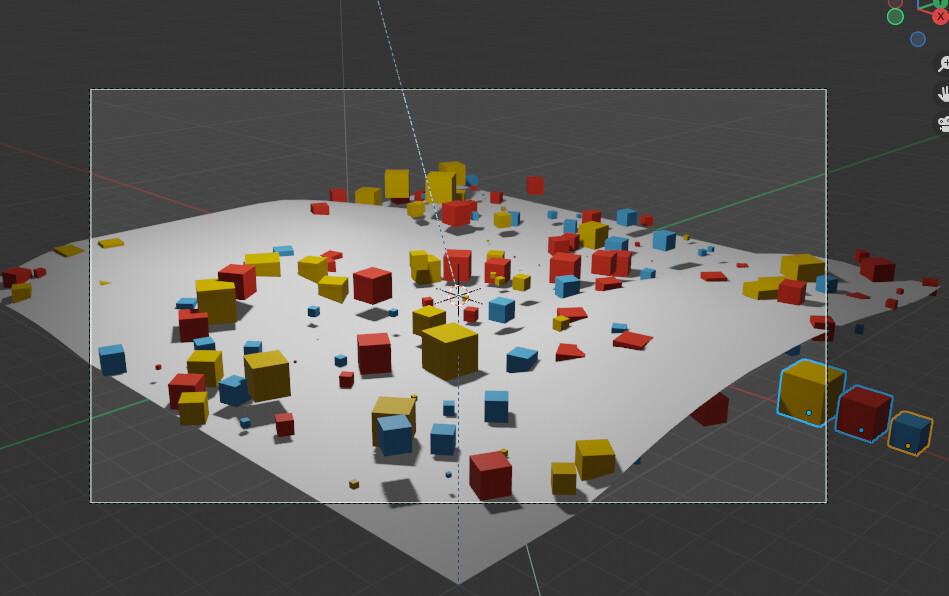
Why are the Instanced cubes not following the contour of my Displaced Mesh?
You can see I set the vertex point at the base of the cubes. I duplicated the Displaced plane and used it as the Geometry node.
Question #2
How do I vary the number of cubes “Individually”. For e.g. let’s say these cubes were: (Rocks, Trees and Grass) I’d want more grass and trees and less rocks for example. How would I do this?
5% Rocks (approx.)
30% Trees (approx.)
75% Grass (approx.)
The Cubes (instances) are currently in a Collection named “CUBES”.
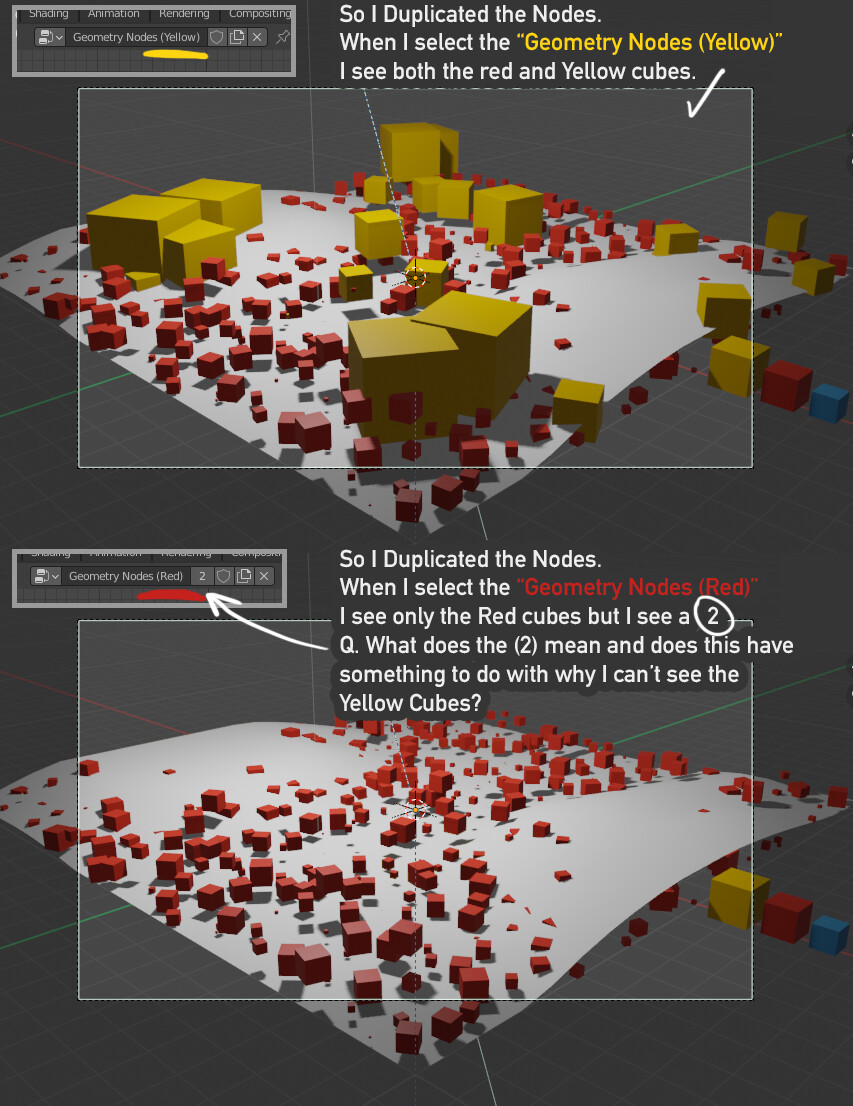
Is there a way to separate the nodes for each color and then somehow apply a different number of cubes each, but this is a lot of nodes, is their a simpler way to do this. Please provide a sample if you can. Thanks.
So I duplicated the “Geometry” Nodes mesh, then added the Cubes individually and not in a Collection. This way I can “scale”, change the “amount” and “size” of each individual Object.
I am not sure if this is the right way to do this. Do I create a new in the Geometry Nodes Window or by duplicating the Node Object.
Question #3
If I realize you can’t get the instanced objects to follow a Displace Modifier, how do I copy all of the Geometry Nodes to a new plane object?
First of all: As I’ve read, you have duplicated the plane multiple times for different NodeTrees. You only need exactly one plane for this.
Q1:
If you displace the plane with the shader-displacement (inside the material), it is not possible, because the shader displacement only gets executed shortly before rendering and the geometry nodes get executed before the material to create the meshes. So you need to make the displacement with the displacement modifier. And then make sure, that the GeometryNode Modifier comes after the Displacement Modifier
Q2:
Just create three different Point Distribute and Point Instance Nodes in parallel.
Q3:
I don’t quite understand this question.
I will attach you my *.blend file here: geom_nodes.blend (1.2 MB)
Patrick, thank you very much for the example. I didn’t realize you only need one plane. Thank you. In my file I did have the displace modifier “above” the geo nodes, but I think my plane was so distorted that the cubes size was making them look like they were floating.
Question #3
Let’s say I applied the modifier on the “plane” or I have a sculpted plane, but I don’t like the shape of the plane and I want to create a new one. Can I somehow “copy” all of the Geo Nodes from the plane I don’t like to another new plane? I hope this makes sense.
Q3:
Yes sure. The GeometryNodes are stored in a reusable NodeTree. You could even use the same GeometryNodes on multiple different planes at once. Just add a GeometryNodesModifier to the new plane and then select the other GeometryNodeTree (it helps if you name them in the GeometryNode Editor) in the modifier.
Just be careful with GeometryNodeTrees that aren’t used but you want to save them for later, because they would get deleted like unused Materials. (you could make them persistent with the fake user button)