Greetings,
My name is Peter Alexander, also known as Mythcons. I’ve previously competed in the Reallusion Character Design contests, which were a great experience of learning and creativity. It provided me a chance to learn the software and to push myself. I am not competing this time, but I am creating a few Work-In-Progress Threads to serve as a guide for your own WIP threads and maybe provide some workflow advice for people who want to compete, but don’t have the same understanding of the software pipelines to assist in the Character Creator Process. I don’t have an WIP template that I’m using, and rather than posting my progress over time (which I would encourage), I did this process in a couple sittings and then built my thread as a demo.
I used an AI image generation service to visualize an idea I had: A steampunk-style gnome wizard.

Update #1: Around June 15th
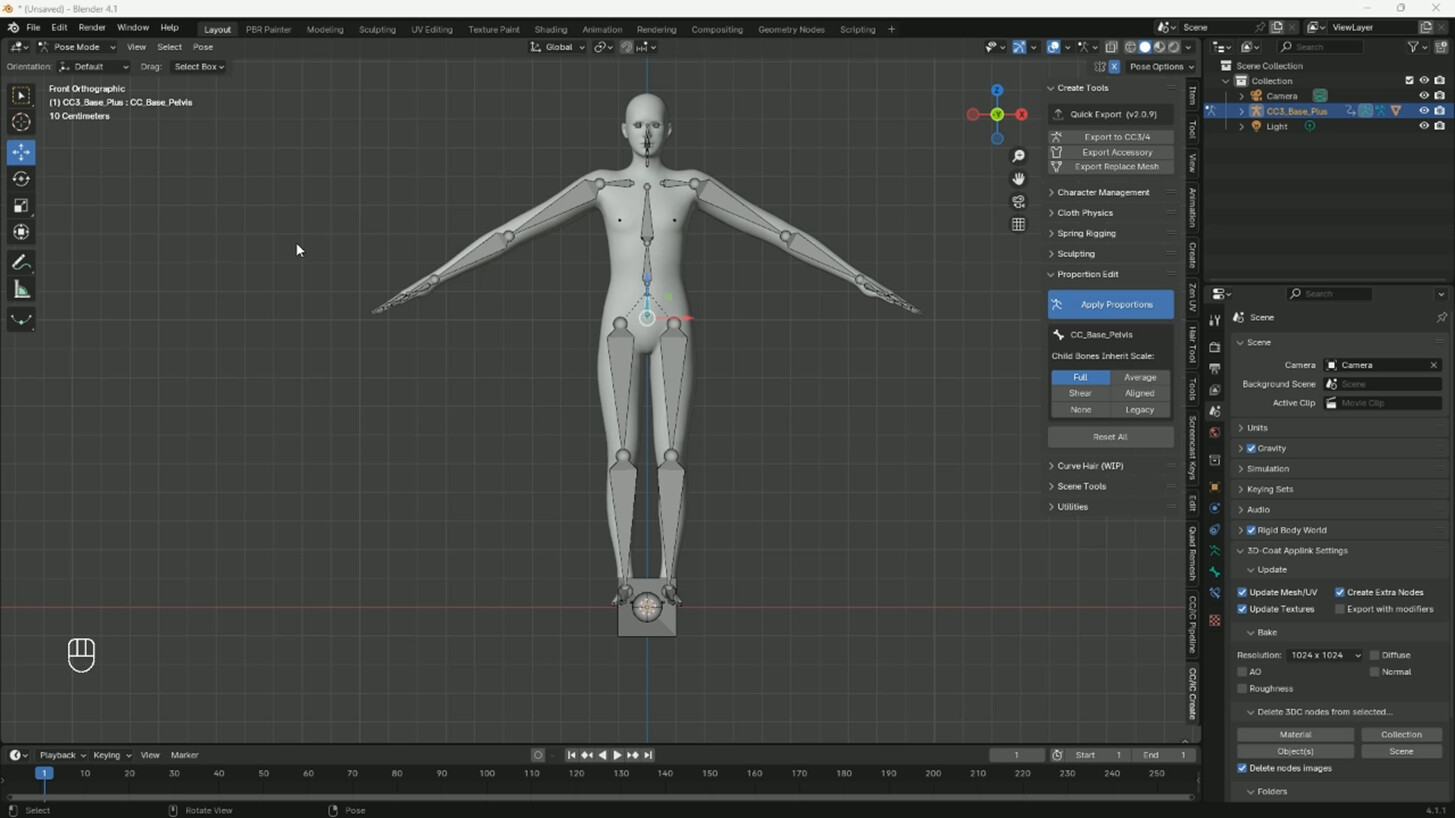
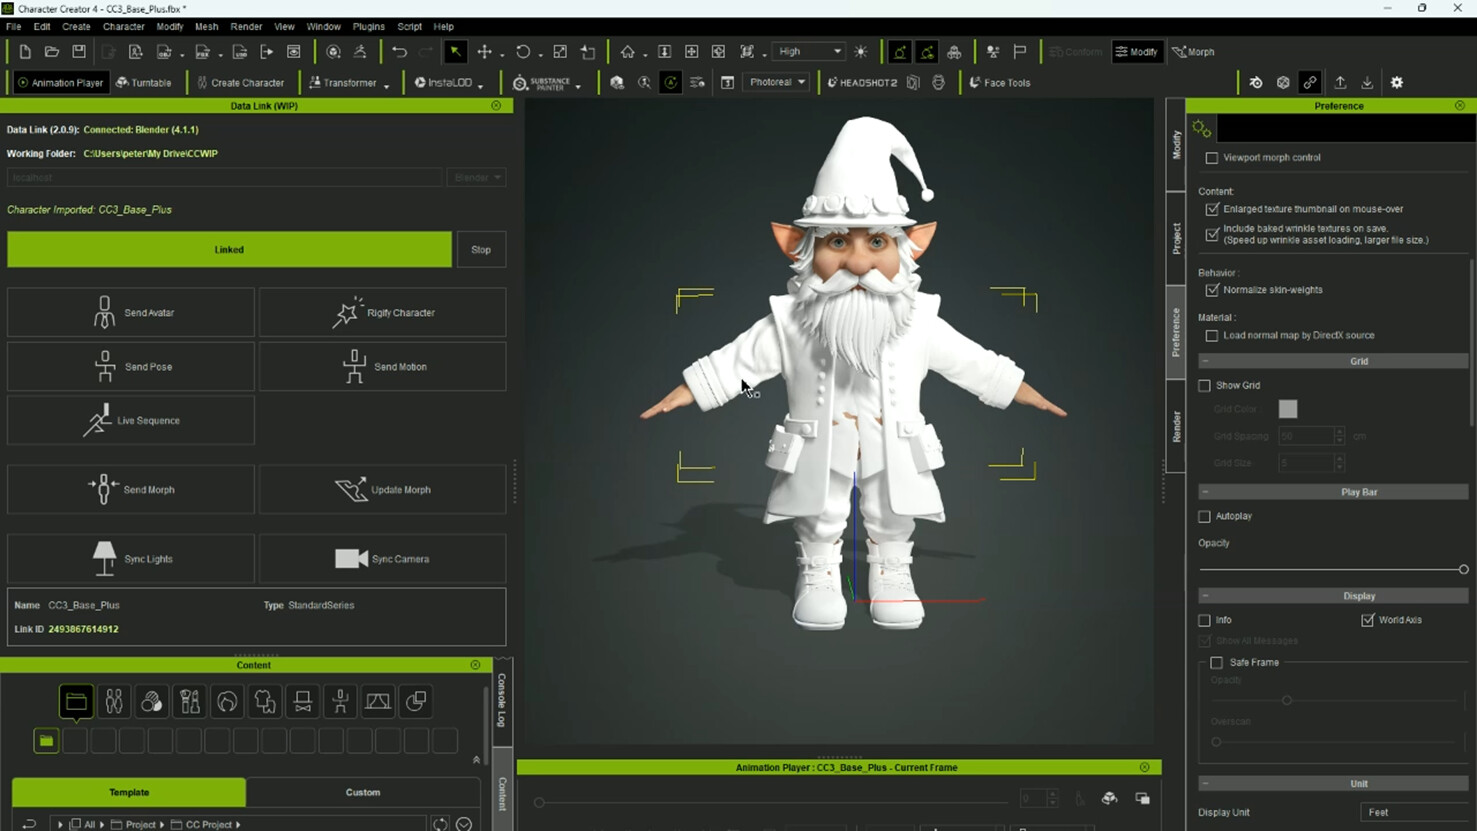
I took the CC3+ neutral base character into Blender using the Blender Pipeline Add-on. For those who are using Blender and the CC / IC Blender Pipeline, I would currently recommend that you Import and Export your manually rather than use the Data Link option. This is because if Blender or Character Creator crash, you may lose the connection and the character you’re working on may become invalid. There is a way to import the character back into Character Creator, it just takes a work around currently. Once the character was imported into Character Creator, I used the new Proportion Editor to start manipulating the scale of the character to Gnomish proportions.

I found the new proportion editor extremely powerful and easy to use. The Proportion Editor has various scaling options for the child bones (the bones attached to the one you’re scaling). These options will determine how the scaling will deform the child bones. If you scale a parent bone with the ‘Full’, the child bone will be deformed fully as well. So if you scale the leg on the Y-Axis, the foot will be scaled the same, possibly causing an unwanted scaling distortion. The ‘None’ option will allow you to protect the child bones, meaning that when you scale the parent, the other bone will be unaffected in terms of scale. This is useful if you want to give your character big arms or something, but you want to keep the hands as they are.
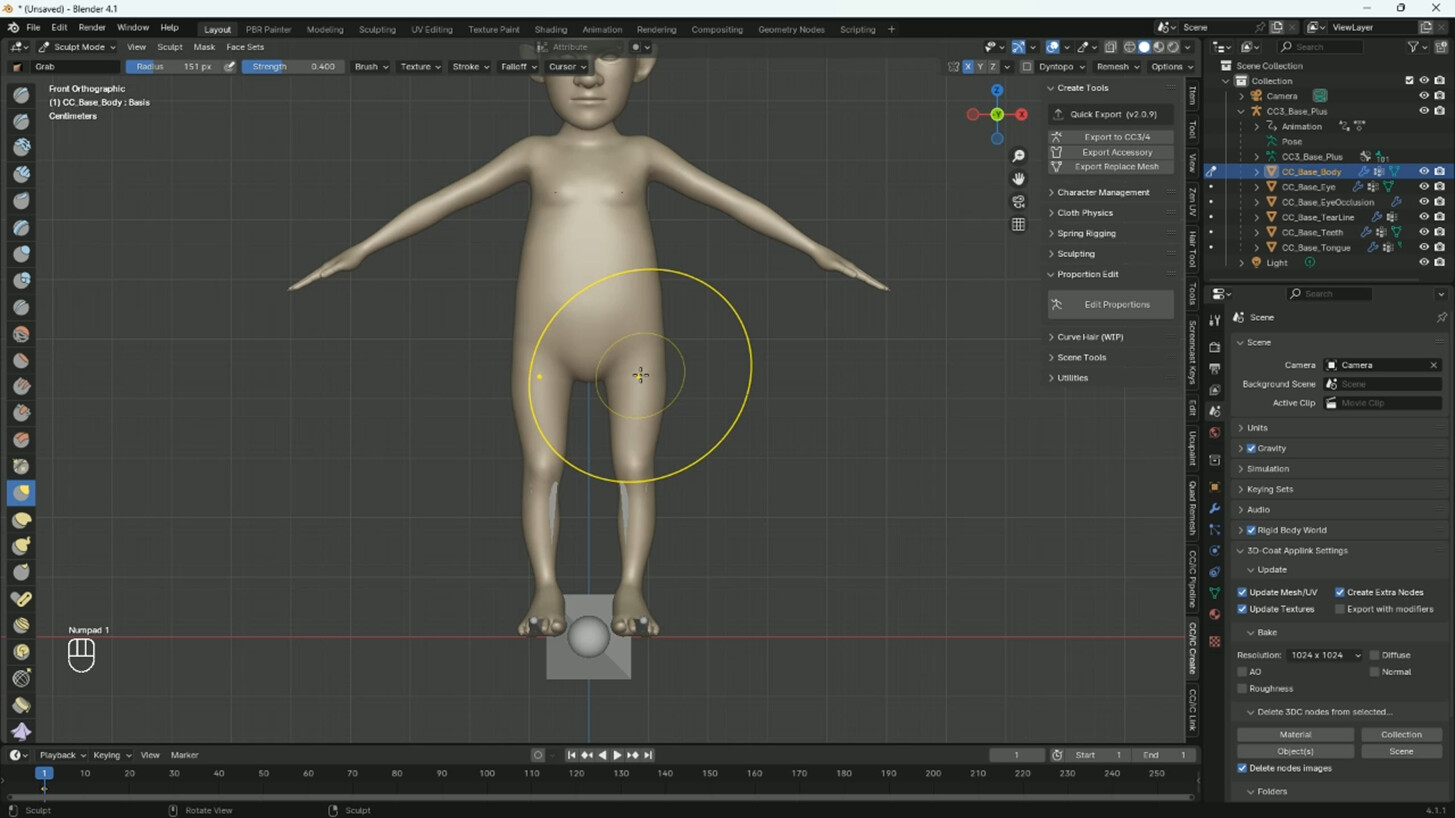
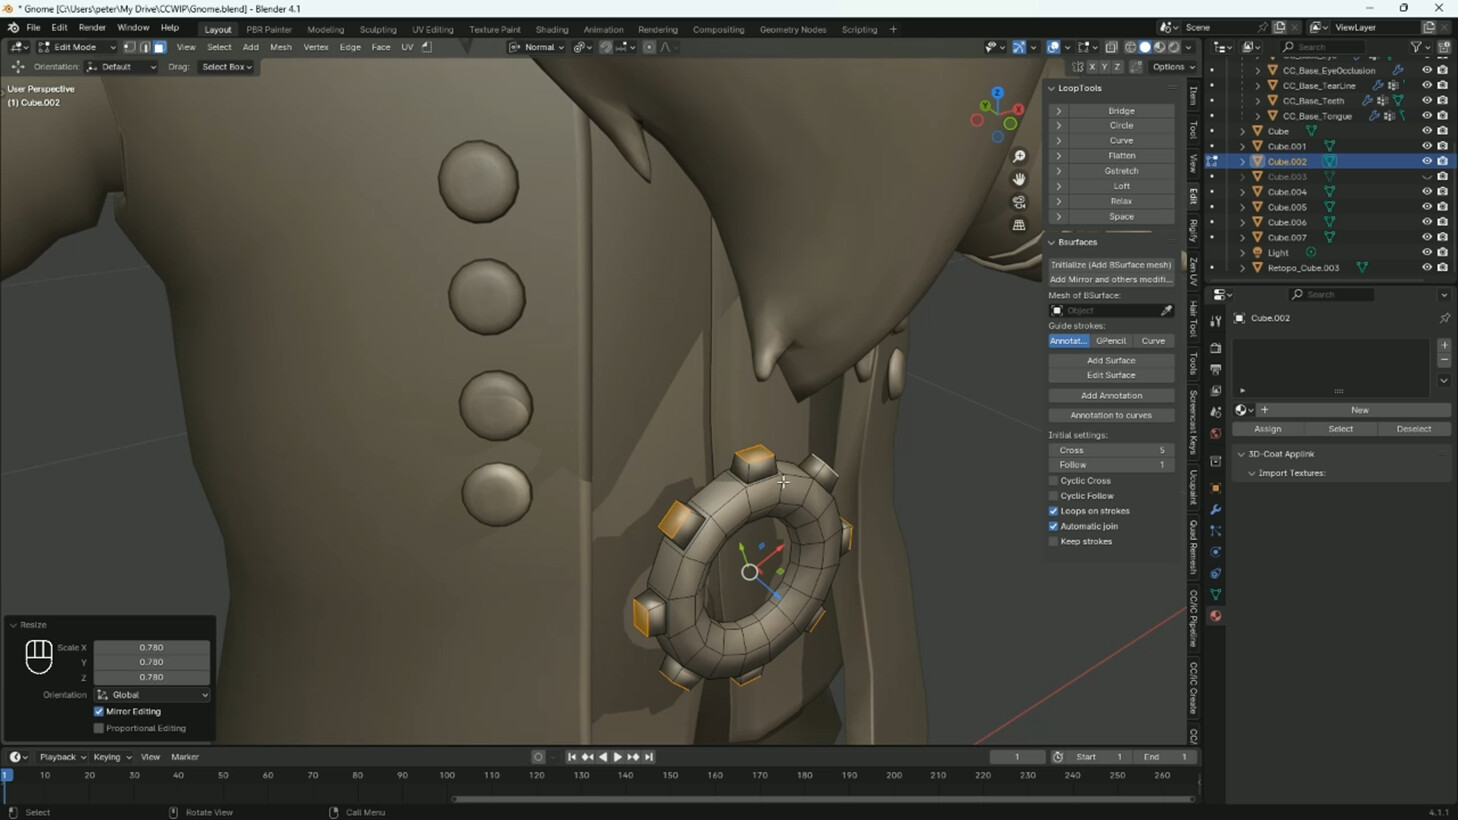
Once the character was roughly where I needed him, I started to build some assets. These assets serve both as the foundation for his final assets, and a way to reference other details for the character, which is an important part of the process. I have difficulty estimating where details should go if I do not have something to reference in those areas, like a piece of clothing. Once I was mostly finished with using the Proportion Editor, I started touching up areas of the mesh that needed some work using the Sculpting Tools. You do not need to be an expert sculptor for this part, as I tend to use just my mouse and keyboard for sculpting in Blender.
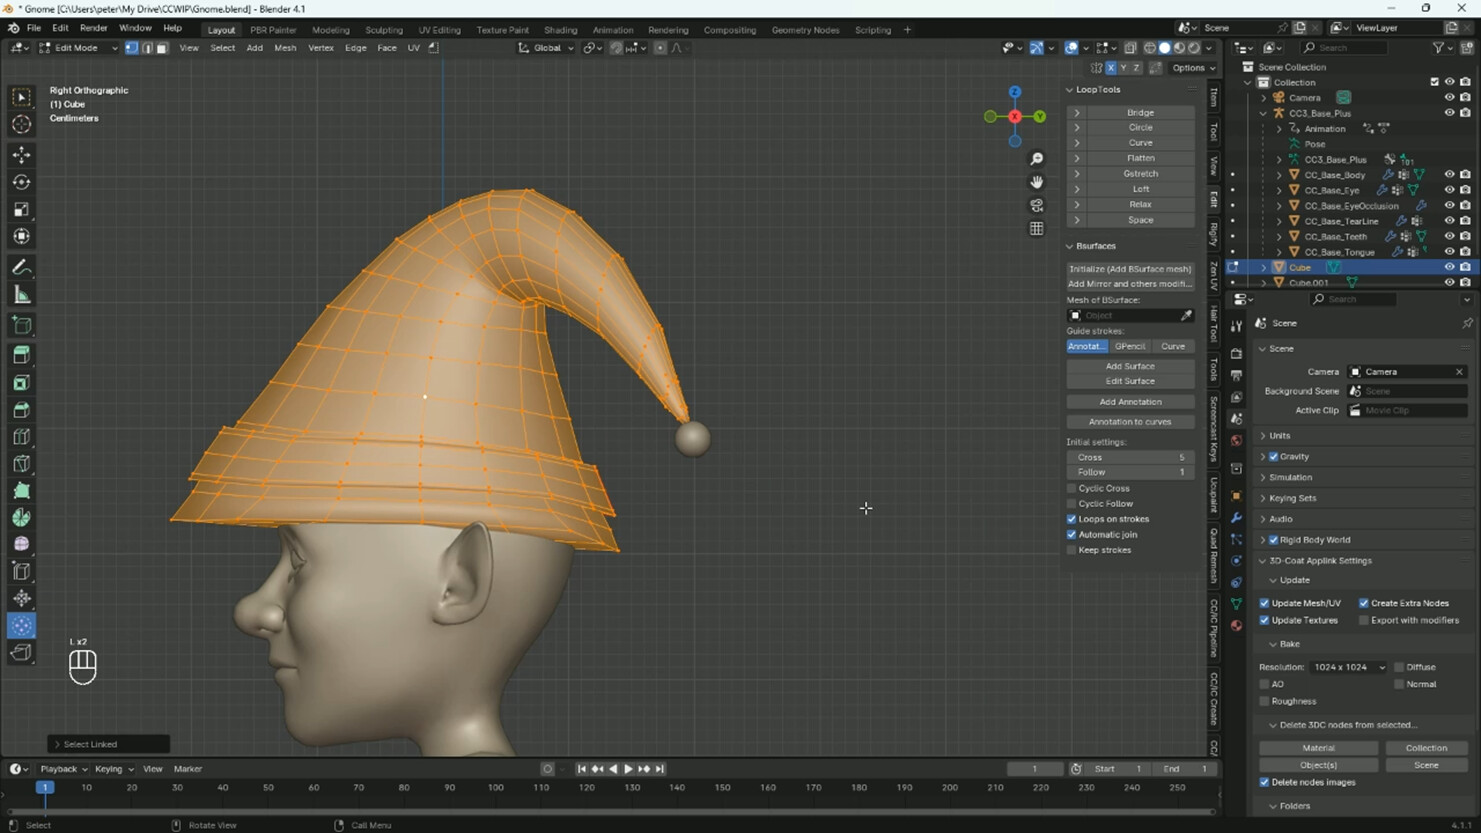
I started with basic shapes for his assets, like turning a cube into a tapered triangle shape for his hat. Then I started building out from there, extracting new geometry and shapes from the old. I will often grab an edge loop, duplicate it, separate it into a separate mesh object, then build more detail for the main object (e.g., a hat, a belt).

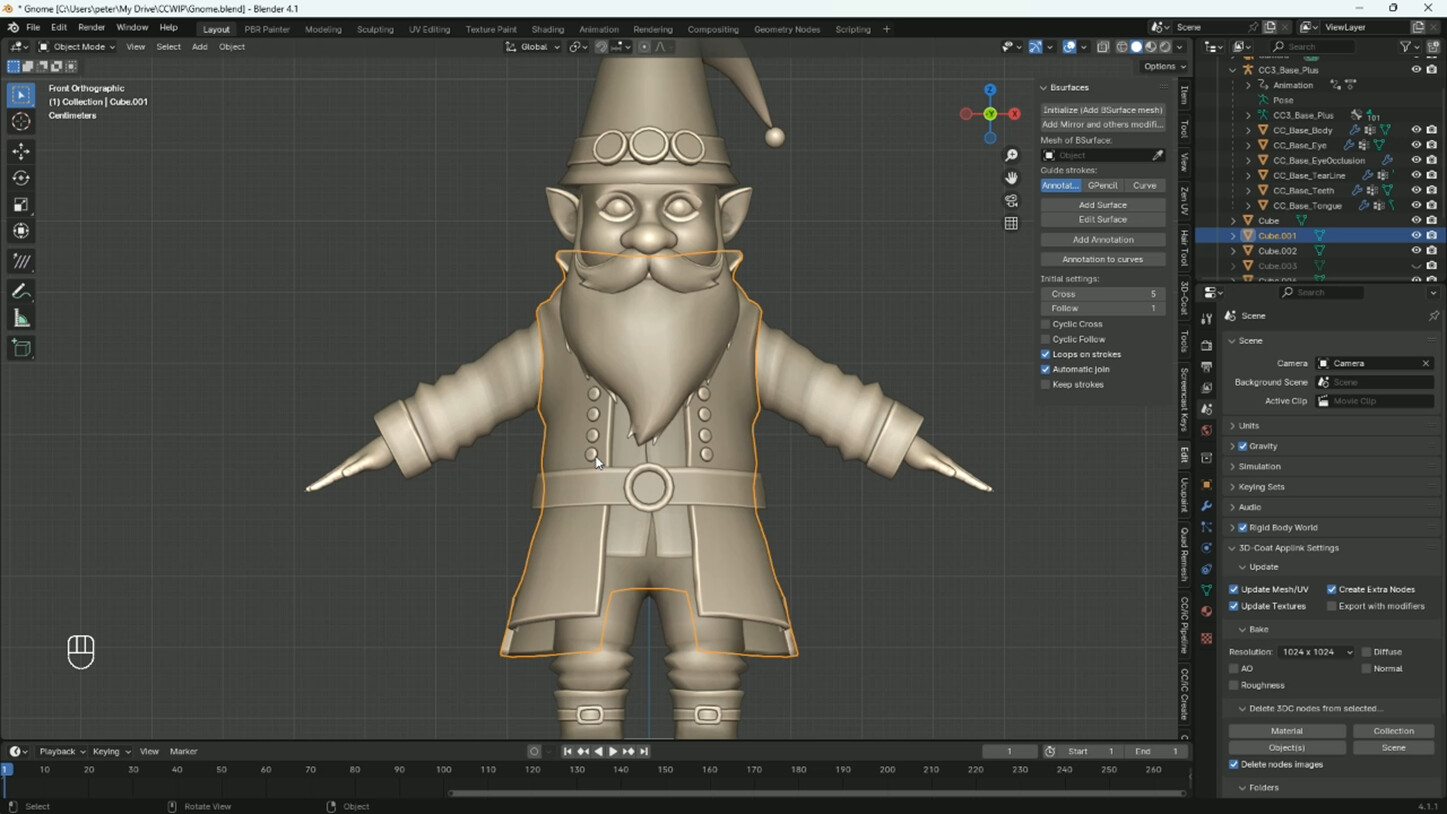
In the following hours, I worked on his other assets, such as his jacket. Not all these assets made it into the final version, but they served their purpose.


I finally got to this point, where I made a few turns in the design process. I switched the hair assets to curve tubes. One of the main reasons I did this is because that’s generally how I create hair. Another reason is that Curves are often UV’ed with a flat plane UV tile, which can be stacked and have easy texture details added. A curve UV will often look something like this or can be arranged like this (my preference).

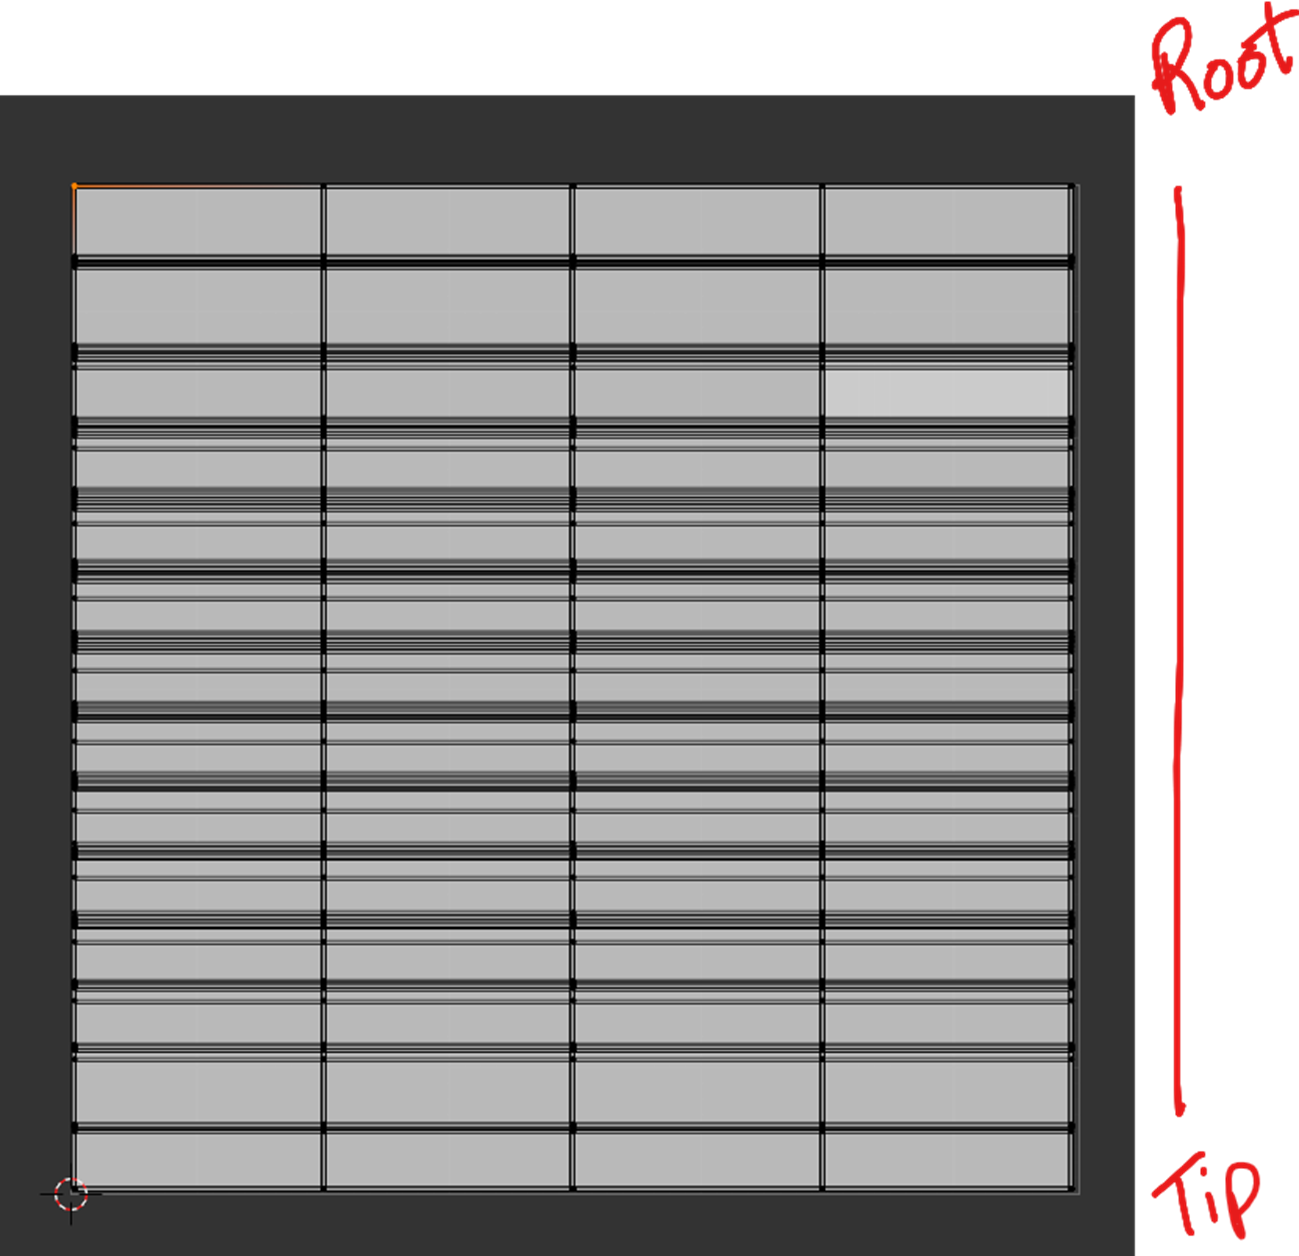
So, if you put a Normal Map like this on it, the details will stretch out across Curve Hair UV and show up as detail along the hair strands.

To that end, I started replacing the Sculpted Mesh object with Curve Tubes. These will eventually be converted into meshes and exported as an asset for use the final CC4 character. There are numerous Blender addons that will do this for you. Among the most well-known add-ons is the Hair Tool, which can be found on Blender Market or Gumroad. There is a bit of a learning curve to using it, as with anything related to 3D.
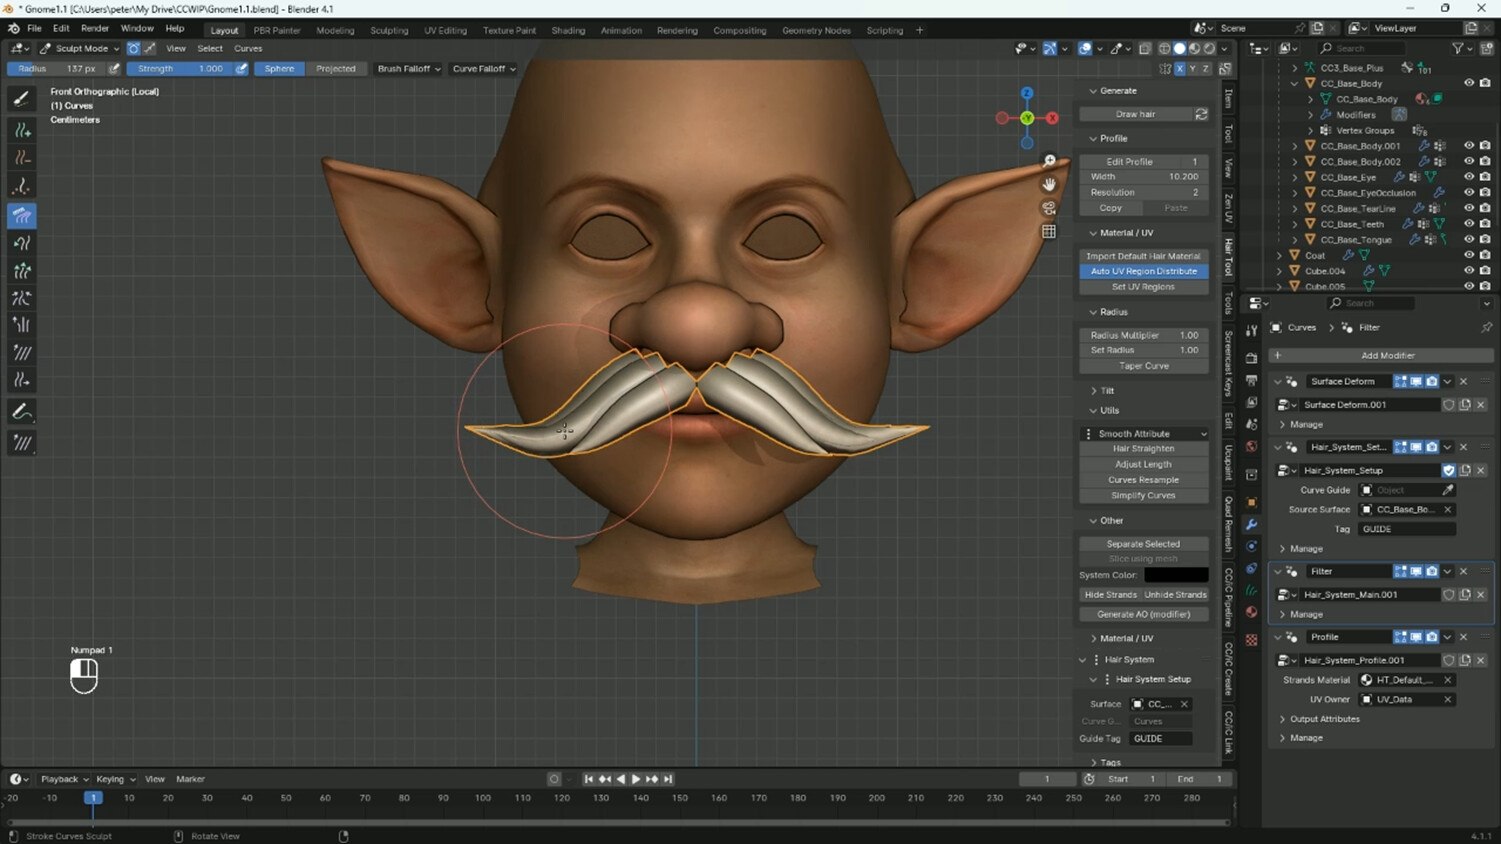
The Hair Tool tends to put realistic hair material on the Curve Strands by default, and it does not represent the final visuals at this point.

In my attempt to create this character I used the Data Link function and fortunately did not experience any crashing, so I was able to retain my connection until the end. Again, due to the potential for losing the connection during a crash, I would recommend using the Import / Export functions for longer projects. Also, I did not send the CC4 character back clothed, but rather I exported each asset as an FBX Accessory, then rigged them in CC4 using the Transfer Weights function. While Blender is a better skinning tool in general, I find that CC4 provides a good starting point for rigging assets designed to work in CC4.
I made some adjustments to his clothes and took some of them over to 3D-Coat, which has been my painting software of choice, and it has a good exchange with Blender’s data. I debated on whether to add the physical buttons or just paint them on with normal and bump maps. I finally chose to paint some of the details on the clothing rather than model them. This is not always the best choice, as normal maps don’t change the silhouette. I decided to use them because I could not figure out how to model certain elements of the clothing, such as the triangled embellishment near his collar. I figured it was close enough to the garment that it could fool the eye. The buttons I decided to texture rather than model as geometry. When to texture rather than model certain detail is a judgment call.

Back in CC4, I started transferring the skin weights to the clothing. I put the character in various poses as I am painting the skin weights on the clothing to see where the problem areas are. These include mesh distortions during certain poses, penetrations with other clothing items, etc. The process is much easier when the mesh object is lower resolution and symmetrical, but this may not always be the case depending on your character project.

I was having difficulty with the Facial Hair settings, due to the size of the facial hair. The facial hair setups are mostly intended for typical facial hair of mostly realistic characters. It is possible to make it work properly, it just takes a lot of trial and error, and I wanted this to be more of an artistic rather than technical process. I decided to try using a system of Spring Bones for the beard and mustache. These also involved a technical setup in Blender (creating bones, skinning the hair), but the effort suits this character better.

I also decided to give his floppy Wizard hat spring bones, so that when he walks his hat will move about in a cartoonish way. I myself am still learning the best way to use the Spring Bones. Experiment and learn what works best in your case. Use the official and unofficial RL tutorials when you need them, they helped me in this case.
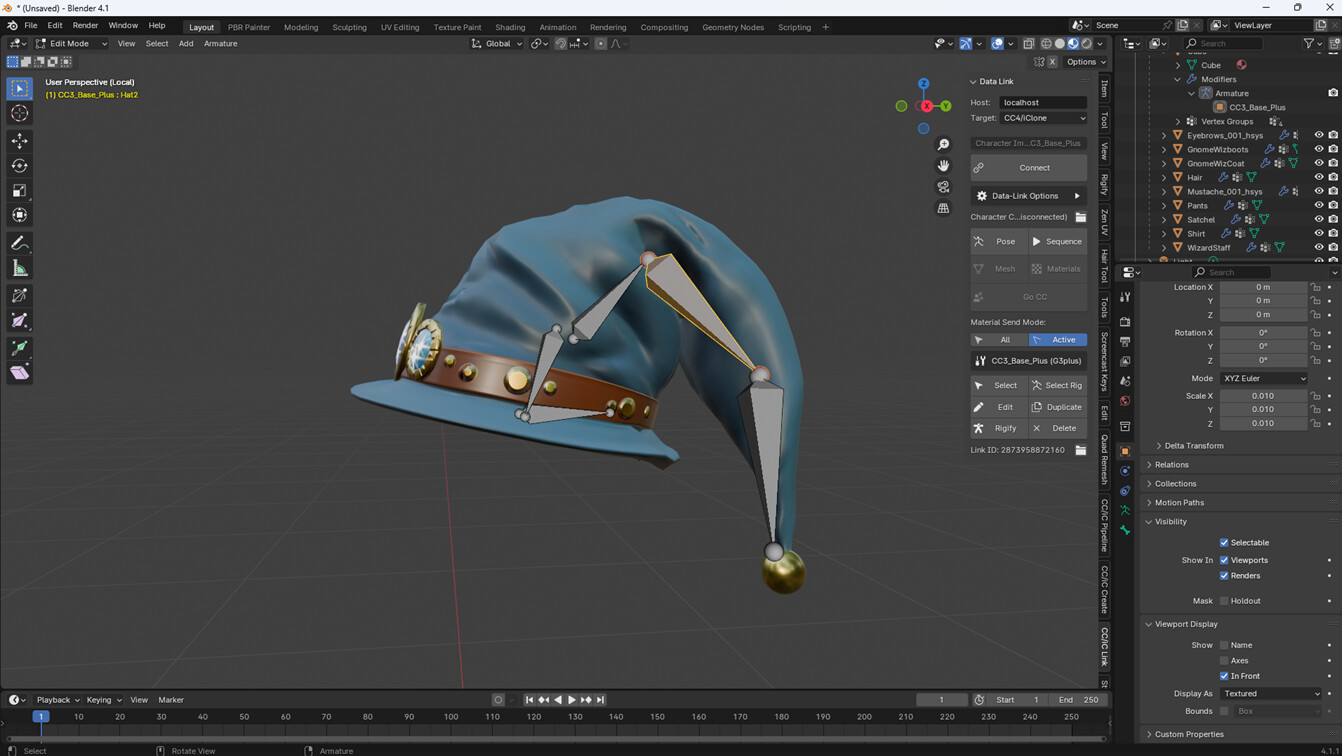
Note: If you use custom Spring Bones for your hair items or accessories, you will need to import them as a Prop item (not an Accessory), manually parent them to the head bone or jawbone (if it is intended to be a beard item), and then assign it as an Hair Accessory. If you choose any other Hair or Beard options, it will eliminate the custom rigging and use skinning system.


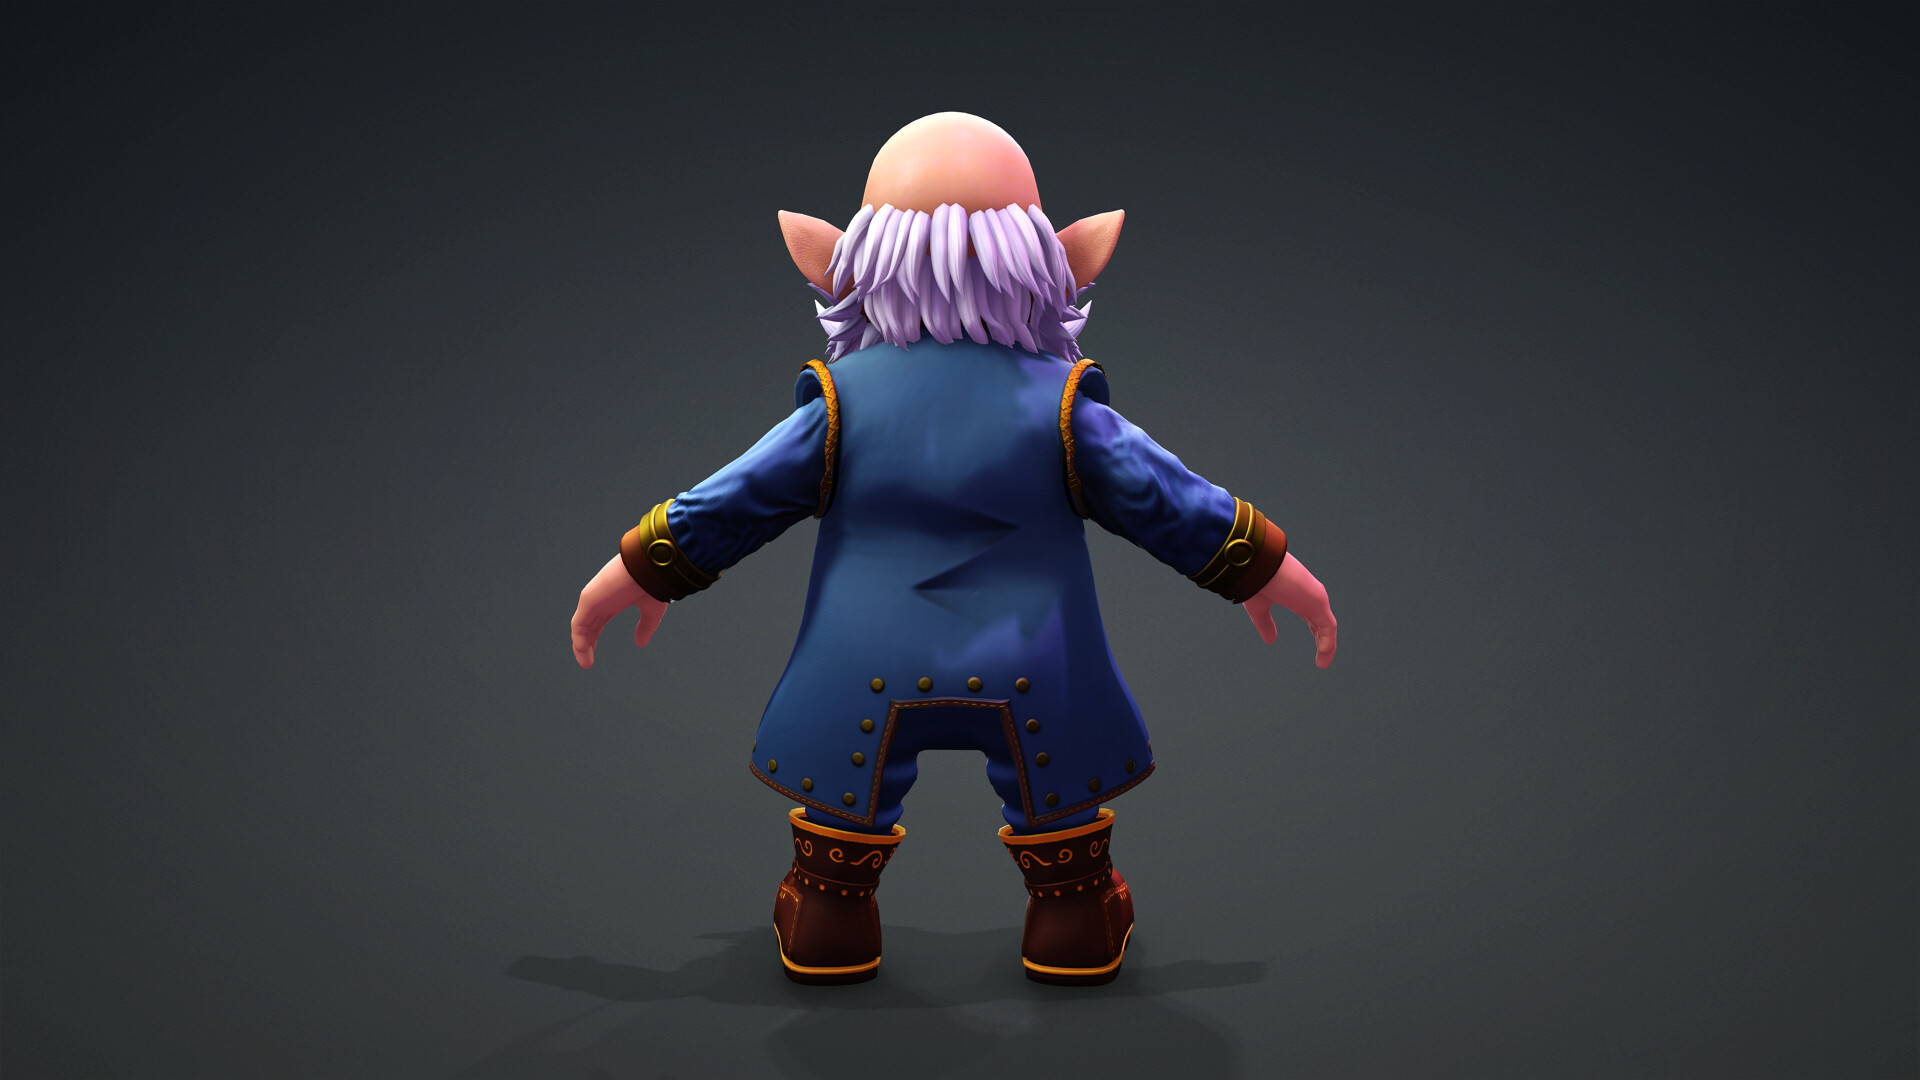
I finally ended with this character here:


Here is a link to my WIP Video. If you create a WIP video, it does not have to be hours of footage or anything that elaborate. The examples I’ve seen tend to under ~10 minutes.

2024 Reallusion 3D Character Contest - Steampunk Gnome Wizard [Demo WIP Video]
Note: This is not a Submission or a Submission Video. Please check the guidelines for the proper content to include for your contest entry submission. This is a guide for your own WIP thread, which is part of the submission.