Okay, so, I’m 100% new to the Blender business, and I’ve slowly been learning how to do things. I’ve started doing UV maps. I unwrapped something but made edits to it (adding seams, etc.), so I unwrapped it again (from what I read that deletes the old UV mapping?). When I did this, the image showed up normally while I was working on moving around the UV Island thingies.
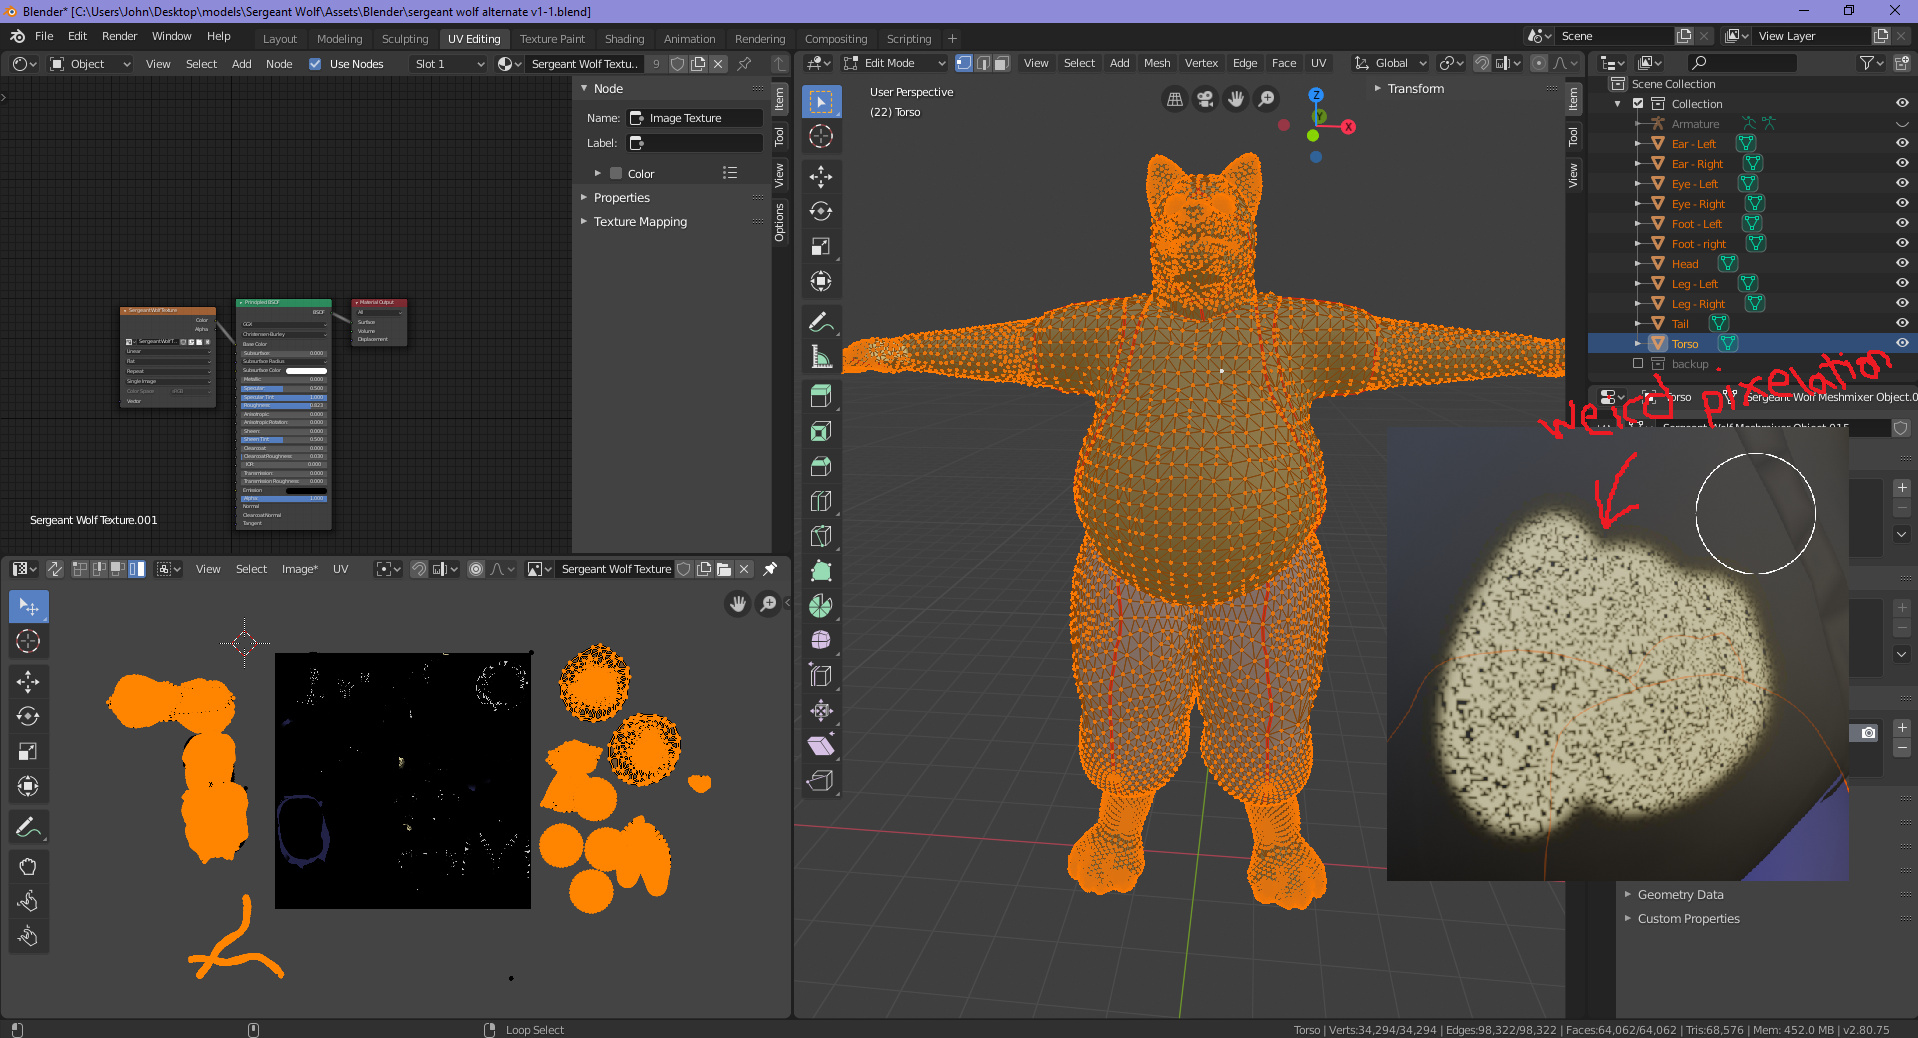
HOWEVER, the moment I left that and went into Texture editing mode, suddenly my brush started to paint in a speckled/pixelated way.
My UV map had the old unwrapping on top of the new one. I tried looking up why this happened and how to fix it, but I’ve not found anything on how to undo this. The most recent attempt I had was to drag the old islands off the black square and “Constrain to Image Bounds”. This, however, did not work and the same pixelation happens, along with parts of the UV, with nothing mapped to them, being colored in whenever I color a different part of the map.
I tried deleting the UV mapping in the Object Data tab, I tried creating a new image to use, I tried unwrapping the object again… and it just duplicated all the existing pieces again.
I’m running into dead ends here and need help.
If the weird pixelation and the old unwrapped islands staying are related, how can I fix it?
If they are not related, then the question still stands: How do I fix it?
I apologize if this is not the right forum to post. Again, I am new to all this.
You duplicated your geometry. Go into edit mode > hover over mesh > hit L > hit G > drag somewhere > hit X > Delete Faces > repeat as needed if multiple parts in mesh are duplicated > re-pack UVs (or unwrap anew if needed) again.
I can definitely see that there is duplicate polygons underneath if I pick a vertex and drag it elsewhere, but when I do the L selection method, it still selects both the regular mesh and the duplicate mesh, so I can’t pull them apart.
SO, with a lot more delving in, thanks to information from Norka, I found the problem to be some sort of shared overlap between two meshes that could not be selected separately from each other unless selecting specific vertexes/faces/sides.
My solution:
Inside the UV map editor, while in edit mode, I did the UV sync selection in faces mode, selected a face on one of the islands I didn’t want, and pressed L. I then moused over to the 3D model viewer and pressed Delete> Faces.
This removed all the extra faces so they would not cause graphical glitches when I moved onto the next step of merging the vertexes.
So, in the 3D model viewer in edit mode, I pressed A to select all the vertices and pressed alt+m and chose “Merge by Distance” which combined all the vertices without messing up the mesh.
Hey, my pleasure! If I wasn’t on the phone with client for so long, I would have helped you get this solved faster, but it’s actually better when we find the solutions ourselves… give a man a fish and all that bs…