So I ran into an issue recently where the traditional “Selected To Active” Normal Baking was not giving me the results I truly wanted. So, I embarked on a project to bypass the traditional method, and (even though it’s considerably more complicated), I think I may have a general solution that is more stable and precise:
TRANSPLANTING NORMALS
Step 1:
Basically, we take two models:
- A Low-Poly undetailed model (without complex surface features, like wrinkles, etc.).
• UV-Unwrap this model. - A High-Poly detailed model should then be subdivided/sculpted from the above (with complex surface features, like wrinkles, etc.).
• This model should retain the same basic UV-Unwrapping from when it was low-poly (just with more detail now) - NOTE: Make sure the Low-Poly and High-Poly models are both either Flat Shaded or Smooth Shaded all the way through, don’t mix and match!

=================================================
Step 2:
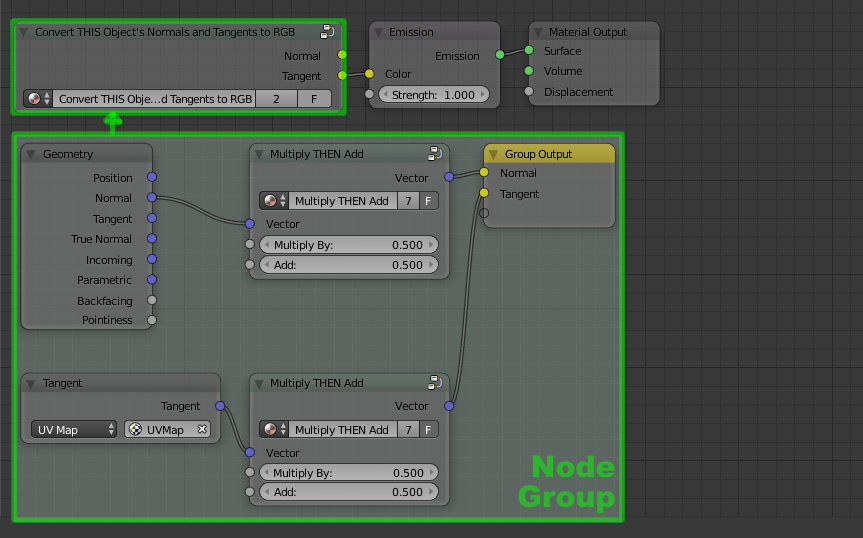
- We encode the Normals and UV-Generated Tangents of the Low-Poly model as two Emission Bakes using the following node setup.
- Then, we encode the Normals of the High-Poly model as an Emission Bake as well.
- In general (unless the mesh is particularly angular), use “16 PX margin” when Emission Baking to reduce artifacts caused by the edges of our UV map.
…
=================================================
Step 3:
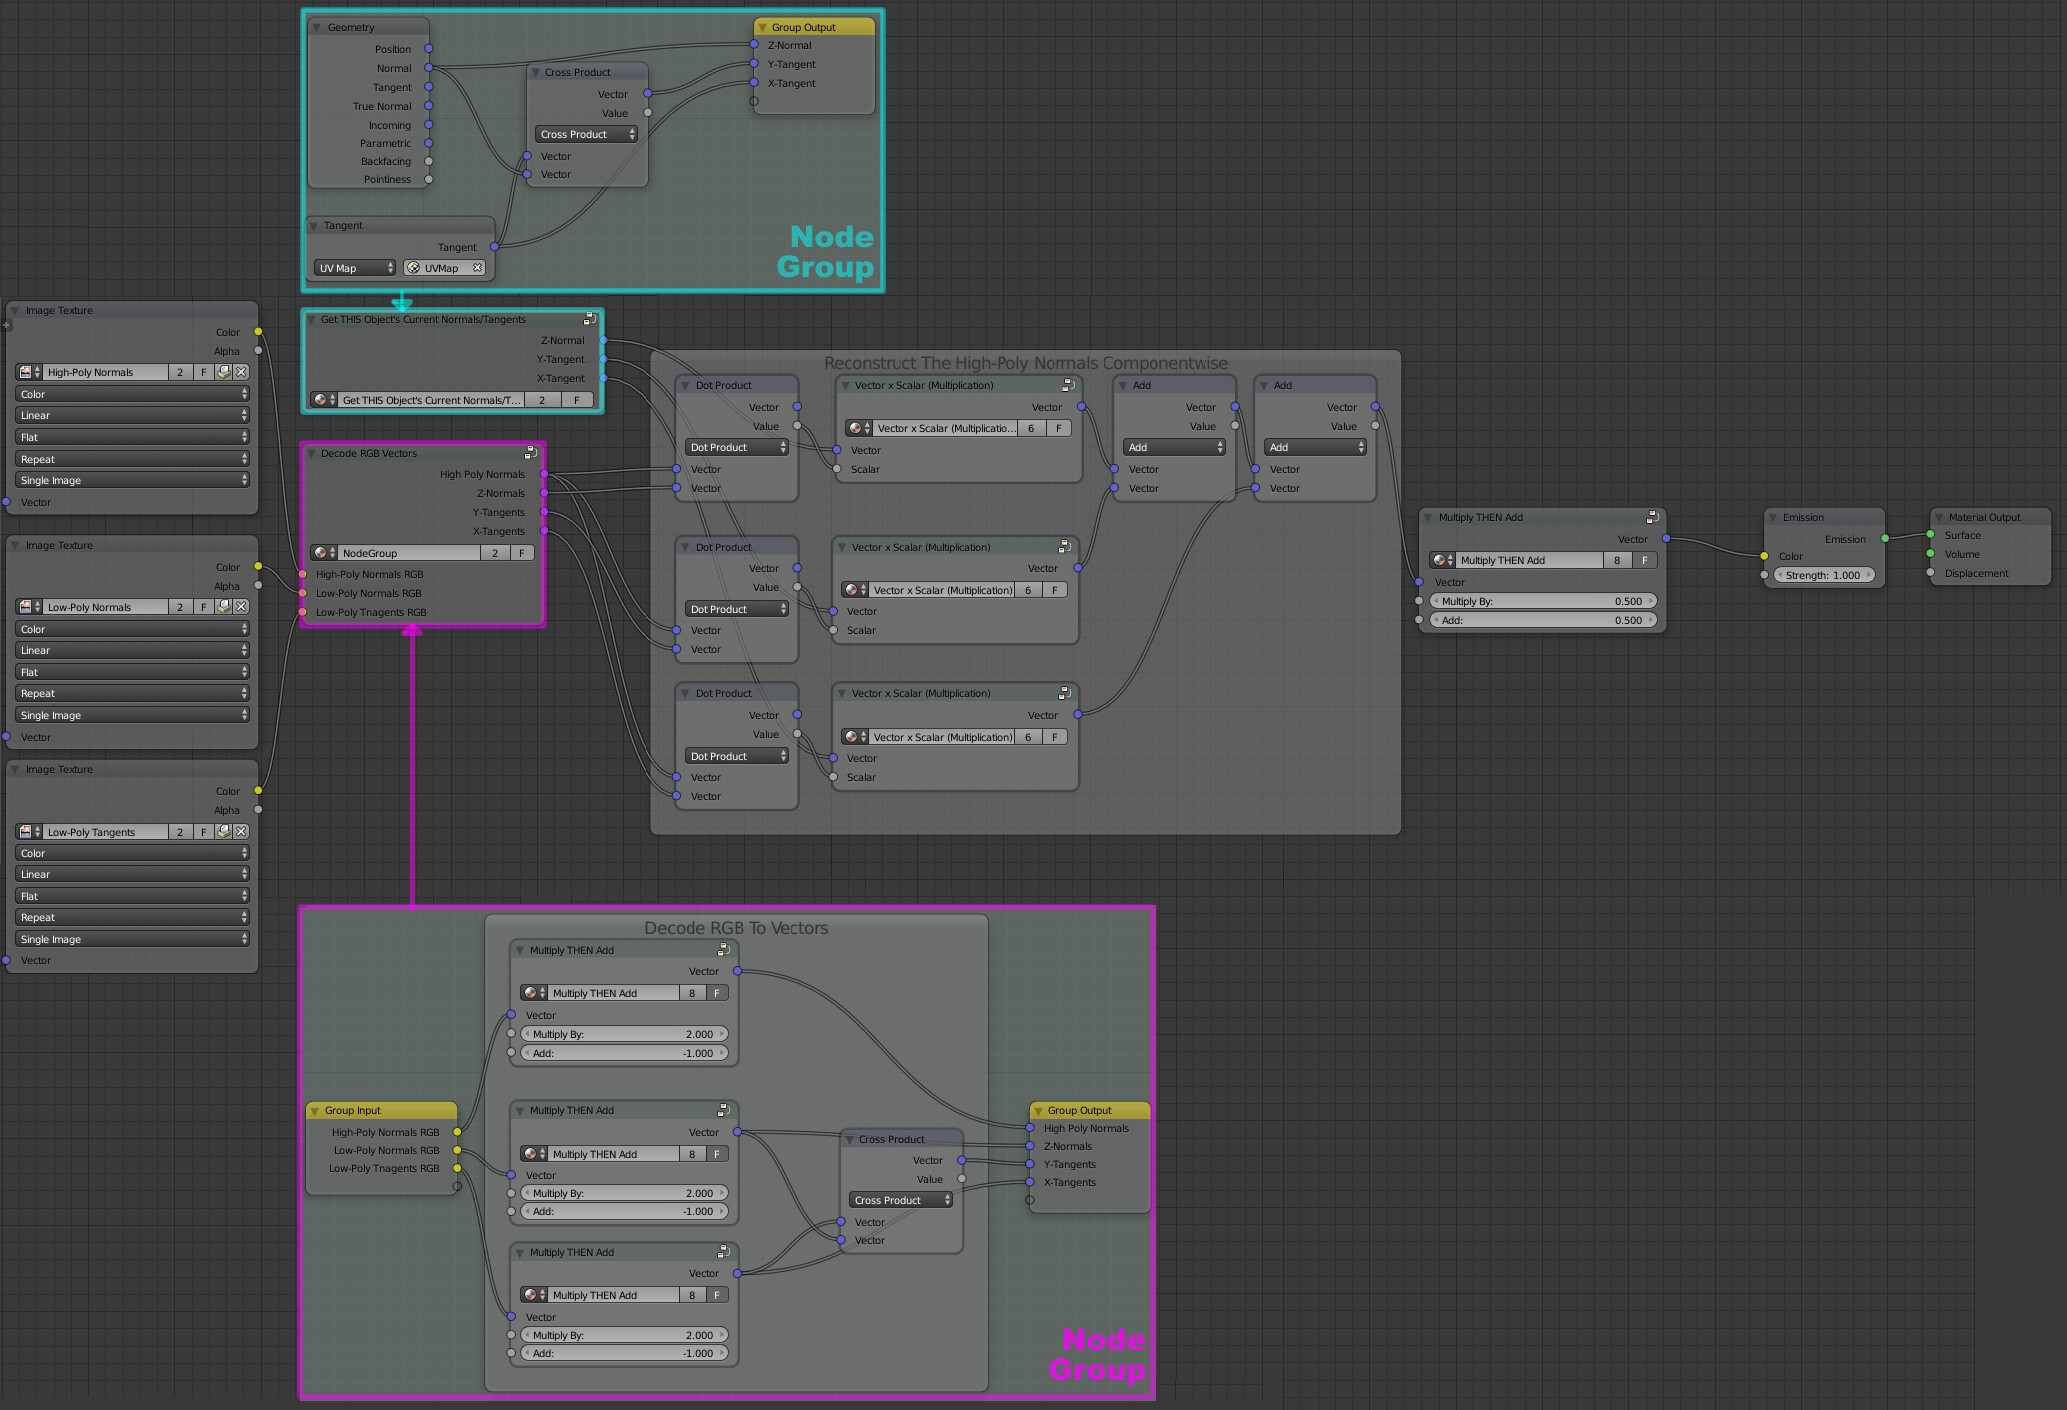
- Next, we return to the Low-Poly model, and decode all of our bakes from RGB Space back to Vector Space.
- We use the Low-Poly Normals and UV-Generated Tangents that were pulled from the bakes to create a basis, which we use to decompose the High-Poly Normals into their (scalar) components using the dot product.
- We then use the Low-Poly object’s REALTIME Normals and REALTIME UV-Generated Tangents to create an analogous REALTIME basis, which we scale using the above (scalar) components to locally recreate the High-Poly Normals, but in the Low-Poly model.
A comparison (between the Low-Poly and High-Poly):
=================================================
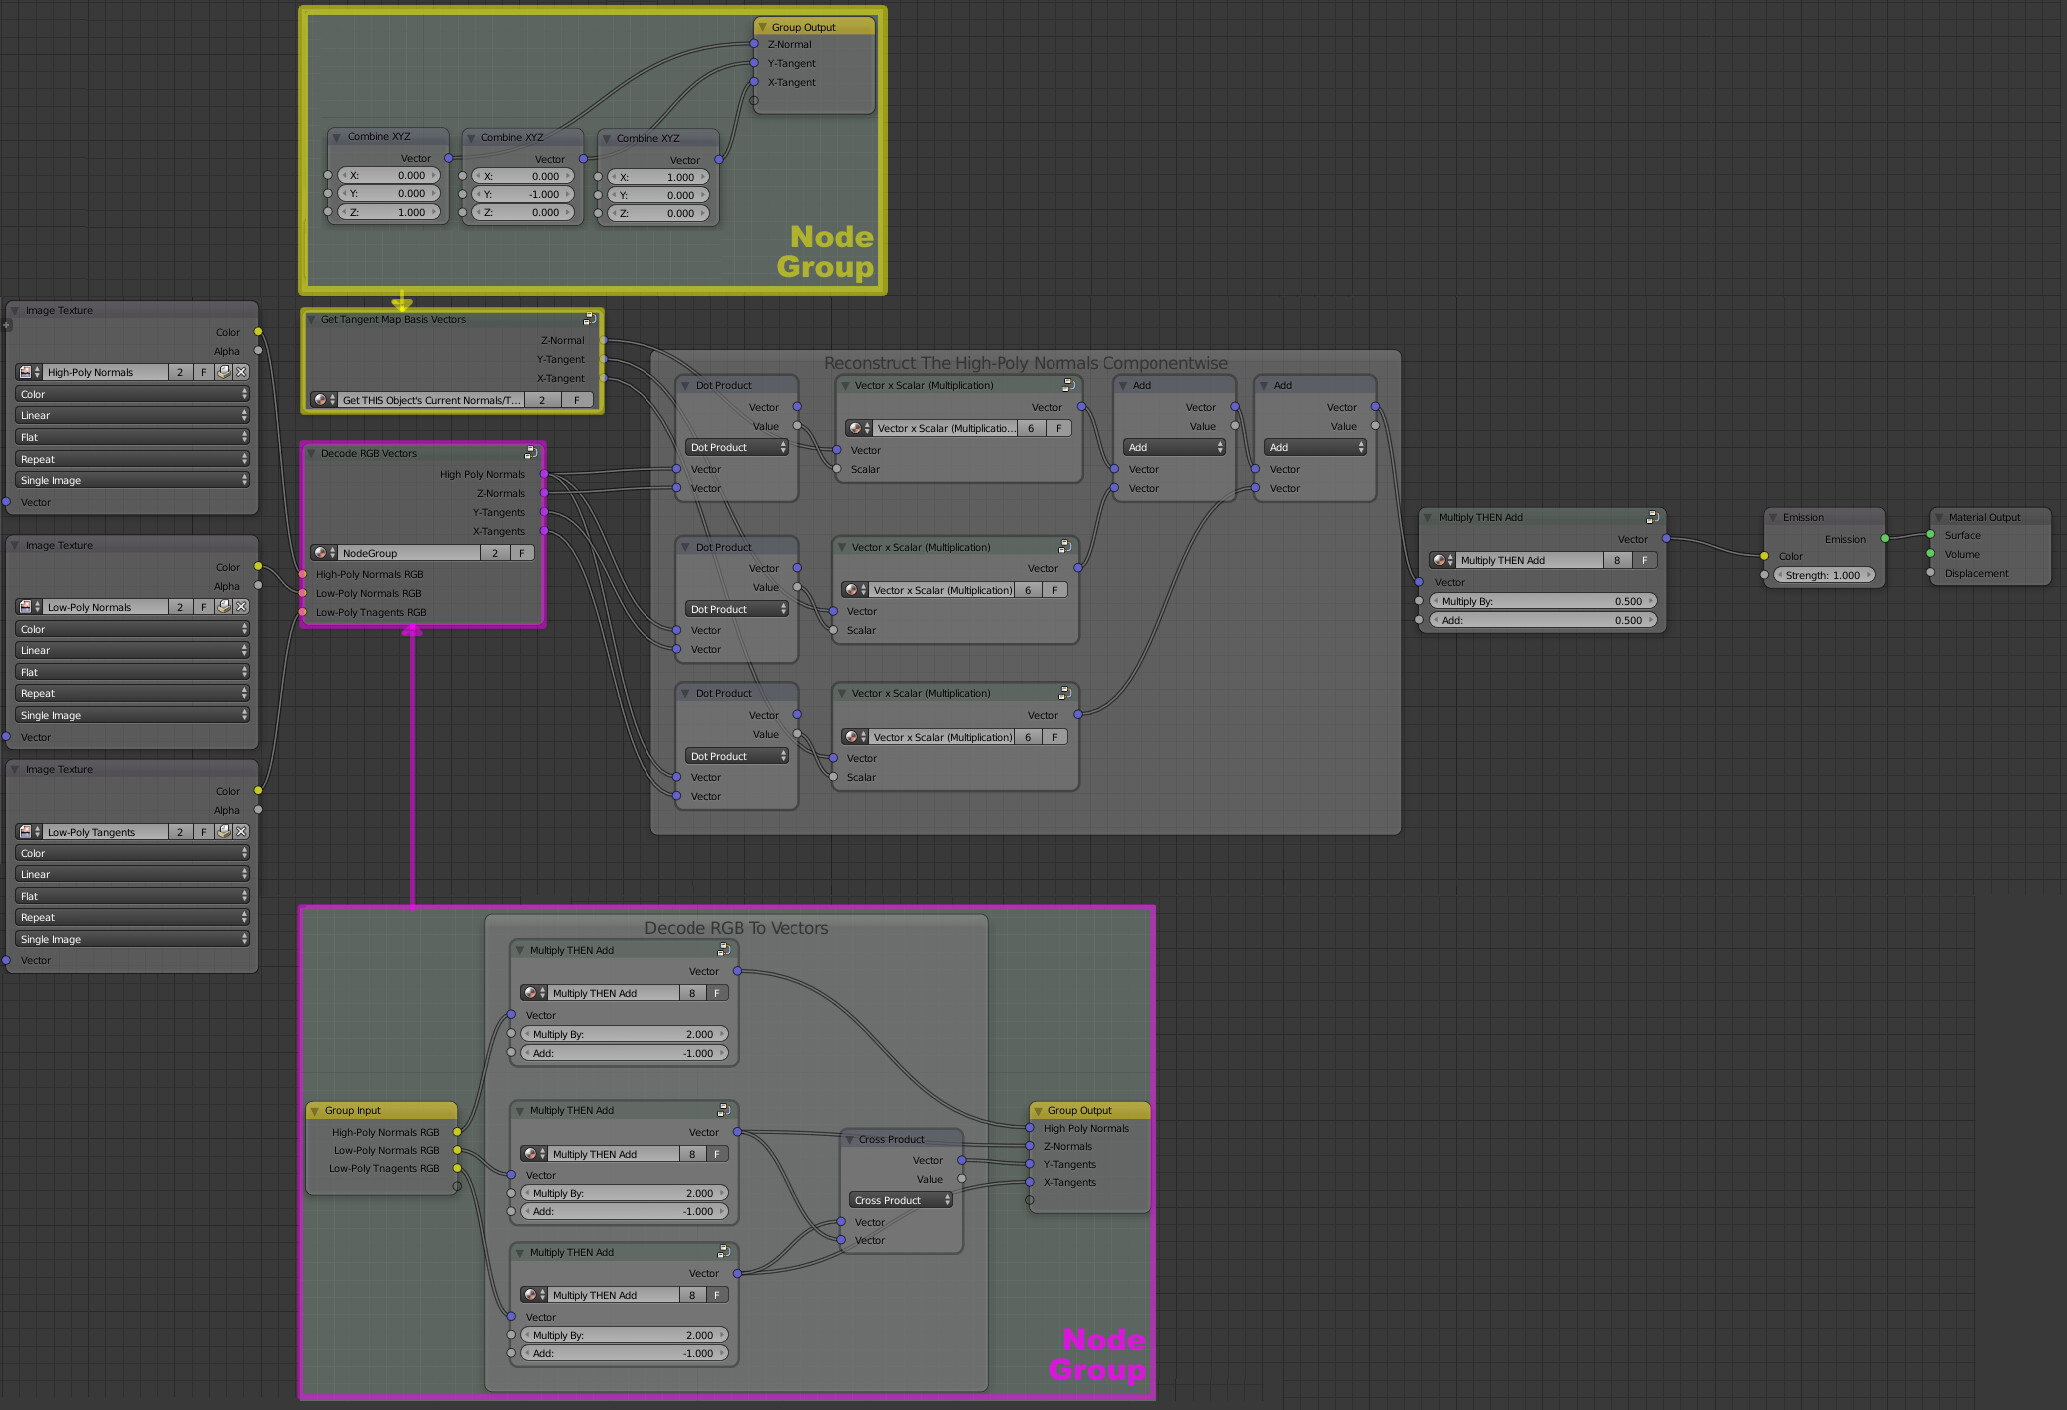
Step 4 (Optional):
- We can also do what we did above, but in Tangent Space instead (if our preference is to bake a standard Normal Map). See the section highlighted in yellow below:
- NOTE: If we want to use said Normal Map in other software, it is possible that colors would need to be linearized first, but if you’re just using Blender, it appears to do these conversions automatically during rendering/importing.
=================================================
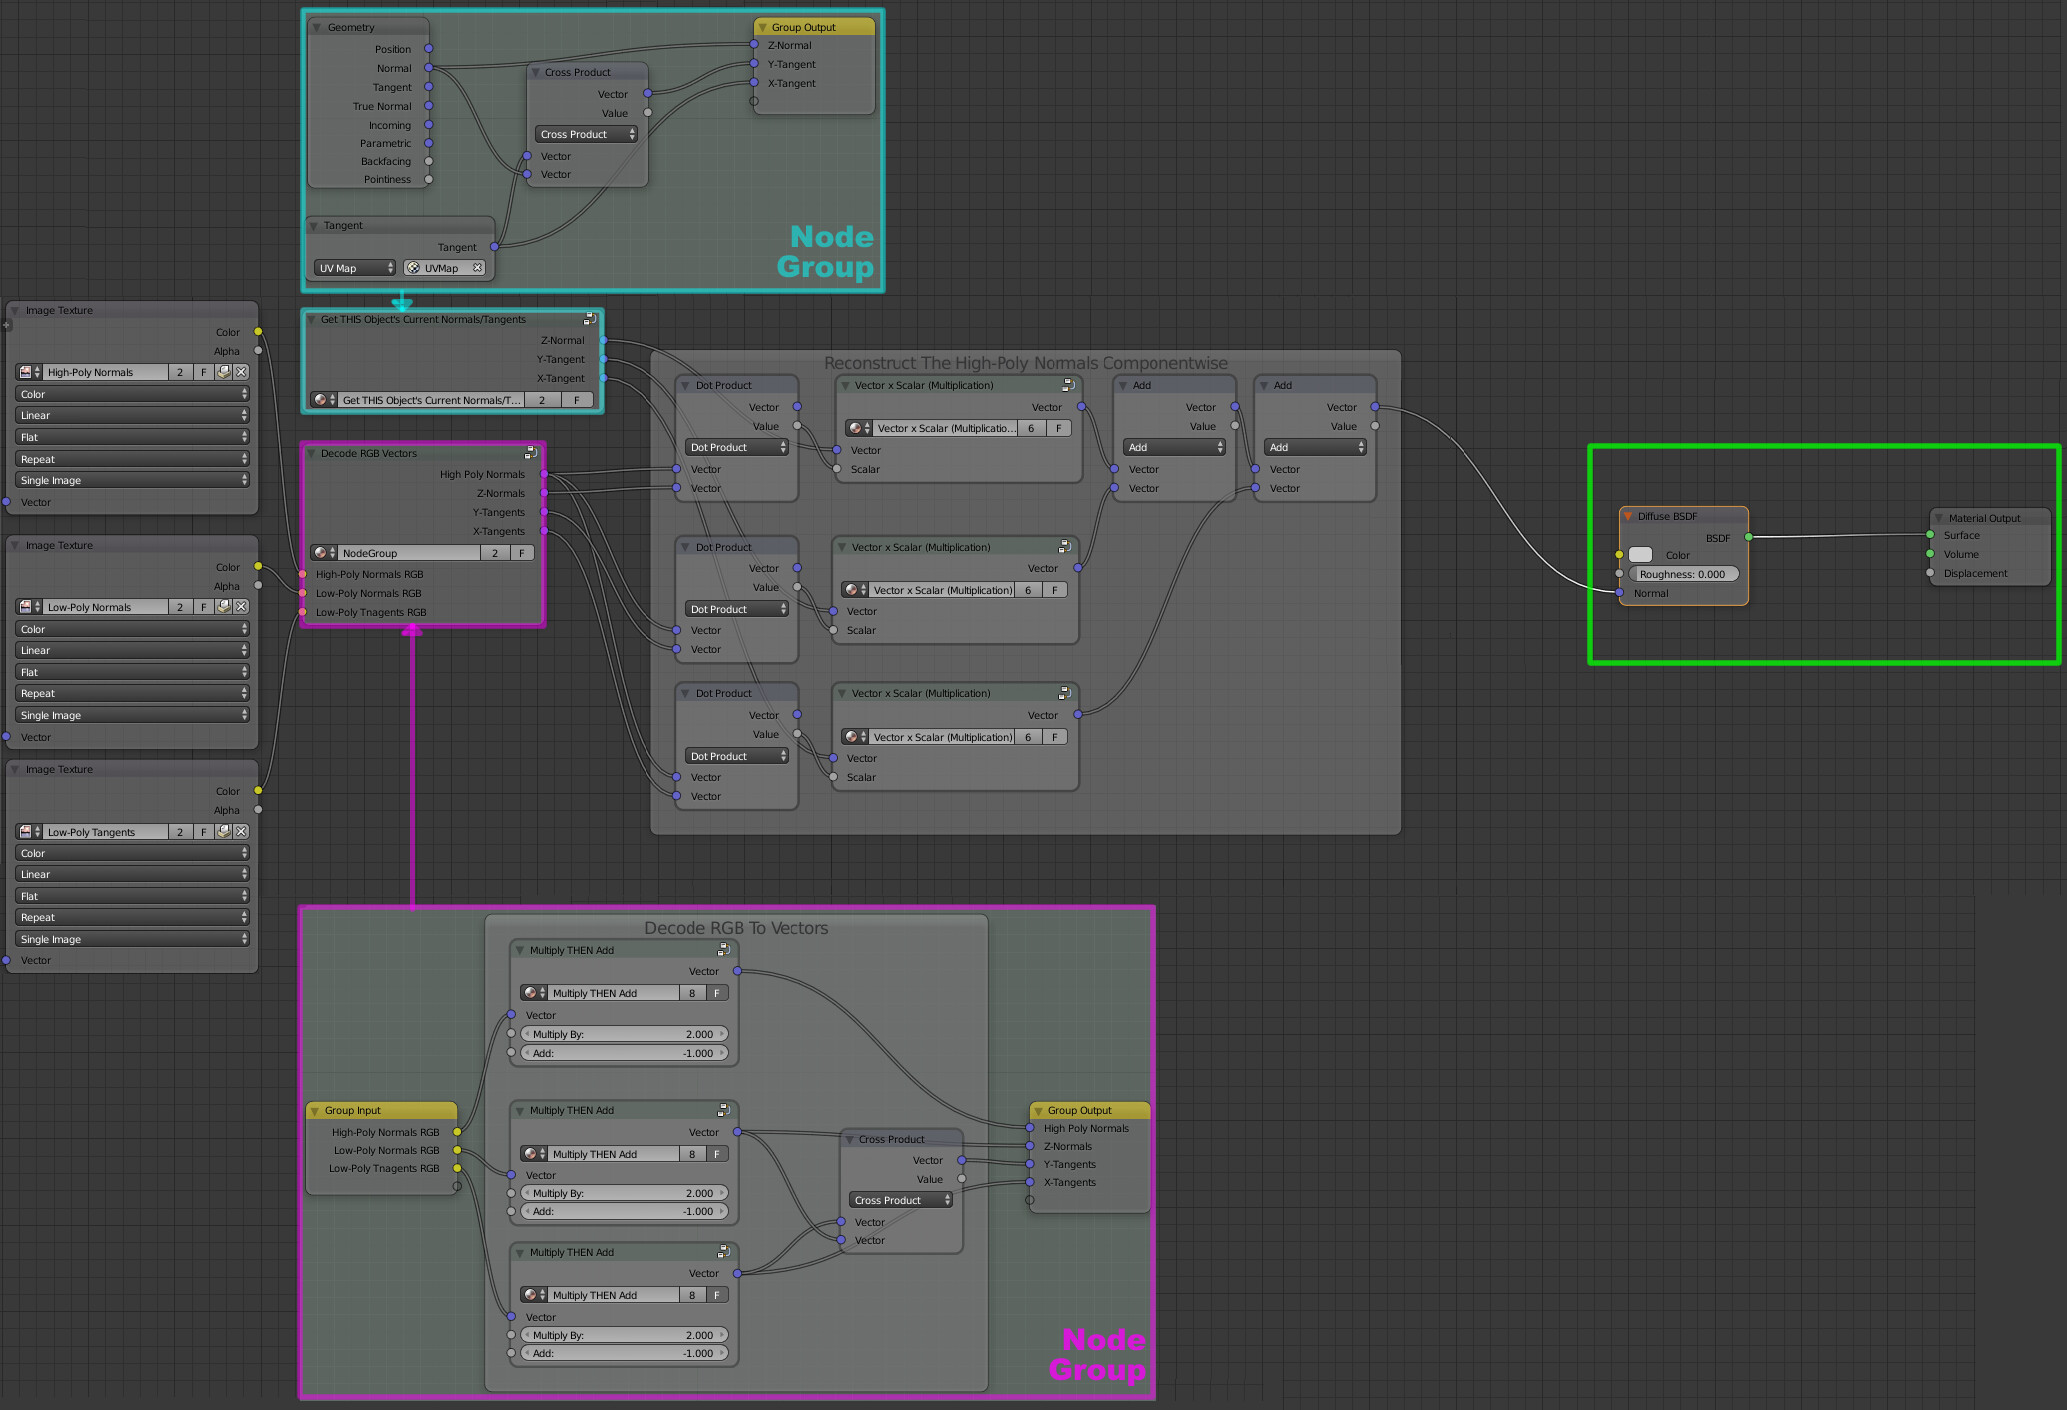
Step 5:
- Finally, we can output directly to the Normals socket in the Diffuse Shader.
A comparison (between the Low-Poly and High-Poly):
Transplanting Normals (Blender 2.79b File) (1.0 MB)
Whew! ![]()
This has several advantages over baking Normal Maps using the “Selected To Active” technique, the most notable of which being increased stability, precision, and (often) fewer artifacts.
Curious to see if anyone is interested in this project and perhaps can improve the process. Peace and God bless!