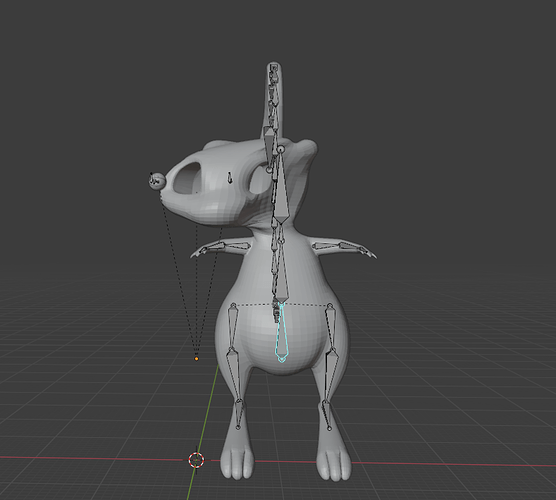
Aaaaaaaaaargh!!! RAR files on my MAC don’t work! The only “unrarer” I can find is full of spyware… just post it as is please! I.e. not compressed in any way.
It was over 5 MB, it was 6.5 something, so it didn’t allow me  But one moment
Copy the blend file first, then get rid of some of the body, I only need to see the head and your armature… Also remove any reference images, etc. or Zip it, Macs like zip files. 
First thing:
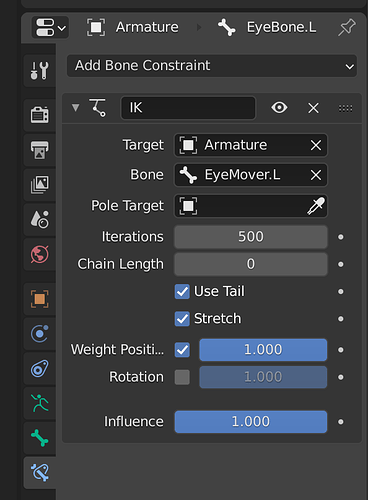
IK Constraints MUST ALWAYS HAVE A CHAIN LENGHT, or they will play up sooner or later, particularly if you have more than one IK chain in an Armature.
Next, this is what’s killing you:
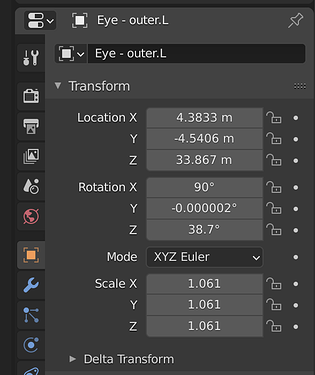
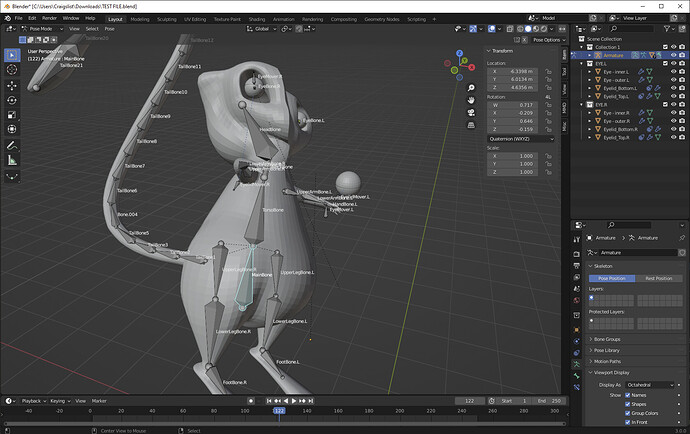
The Eye objects have un-applied rotations and scales as you can see above. This will FUBAR your parenting to the bones. You should Apply Rotations and Scales before you parent any object to an Armature.
Oh yes, Armature has an un-applied scale. ![]()
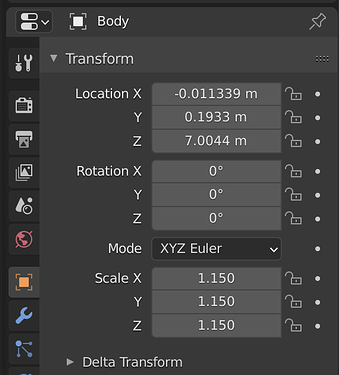
Body has an un-applied scale. ![]()
Have I made my point? ![]()
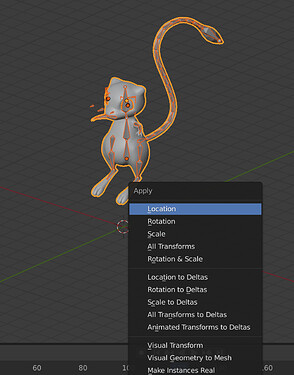
Select All object and Apply Rotation and Scale (CTRL+A to Apply).
You should find all your troubles go away then.
Hint - do all EDITS in EDIT mode, like rotating and scaling complete objects (select all vertices), not in Object Mode unless you then Apply Rotation and Scale afterwards.
Cheers, Clock.
Thank you very much for your efforts! 
I will follow your instructions and hope everything will work fine.
I will get back to you afterwards 
Now the eyes are not fixed at their positions. They move a bit from the eye sockets.
I didn’t apply scale or rotation to the lattices. It was deforming the eyes.
Why is this happening now? ![]()
Should I send the file?
Hi, try this method,
disc eye rig.blend (846.8 KB)
it animates only the iris the eye ball don’t really have to move:
File:
Thank you very much. I will try this now.
My eye is procedural though. Would it still work?
I don’t think it’ll work fine if the eyes are completely procedural, unless you wanna suffer a bit with weight painting and vertex groups. The ultimate solution, in case you can’t find one in rigging, is Shape keys.
Made a backup.
Then get rid of eyes armature, merge the eyes to the model and remember to add them to the head vertex group, (or weight paint them in). In this way when the head moves the eyes follow.
Then u can add the shape keys to the eyes.
It won’t be that much of a pain during the animation process within blender cause u can do the block out on the rig and then add the eye details later on the shape keys editor.
The problem is that to create a nice deformation, with that shape you’ll have to suffer ( meaning creating many shape keys to adjust mesh intersections) .Not for the eyelids, more for the iris movements, I think.
Of course you can always follow the you tube tutorial from CGDive on the rigify head, with a bit of fantasy you can achieve every face you want.
About the shape keys there are tons of tutorials on you tube, they’re easy but require a bit of work.
Let me know how it goes 
Thank you very much for your reply 
This is getting kind of complicated for me, all I want is a simple rig  I guess I have no choice but to look into your suggestions as well but I want to keep the eyes the way they are
Thank you guys all very much for your help.
If I’m already having this much trouble just with the eyes, I wonder what I’ll suffer from while working on the eyelids 
Please let me know if anyone finds a simple solution because it will just be so irritating if even the more complex suggestions do not work 
Ok, I meant that the shape keys need work to achieve perfection. U can have the first results in ten minutes, it depends on the form of the eyelids, but the theory behind it it’s very simple (much more simple of the rigging one).
U won’t ruin your eyes, at the most you’ll delete the eyes rig, but you have the backup so no troubles.
Trust the process, it gets easier with time.
Next rig try rigify, Cg dive explains everything so well and it always works.
Alright, I will check that out next.
I didn’t want to use rigify because they didn’t really match the shape of my model. I thought I could just remove the unnecessary bones here and there but it’s possible that I may have to properly try it.
Thank you again for your replies 
It’s just the shape of my eyes that are causing all this trouble. I need them to be oval. Actually, with procedural eyes, is it possible to have a spherical eyeball but oval pupil and iris? This could also make things easier. Then I could just get rid of the lattice and all…
When you have time try to follow the full rig CG dive tutorial. He explains that even between different kinds of armature, like Human-Dog or Cat, the face rig has the same bones (this in the 2.93 version, in the 3.0 u can chose if update the face rig or just use the one from 2.93,which I Recommend).
So it doesn’t, actually, mean that much if the face isn’t human. As I Said u need to get creative, if u try the face Rig you’ll sure be wrong a couple times but u can actually shape it and adjust it in infinite ways. (CG dive explains it a lot better sorry ahahah) he even made a tutorial about the attaching a tail to you rig, so you’ll be in good hands.
About the procedural texture, u can try control mapping it. In the Shader editor, with the node wrangler addon activated, u press Ctrl+t on the image texture of the eyes. It should create 2 nodes, besides it, u need to look at the mapping one and adjust the scale to create an oval. Play with it a little, u never know how bigger those eyes can get 
Also u can try in the in the UV editor. If the eyes are Unwrapped u can adjust, over the image, the scale along the Y axis to be higher than the one on the x.
Try searching for these word followed by “blender” on you tube, there are many tutorials out there that can give you a better understanding of why things don’t work out.
Have fuun!
Thanks a lot for your reply!
Seems like I have a lot of reading and watching to do 
I hope I can get back here with good news 
Alright guys, I did it from the beginning, all the bones are now 1 armature and they are all working fine. I have applied rotation and scale to body, all eye objects, and armature before anything as Clockmender instructed. After I combine the body with armature for animation, eyelids work fine. When I move an eye, that part of the head moves in the same direction as the eye and deforms.
When I move the body from the main bone, the eyes stay again where they are and the head deforms again as if the head is attached to the area where the eyes are. I tried parenting the eye bones to head bone, eyes to the body, it’s just not working.
Can someone please tell me WTH is going on here?
Here is the Blender file BEFORE combining the body with the armature:
TEST FILE.blend (1.9 MB)
Can someone please help me fix this? I’m going crazy! There must be something very simple that I’m missing.
Could it have something to do with the main body armature that was created before? Could someone please take a look at the file again tell me what is going on ![]()
I’m now also certain that it has nothing to do with the lattice or non-spherical eyes. The same things are happening still…
Some update: I parented the bones in the eyeballs to the head bone by setting parent to ‘‘bone’’. Now the head doesn’t get deformed, but the eyes still do not move with the body…
P.S. parenting the eyes to the body still doesn’t fix it.
Your eyelids still have unapplied scale. You’ll want to fix that someday for use with modifiers.
This is just a problem with weights.
Parenting the eye bones to the head bone is indeed necessary. It’s also necessary to parent the eyelid (objects, the way you have it set up) to something. What you should parent them to depends on your plans. I would parent them to the head bone (parent bone relative.) You should probably parent EyeMover bones to the head as well, but again, it depends on your plans. Here’s your file after autoweighting then doing all that:
It’s not pretty because of the weights from the eye bones, but it’s basically doing what it ought to, on its right side.
I wouldn’t recommend combining object and bone level constraints. I would make bones for those eyelids that did what I wanted rather than putting object-level constraints on them.
Ctrl+P=Keep Transform.
Look at see?
But no enjoy eyes and face. Ok?
