The following is a method (for dummies like me) for transforming surfaces into shell sections that have a selectactable shell thickness whose edges (rims) are precisely matched in their shape. This technique was developed so as to produce 3D printed sectioned shells that intermesh precisely. For example, it should serve as a component step in making plastic model kits for precise reassembly by the hobbyist model maker.
A method that employs cutting the surface followed by application of the Solidify Modifier has been shown to produce shell (rim) edges that are not precisely matched and may be problematic.
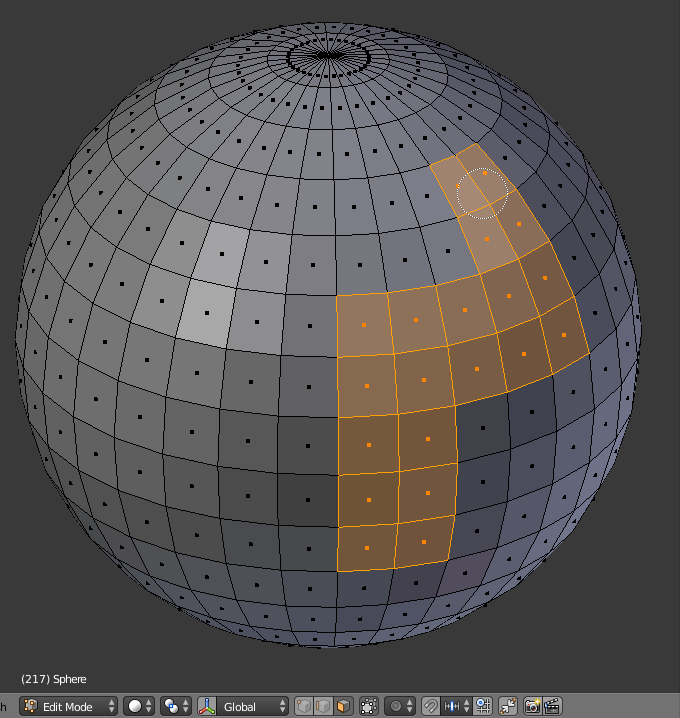
- In Edit Mode (Face Select), select all faces to serve as the outer surface of a shell section (the C key enables Circle Selection).
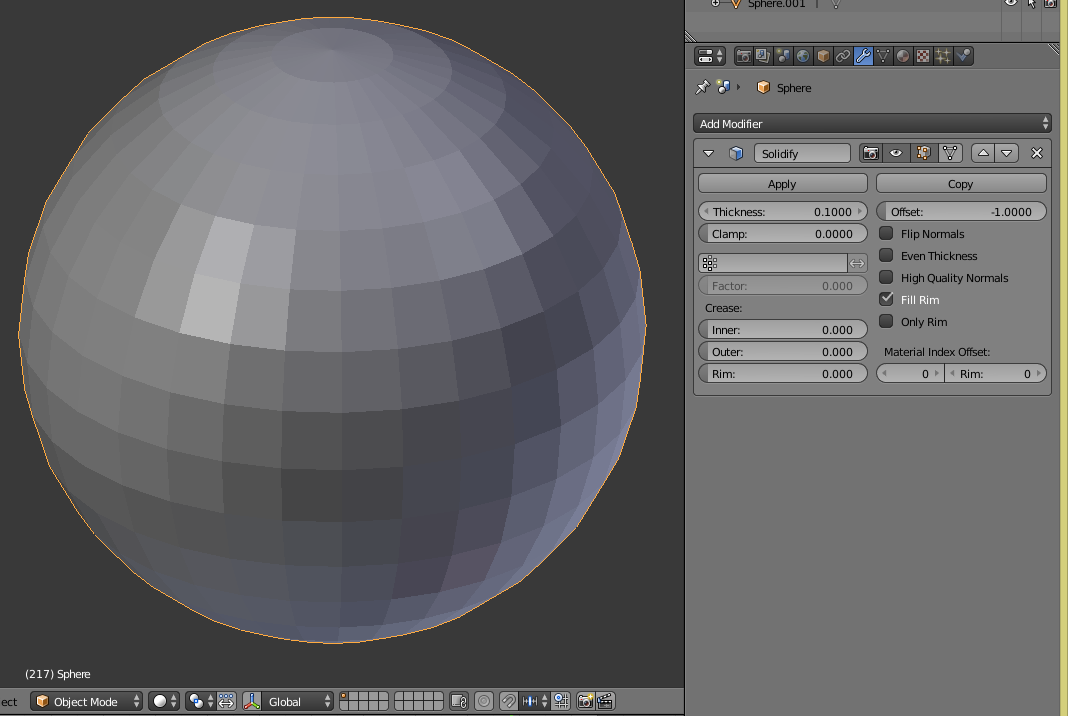
- Back out to Object mode and Apply the Solidify Modifier. Be sure to press the Apply button after setting up the modifier.
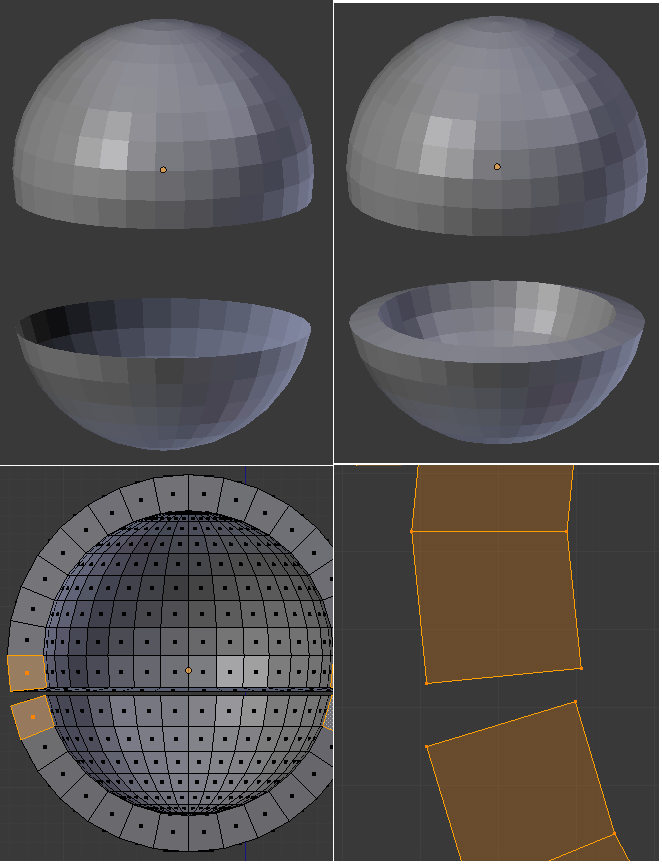
- Back in Edit mode (Vertex Select), Seperate by Selection the still selected vertices.

- Back in Object Mode, Select the new object. You can grab (G) and pull away the outer and inner surfaces that are still coupled together in order to see what you’re doing or hide the source object or move one to another layer as https://blenderartists.org/u/drdubosc suggests below. Do so in a precise amount along a specific axis if you want to put the section precisely back into place later.

- Back in Edit Mode (Edge Select Mode), Select->Select All by Trait->Non manifold (ctrl+alt+shift+M) to select the peripheral edges.

- Mesh->Edges->Bridge Edge Loops (specials, W) to turn the peripheral edges into faces. That should produce a complete manifold (solid object).

- Back in Object Mode, select the remainder of the other (original) object and repeat steps 5 and 6 for the edges left behind by the cut to create the other manifold (or continue sectioning with step 1 as necessary).


Thanks to https://blenderartists.org/u/tricotou for suggesting the method. He also offers some additional pointers here: