Abandoned House Project - Help Requested

Ok, you’ll have to be a little more specific. Your video you posted must have the wrong link, as I can’t see it.

I see a little blob of white, which I assume is what you’ve painted coming through? Also, if you can, it’ll be easier if you use Material Preview instead of cycles for the time being.

But even I’m confused looking at your nodes. What happened with using groups to try and simplify everything?

Ok Go to OLAV3D Youtube channel or just search their vid " [3.0] Blender Tutorial: Mixing PBR Textures Quickly"
The nodes I made are in this vid…The white blob is supposed to be a texture…but something’s wrong…
Here’s the model file if you want

I think we’ll go with the solution u listed above (after we try this one)
But if we did…pls offer more detail on how to do the solution you just offered since it might actually be the one I was looking for @Magnavis
Thanks

1 Like

I think you know how to do this, but something is still apparently getting crossed along the ways. So I’m going to show you this node setup which I have confirmed as working. You’re going to need to copy it exactly, and listen to what I say.

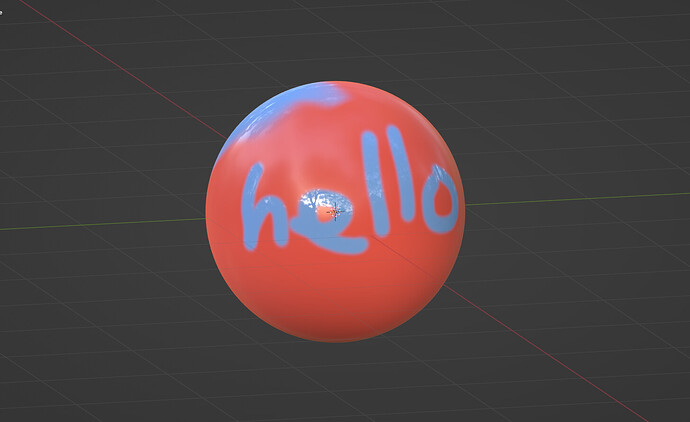
So… Here we have a sphere, which appears to have two separate materials:

Ignore that they’re not wood textures. Just look at the very basics of it. It’s super easy to replicate.

The Node Setup:

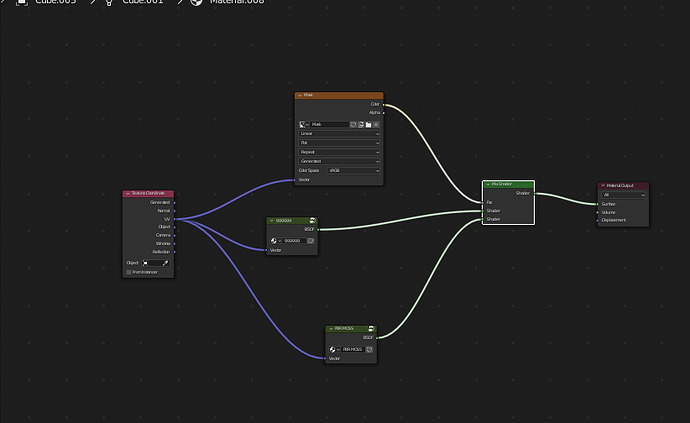
So lets look at what we have. We have two node groups, a mix shader, and also a texture called ‘Mask’ which controls the factor of the mix shader. This is what’s called a black mask. If it was inverted, it would be a White Mask.

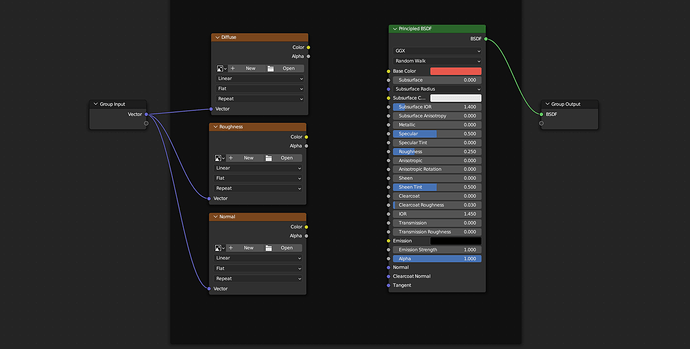
We spoke about node groups a little while ago, so they shouldn’t be new to you. If we expand the Node groups (Select it, and hit TAB), you’ll see something pretty familiar. We have the individual texture slots, but importantly, we also have the Principled shader.

For demonstrative purposes, I haven’t plugged any textures in, and have simply set the Principled to a red color (the other is blue.) For your setup, all you need to do is plug your Diffuse, Roughness and Normal map in, which you already know how to do. Forget Displacement. Even Poliigon nodes disable it by default.

The other node group is identical, but I’ve made it Blue - again, for demonstrative purposes only. In your scene, you’d load in the other PBR textures.

The Mask:

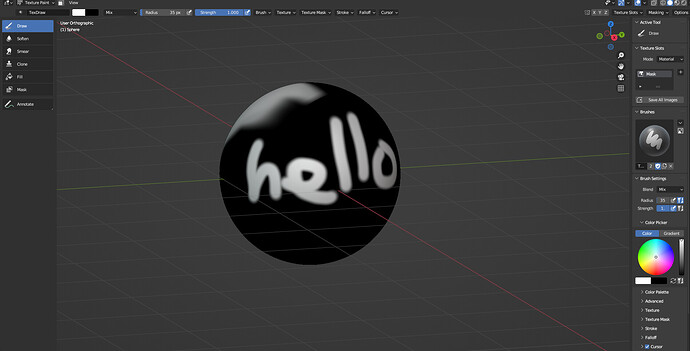
The mask controls how much of the other material is shown, and is also super simple to create. It’s just a new texture, that’s it. Click New, set your resolution, give it a name (I suggest ‘Mask’) and press ok. You can then go straight into texture paint, and paint using white.

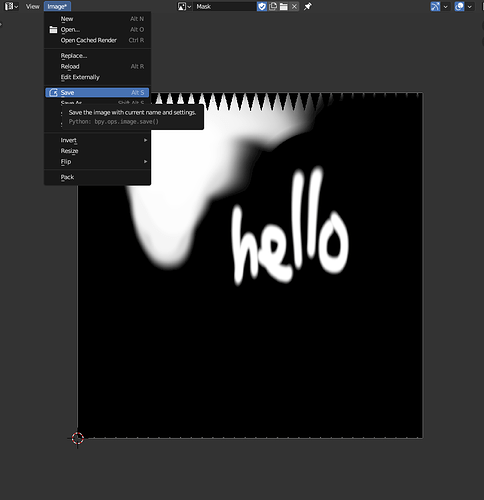
You will have to go into the UV Editor, and Save your image, and make sure you do so before closing.

:rotating_light: BLENDER WILL NOT SAVE IT AUTOMATICALLY :rotating_light:

Final thing. In the node editor, make sure your mask is set to ‘Non-Color Data

That is literally it. I could upload a .blend with the node setup, but I want you to actually learn what’s happening, and try to understand it. I also think you’ll feel better if you can get it to work on your own.
4 Likes

Hi, @Magnavis
Why my node group doesn’t have a vector? (Ik its a silly question but)
Why No vector

Open your node and compare it to the example:

https://blenderartists.org/uploads/default/original/4X/4/0/c/40c71d6567e19a608292db8d698feace48a19c35.png

1 Like

Compare with my screenshot. Inside the node group, you have to connect to the input on the left, and output on the right. All the information you need is in the post above. If you get stuck, or something doesn’t seem to be working quite right, go and re-read, and compare. :slight_smile:

I’m comparing but where’s the vector point?
See the pic I sent

You need to TAB into the node group, and then you’ll see the problem. Again, all the information you need is in the post above. I even mention tabbing into the node group.

You mean ctr-g then TAB right?

See that little icon on the top right of the green bar? Click it.

Ok I must admit I’m not that good when it comes to nodes :frowning:
Can @Magnavis attach the .blend file so I can learn more?
Thanks agin

You don’t need to be good at nodes. This is all super basic stuff. The modelling you’ve done so far is more complex than anything here.

No. You’ve already done CTRL G to create the group. Select the node group, and press TAB. That’s it.

Nope. I said in the post above with the instructions that I wanted you to learn it yourself. I’ve read my instructions multiple times, and they seem pretty clear. Go back, and read it again slowly. Don’t just look at the pictures.

:slight_smile:

2 Likes

Ok then…did u use any custom nodes?

while they grouped some nodes, all of those nodes exist in default blender. no “custom” nodes by the standard definition of “custom”. (i don’t consider node-groups, which were used and the contents of them shown in the same post, custom … something like svenchek nodes to .me. are custom)

1 Like

If I’d used anything custom, I would have put it in the post above.

I believe that should work! @Magnavis :slight_smile:

1 Like

We have another challenge…the texture paint is not working in rendered mode…I can see the 2nd PBR material in preview mode but not in rendered mode

Nice. What do the node groups look like inside?

Don’t forget to set the mask color space to Non-Color Data.

Also, screenshots help more than anything at this point.