Abondoned Brick Temple... or is it? My first Animation+ Scene and my greatest work yet

This is the result of all the questions and posts and comments from end of June to date. My first true scene and also my First Animation.

Here’s a detailed breakdown.

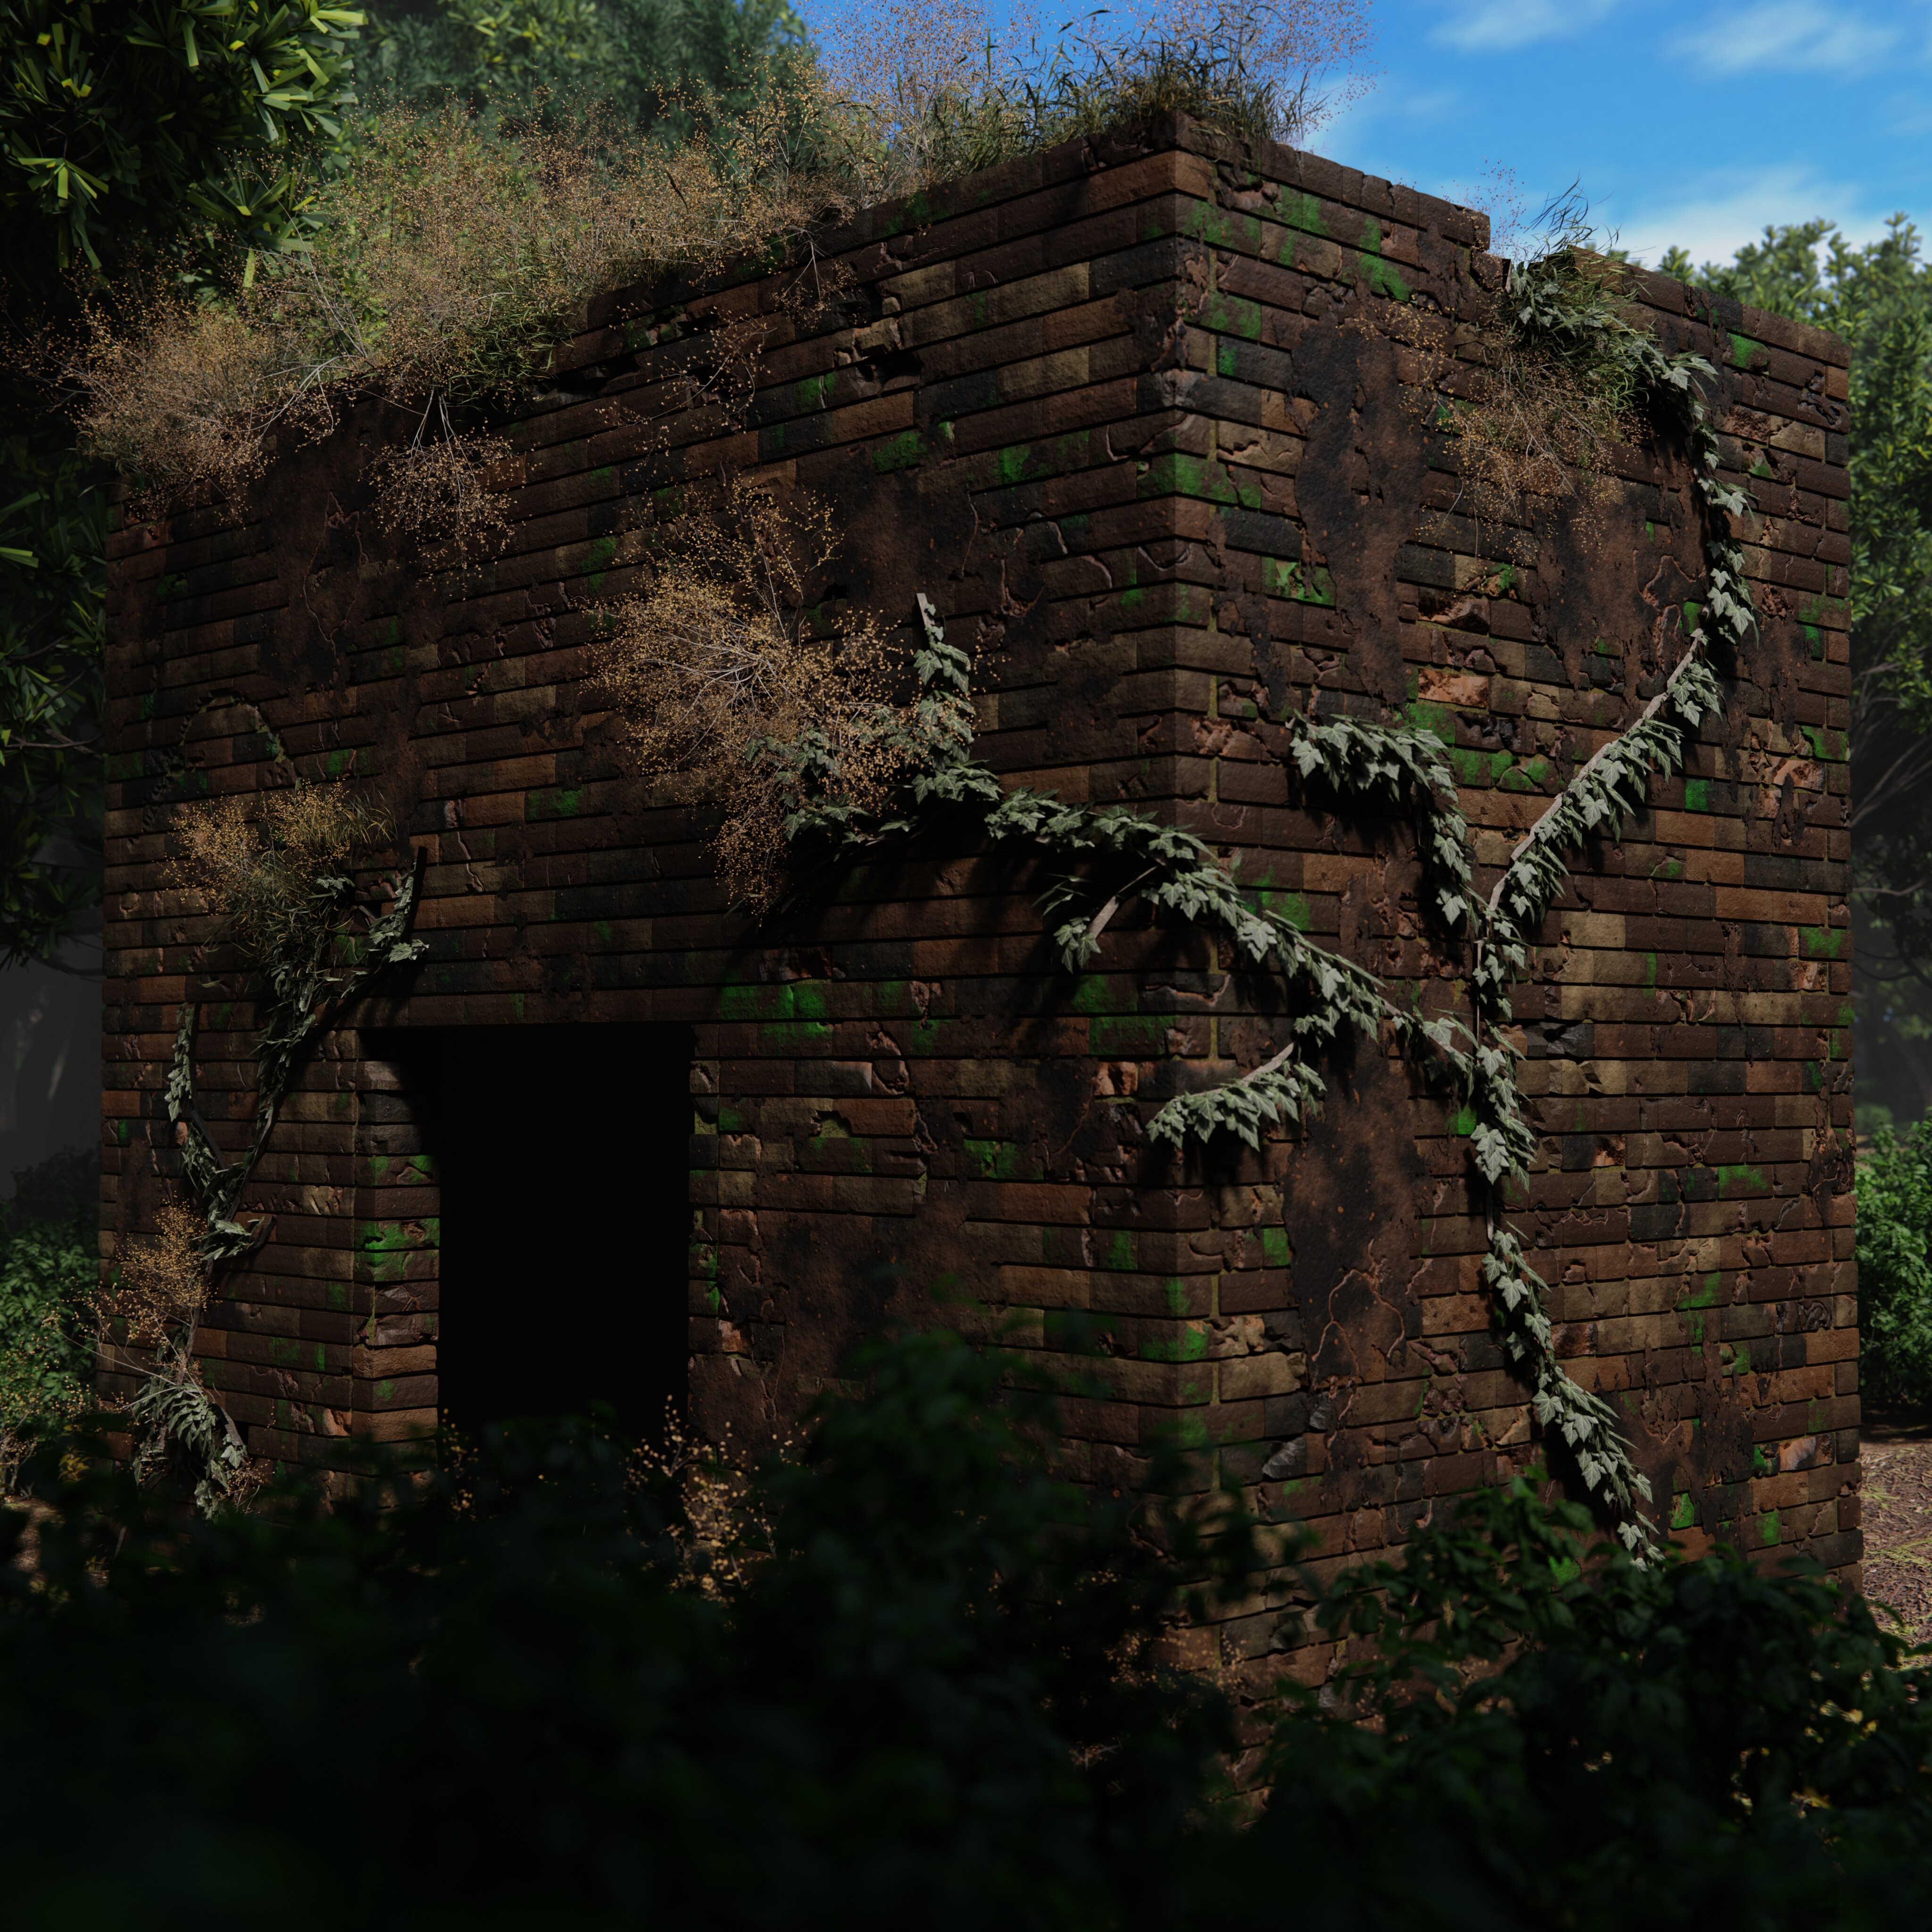
The idea from the start was to make a horror scene at night, in an abnormal dense forest, in a secluded area where a abandoned yet a not quite broken brick temple existed, not listed on any map. And i planned the scene exactly as how you saw.

This project was a lot of “First’s” for me. I learned sculpting, procedural materials, lighting [nishita, proper HDRI’s], volumetrics, addons like Scatter 5 and Grassblade, curves, Geometry nodes, Animation and almost everything i can name. I came out of this project a far more knowledgeable person than what i was when i dove into it.


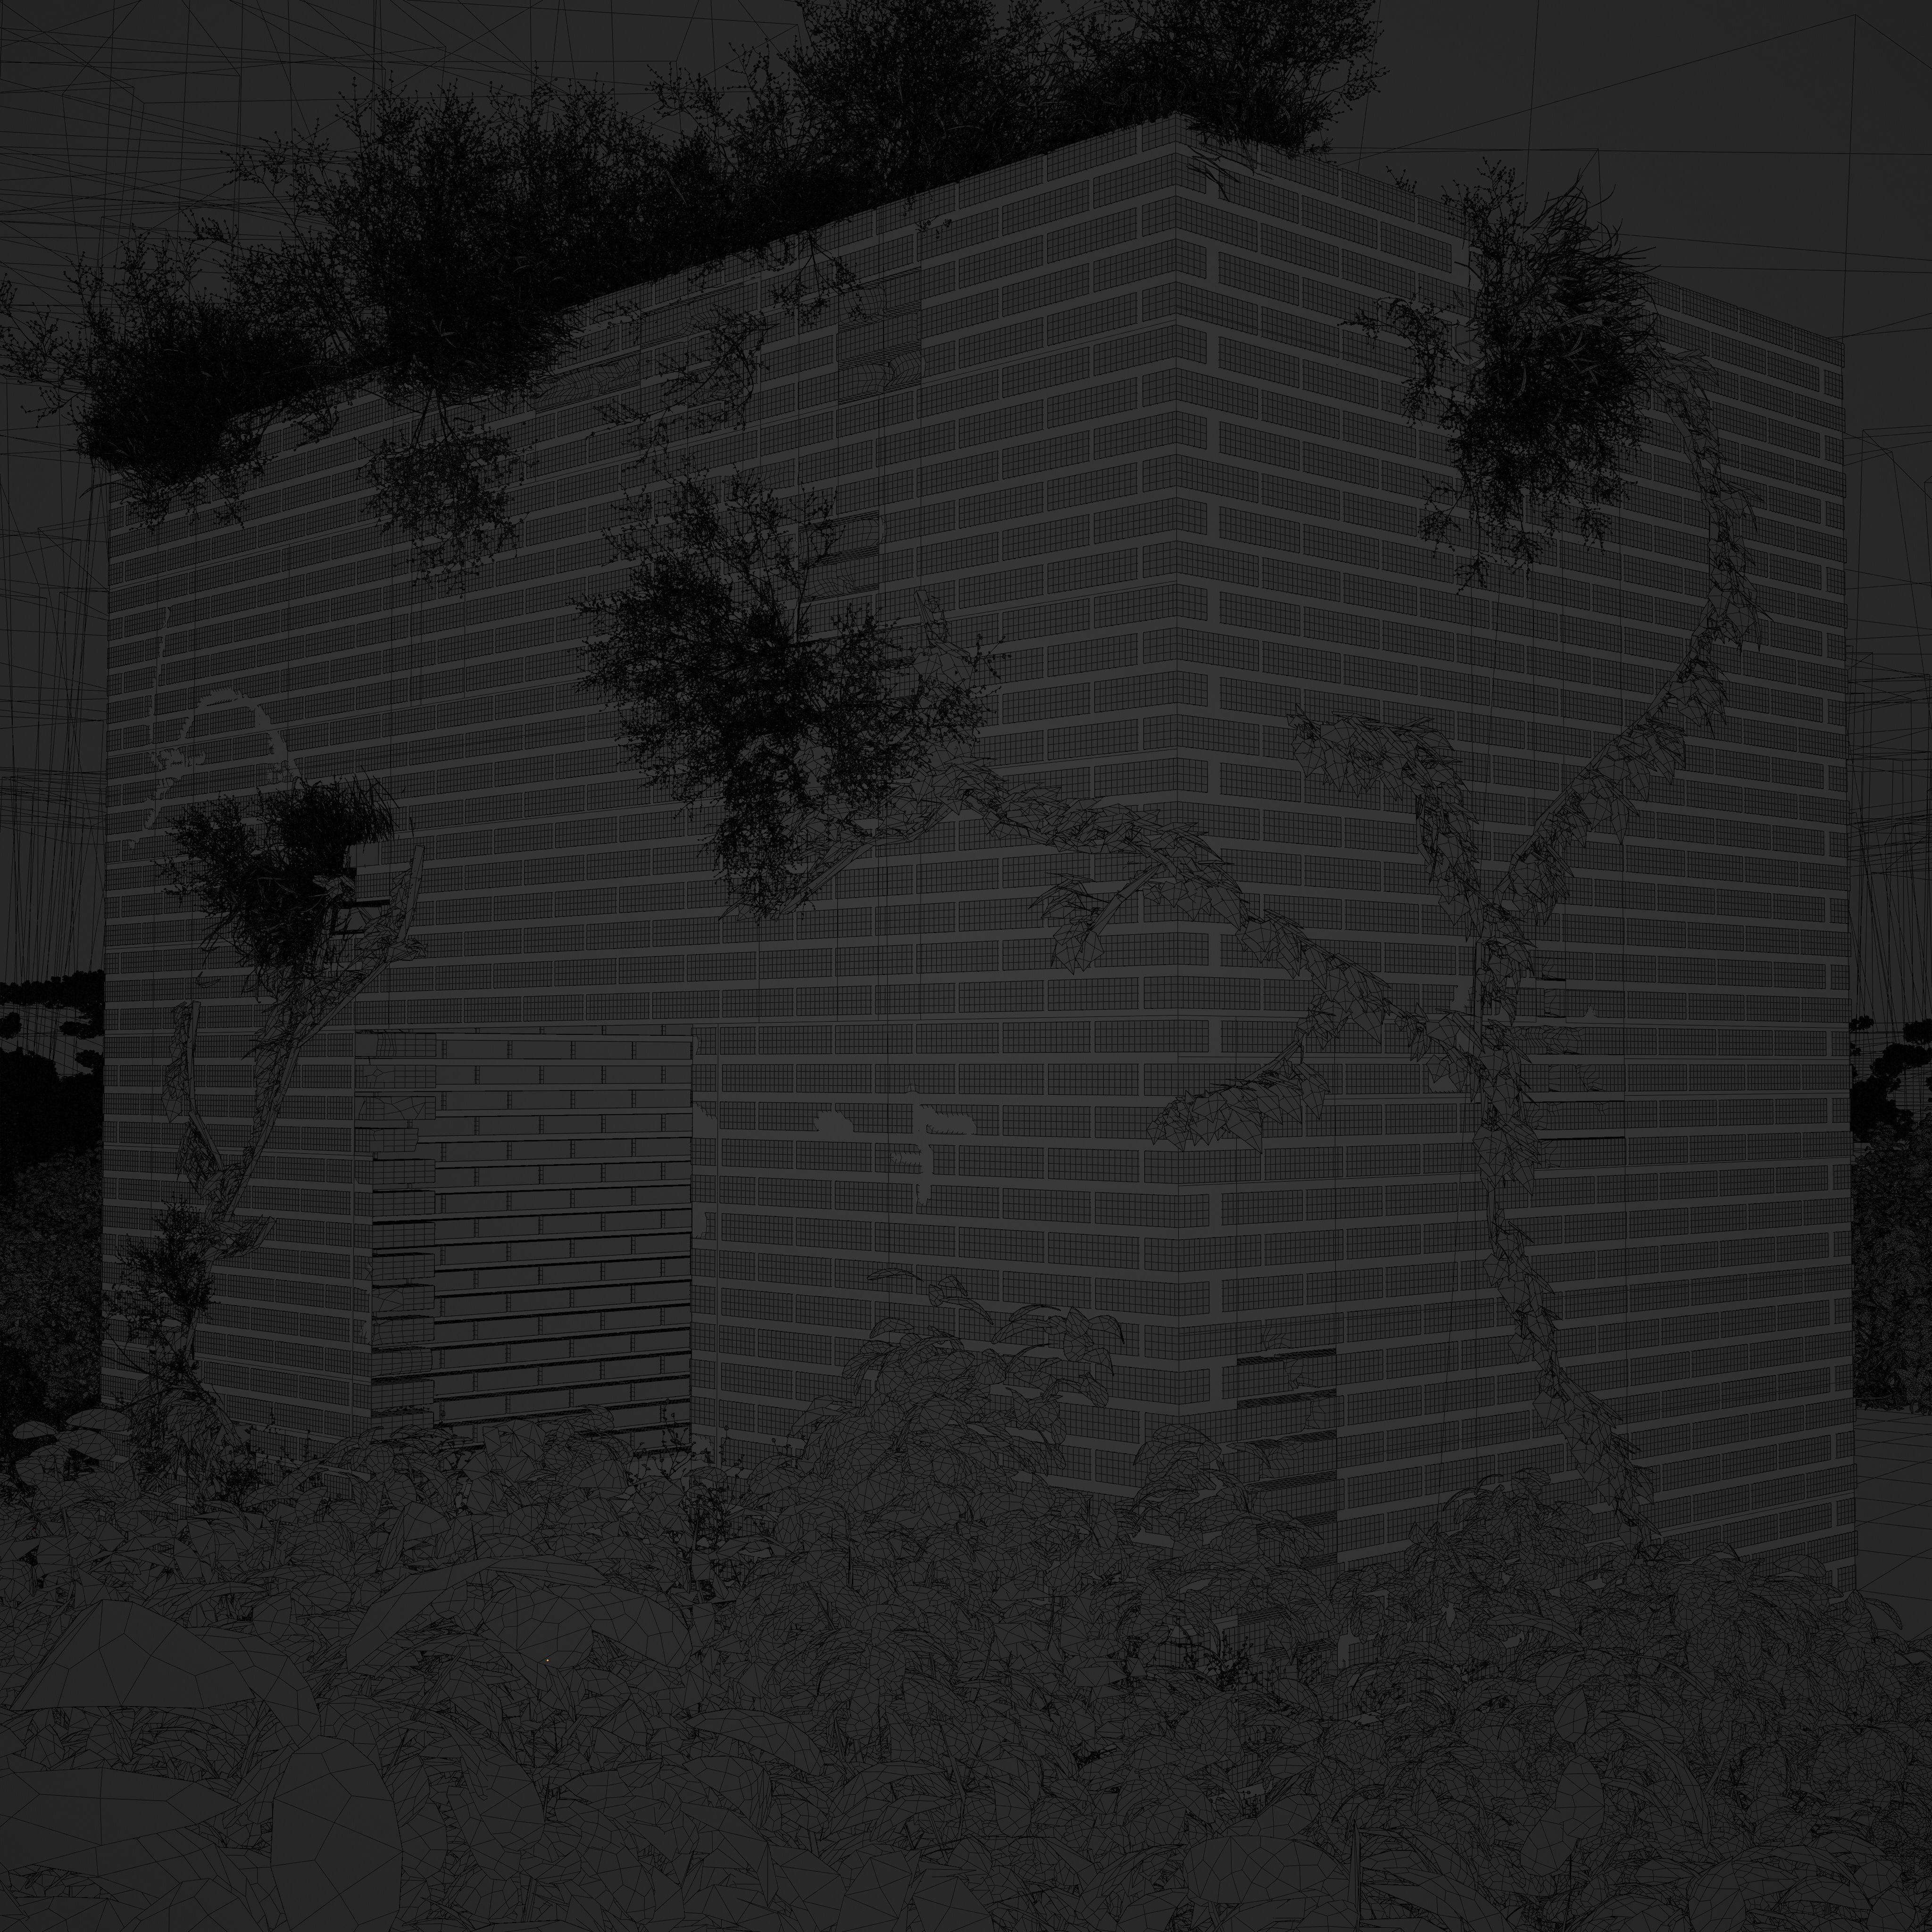
This is the scene at the first frame, the missing things are obviously the scatter v tress which for some reason just can see in proper shape in viewport.

The scene consists of 3 ANT large terrains and one plane. It was heavily subdivided, scultped. Then i used textures and displacement to displace the surface. 12 total weight paints were used in the who scene for the paths, the dead leaves, the shrubs, the small plants, the trees, even the growth on top of the
temple.

Speaking of the temple, the structure was [mostly] made with geometry nodes and complete procedural objects, materials, for damage and displacement and even moss.

The first order of business was bricks.


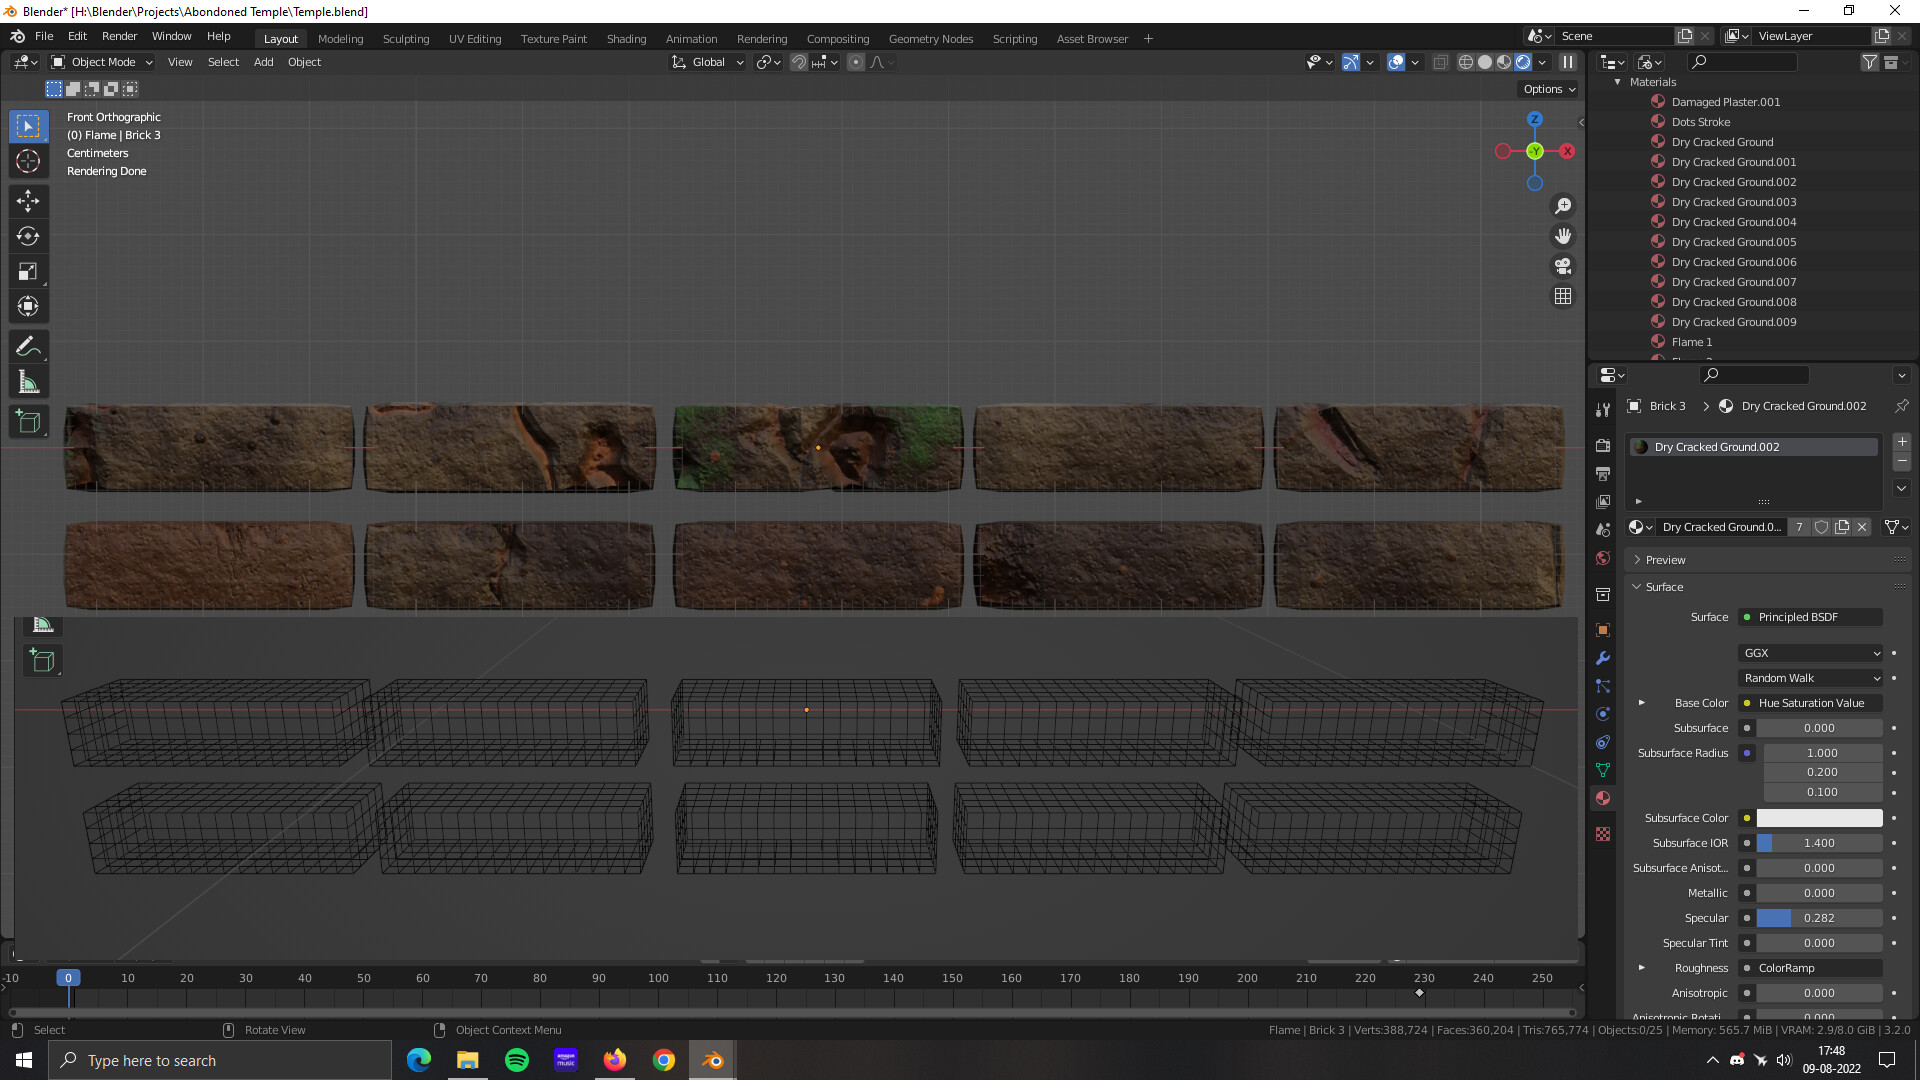
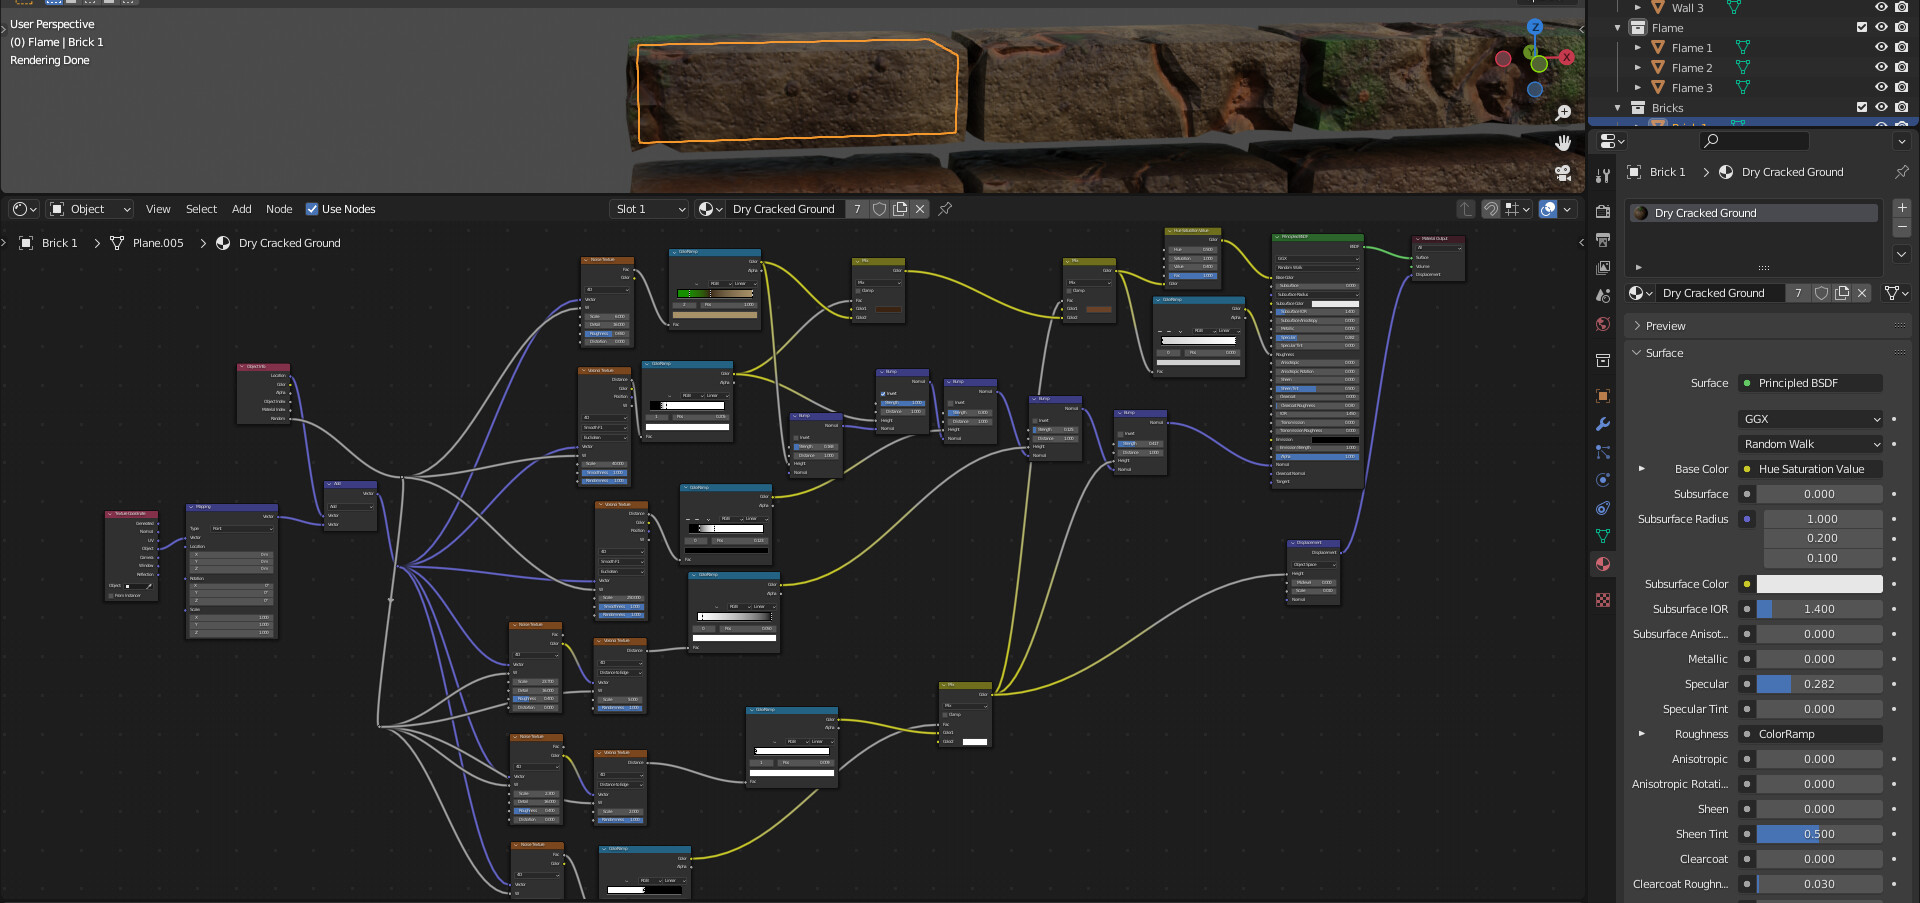
10 brick models, 10 different materials, all set to object randoms AND positions. So each brick, whenever copied to a new position, created a whole different color scheme within the parameters, AND proxy moss [didnt want to waste geometry on moss so chose green moss colored procedural to place]. it ALSO added damaged through displacement.

Yes, the displacement was completely random on position and the random placement of the procedural texture. On top of that, the wall was done in geometry nodes, where again each brick was placed randomly through nodes.

The result was a completely proceduraly generated damaged and mossy brick wall.

Then i added a mortar for the inside. Then i remembered, temples also had mortar/concrete covering outside of the bricks. Which should be heavily damaged and darkend because of time and environment damage.

Now the normal way would have been to make mesh and textures and drop them all around the structure.

I chose the clever way.

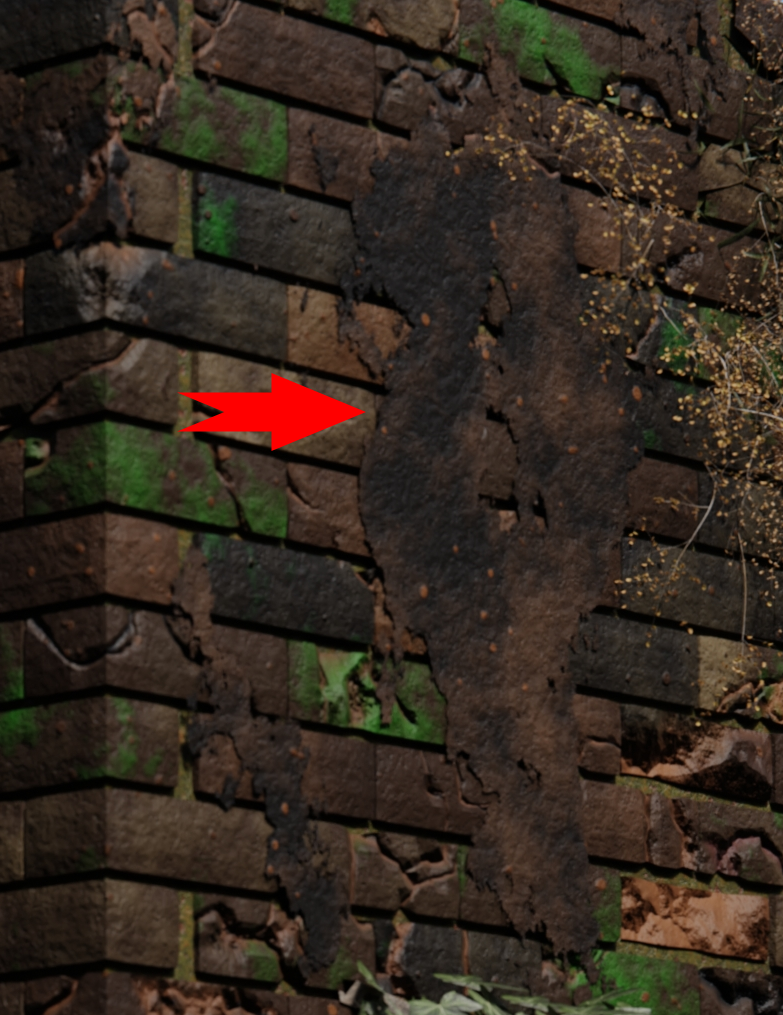
This, is a full layer. a full layer of flat mesh

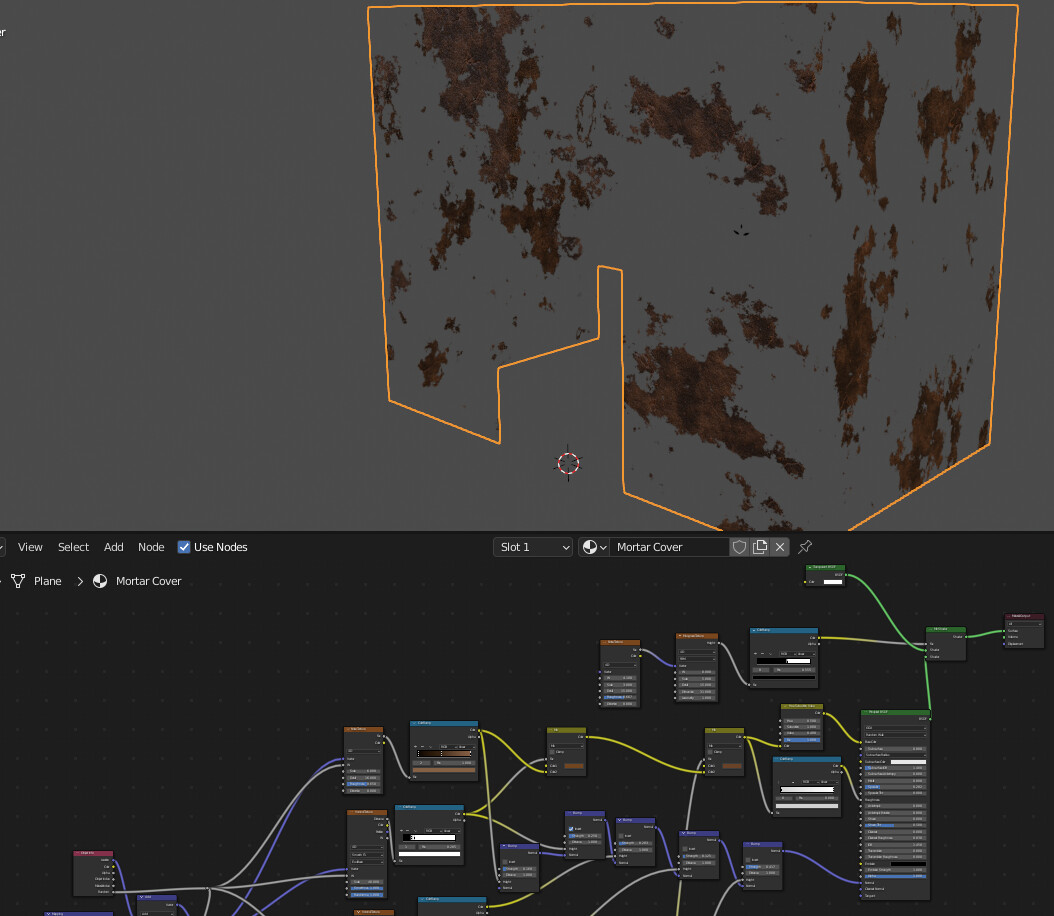
done with musgrave and noise texture to place, then the rest was made fully transparent with the transparent shader. i just dropped my brick texture to show up on the visible areas [except the displacement]

honestly, i think this was clever and an easy way to get what i needed in about 5 minutes of time.

Then the most important parts for the animation

I had to learn so much about keyframes and animation and all that and i asked so many questions here. [Thanks @sozap and @joseph ]

I made the Diya

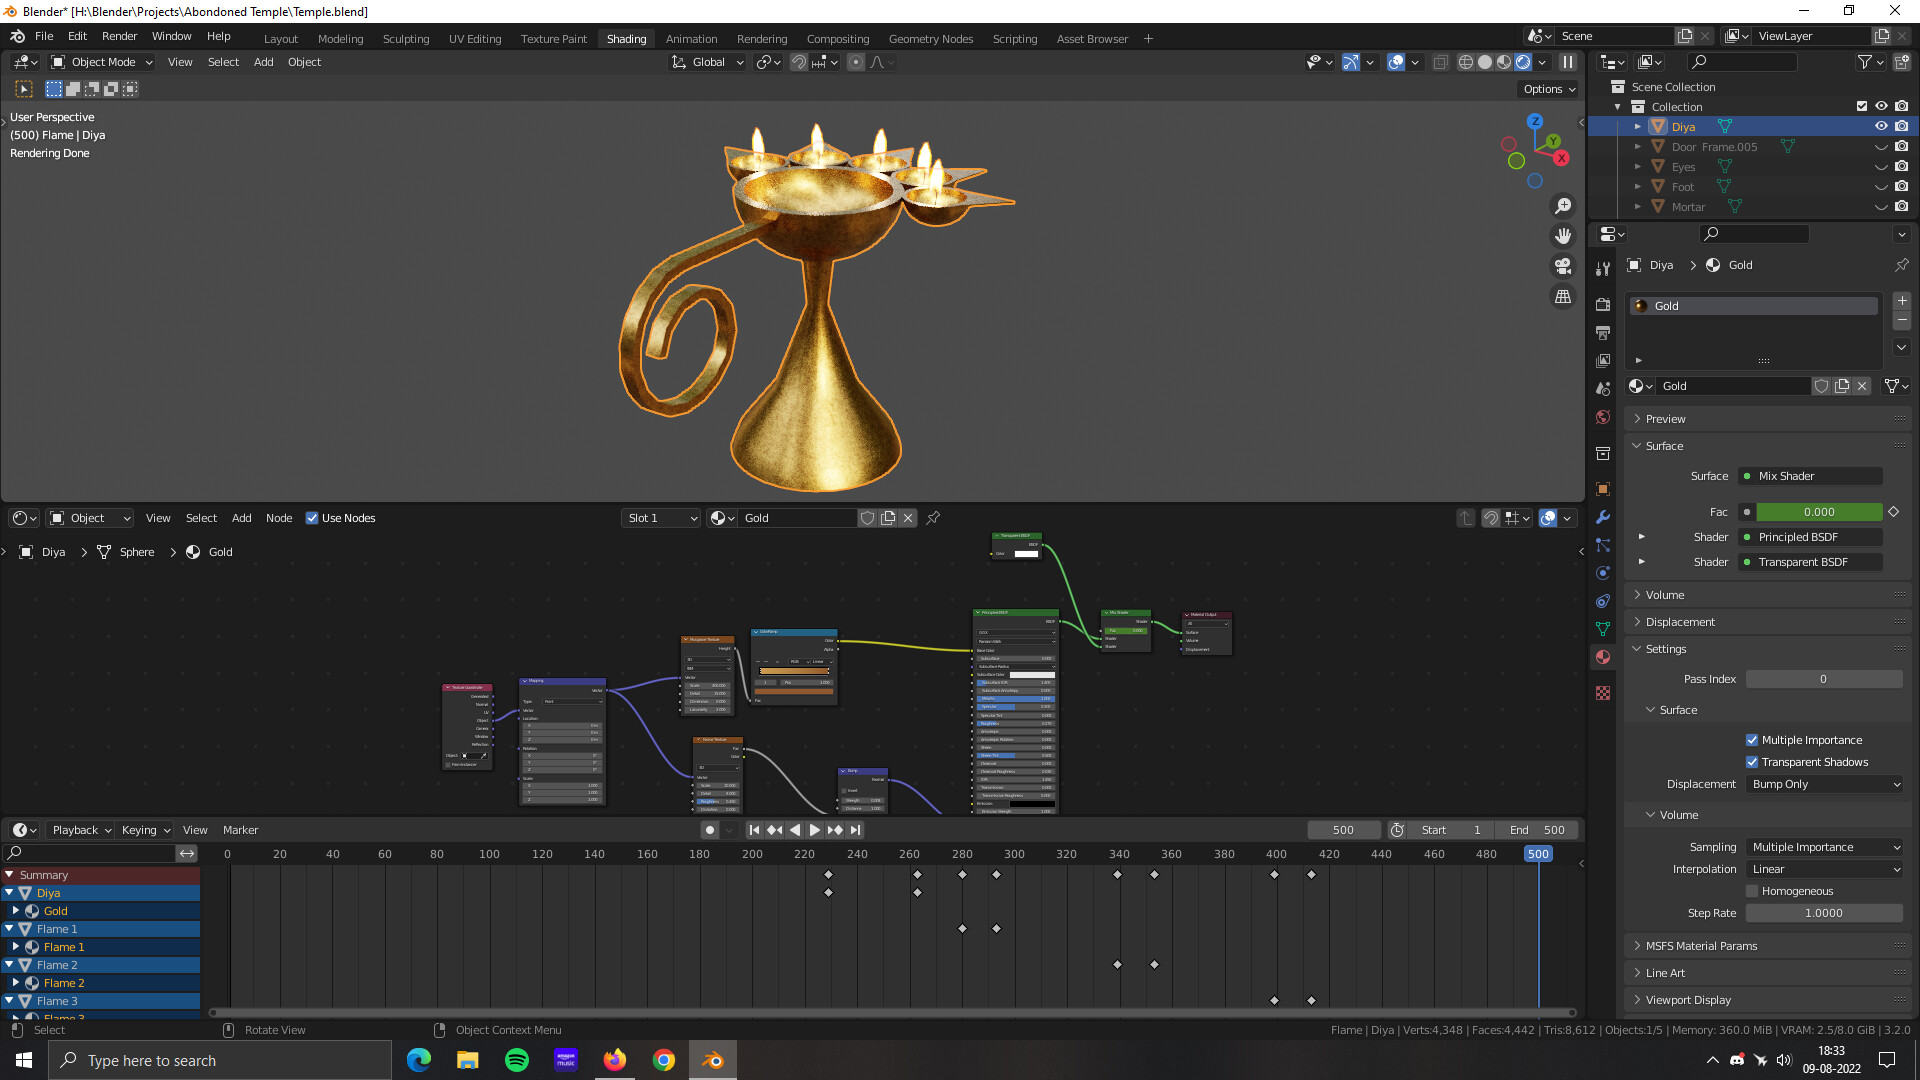
the flames were png that were also animated.

the diya, the flames, and the eyes all were animated to show up at the exact moment using keyframes.

Then came time to render the animation and i learnt so much again. I did the main animation a total of 8 times. waste at least 40+ hours rendering just that.

At first i saw weird jumps in the moving shurbs and moonlight. Like they just reset. I couldnt figure it out for a long time. Then it hit me that i had to render THE WHOLE thing at the same time, instead of rendering in parts. Whenever two different parts meet, the light and position of the stuff changed and it was jarring.

Rendering 1000 frames with 100 samples+ denoising at 1080p and all the passes and paths took 10 hours.

Then i learnt how to composite, make beauty pass etc. i even tried to use cryptomatte but it wouldnt work so i dropped it.

Then i dropped it all on Davinci resolve [something else i hard to learn in full and fast]. 7 types of sound effects later, the video was done.

I worked really hard on this project and i think i came out at least 10x the creator i was when i started on June 28th. I hope people like it, but i would understand if people dont. But i will stay really proud of this.

Thank you too everyone who helped me through my annoying barrage of questions and posts

@sozap @joseph @Dexel365 @SterlingRoth @Okidoki and everyone else, i COULD NOT have made this without you all.

Thank you.

https://baiddsb.artstation.com/

7 Likes

Now this is some kind of progress :grin:.

3 Likes

This is incredible, you should be super proud of yourself both for creating something awesome and for putting in so much work to learn how to do it :slight_smile:

2 Likes

@Okidoki @joseph Thanks a lot

id like some critiques too. Im not doing any animation soon but im planning a fully realistic scene based on a fairly popular real life picture [i think it is, google uses it as a wallpaper for its wallpaper app].

the critiques can help me improve

2 Likes

Well done @BaidDSB !
This is quite good and even better if many things are new to you !
There are also some nice little cheats here like the mortar texture or the lamp flames ! well done ! And thanks for sharing these ideas !

probably the animation and the lighting can be improved a bit,
For animation the motion of the camera sometime feels right, sometime is a bit unnatural if it’s supposed to be hand held. That’s not the easiest things to do BTW.

A cheap trick is to film something with a phone or something else and track that motion, that way you have a really natural camera move. Or you learn how to fake it properly.

The overall lighting is not that bad too, but maybe a bit too dark, there are ways to cheat in order to have a dark feel but still having high values so we see things but still getting that it’s dark.
Sometimes it’s a bit too much and we loose all the cool details you put in there.

But that’s not that bad and it’s quite logical, given the fact that you learned so much new things that less energy goes into solving artistic stuff. Where at some point you might get comfortable enough on the technical side, so you spend like 10/20% of your energy learning new stuff and everything else goes into the creative side of things.

So keep them coming, do more stuff and improve each time ! It’s already a great achievement, I wouldn’t bothered making critiques because it’s already good but you insisted !

Good luck and I’m looking forward to the next piece !

2 Likes

i didnt know i can do that. WOW! Can you point me to a tutorial?

The overall lighting is not that bad too, but maybe a bit too dark. Yes, i thought of increasing the highlights a bit in post. and i did it too in compositing, but i wasnt sure about it.

i have actually never visited the woods myself at dark. dont know what it actually looks like.

Honestly what i really wanted to get a critique is about the layout of the scene, especially the two render images i posted.

Well… if you were to replicate what the woods actually look like at night, your animation would be a few hundred frames of flat black :wink: This is a situation where you have to sacrifice some ideas about reality and go with what looks good instead

true. i still browsed google and pinterest for ideas. did what i thought.

1 Like

This one is great for motion tracking :

Probably in that case you may start by doing the camera motion first and then build the set around that .

Yeah, that depends if you want to be realistic of cinematographic.
I’ve seen a few time some cars on fire, but they never exploded like in movies.

It’s quite cool, The first one seems more cinematographic, the second is more about showing the model.

On the first one, is the idea to make it creepy ? it’s a bit of a middle ground , with warm colors, green vegetation, how could you make it more scary ? if that’s the idea behind the image…

2 Likes

Slightly, since its the theme, but i was more interested in showing a temple in the forest, covered with god rays all around.

basically a beauty render, something like this Creekside or this Forest Path

1 Like

ok ! this is a bit confusing because the video is creepy, but it works well then !

Keep up the good work !

about the video you posted, it shows how to put 3d objects in a video.

i kinda want the reverse, take the motion and put it in the scene as camera motion

1 Like

yes it’s the same, even simpler !

Once you reconstructed the camera you can get rid of everything and keep only the camera motion.

You can also be a bit lazy with the camera move because you don’t integrate something into the video, you just need it as a reference to get a natural move and avoid too much computer-ish moves.

I featured you on BlenderNation, have a great weekend!

1 Like

was wondering if i will be featured. thanks

1 Like