stephen_leger. I love this addon it’s incredible. Thank you for all these tools. I have a humble request… is it possible to have the rows of the windows go horizontally? where I live most windows are double hung sliding up and down instead of side to side. Thanks in advance.
Hi Ector3,
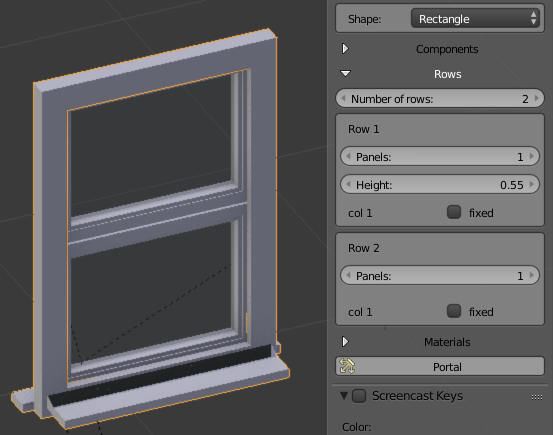
Use 2 or more rows of 1 panel each.
As side note, window may benefit of solutions found in upcomming kitchen cabinets code and while refactoring i could take a look at allowing columns and rows of panels to achieve much more complex layouts.
Thank you stephen_leger …This does what I need.
cool, this plugin gets better and better  are there chairs, couches, beds and tables planned in the far future? It would be cool to have some procedural base meshes for all the important parts of a room for quick blockout and testing
Hi,
@donnydarko,
Not planed to do it as there are too many variations to be able to make efficient parametric objects, but as simple base mesh for furnitures as testing mesh should be simple to implement, so maybe in a next release.
I started writing a workflow for Archipack. The point is that one of my major difficulties in using Archipack is that it creates it’s own relations in the data, confusing the way the outliner presents. I am sure the idea for the References, the parenting and other groupings and relations follow a certain logic, but my problem is that this is not written out in black and white.
When pressed for time within a project, one easily reverts to the easy path one knows and in this case from the “structure” of Archipack to Blender generic.
So I started a test .blend file where I do only Archipack tests and write the workflow in a text block within blender text editor.
Eventually I hope that the whole file will be like a tutorial with the text block narrating the workflow.
This will help us at the office, to accommodate our data outline and practice to fit the Archipack data structure.
This is crucial to incorporate this kind of addon, in my view.
Below is the first part of the text block, written today, that is the basic understanding of Archipack data structure/workflow.
Comments and corrections are very welcome, from Stephen or any Archipack user:
- Reference object parenting (how to work with Archipack Reference objects and relations :
a. wall draw or wall from curve (best practice is to start out with exterior wall outline)
b. slab from wall
c. interior wall to t-walls, so that they are parented to exterior wall (this way they “join” the reference parent)
The exterior walls can have the surface on the outside or inside and solidify will give thickness
bug often the interior wall does not follow the exterior when that is modified, even if
the interior wall is generated starting exactly on the internal surface of the exterior wall,
d. Windows and doors generated on exterior and interior walls join the reference object
Use Draw window or door, so that they snap onto walls and automatically do the hole cutouts
e. Select exterior wall create slab from wall, puts a slab under the wall
Reference consists of: a + b + c + d + e
(You may rename the parent “Reference” to “GroundFloor” or “Level00” for clarity in the outliner)
- To build a multi-storey building, having started as above (item #1)
a. Select the exterior wall create ceiling from wall, puts a ceiling slab over the wall
(note: this is created outside the Reference object, described above)
b. Select this latest slab and create wall from slab
(this will be the same as the exterior walls of item 1, if you have not modified the slab outline, but one level above)
c. Create interior walls, tee-parented to the exterior wall
d. Windows and doors
Reference consists of: 2a + 2b + 2c + 2d. This reference will be located with same origin as previous
(You may rename the parent “Reference” to “FirstFloor” or “Level01” for clarity in the outliner)
You can keep going on to create stacked building levels, one reference each. Note that in the end, you will be left with the very top slab, the roof slab, unparented.
Hello Stephen, please help,
Don’t know how but now the thumbs selection menu for doors, windows etc, brings up a void container with the headline for text but no icons, not even the null icons and no clickable areas.
I checked under the appdata folder and Archipack is where it should be, under scripts and the png files can be found in \presets\archipack_window, for windows for example.
It seems that Archipack does not locate them? I tried to start Blender as an administrator to “re-constuct” the thumbs and the menus but with no luck, because the menu option is not available.
What is wrong?
Edit: found the answer here
Hi csimeon,
bug often the interior wall does not follow the exterior when that is modified
If the mouse is not over parent wall at create time, child is not automatically linked (“T parent” is empty).
You may still setup parent by hand in child wall, setting parent wall in “T parent” of child, and using start angle of part 1 to set rotation about parent.
Your workflow seem correct, and must be part of documentation and a video tutorial.
Data-structure and in-depth use of reference point too.
This video does show advanced usage of reference point in multiple storey buildings (from 4:45).

Yes I understand how to setup a T-parent, however sometimes it simply does not work: the child joins the parent under a common Reference, but the modifications on the outline of the parent (outside wall) do not carry to the child (interior wall), they are disjointed.
Link to example blend file. See the T-wall child object Wall.009 parented to Wall.001
Changes made to the exterior have no effect on the child, for example making the exterior larger, leaves a gap at the T-junction.
Question: Is it better practice for the outside wall to have the surface on the outside and offset thickness to the inside? Is it necessary for T-junctions to interior wall that the “true” surface be on the inside and offset to the outside, so the start of the interior wall lies directly on the surface?
(I would prefer to have the surface on outside, offset thickness inward, so dimensions are the exterior dimensions of the building, but I wonder if this somehow effects T-parenting)
Edit: note this interior wall was created with the wall button, not the [draw wall] button, so it was created and then Teed manually. Maybe if created with [draw wall], with automatic T-link it would adhere to the parent? Should this not happen anyway, with manual T-parenting?
When creating slab from wall, on two different occasions, I got different results:
- Slab created under the base of the wall with thickness 30cm results with all thickness under the wall (the expected behavior, for me).
But other times… - Slab created, resulted vertically overlapping the wall, and I had to give negative thickness -30cm to get the same result.
I was not able to see the pattern to reproduce 1 or 2 consistently…
#2 though caused an even stranger result, when creating the ceiling slab: with a default thickness of 30cm, the resulting slab left a 30cm gap from the top of the wall (and was 30cm thick). When the thickness of the slab was changed to -30 it “fit”, however that meant that to fit the ceiling slab after changing the thickness, one needs to move the slab accordingly!
Hi csimeon,
Thank you for the file and the reports, was able to narrow down and fix your issues.
When looking for a child’s parent wall segment on the wall dosen’t take account of his width, so your child is little bit outside of every walls segments.
Slab issue fixed by allowing CW slabs, performing the ccw check and revert when needed under the hood when building the base mesh.
Also expose a global “offset” parameter for slabs so you’re able to grow / reduce the slab to fit wall.
Until then, slabs was expecting the walls segments to be CCW, so if you get wrong result, use “Reverse” on the wall.
Will push those fixes into 1.3.7 release.
[edit]
T wall parent work the same way whatever creation method, and manual/auto T link.
Slab is designed to fit wall base segments, so you better use exterior line as basis for walls - does make sense for manipulate mode too as sizes rely on this base line.
Note that slab new offset parameter allow to fix wrong slab size when base of wall is not outside.
Stephen Ledger. I know this may seem rather obvious to you but here is a comment. In the last video that you posted you demonstrate the 2D to 3D features. That is fine but for a new and unitiated user, when he first views that video or even when he looks at the only documentation the first question he will ask is this. “Where did he get those orange tracings of the walls?” When you first posted about 2d to 3d I asked myself that question then I just decided to skip over that part of Archipak since I did not know what you did to create those and how I could get them on my blender screen.
Two weeks ago I was quiclky skimming some of the documentation pages ( which are actually just a feature list rather then instructions) and one of them said something about curves!!! So FINALLY!!! after months of following this thread I understood where the 2D portion of 2d to 3d came from.
So I assume that one would have to use bezier or other types of curves with vector handles to trace out the 2d forms then use the 2d to 3d fectures. Is that correct.
One more suggesstion PLEASE PLEASE PLEASE turn on screencast keys when recording a video. So many people foeget that the people viewing the video have NO IDEA what keys they are pressing or mouse buttons they are pressing.
Thanks
Opps!!! after viewing the video fully i see that you are using screencast keys on it. Sorry about that comment. I wish more tutorial makers would remember to turn that on.
Hi SHABA1,
Archipack 2d to 3d currently does support POLY and BEZIER curves as input for 2d to 3d.
Unfortunately screencast keys somtimes simply dosen’t work with some archipack features while recording.
There are more than one ways to utilize the curves-to-wall feature:
- Use imported dxf outlines, curves and convert those (you don’t actually “trace” over anything)
- Draw curves in Blender and “loft” them with curve-to-wall
- Use existing geometry done in Blender as mesh, Alt+C to change mesh to curve and curve-to-wall
You may wonder why #3, why not draw a curve directly? Here is where design workflow comes into the picture.
As an architect, after getting familiar with Blender, I now use it for massing studies, during conceptual design, where buildings are represented as block objects (meshes). Once I have the volumes arranged and sized as I want, I can take the outline, convert from mesh to curve and curve-to-wall with Archipack and start configuring rooms and spaces.
And I totally agree with you that Archipack is now sorely missing documentation, starting from an introduction with workflow concepts and on to the tools to do the work. Without it, I am confident it loses usability and scares potential users away (I persisted…)
Stephen on the other hand needs help, I assume he is very busy writing code and testing.
At the office I started creating the Workflow Conceptual Introduction to Archipack as an in-house document, so all of us the architects using it, waste no time discovering and our Object Outliners have the structure to organize larger projects.
Stephen is very welcome to incorporate this in any Document (we are still writing) and any Archipack user too.
I totally agree with you on that. If you need any help, writing contact me in about a month. I was going to volunteer to do the very same thing for stephen but right now I am doing a workflow document for another addon programmer. I do not want to make a commitment that I cannot keep.
Hi guys,
Any help / contribution in the documentation process is welcome.
Documentation is in a standalone branch on github,
so feel free to add changes and commit there.
It’s sphinx based rst (restructured text)
Hi,
Released archipack 1.3.7
Add kitchen cabinets
Add parameter for slab offset
Add parameter for window panels depth and borders, and hige size for shutters
bugfixes
- wrong slab geometry with cw wall
- blind not properly created by windows
- wrong location of hinge when shape is not rectangle
- wall T parent not always synch child
I am always a day late and a dollar short. I just finished making my kitchen cabinets, dresser, refrigerator and shelves using Archimesh. Literally Yesterday. I am now at the point of UV unwrapping and texturing them Then going to append them into the ARCHIPACK room and bathroom I previously created in another blend file 
Then I log on today and find you just released a version with a kitchen cabinet maker Like I said Day late and Dollar short. No Big Deal though. Great to see you are continuing to improve then addon and even GREATER to see that you do not mind answering questions.
So many devs just abandon their addons after the initial release and then just assume that since they can use the addon anyone can.
OK question: Is this just a copy right over the present archimesh folder in the blender addon directory. Or is it a delecte the present folder and unzip 1.7, rename and then copy into the addon folder. I know you can “install from file” I HATE doing that becasue it puts addons in some C://Users/APPDATA/Public/Documents/ folder or something like that. I am just paranoid and like to know exactly where things are going on my hard drive because I* put them there.
Hi SHABA1,
Archipack is shipped with the excellent addon-updater script from cg-cookies.
In user prefs->add-ons ->archipack, beside “File” (on top) you’ll find exact location of current archipack installation.
Updating archipack, the easy way:
open user pref->add-ons ->archipack, scroll down to bottom, and find Updater settings.
Click “Check now for archipack update”, wait a bit, then if apply click on the same button (Update now to x.x.x), restart blender.
This way you are able to rollback to any previous version if you need.
Don’t forget to press “Render presets thumbs” (wich should not actually render thumbs, but copy from addon folder to user folder)
You may enable “auto check for updates” but if you’re paranoid, don’t even think about
Updating archipack, the hard way:
I can’t find any good reason to make it like this, but anyway, freedom rules.
Open user pref->add-ons ->archipack, click “Remove” to erase old installation.
unzip archive at same location, restart blender, press “Render presets thumbs”.
I would rather do it the hard way. I just like to know what is going on in my system, because I have told the machine to do it.