Thanks for catching that. I only put that in for testing the joystick object and forgot to remove it again. I have updated the same file, same name - I just removed those debug lines, so previous post link will grab updated file. I am curious though, what type of scene threw an error. I tested on a scene with over 100 objects and there was no error. I want this code as bullet-proof as possible, so I am very glad for testing by others to catch the wacky stuff modeling throws our way. PS: I have started coding for 3D textures and they have been successful. So far, Voronoi and Stucci work in that build. At least on my tests. Again, thank you Oyster for running it through its paces!
@Oyster, thank you for lowercase suggestion - great way to solve for variations. I use ‘Upper’ in Visual Basic.NET for same effect, but haven’t been doing Python very long. Brilliant solution! Should reduce characters if more materials come from .blend files that are named any which way.
Import the joystick ontop of cube? I will try that…
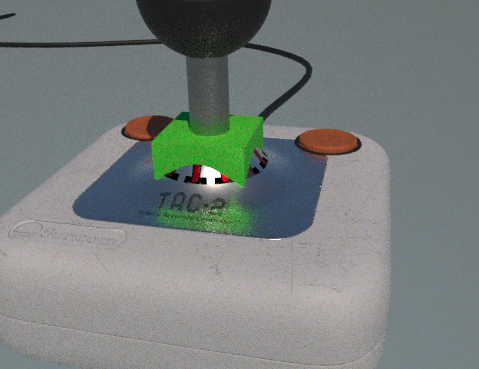
OK. I just did. I colored cube slime green in BI. Ran my Addon and the cube is just melded with the joystick:
Yup. Per your edited post right before this, I reinserted those debug lines and it blew up. It was referencing active object that was the cube, not current object. Anyway, revisiting code let me discover another issue, on some materials, there is a specular color error, but it isn’t halting the convert, so I didn’t witness. I am testing/making changes now. It won’t be a new version, as it is a correction. I will add a fractional version number though: 1.5.2. I will upload and link in next post.
Scratch that. I retested with and without the 2 debug lines with basic objects, plus objects with the joystick, as well as other models. Cannot duplicate the ‘specular’ error I saw in the message console. Must be a ‘one-off’ from a dangling participle! So next update will have enough enhancements to warrant a 1.6 version number.
I also tried with a 3DS file downloaded from the Web. I had added ability to deal with normal maps as well as plain bump maps. Seems to work the way it should. The 3DS files:
Hello MarsThunder. First of all thank you for your adaptation of Silvio’s add-on. I wanted to give it a try so I downloaded the latest version 1.5 you referenced above and installed it both in Blender 2.76b 64bit official and the latest build Hash: d970f02 together with Luxrender’s latest 1.6 build (http://www.luxrender.net/release/builds/1.6/windows/) and its add-on. I run Blender only from portable zipped version (with all the customizations required in the User preferences and directory structure as well as to the addon_utils.py file).
I’ve loaded an old BI test scene with no material nodes, switched to Luxrender render engine and under Materials tab I run your script (Convert All Materials to Lux) checking the box “Disable Maps on Glass” and on both above Blender “installations” I get the following error messages in the console:
“”"
This is the Lux Material Converter
Starting convert here…
** Image Map on Glass Disabled
Traceback (most recent call last):
File “D:\Blender_2.76_stable\2.76\scripts\addons_extern\materials_lux_converter.py”, line 1357, in execute
AutoNode(False)
File “D:\Blender_2.76_stable\2.76\scripts\addons_extern\materials_lux_converter.py”, line 176, in AutoNode
wr = open(outpath + ‘LuxConvert’ + timestring + ‘.log’, ‘a’)
FileNotFoundError: [Errno 2] No such file or directory: ‘//LuxConvert9169.log’
location: <unknown location>:-1
“”"
No material is converted. Any clue?
Harvester
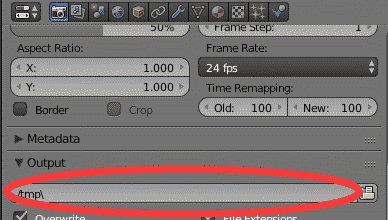
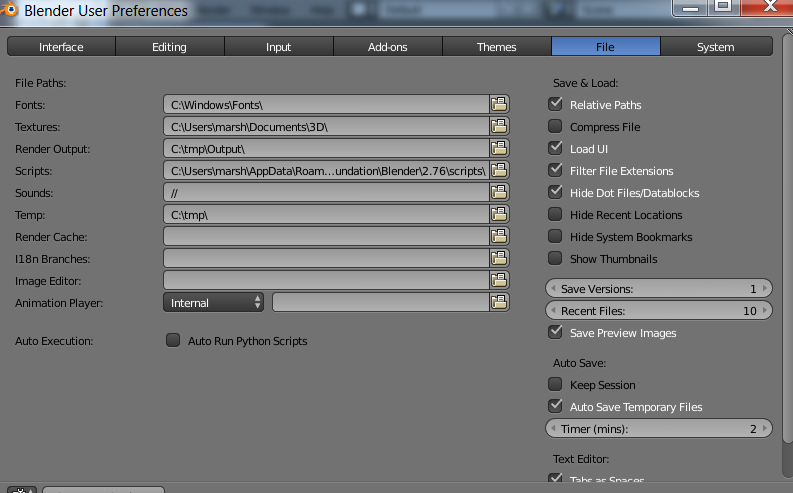
please check whether the output directory under render panel is valid.
if valid, maybe you can try use diretory whose name is only English and number, without space and Charaters in non-english
The Output path or location was initially as per your image but I changed it to be the root of the .blend file “//” as a relative path, and it didn’t work. The use of relative paths in the Output field seems to be the source of the issue. So, I simply unchecked the “Relative path” flag in the File Browser and run again your add-on and it worked fine.
This “problem” of the relative vs. absolute path affects Luxrender too, so I should have noticed it before posting but anyway I hope it might help other users of this add-on facing the same issue.
That is interesting. Glad that solution worked. What operating system are you using? It may be something related to that - and if unchecking solves, that is very helpful to know. I have never unchecked that box, but I always have my output in a folder that is writeable. Windows 7 does not like anything trying to write in the root of C:, so I know that is an issue.
In fact, here is my output settings here:
PS: I have updated code yet again, as I am trying as many imported models as possible to get it to fail, so I can make it smoothly get over it or avoid. One of my OBJ files failed and due to changes I made in v1.5, so I have fixed. The reason it is failing is it is a very simple matte material with a texture image, and no bumps. Other tests had more difficult materials which enabled more attributes. Latest v1.5.1 here.
I’m using Windows 7 Pro 64bit with Admin rights, Blender is run from the portable zipped version copied onto another drive, not C:, and I do also use relative paths whenever possible in Blender for all my projects based on a tree structure hierarchy. Anyway, when I said that Luxrender (the Luxblend add-on to be precise) required the output file path to be an absolute one I was wrong; it works fine with relative output file paths too, sorry. What didn’t worked for me was the material conversion operation with the Output path set as a relative one. As soon as I made it absolute the conversion went smoothly. See below.
I’ve just tested the 1.5.1 version you linked above, and I get the same behavior and solved it in the same way. I cannot exclude that when using relative paths the space character in the production root directory’s name might be the cause of the issue, while it have no impact if the path set to absolute. Just guessing.
Glad you figured it out. I think I know why. On my office computer, which I rarely use Blender, I do not have all the file and folder preferences setup fully. I think this is where something might be snagging. I noticed the similar ‘//’ to your default ‘relative path’.
Just for goofs, try setting up a default ‘output’ folder you can write to. Notice I didn’t do that for ‘sound’ folder in my screencap. Keep ‘relative paths’ checked and then try running the Converter. It just may solve it. If not, at least you know a workaround! User preferences found by clicking ‘file’ on menu.
@Harvester, I am curious how that room scene turned out after being ‘Luxified’. Even if it is just a 10 minute bidirectional render, I would love to see how it turned out!
I’m currently reworking the original BI scene, models, materials and textures to correct some bad mistakes I’ve found and get a properly done starting scene to convert. The reason is that I’ve noticed some uncorrect conversions and I wish to be sure they aren’t caused by faulty modeling, materials or textures. I will publish a LuxConv test render soon.
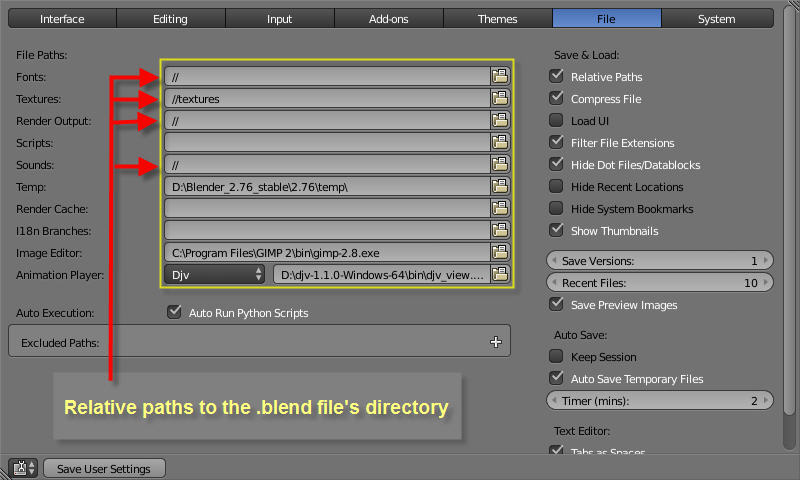
In the meantime, here follow a screenshot of my File Path’s setup in User Preferences. As you may notice I do use relative paths but map only the extures folder; Scripts path, I don’t need it because I setup my Blender portable installation properly to have everything that’s needed within it’s installation directory.
Thats good. On the relative path thing, I did see this. If you have relative paths and don’t save .blend file beforehand, it might not work. Found this on wiki:
I am still searching for all kinds of models to test the converter. I found this one, which is awesome, and the largest scene I have loaded to date. It takes my Converter 16 minutes to parse through the file. I am so glad it didn’t throw an error! Sifting through that 40 megabyte log file would be a pain! Anyway, it is here: http://forums.cgsociety.org/showthread.php?f=185&t=1309021 Like you have been checking on your scene, after test render it came out missing some textures. I thought, crap! the Converter blew a gasket. Turns out when I looked at the original BI version, those texture image links had non-sensical paths, so the OBJ converter in Blender had the hiccup, or it was bogus from start. The converter passed over the wonky links and kept going. Now I am trying to see if I can code it to make guesstimates on some of those image textures and perhaps substitute instead of outputting material like clay.
It’s interesting that you mentioned the Piper’s Alley Lighting Challenge #42 (model, materials and textures by Clint Rodrigues) because I am working on it but, as usual, I won’t be able to publish anything on time.
It has been not easy to work on the OBJ because texture naming convention was … a mess to be polite, furthermore there were so many duplicated images once imported in Blender that, to make it short, it took me more than 40 hours (counted) of tedious and repetitive actions to clear it. If you have put your hands on that OBJ scene you know exactly what I’m talking about.
So I went through each single material and texture to optimize and properly rename them (this was necessary to make the conversion to Cycles easier later), then I removed those flies (have you seen them?), corrected the normals of the broken windows, retopologized (decimate etc.) those tissues hanging on the foremost left building (you cannot imagine how dense these meshes where).
Initially I converted all the 100 materials for Blender Render (needed because of the way the material are built in the OBJ), then rechecked every material and texture (about 300) again to make them into BI node materials (before converting each material to Cycles). All this work was needed to bring the memory consumption during rendering down from 17GB (my poor laptop has only 8 GB) to a merely 10 GB. But also the memory used by Blender went down a huge amount after optimization and removal of all duplicated texture images. Some materials were missing the normal map and/or specular/roughness map but that was easy to fix.
Now I am trying to render this scene with Cycles, sending the job to a render farm for test and final renders. At the end it was in any case an interesting exercise.
That is pretty wild, yes you are absolutely right - when that model (Piper’s Alley) came into Blender, there are so many faces and (apparently) so many separate objects and materials, that it sounds like a nightmare to correct. One of the things that caused it to take so long is someone put detailed fly models in it and it slowed down the whole crunching process. Kind of like Easter Eggs, I guess, but that added to the size of it. If you say it took 40 hours of work just to get the Blender version set, I may pass that one up as a test. I like the other models they have for the ‘Lighting Challenges’, as they have no materials, and you are on your own to create them. Some of these are top notch models too. Anyway, good luck in completing that scene!
Yeah, I played with some of the LC scenes on Jeremy Birn’s website to learn and practice, but if you liked them then you should read his book, now at its third edition with some new content covering physically based lights, physically based shaders, Ptex, and unbiased rendering (in the introduction he even mention Blender, which wasn’t in the previous edition).
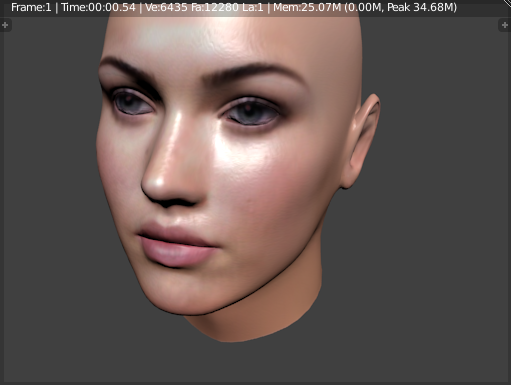
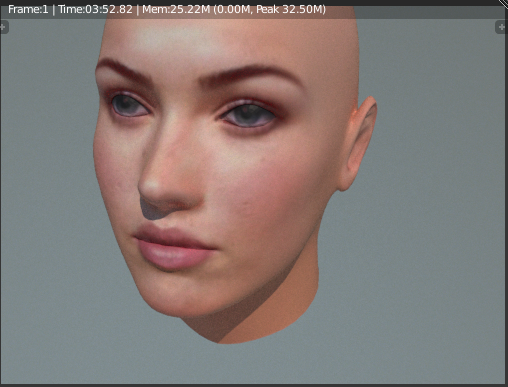
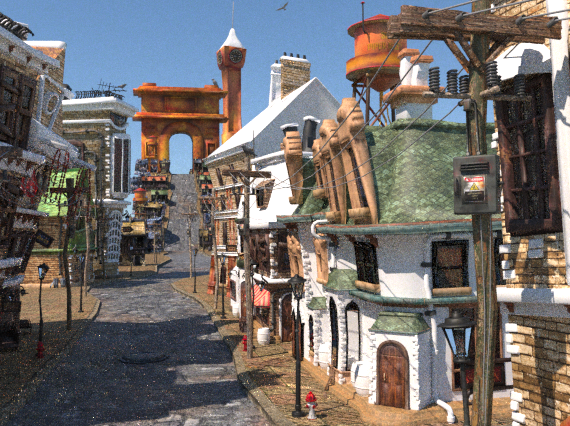
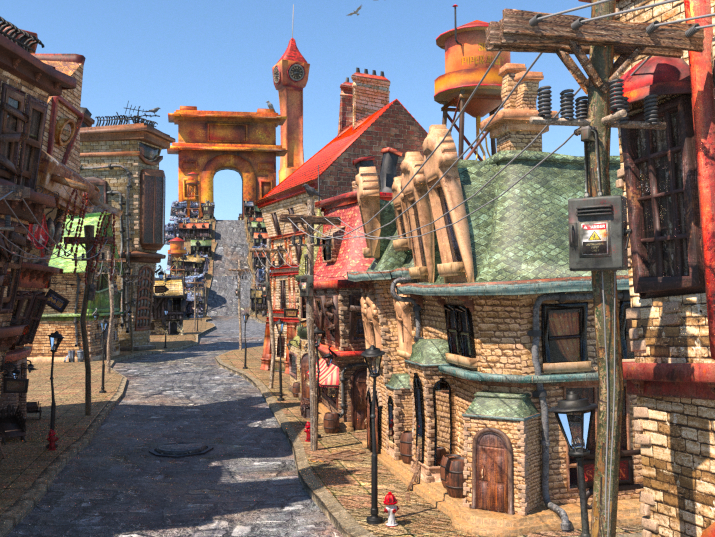
I think I will pick up his book. Thanks for the suggestion. I messed with the code enough to get the Converter to parse that huge OBJ scene despite some of the naming issues on the texture slots. Granted, there are probably many missing specular maps and ambient maps, but I think it at least got diffuse and bump - at first glance, at least. So the conversion takes 16 minutes, and then corrected code render was another 33 minutes. So the first image was before the tweaks and the second was after. I have already uploaded the new version 1.5.2 with those few changes. To abide by the CGSociety web site, The images below are from a model created by Clint Rodrigues.
I have succeeded in coding the Converter to handle transparent images. I have to run a few test with previous scenes to make sure the changes didn’t break something previously working. It works by identifying if it is a PNG, then it assumes there may be an alpha channel used. If not, no big deal. I just noticed in testing that if image has some color that shared background ‘transparent’ color, it will be clear as well. Interestingly, boosting gain reduces that, so I am going to code the gain to be boosted if alpha channel is being used. Here is that test sample un-doctored except for camera position and background color in BI before converting:
I will upload after some more tests, but I think all is good! It has tested good on other OBJ scenes like buildings with signs and what-not.