A big HELLO to the great Blender community!
You guys helped me a lot with tons of free tutorials, add-ons and tips and tricks, when I started using blender a few month ago. Thanks so much, I really appreciate it.
With my first post on BA I’d like to make a tiny contribution, as well.
Since I’m a 3D newbie, but have a history in compositing, I thought I share some un-tiling nodes I recently created.
They remove unwanted tiling patterns of image textures. And I think the results are quite helpful.
I know that there are several such node groups out there. But mine work a bit differently and I think they have some advantages – so I thought it might be worth sharing:
My nodes basically duplicate an image texture 4 times and rearrange it with slightly different position, scale and rotation. Composited with differently sized noise textures. I also added some colour corrections, which hide the patterns even more.
The cool thing is, that you have to load each image texture only once, since it gets instanced to the other 3 image texture nodes automatically. So you load Diff, Rough, and Norm texture maps once each, as you would normally do.
Instructions: (Blender 2.8)
Please append the desired material of the attached blend file. (Not the node groups!)
You can then simply select the appended material in the material pull down menu, as you would with any material.
Now the absolutely essential part: You have to load the texture maps under ‚source’ in the properties tab, NOT in the image texture nodes!!! This is essential, otherwise you break the instancing link!
(In case this happens just use the undo function. You see that something’s wrong, when the names of the image texture nodes change to the name of the texture. That should not happen. If you don’t want to use the undo, then simply delete the open image texture node, duplicate one of the closed ones below and connect it on top again, where the open node used to be. As long as the image texture nodes are named DIFF, ROUGH or NORM you’re fine.)
So click on an open image texture node, then press ’N’ to open the properties panel (you then might have to open the properties section in the panel). And load the texture map as shown on the picture below.

In the Blend file you find two different materials:
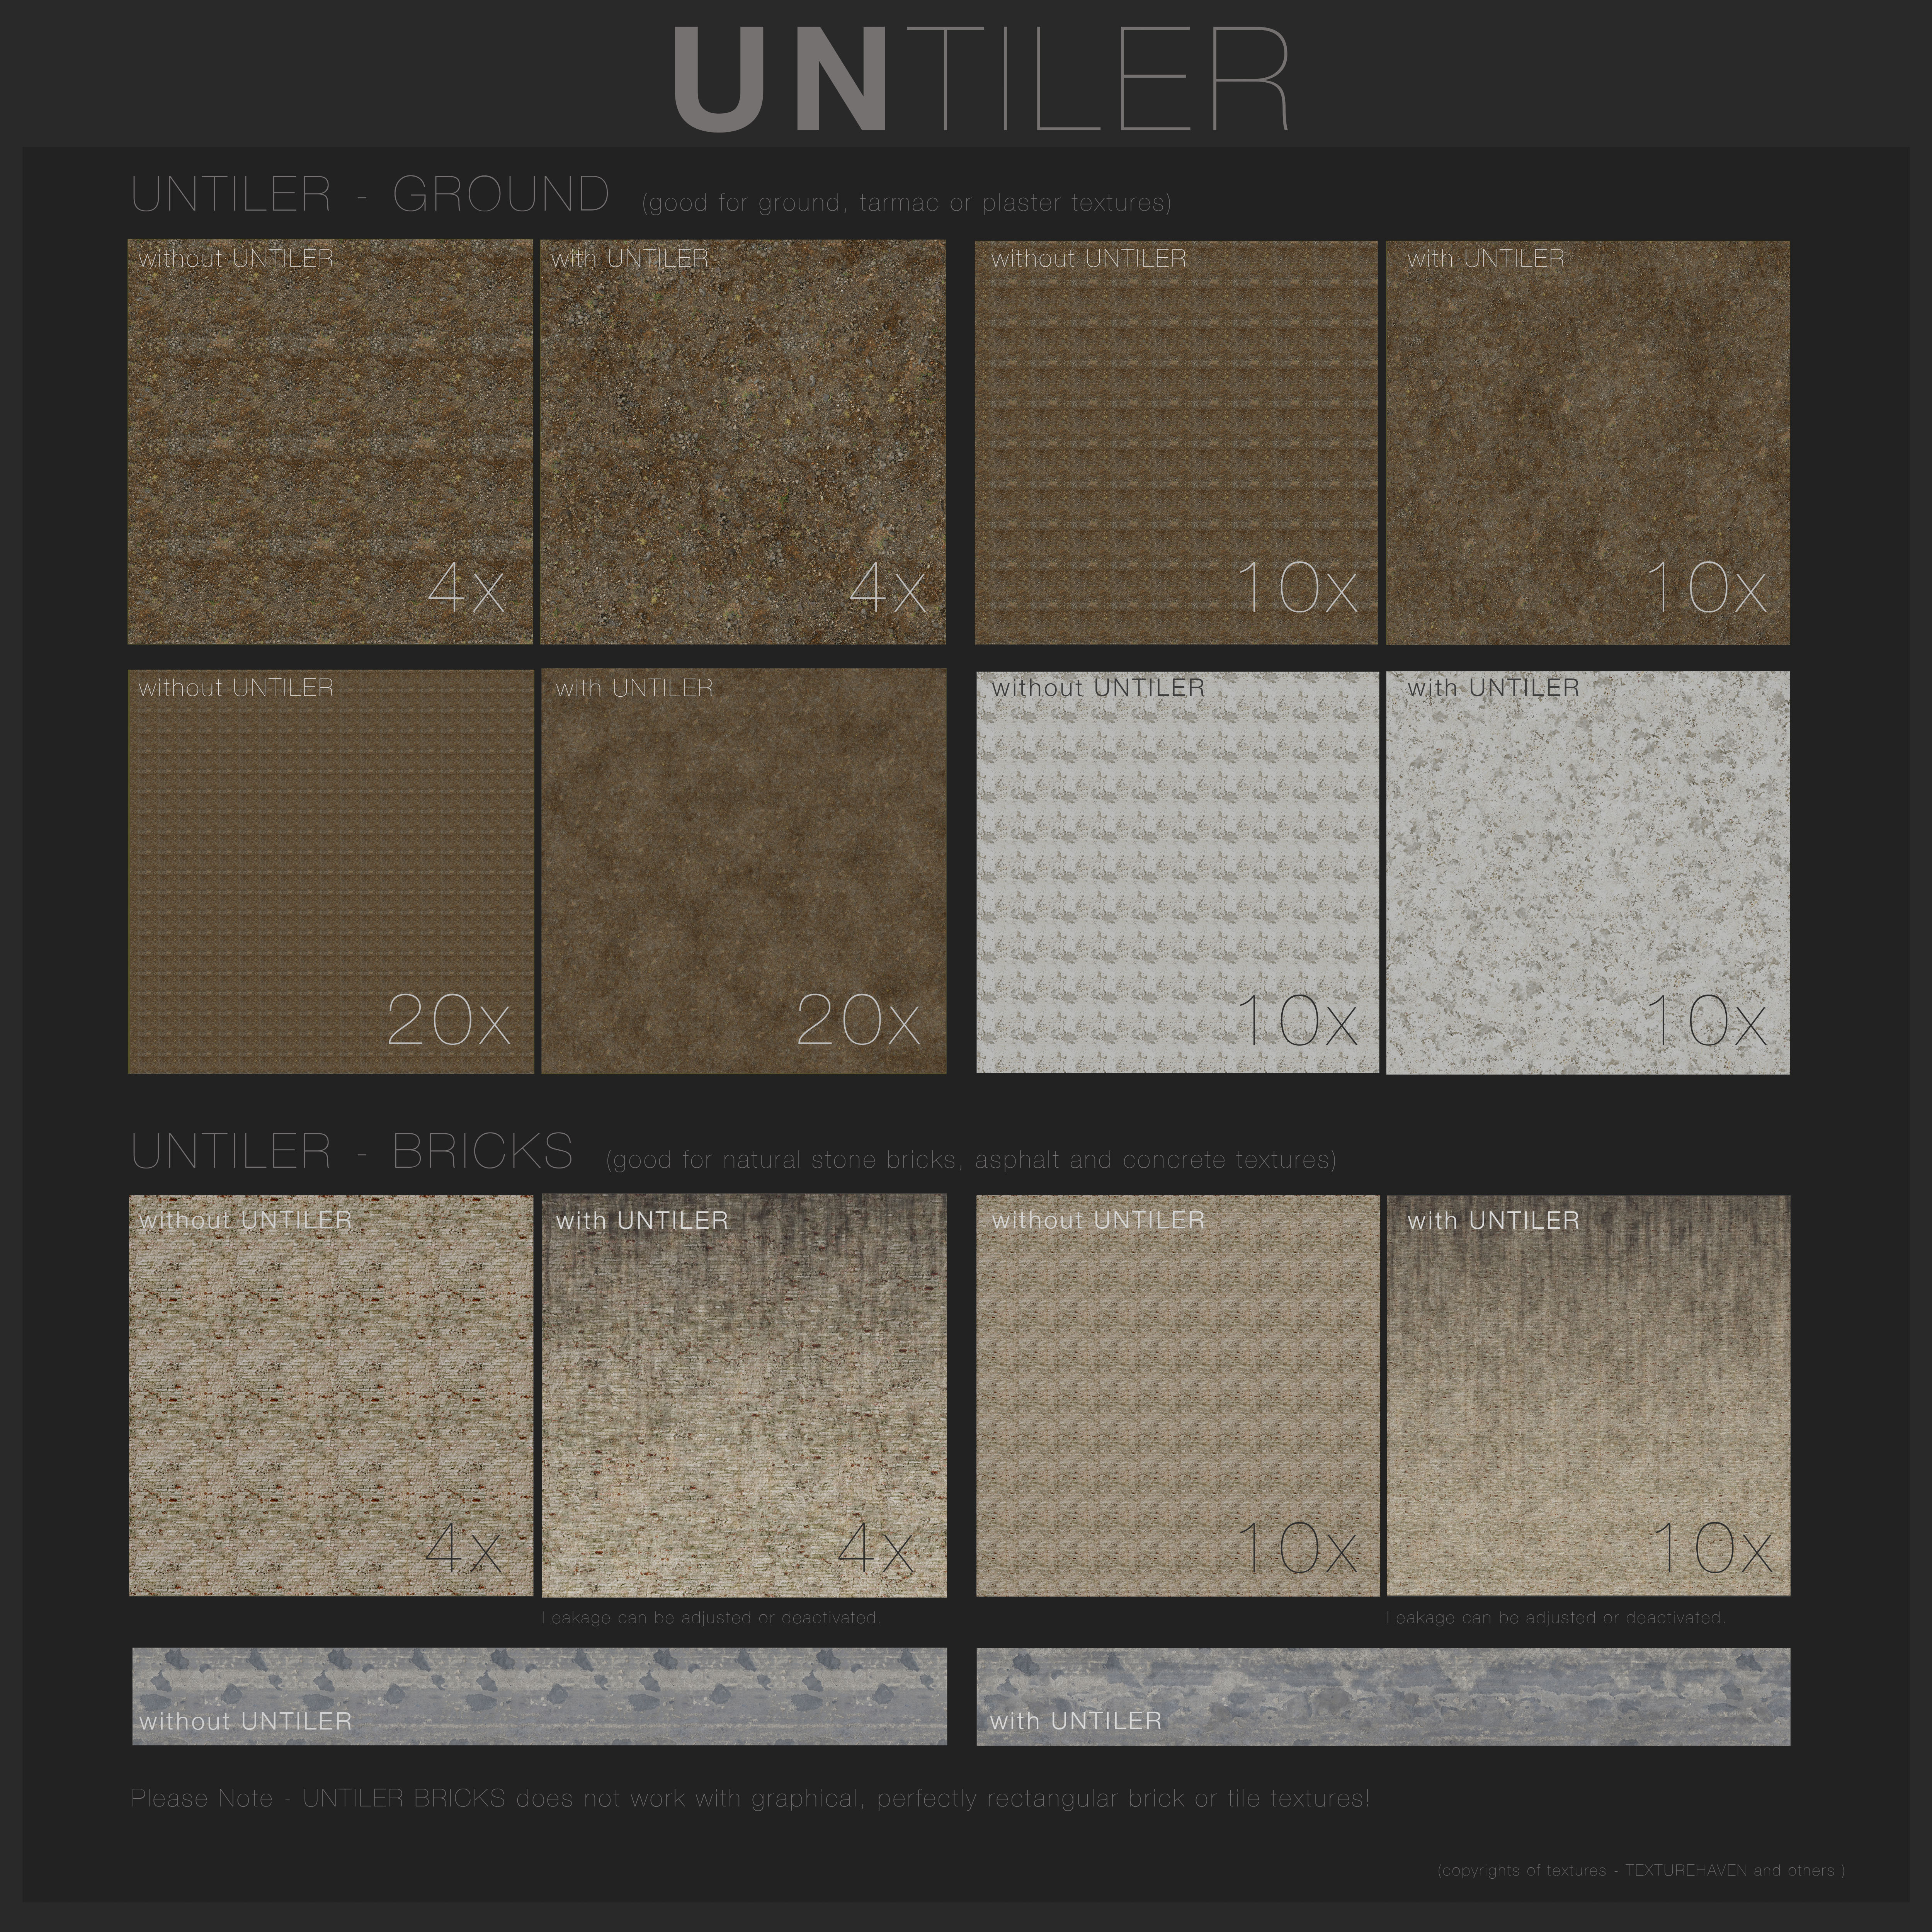
UNTILER GROUND
Use this for ground, plaster or tarmac textures. Basically for any texture map which has no graphical patterns and/or straight lines. It works with scale, position and rotations and can create really cool results.
There is one drawback though – it does not work with NORM maps. Since norm maps can not be rotated. Please use BUMP maps instead. (Use Displacement maps as Bump maps, if available.)
UNTILER BRICKS
Use it for natural stone bricks, concrete or some street/asphalt textures. For textures which have a certain graphical nature, and maybe a few lines, but not perfectly rectangular shapes like classical tiles or modern bricks.
This node group only uses scale and position to break the tiling pattern. It is hence a bit less effective. That’s why I added a leakage effect to cover the patterns even more. I think it makes sense with wall textures anyway. Of course the leakage can be adjusted or deactivated.
Here you can also use NORM maps, since there is no rotation of maps taking place.
UNTILER BRICKS also works very well with asphalt street textures. (As long as there are no white/yellow lines. Simply add those with decals.)
NOTE: It’s tricky to find a setup which works for all sorts of different textures.
I tried to find a good compromise. In some cases it might help to adjust the sharpness of the noise textures with the color ramps, though.
I often shoot and create textures by myself. In the actual sizes I need them in.
But sometimes I also use textures from libraries. Since most textures found on the internet (eg. TextureHaven, Quixel, Poliigon, Textures-com) are limited to 2x2 meters, I need to get rid of their patterns in some cases.
That’s why I created these UNTILER nodes:
UNTILER.blend (1.1 MB)
Would be great if they could be helpful to some of you, as well.
I wanna thank all of you again, for making it so easy to learn blender.
And, oh boy, how I will still need you guys. Still soooooo much to learn!

