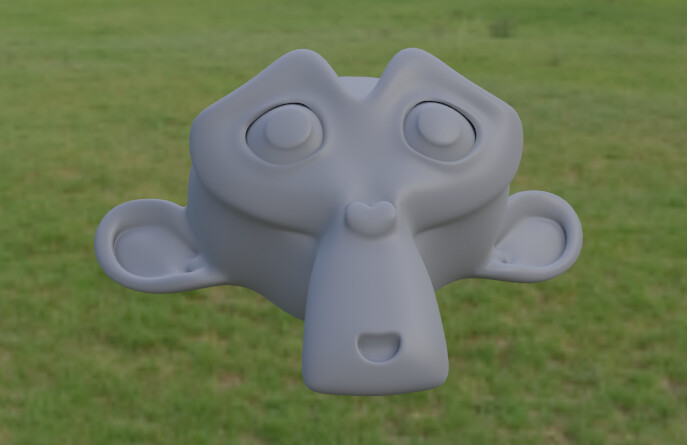
Hello i need some help and advice on how to make this photo realistic im using hdri and all textures are from megascans i’ve tried playing with lighting and composition but still i dont like the results what can i do ?
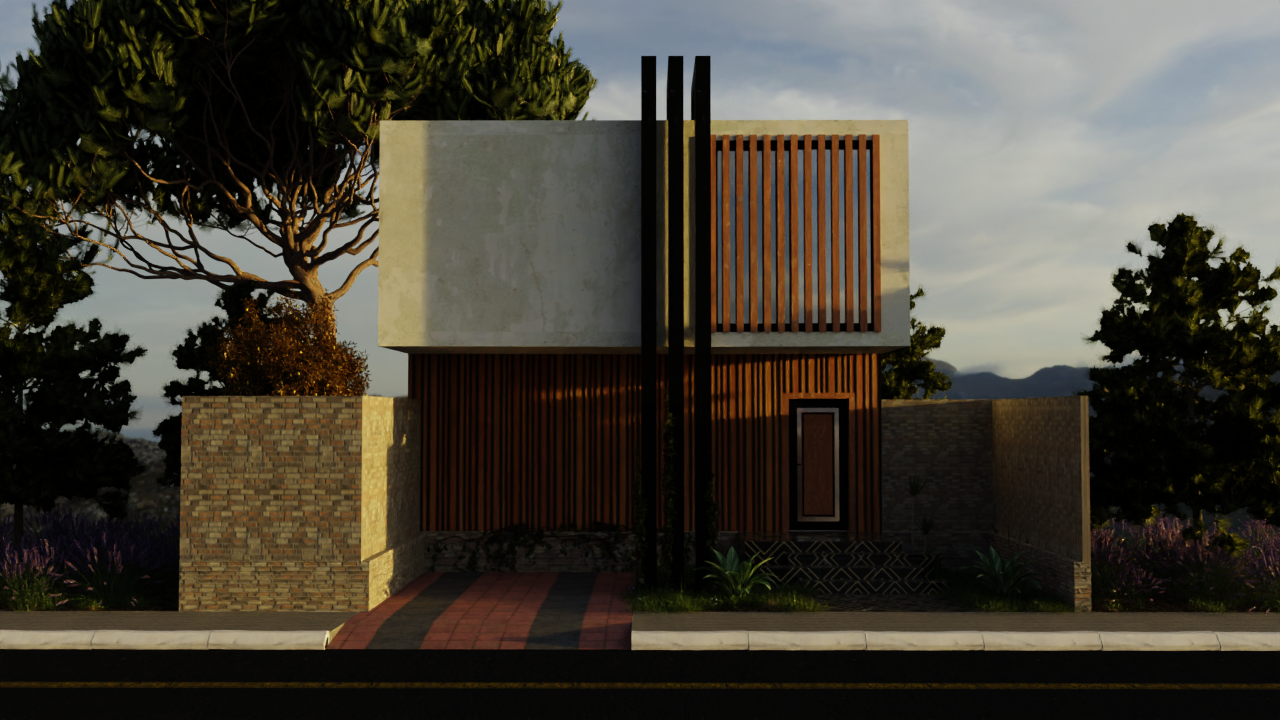
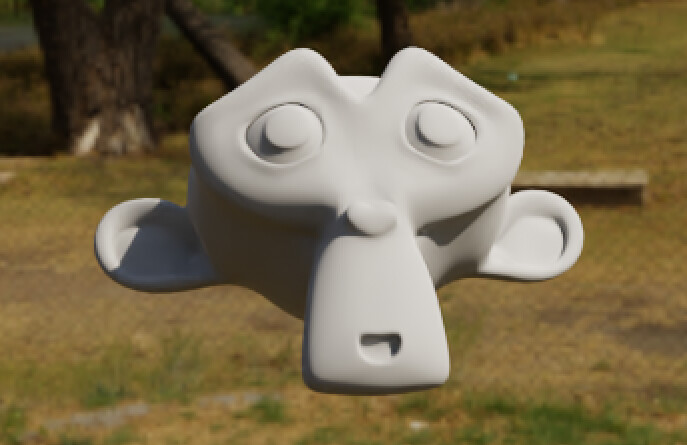
I believe you are trying to achieve your exposure corrected in the places you were supposed to have highlights. You know, in a real photo situation you would have some areas with a bit more light than desired (highlights), some areas a bit underexposed(shadows), and some well-lighted areas(middle tones). if you correct your exposition right in the direct sunlight the result is that the image will look a bit underexposed and “fake”. You need to find that middle point, something between the strong sunlight and the shadows you have in the image you make.
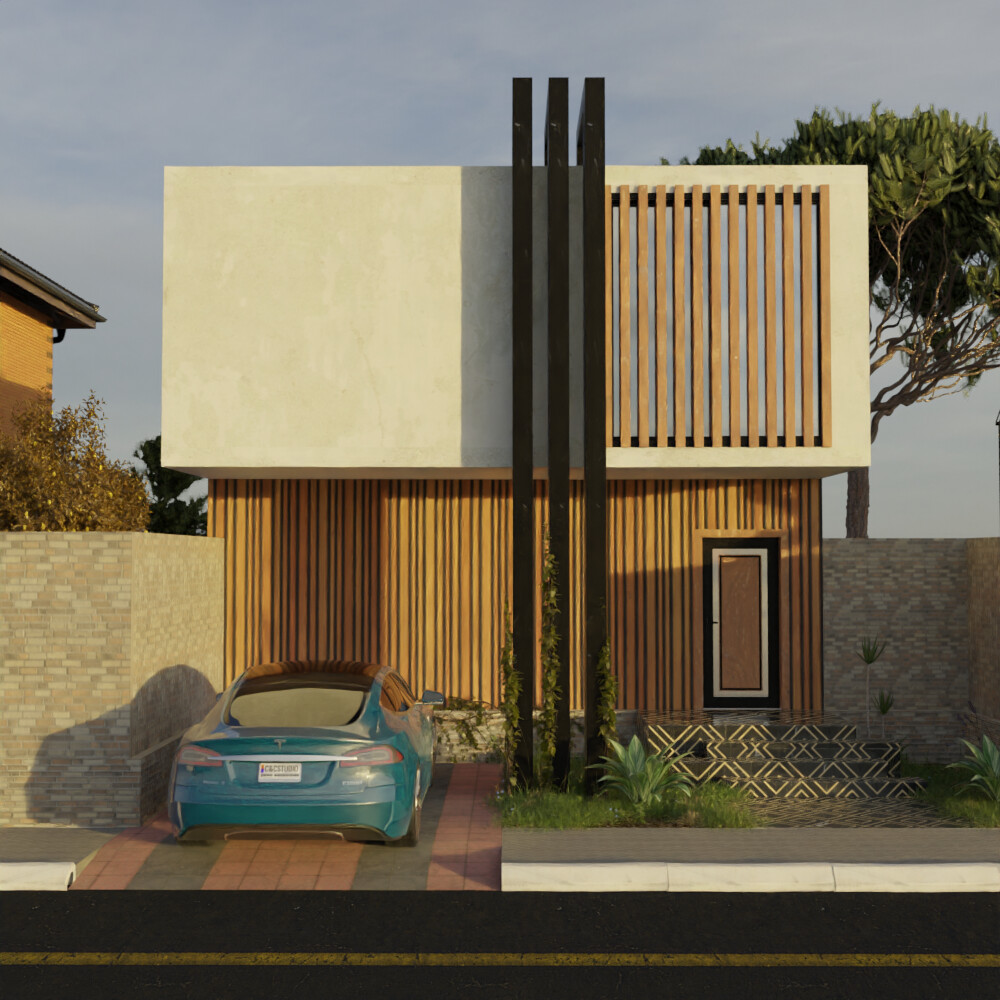
This problem is even more evident in the images with less skylight, like the second one where the shadows look too strong.
I’ve made an example to help you understand. Maybe not the best example because of the white walls, but you can understand the idea.
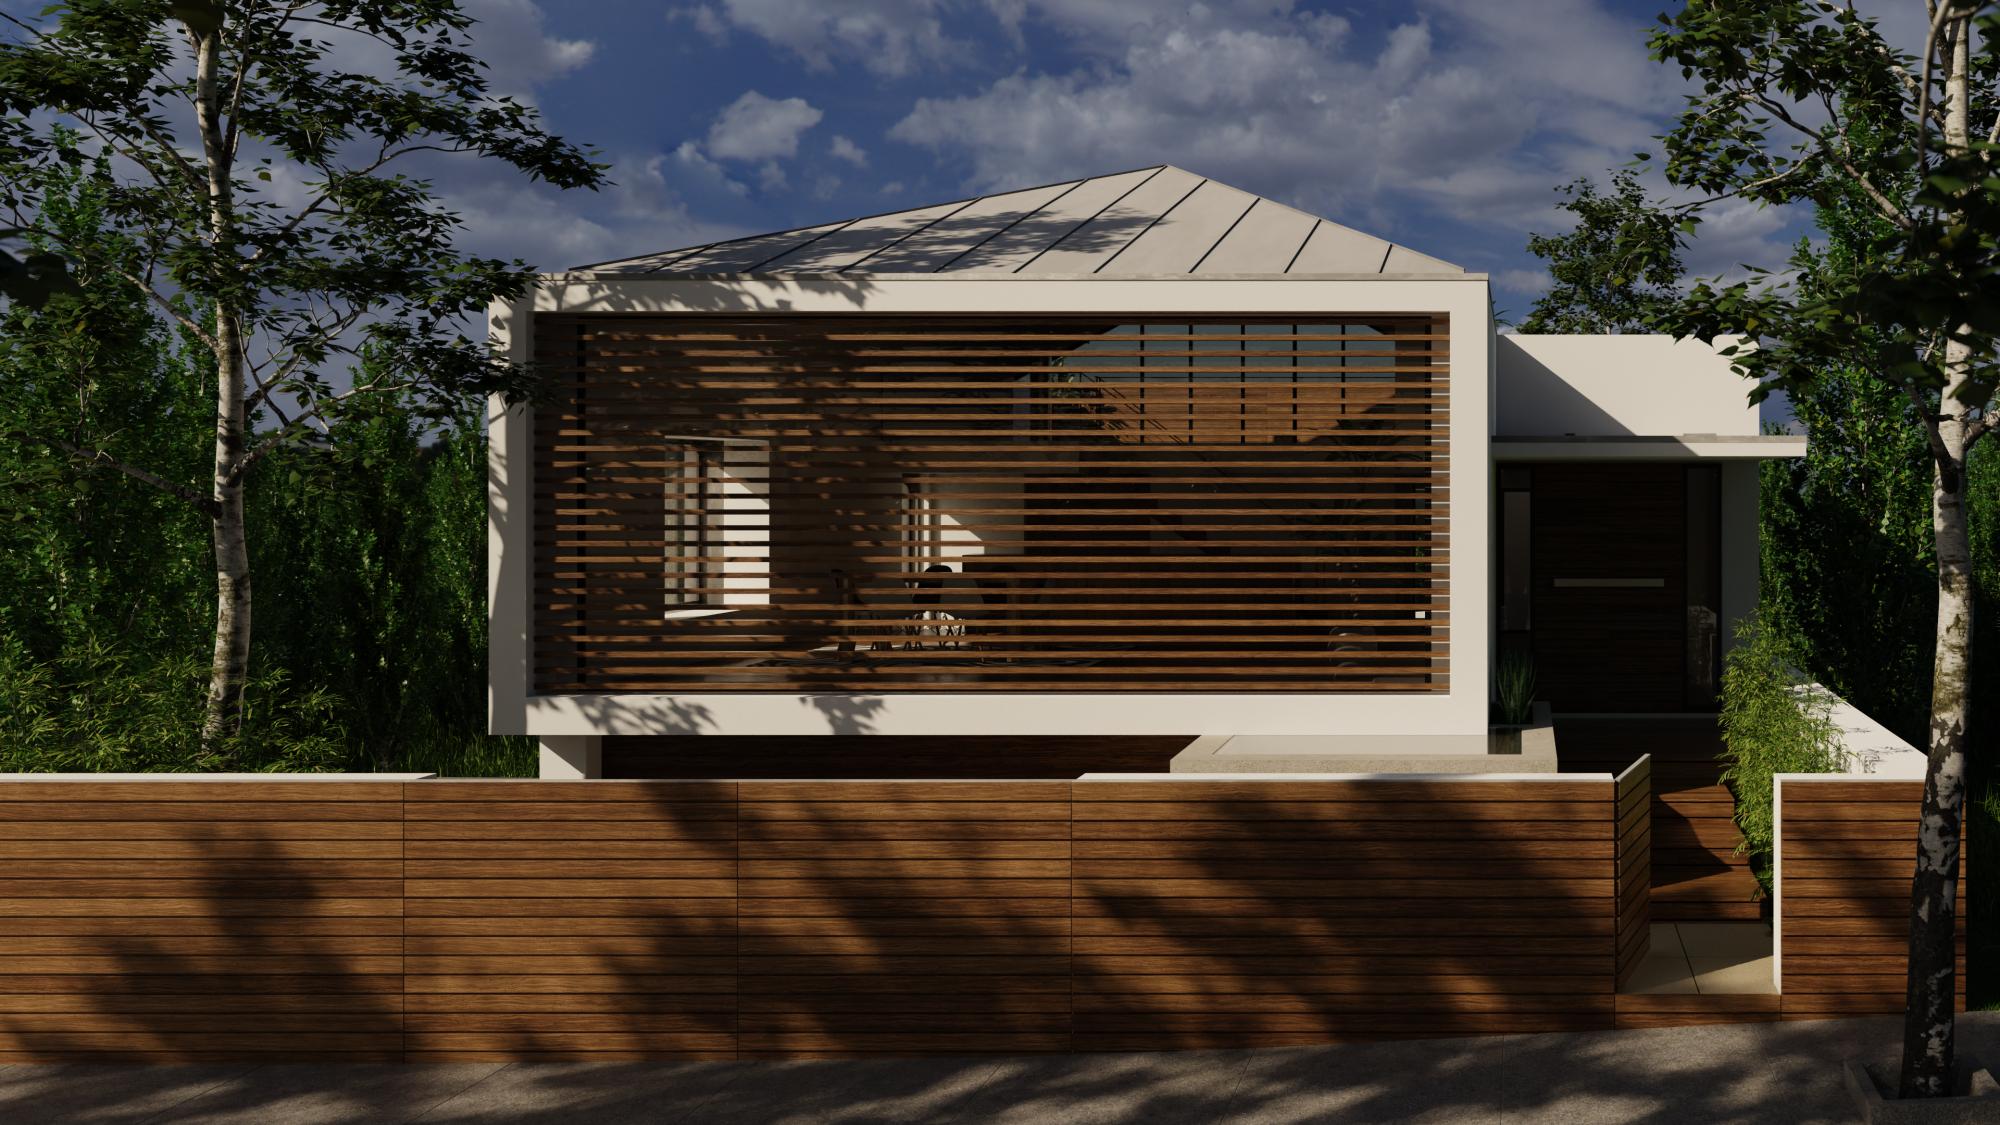
the first image is adjusted taking the sunlight as the exposure reference, the second is taking the mid-tones.

1 Like
i guess that will be adjusted in post production but i want to achieve that in the render both images have different tones because the difference of rotation in the same hdri.
I also feel like these can ve adjusted with contrast
No, that is adjusted in the exposure value in the color management tab. Those renders are not post-produced.
What you see there is how they came out of the render.
Well, I can say what I use. In the case of my renders, I set the filmic color management to high contrast and use false color to find the right exposure for the middle tones.
If your lighting is set correctly, when you have your middle tones giving the right values you should get a better render.
1 Like
okay thanks i will try your advices and reply with results
Ok. Do you know how to use false color to adjust exposure?
Didnt use it before but i know it is gradient from blue to red and i try to adjust in orange zones with some kind of blend between other gradients so i dont have sharp shadows…ofcourse i would like your insight about it
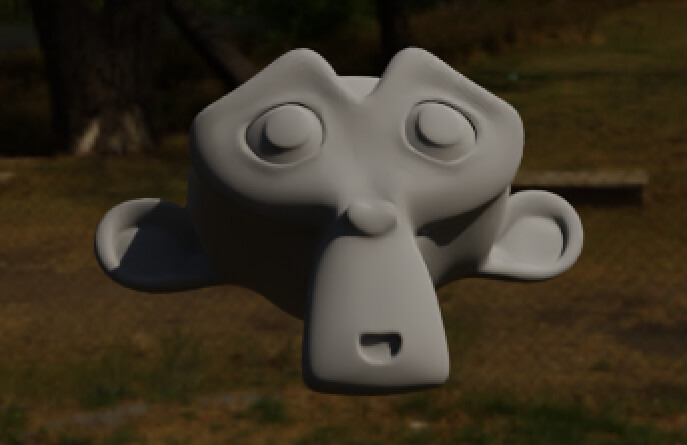
Basically, you need to create a middle grey object, I normally use Suzanne, make it smooth and give a subdivision modifier. The material should be rough and the color is grey with the value of 0.214 (that’s the middle grey for Blender) Put this in your scene and try to adjust the exposure so the “grey” color that is visible in the middle color of the false color filter matches the middle light area of Suzanne’s head.
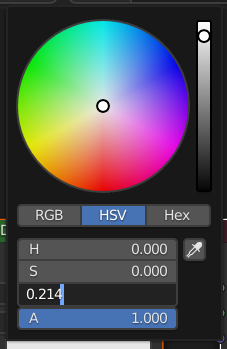
You can see that grey in the marked area here:
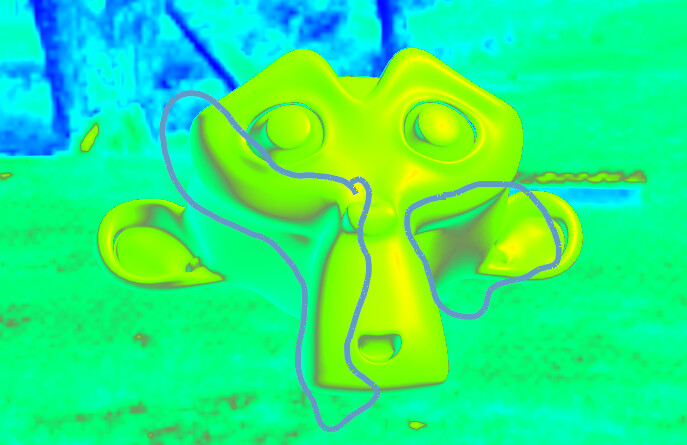
There you can see that the areas in the direct sunlight are a bit overexposed and the shadows a bit underexposed.
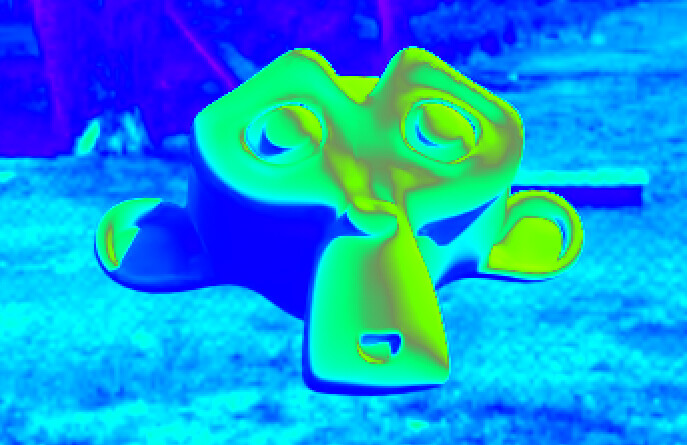
In cycles, with high contrast it looks like this:

Sometimes, it’s useful to reduce the contrast a bit to be able to see better the grey areas.
The result of that measurement in cycles looks like this:
If I had adjusted the exposure for the sunlight instead of the middle tones the false-color would look like this:
And this would be the result:
Don’t forget to make your material rough, it helps to see clearly the grey areas.
1 Like