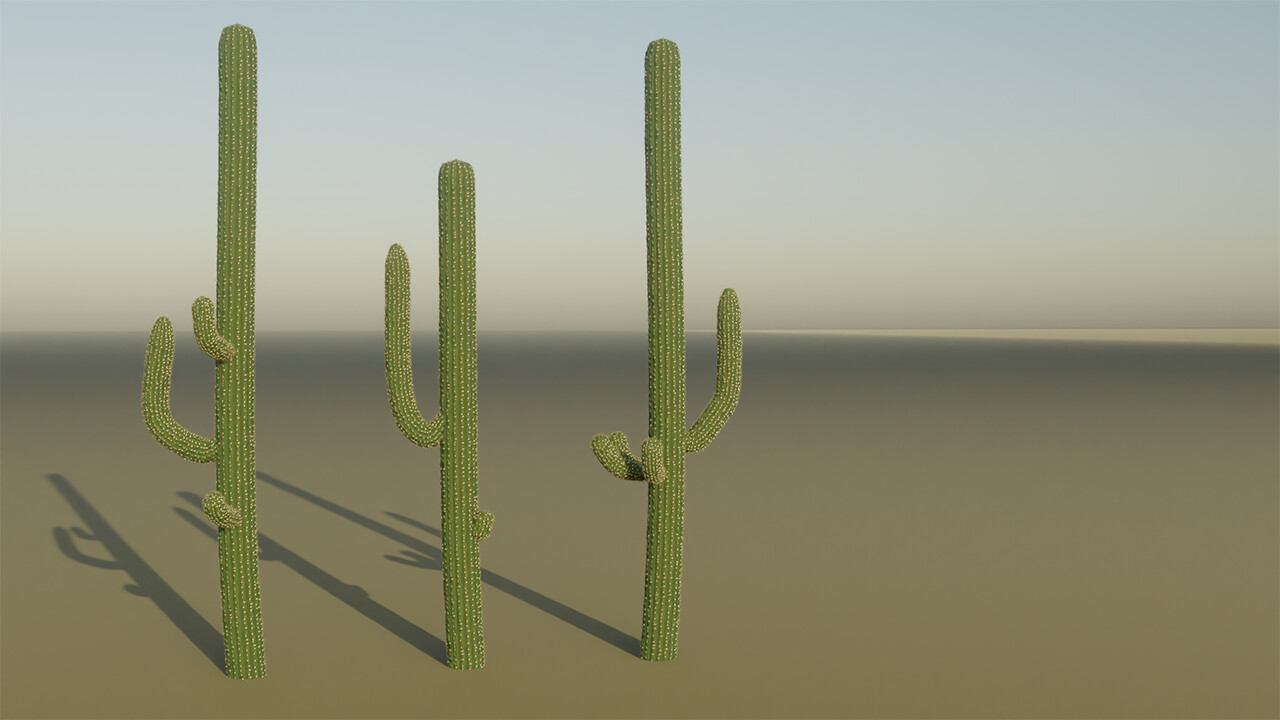
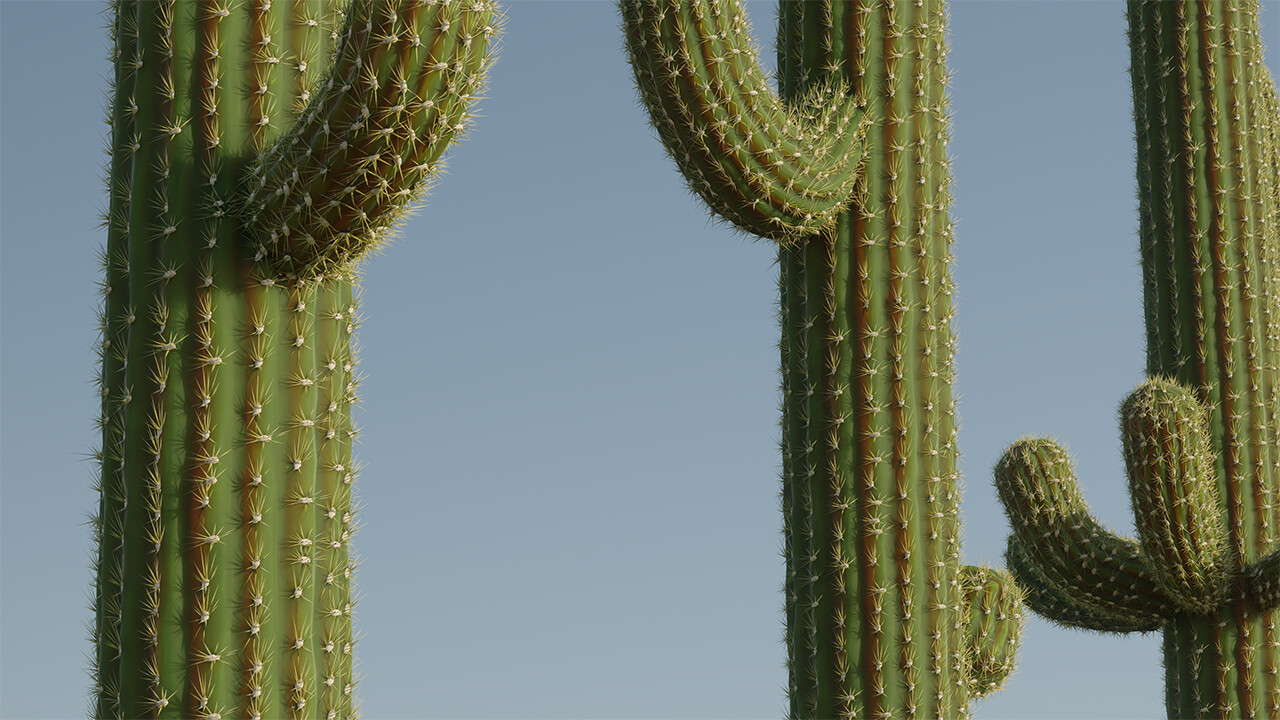
So i’ve made some saguaro that i am fairly proud of. Using Geometry Nodes to create the ridges along the length of the trunks & limbs, and to instance a variety of thorn clusters along those ridges.
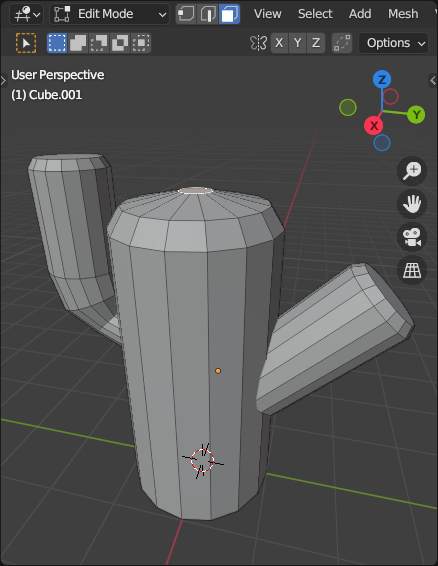
All of which produces a hell of a lot of geo. Even after stepping on these heavily, both prior to & after Geo Nodes > Realize Instances, these are quite heavy.
Which for hero & close-up shots, these (and about 5 other variations) will look great in the immediate foreground. But I would like to place many dozens of these in the background distance. Far enough away from the camera, after some DOF, the thorn and ridge detail ought to be a texture versus geometry.
But i am stumped on how to convert these; make variations of these where the detail is a texture. Any nudges slash hints slash stand-out tutorials on how to achieve this?
Thanks for your response. I am not at all opposed to the solution being based around an add-on, paid or otherwise. However, the add on you suggest is Eevee only, whereas i will be rendering out in Cycles.
Hmm… if the trimmed down version for $20 doesn’t include the paralax effect… then i see no reason why a simpified render shoudl work with cycles… you may just ask teh addon author ??
Anyway… what’s about appling the modifier and then the “usual” highpoly to lowpoly baking… ??
@Okidoki
Thank you for the response. It is precisely these “usual” tactics that I seek to learn more about. Other than using the Decimate modifier, i have not been exposed to high poly to low poly baking process. And other than seeing it mentioned in other posts, I am eager to digest some best practices in terms of the billboard trick.
Any tutorials or explained process for either method is appreciated so I can bootstrap myself the rest of the way?


")

