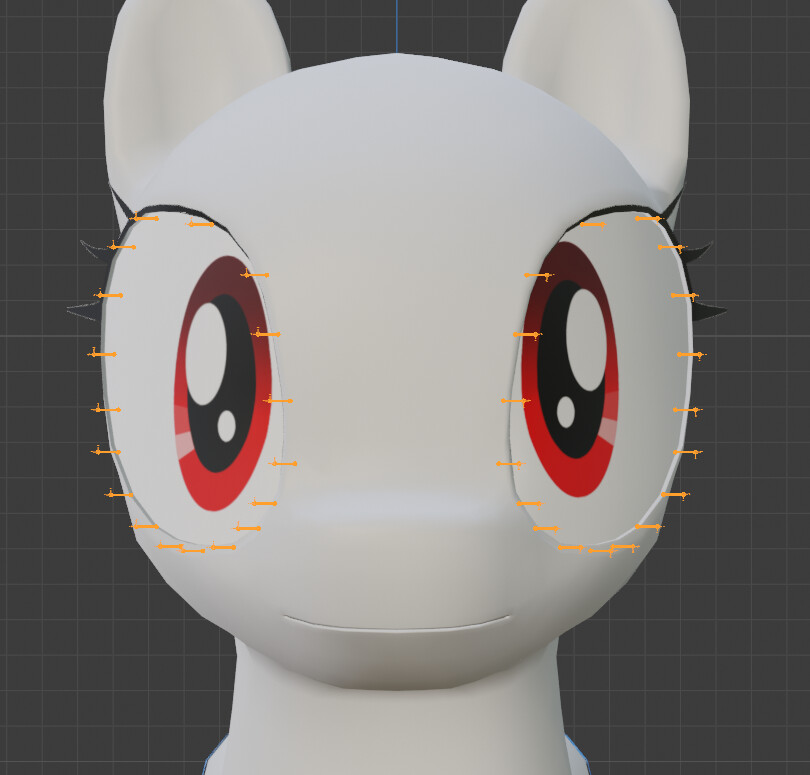
The eyelashes themselves are on their own planes which fold down with the eyelids. I have selected the eyelid edgeloops so you can see it a bit better in orange.
For a lazier but annoying alternative…
.
Make shapekeys only for your character’s mesh (and not the armature).
Essentially, you move the vertices in edit mode to eye-closed positions, and save this to a shapekey that you can turn on or off (or halfway).
But just so you know, here are some things that can go wrong with shapekeys (at least for me in blender 2.79):
sometimes, after adding shapekeys for various face expressions, I want to edit the base mesh.
But sometimes I forget that I have a shapekey selected.
So I accidentally edit one particular shapekey instead of the base mesh.
(E.g I make the arms bigger but it’s only for a “happy face” shapekey).
And it’s not easy to transfer those changes to the base mesh (assuming it’s possible at all)
editing a mesh with shapekeys can “corrupt” your shapekeys, making them unusable. So you have to remake them afaik. I think this happens if you add new vertices to base mesh after adding shapekeys or something.
I don’t think you can apply modifiers to a mesh with shapekeys.
I find that I want to animate the character while I’m making the mesh. I dunno, maybe professionals aren’t as impatient as me.
Maybe I should start using the rig/weight paint method.
I think that if you add a subdivision modifier after your armature, you’ll get instantaneous improvement. For that matter, reducing the vert count would improve it as well. When you start with few verts and subdivide, you’re a lot more likely to end up with something smooth.
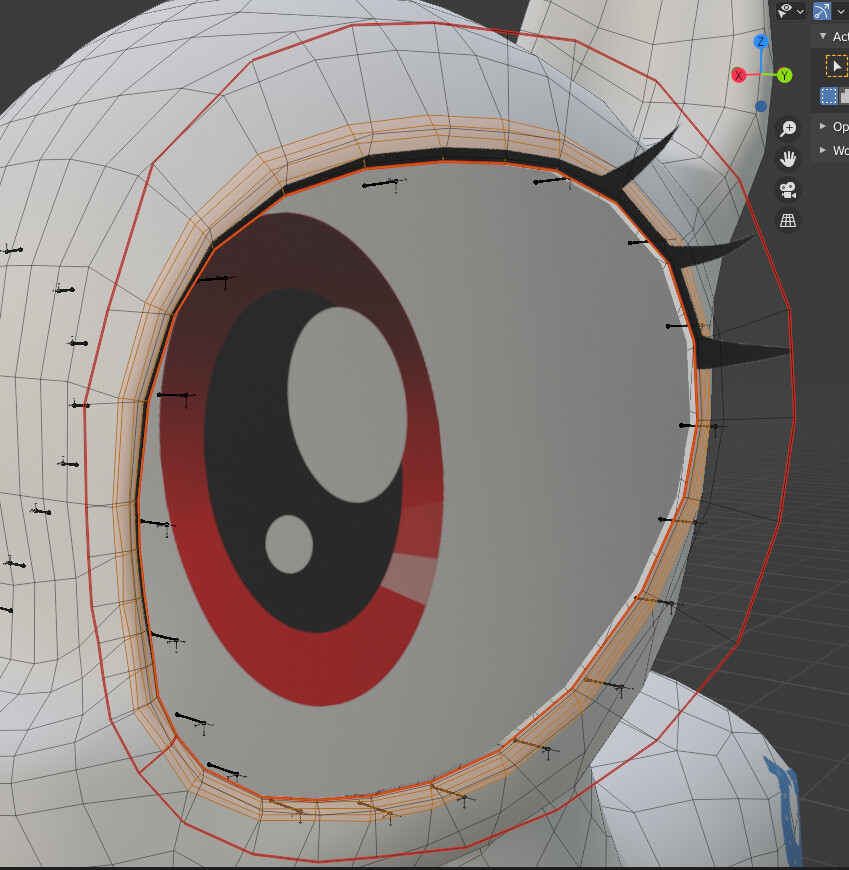
The rig looks weird to me. You have almost as many bones as verts in the loop. And the bones seem placed haphazardly. It’s not clear how you plan to animate this-- by moving each of those bones individually? That would be a giant pain in the butt.
I would say, either use fewer bones (which is easier to manually weight paint), like 6 or 8 bones per eye, or else go all-out and just use one bone for every radius of the eye, which would also be easier to weight, because each radius gets one and only one eye bone that way.
I’d recommend just ignoring the eyelashes until you get the basic weights of the lid right. When doing the eyelashes, they need relatively solid (unchanging) weights so they don’t stretch and deform, and they need to rotate. Right now, that rotation is probably never going to look right, because of the placement of your eye bones (not really right at the lid). If it turns out that you can’t get the lid right and the eyelash rotation right at the same time, you can always create eyelash bones (hopefully, controlled only via constraints.)
Sometimes, I weight paint by creating a plane and data transferring from it on nearest face interpolated. I can cut the plane and assign very few verts and, via the data transfer, get smooth, linear weights automatically. This lets me weight something high poly if I want, lets me tweak weights live, non-destructively, until I’m happy with them.