Why?
exactly
as starting point, you can use the diffuse 0.18 grey shader method, to get a well adjusted greypoint with filmic,for a look dev.
Why?
exactly
as starting point, you can use the diffuse 0.18 grey shader method, to get a well adjusted greypoint with filmic,for a look dev.
Troy gives some thoughts about the grey-card method in:
I used to use the grey-card method indeed, and that’s my only reference I have. And he says this:
Bear in mind that the idea of “middle grey” is the connection between the radiometric-like quantities of light and some sort of “fully adapted” thing. That is, if we stare at a display with a block on the right that is emitting 100% sRGB R=G=B light, and a block on the left emitting 0%, 0%, 0% light, a value in the “middle of the two” is approximately 18-20% emission in radiometric terms from the display.
That is, it’s an anchor that is the only viable one, as the upper and lower ranges within the scene can vary tremendously.
There are quite some things I need to dive into: radiometric vs photometric in laymans terms. And do I use the false color and grey-card properly, practically. (I am not so good in interpreting theory without seeing or experiencing examples.)
Yes they work together no matter the lighting. But, see what happens when I start Blender and going to design a material (without greycard this time, because barely anyone is doing it I get the impression. Besides that I am not to sure now. ):
Such things do happen, frequently. See the comparison of grass products in last render. Another example, I have here an addon called “Real Snow”. And that is using an albedo of 100% white.
Another example;
And I could go on with a whole list of scenario’s.
Yes that is what I use so far. Could it be that something has changed for False Color in Blender 2.83? I rember I used to get grey, but can’t get grey in False Color view anymore. Looks like we suppose to use green now?
I had tweaked the original version to show more variation, and in doing so, accidentally over-constrained the slab of grey. Not sure, but you can try the False Colour in my branch as a test to see if there is any difference.
Test where I render grass patches from Quixel Megascans in different HDRI that have grass, to get an impression if their albedo values are off or not. (Maybe hard to see if you don’t know it.) It looks quite ok. Few thing not right, but that is because I didn’t include translucancy. So it’s not way off at least. 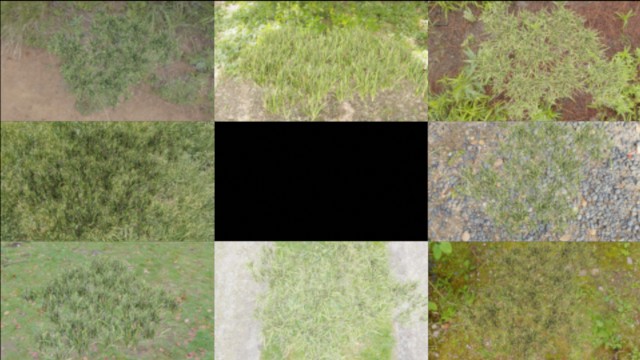
@troy_s Thanks I will test today.
I just need to replace Filmic_False_Colour.spi3d , from the Master Branch?
That should work.
I had to rename the file to: filmic_false_color.spi3d (without capitals and color instead of colour, Blender couldn’t find the file otherwise).
But got barely any grey:
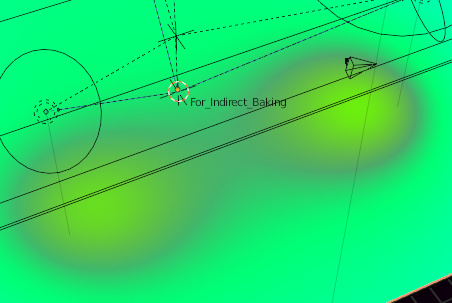
But I could work with this as well.
That was a request from a studio. Try master now. I’ve widened the range ever so slightly.
That’s fast. But I am not sure if I see much difference. But it’s also ok.
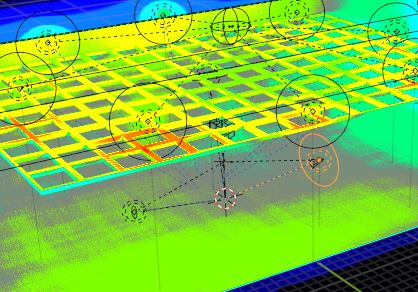
The problem is that the value the grey represents is literally an infinitely small “slice” of radiometry. If the visualization becomes too wide, it begins to obstruct the interpretation of the other adjacent values, and in fact degrades the ability to deduce what values are approximately middle grey in terms of photometric luminance.
So for a solid emission plane at 0.18, it should be a solid block of values. For a reflection, the value should likely be much more close to the band that represent the 0.18 range.
Hopefully it can be seen that it is an attempt to dial in a Goldilocks range.
It is not a good idea to create a PBR material in a random low light conditions.The best advice is still to start with a .18 grey setup for a look dev.This way you can have a basic ancorpoint for every PBR mat you create and see in the scene.
All the Quixel textures are adjusted to the greta mcbeth colorchecker chart,as you can read in the quixel link above.
Each albedo is consistently scanned in a controlled mechanically automated environment and calibrated using the Macbeth ColorChecker standard.(from the Quixel link)
With the 0.18 grey setup you do almost the same,finaly you can choose the filmic look to get the contrast to your like.
Another tip,if you want to make a own concrete albedo, then load a concrete albedo from a PBR texture pack you can download here as example https://texturehaven.com/textures/?c=concrete
or Quixel library ect,and useing this as your starting/basis values.
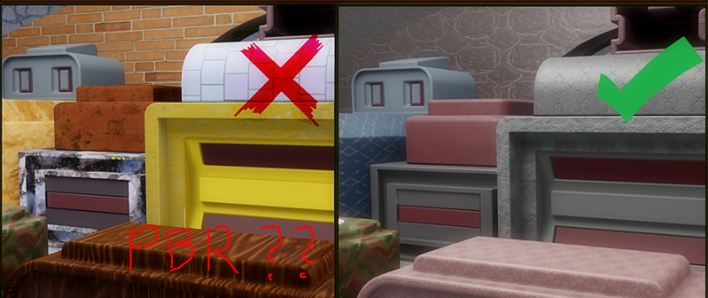
Yes ancorpoints. I love that. Used to use 0.18 setup to design materials. (see on the right of image below).
I think I go for quixel which sounds interesting, but definitely not sites like texture heaven. Here is why:
On the left you see I loaded “PBR” material from such sites. It’s completely messed up. I’ve seen textures with 100% white and 100% black or 100% one of the primary colors. I have also the Extreme PBR addon, but it has nothing to do with PBR. It’s using texture from those site, and…it is also using brightness and contrast to adjust the textures. Getting those textures is the exactly the same as getting getting albedo values from a chart you don’t know how they derive the values. Is the texture taken with an iPhone, and all kinds of things could go wrong converting to spaces, formats etc,
So next it downloading some textures from Quixel, and see if I can derive some useful values from there:
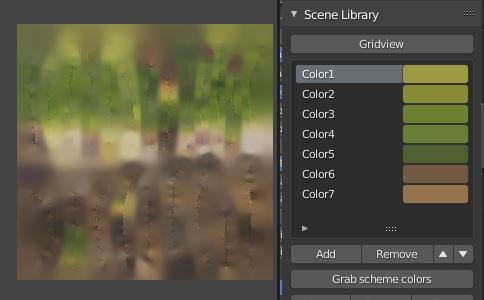
Not sure if it will work, but I’ll see. I think it’s the best bet so far.
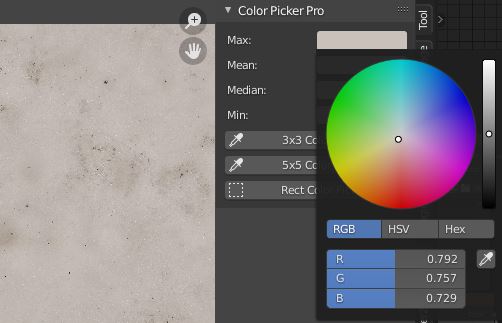
Ah, look at that. It’s the first time I see a snow-texture that doesn’t have 100% white. And it’s from Quixel. Seems that is what I am looking for:
I’ll go a step further, and it’s something that the various development folks haven’t yet gotten right.
As everyone in the thread understands, an albedo is a reflectance value. We can visualize a pretty reasonable model of this if we follow through.
That is, if we visualize the camera perfectly orthogonal to an albedo texture plane, and an illuminating diffuse source directly at the camera and projecting at the albedo, a few useful inferences come from it.
That is, if we want as-close-to-idealized representation of the albedo surface, we want to see the radiometric reflectance as closely as we can. We’d ideally want to see 100% emission at 1.0 units of light, 50% emission at 0.5, 18% at 0.18, and 0.0% at 0.0.
There is one means to have an SDR sRGB-like display output that range of light, and that is to toggle on the display’s native transfer function. In doing so, we are taking the code values as input as radiometrically linear ratios within the display linear range, and encoding them such that the display will decode them as a “no operation”, and we will see the linear light output directly from the display.
This can be easily done with a well-designed colour management system and configuration, simply change the view to the display native transfer function.
When designing in “look dev” mode, it would therefore make sense that if someone were hoping to see the albedo ratios “as is”, that the light is constricted to being exactly single source, diffuse with no glares, lens-like focusing, or accumulating reflections, and set to a strength such that code value 1.0 reflectance ends up yielding 100% display output. That is, essentially turning the albedos into direct emission sources from 0% - 100%. The rest falls perfectly into place from there.
Even with the “idealized” setup above, it must be noted that some objects absorb quite a bit of visible light, and as such, judging some of those tricky albedos via the output of light from your display, should be taken with care. A high bit depth OLED display, for example, will have a much better range down low.
Be careful with values above 80% display emission and below 5%. Your display may become a problem with the above general outline.
Yeah, well, “Real” doesn’t really mean much these days, I wouldn’t give it much weight. HDRI’s are often clipped (like Barcelona rooftops). Snow is a very high albedo material, but in albedo lookup tables you’ll find it usually at around 0.75-0.9 - personally I would never let anything dielectric go above 0.8.
Similarly “realistic” PBR materials I find to have very dubious quality. Roughness and normal maps seem to always be some derivative of albedo - indicating “sloppy” work, and albedo often need to be adjusted to get into albedo ranges according to cheat sheets. Basing it on a desaturated value, use RGB->BW node rather than HSV node. I don’t know what kind of normalization it does on the colors, but HSV node does nothing. These are ballpark values, don’t melt your brain over them.
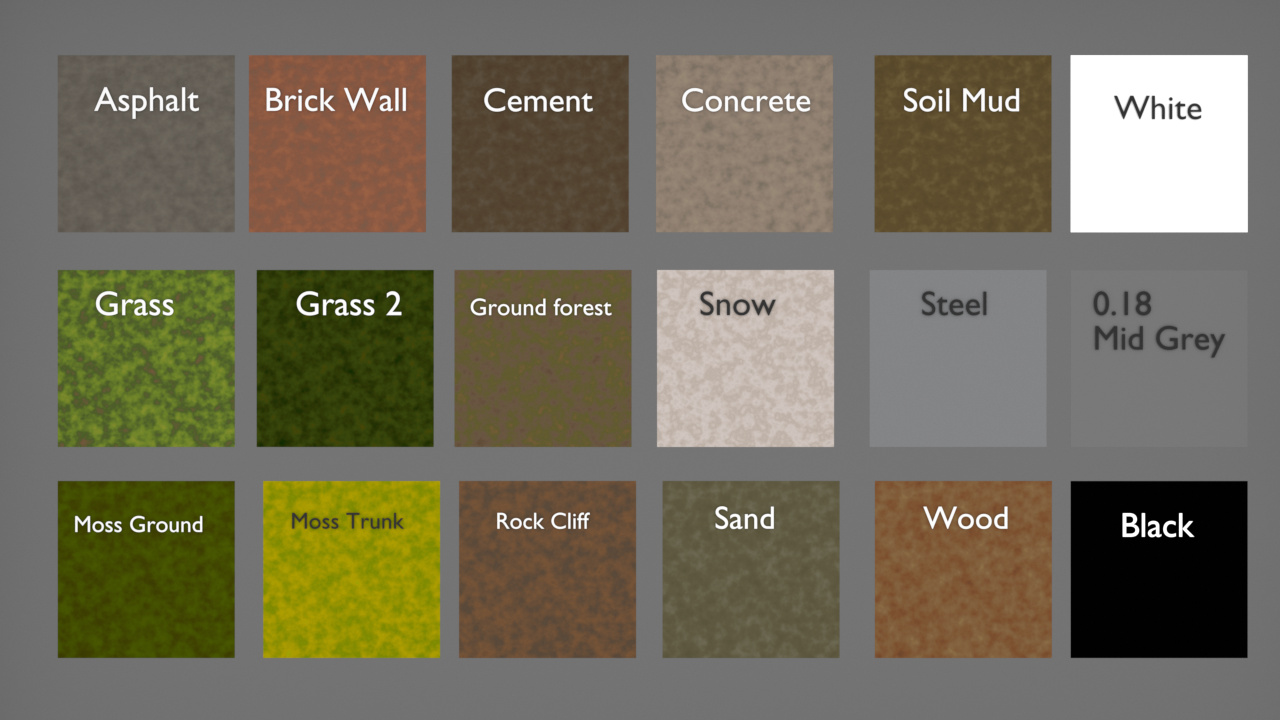
Here I did an experiment. Goal is to see if it is an idea to get albedo values from Quixel Megascans.
Downloaded a few albedo texture from Quixel Megascan. (Couldn’t find info about what technology they use like crosspolarization: Your search - cross polarization site:quixel.com - did not match any documents.).
Picked a bunch of colors from the albedo maps and feed them in a colorramp. For each card one albedo map is used.
Light is an rectangle area light shining on the cards, camera on same location.
Calibrated scene with grey-card, false color and exposure.
Rendered out with default view instead of filmic, because I need the uncompressed data.
Result it this.
What I see at first sight, is that there is a huge difference in “Grass 2” and “Moss Trunk”. In real life there is not such a high contrast between the two: from a distance you wouldnt probably notice is if was grass or moss. So, maybe something went wrong there, or they don’t use a technology as consistant as we think.
Oh yes, and never mind the Steel. I don’t know how to represent albedo of that since it’s a metalic.
Not sure what this will lead to.
They keep the hardware scanner and processing secret.however the method to get diffuse albedos from scanned data/fotos is well kown.You dont need to know how they get the albedos.
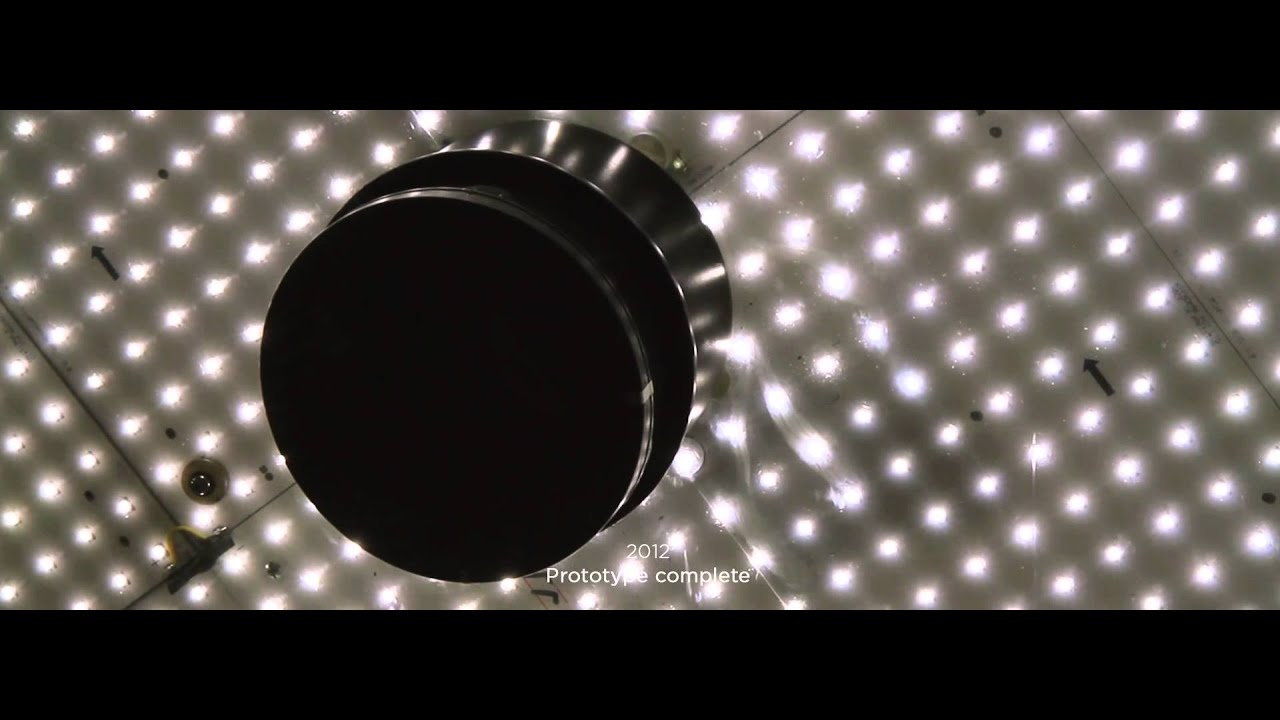
here you can see the most used scanning methods and more
https://www.pauldebevec.com/
I am not sure what you expect, if you make a colorramp with a bunch of colors from the albedo maps.
Dont blame Quixel,i think you cant get better PBR scans outhere.
If you have Metal Materials you have to load the Metallic map/mask for masking in the principled shader(metallic input).
Below albedo-maps from Quixel. On the left grass and the right trunk with moss.
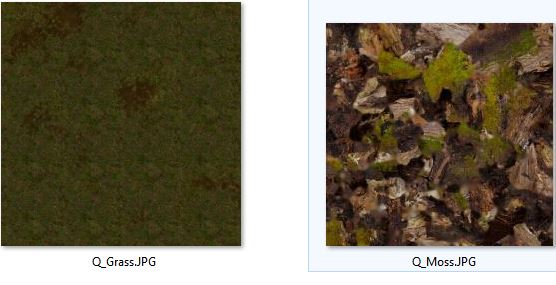
I can’t believe this is correct.
Yes, realized afterwards that colorramp is not a super idea. It was to create those cards so I could see nuances of colors.
On the left we’re talking about values around 0.2 and on the left 0.6. And snow can be around 0.8.
Update, I see now that moss can be quite bright compared to grass:
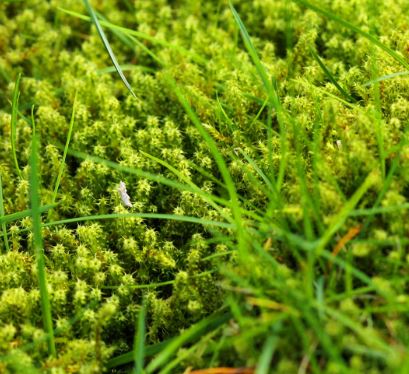
But not sure if the difference can be that big as in the Quixel albedo maps.
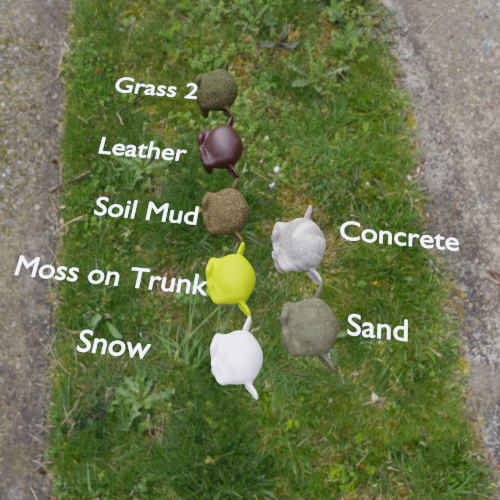
Here the Moss on Trunk material stands out as well. The rest seems to be ok.
Albedo values are approximate values. You needn’t to obey this 100%. Different situations create different material values. Scientific measurements says albedo value of snow can be high than 80%, or low than 80%. Reflection values can be high or low.
If you want create really realistic materials, you can read academic material measurement values. If you only want create artistic materials, then you don’t tire yourself too much. Trust your eyes.