Hi, is it possible to create materials like PBR assets in ambientCG.com on our own using a mobile camera? I have a 100MP Quad camera on my mobile phone. Planning to use it on personal projects and learn how to create them.
I mean, we can take a picture of say, floor or fabric, but how to create color, displacement, normal, roughness etc PNGs to use with Node Wrangler?
There are specific workflows in substance designer for generating accurate maps from a set of photos for example. You may have some luck finding a free tool that does that, but I believe substance sort of crushed most of them.
You can use a similar software to “guess” advanced maps from pictures. That’s when ambientCG indicates “approximated from bitmap” and I also believe substance designer is the best there. You can try yourself with tweaking an image inout with the Blender node system too. That sometimes works well for roughness and bump maps. You can also try to apply image operations as pre processing to isolate what you want by separating channels etc. In Gimp.
A faster way is procedural generation, which exists both in substance designer and in Blender through the powerful nodes system. If you want to design tiles for example, I thinknit is the way to go.
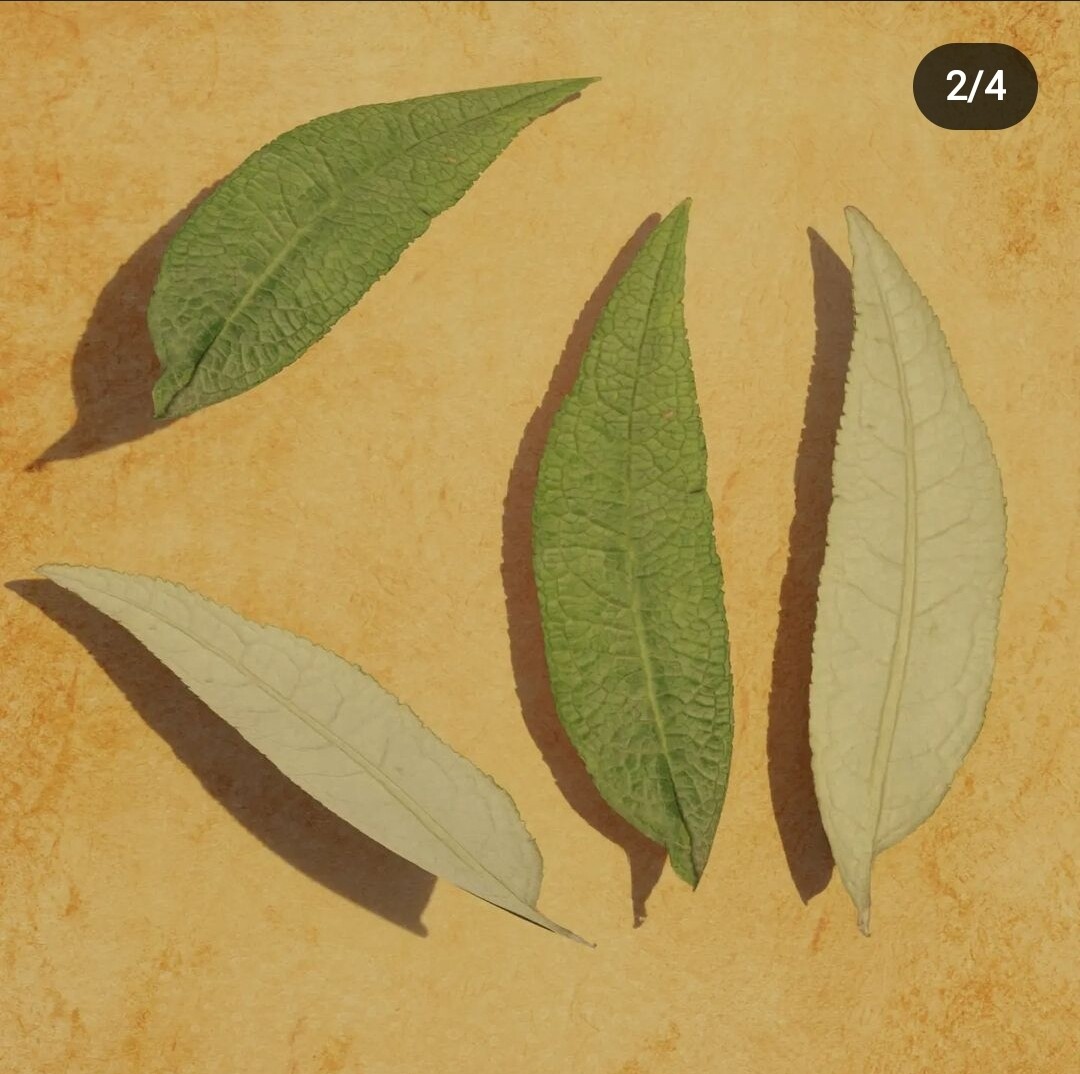
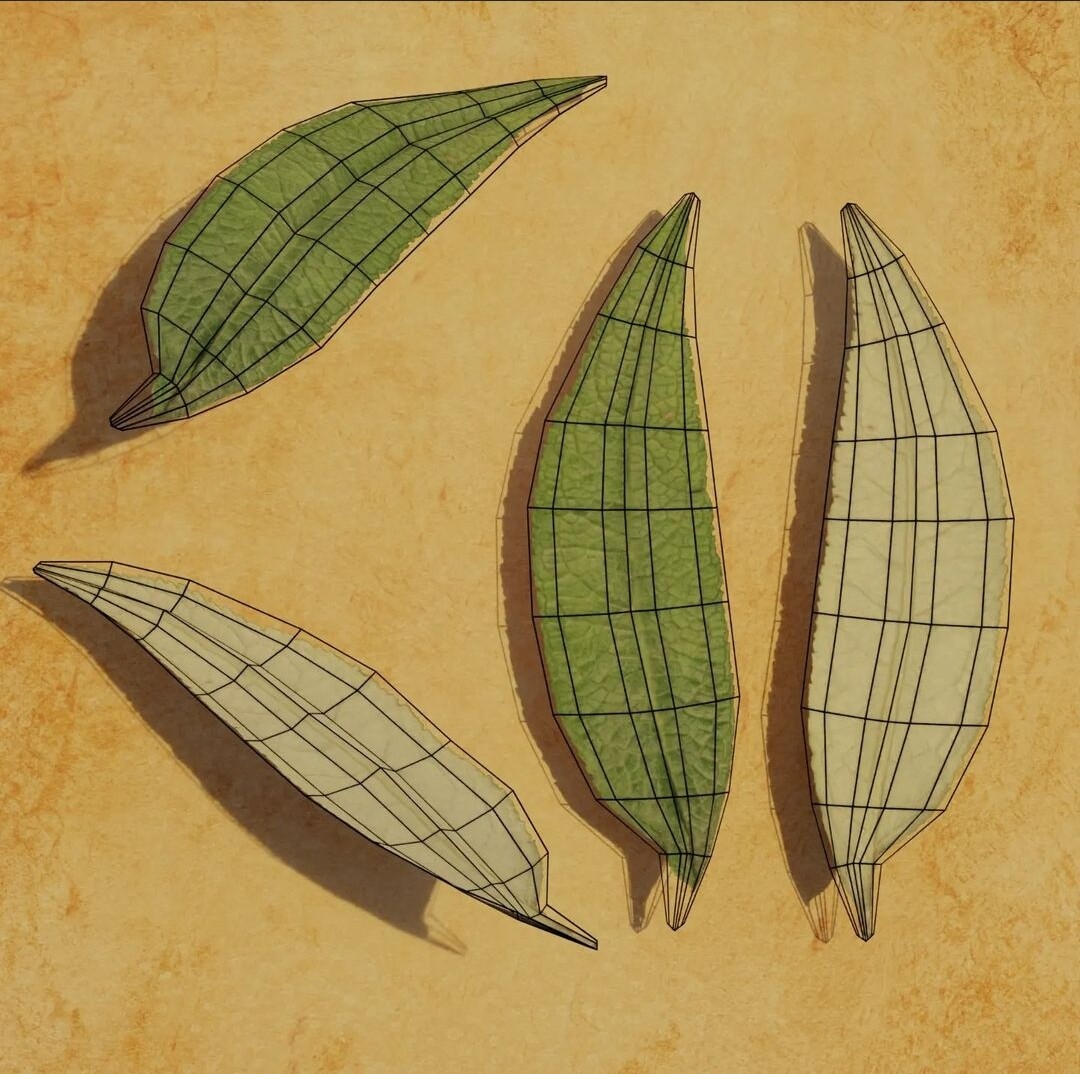
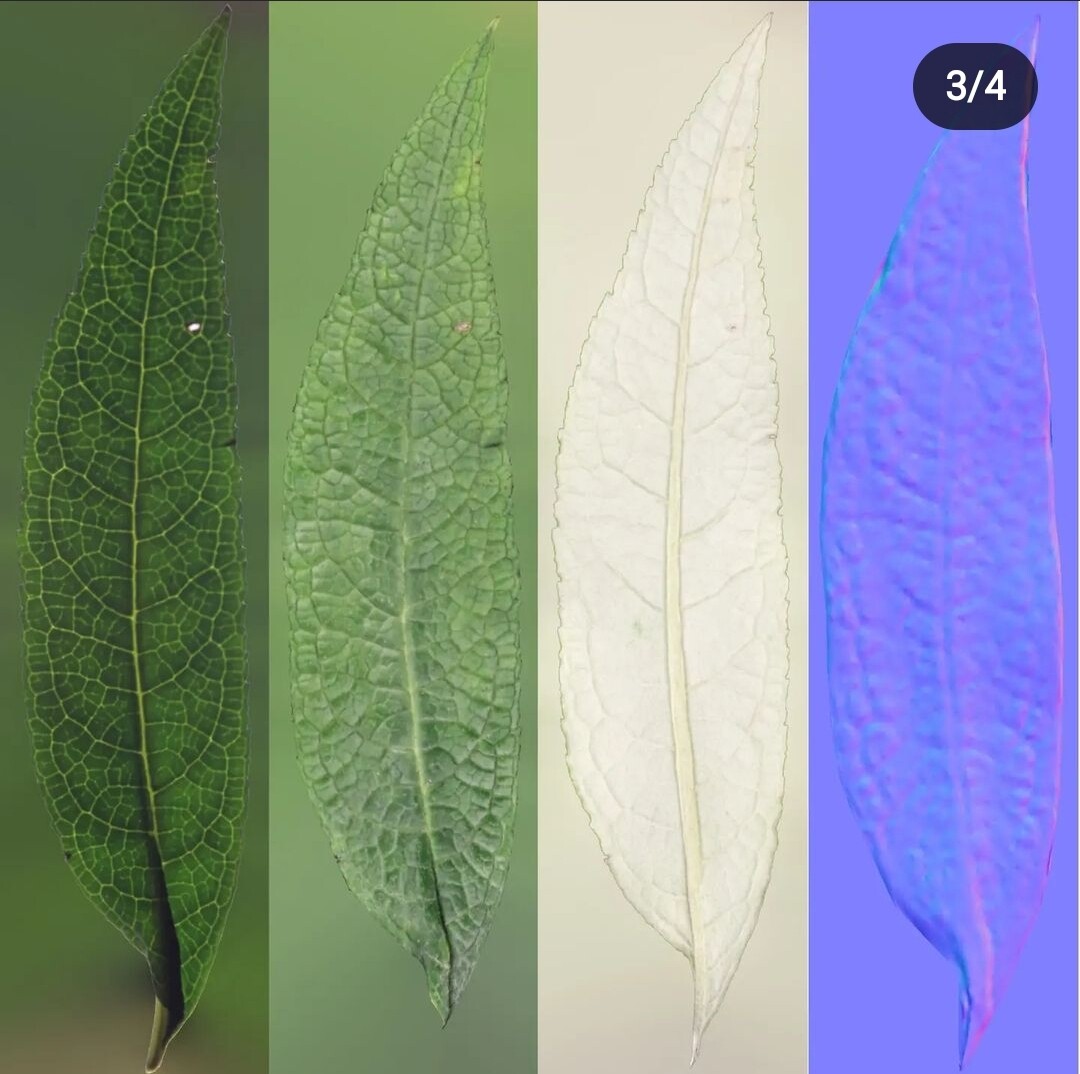
If you really need the photocapture aspect of it, you can do photogrammetry and bake the model onto a low poly one, giving you perfect normals and diffuse maps. Example attached. Spoiler: it’s hard and long.
I almost forgot the fifth option and really the least time consuming apart from grabbing them on ambientCG: AI generation. It becomes increasingly common. I have seen an Blender add on passing by here. Polycam just offers a new tool that does just that, based on text prompts.
All techniques are fairly time consuming for getting good results, but definitely worth it for materials you can’t find for free.
Thanks. I am doing this simply to grab the textures that are around me, purely out of academic interest. I tried GIMP while waiting for the answer. Looks like I am doing fine with roughness and displacement. But no idea how to add Ambient Occlusion or Normal PNG/JPG.
A good bump is more than enough for such approximation IMHO.
Normals are useful since their can store 3 coordinates for each point (RGB), hence vectors representing the orientation of the normals. That’s superior to bump maps only if you have cases where you geometry is too complex to be represented by a simple 1 dimensional profile. Think of baking the detail of a very high resolution mesh into a low resolution one, that can go in every direction. That’s not the case here, and anyways you don’t have enough source data for the generation of an accurate profile. If you use a bump map node, the normals will automatically be generated for you based on the bump black and white data. (I’m pretty sure the idea is correct, but I might not be accurate on details)
If you really need to export normal maps (e.g. your target app requires normal and does not support bump), you can simply bake the normal from the bump map. Just setup the material how you want it and bake the normals, there are plenty of tutorials.
The AO is tricky to generate from images. A real photo has mixed diffuse + AO. That’s OK for a very large majority of the cases, unless you’d go and shine a lamp straight in a little crack.
For a whole 3D model, AO baking is quite important if the rendering engine does not support it, but for tile able materials, I think it’s more a luxury to separate these channels than anything else