Hi All,
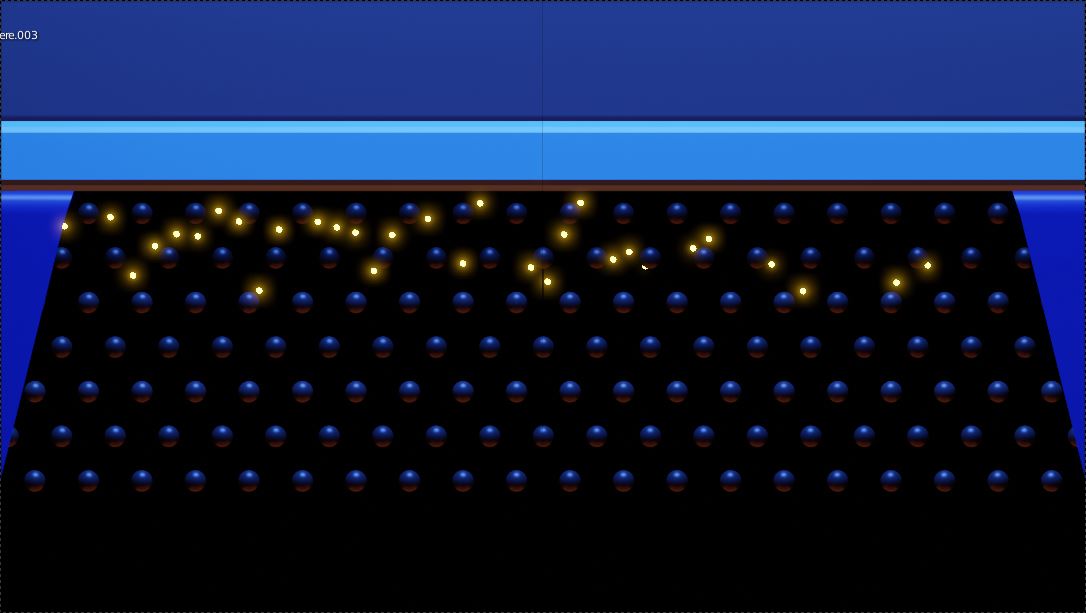
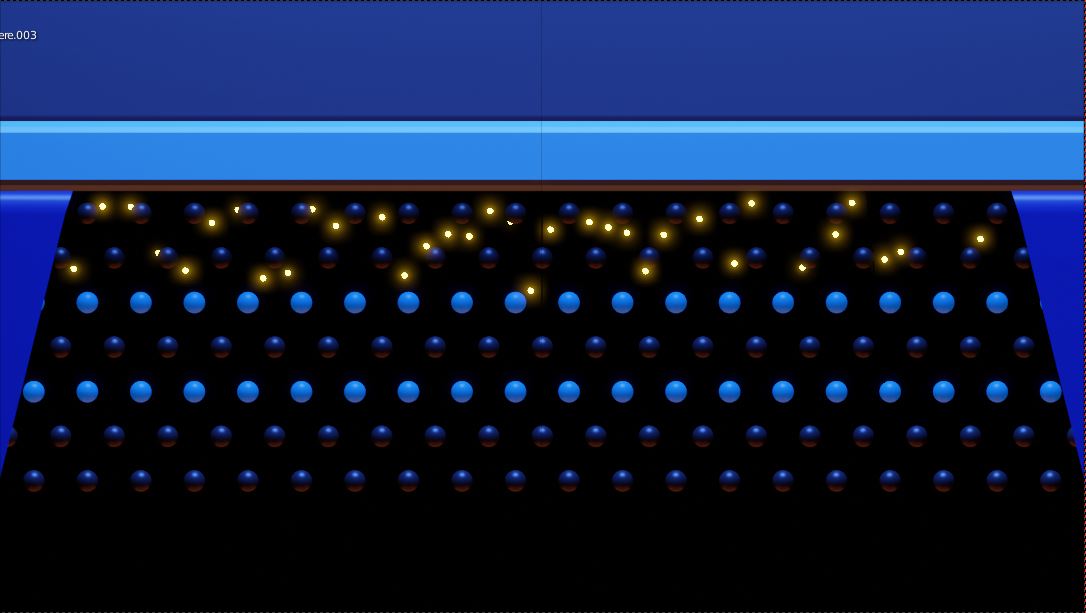
Here are two images from my project. Two rows of the black spheres need to change from black to blue. I had no problem animating that in the shader nodes but they change all at once. What I would really like to do is change them individually from left to right so it looks like the blue color change sweeps in from the left.
At first I thought I would make a custom shader for each and change the color for each sequentially in the timeline which seems a bit laborious. I thought maybe someone here would know of a better way of doing it?
Yes, although you need some way to measure “left to right”-- probably generated coordinates.x, but there are imaginable situations where that wouldn’t work for you.
It’s hard to say exactly what you’d need to do without seeing your nodes, but you’d basically be changing color if generated coords.x - some value < 0.0, and then animating “some value”.
This is possible in Animation Nodes, if they support getting materials from the blend file now. Some time ago I wrote some extra nodes the output the materials, then you can feed two materials into a boolean switcher.
The system would work by changing the material in slot 1 of the objects from black to blue at certain frames, or when an empty moved from say Z = 0 (black) to z = 1 (blue). I can look out my code if you like and see if it is possible still - it was a while ago I did this.
If there are issues with AN, I could do this with expression nodes, it would take some time to setup, but would animate nicely.
I don’t really use AN now, it got too unreliable on my Mac to install. So I would have to try to get AN to load again.
There is a brief example here:
This was done with 5 materials I think and my Sequencer Node and just switched material for the various objects at set frame intervals.
Cheers, Clock.
EDIT:
I will look at ways of doing this with basic Blender, it might be possible using Drivers and Custom Properties…
So, what to do? Click the “Run Script” button in the Text Editor, then play the animation.
Tell me what you think, I could make this into a simple add-on, given some time in my heavy schedule.
The two circles are simple material holders, don’t delete them! It would be better to do this another way, if you think this will be a good method. I have left some comments in the code, if you change any of the numbers, just press “Run Script” again…
Cheers, Clock.
EDIT:
To “sweep in” would just need some changes to the logic, I just threw this together quickly…
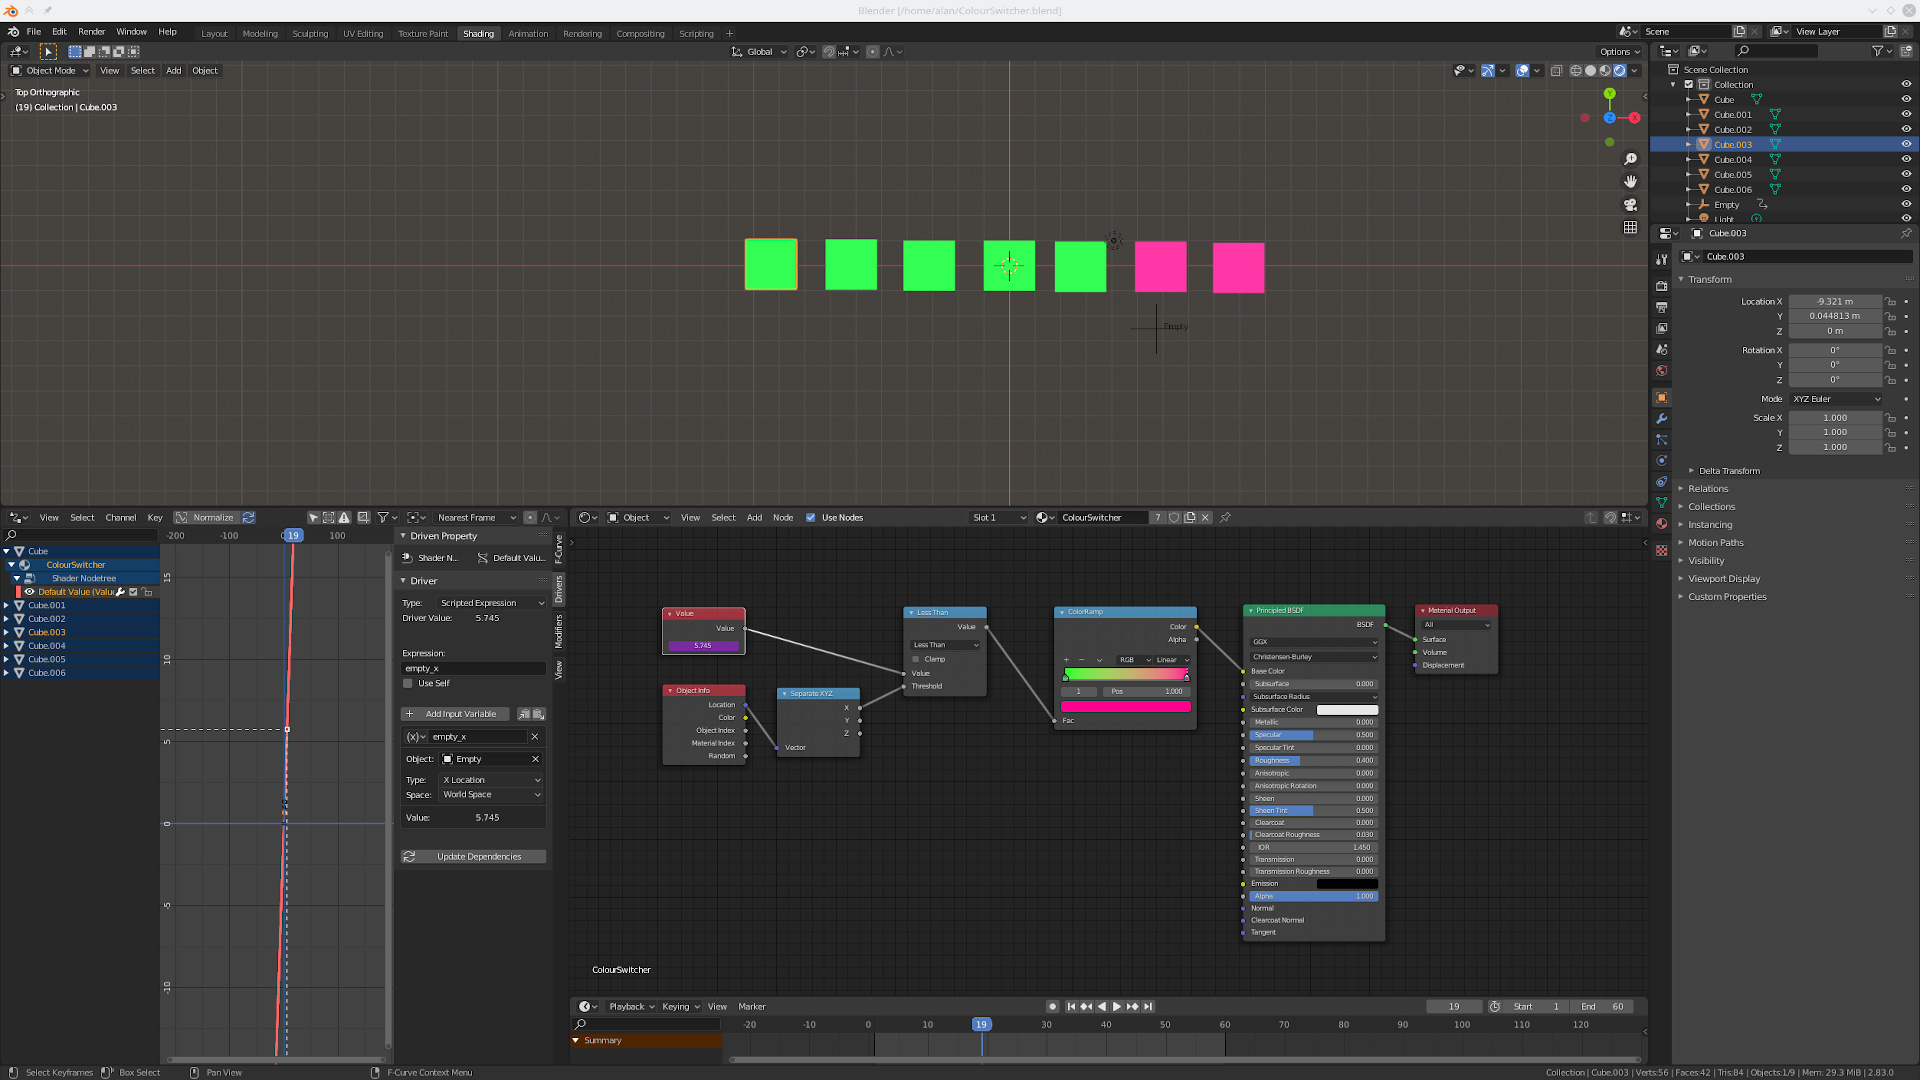
As clockmender suggests, you could also solve your problem using a driver. Using a driver and a little shader logic you can set the colour of your spheres depending on (for example) whether a reference object’s x position is less than or greater than a spheres x position. Animating the position of the reference object will cause the spheres to change colour.
As can be seen in the attached blend file, a driver is added to a value node in the shader. The driver simply sets the value of the value node from the x position of an empty. That value is compared to the x position of the object the shader is on. The compare returns a 0 or a 1 and this is fed into a ColorRamp node.
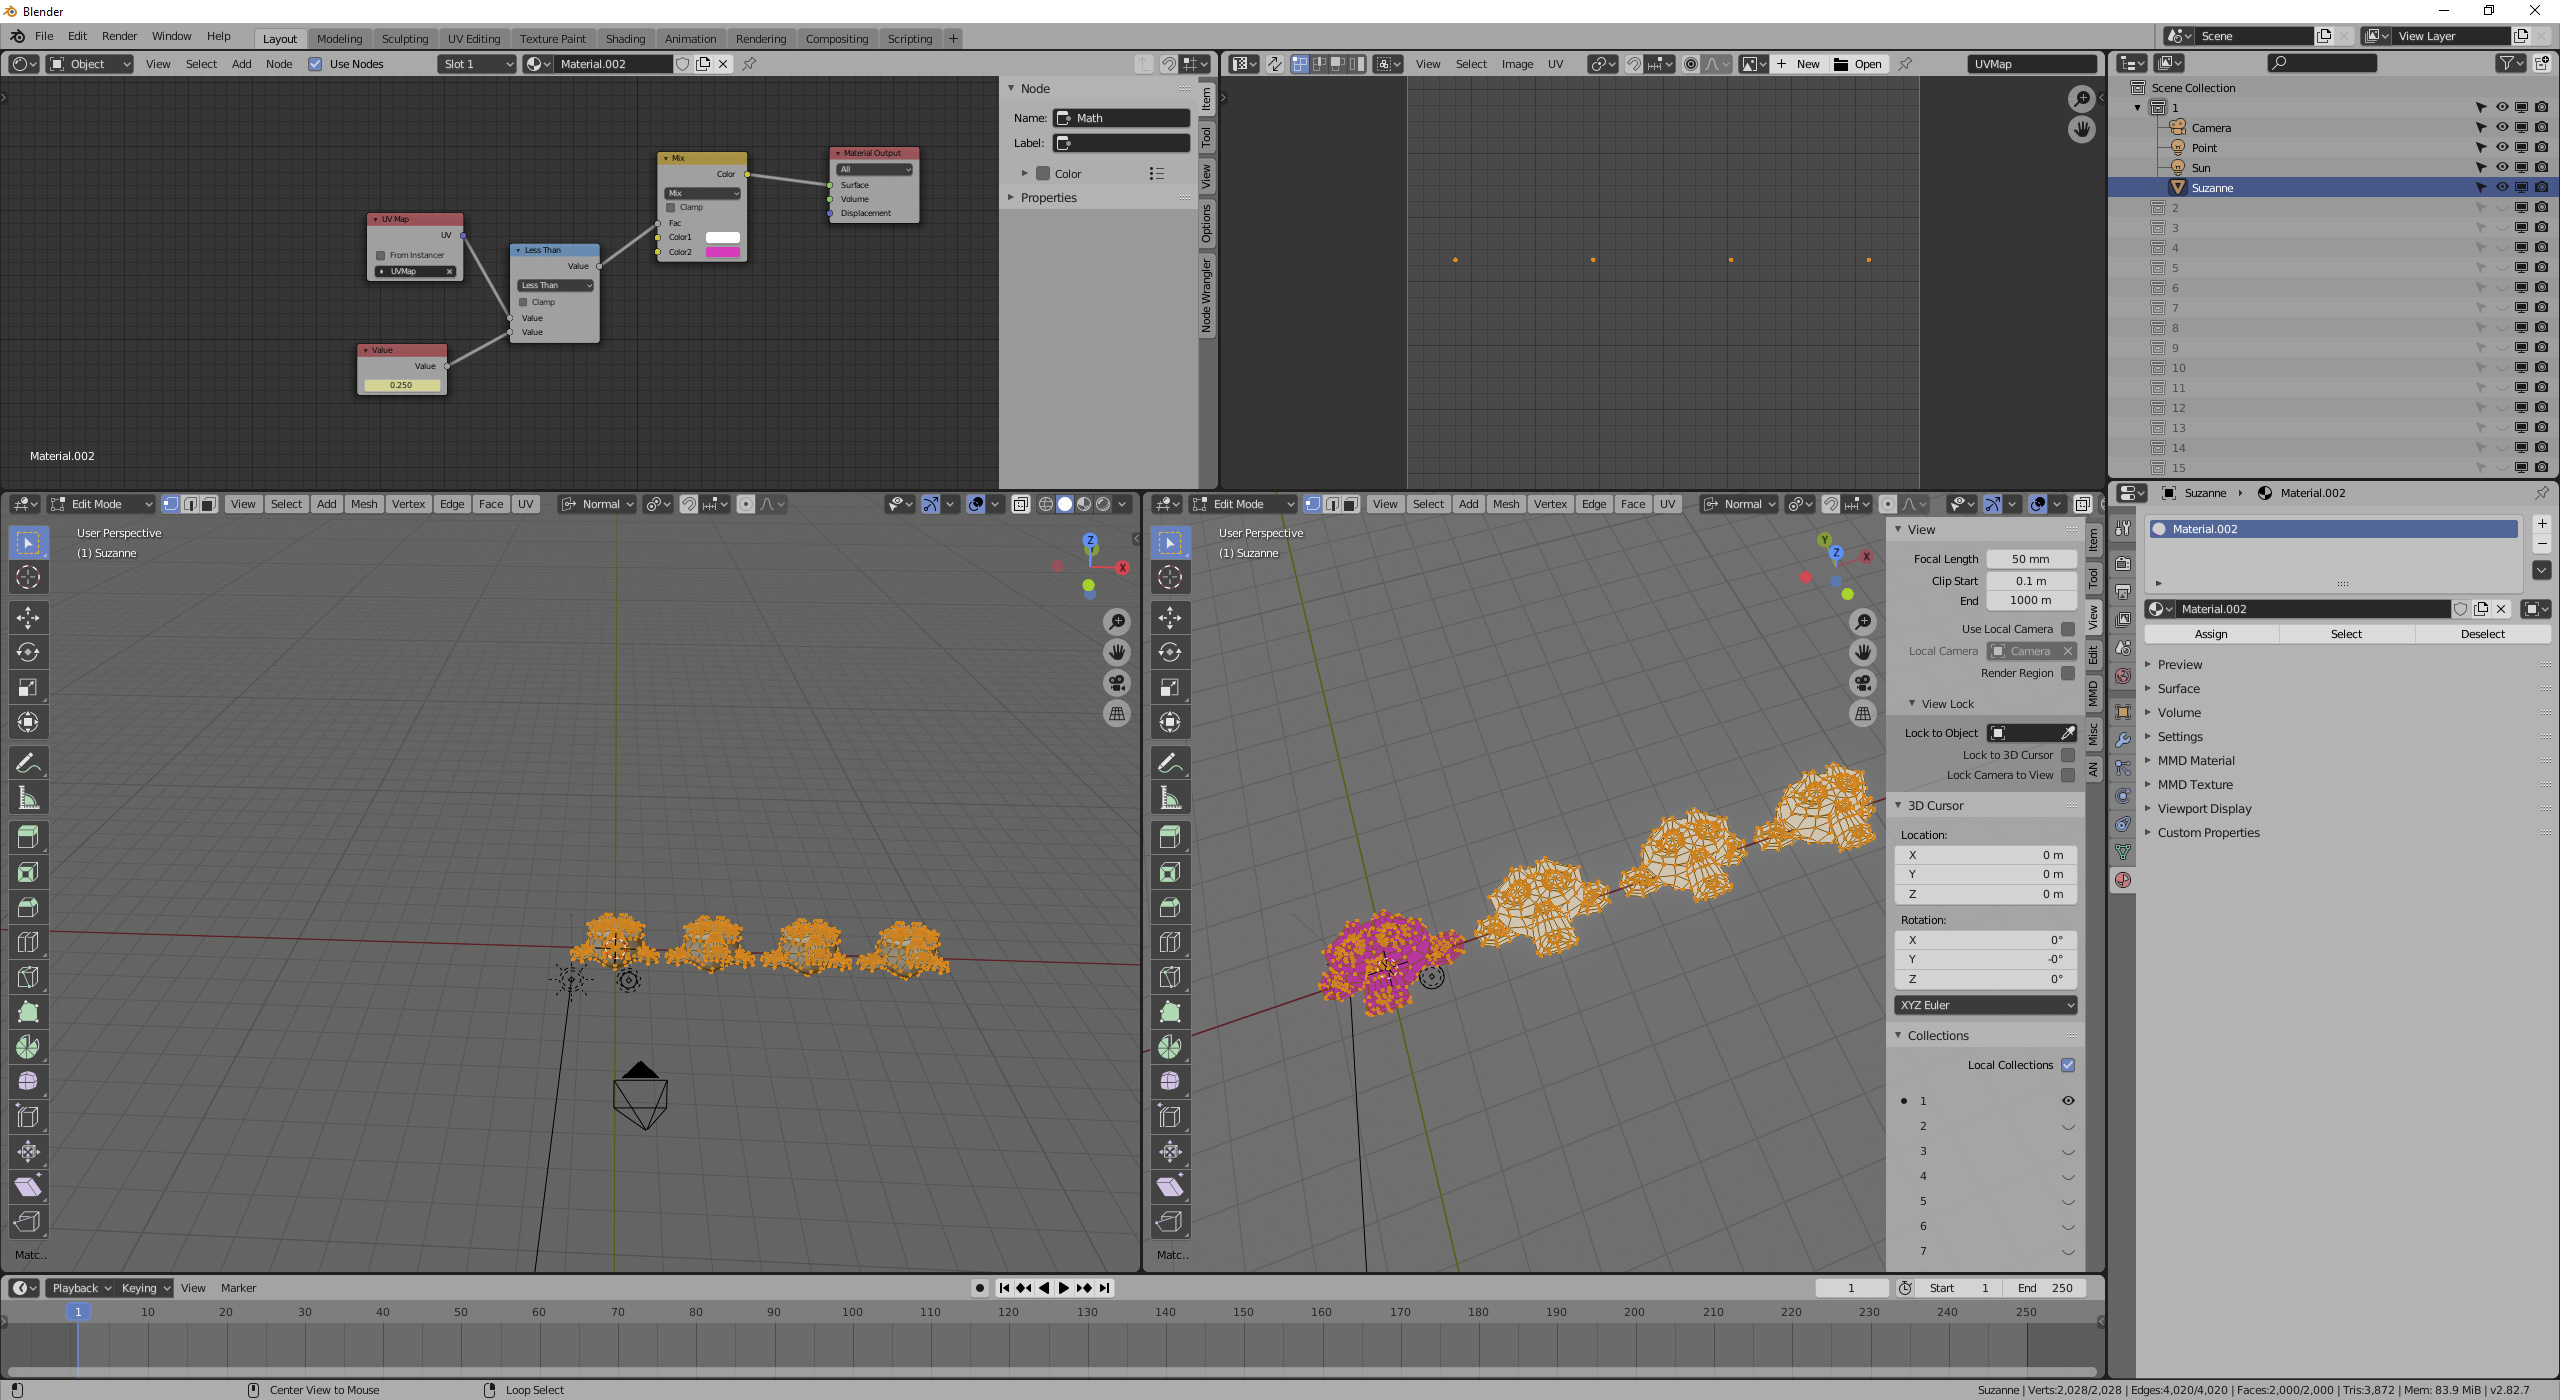
Here, I’m using the U coordinate of my UV map to specify. Because individual monkeys’ UVs are shrunk to individual origins, each entire monkey lights up at once.
Note that you can move those islands around if you don’t want it left to right-- you can make it light up in any order you want.
Now, if you really want a controller instead of just directly keyframing the value node, you can do that, again, without animation nodes or drivers or anything:
By using an unscaled, unrotated empty, parented to the object, I can compare object coordinates and see how “far along” the x axis my empty is, in my shader. But there’s little point to doing this, when the value node can be animated just fine all on its lonesome.
I separated some parts to test something else, but that’s probably good, it demos the resilience of the technique (doesn’t depend on things being in same object or having the same transformation.)
The controller version doesn’t do what I expect when I remap values, so I’m concerned that I did something wrong-- it’s not really right unless I understand all behavior. Right now, my head’s not screwed on straight enough to figure out exactly why. Even if I did something wrong, something similar ought to be possible.