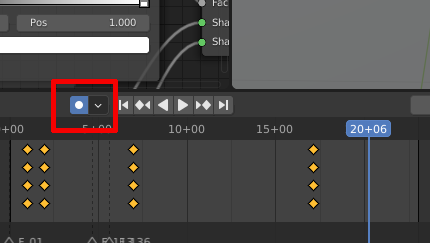
I’m in the process of animating a red flare to a sound file. The problem is, the material of the flare (actually a circle) does not always show up. I’m rendering with Eevee & am using the Bloom feature. Here’s the link to the .blend file. I already tried different things, but not to much avail.
TIA,
Claus
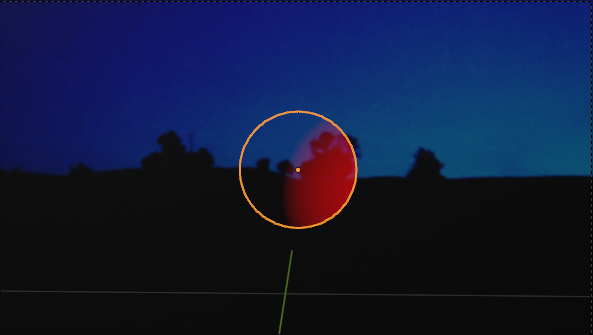
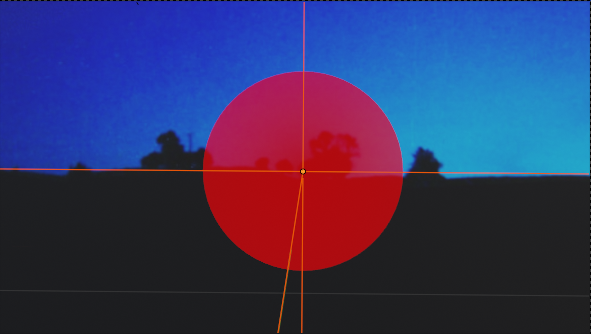
P. S.: This is what the flare is supposed to look like. At best, it now looks like this:
Most of the time, though, the flare isn’t visible at all.
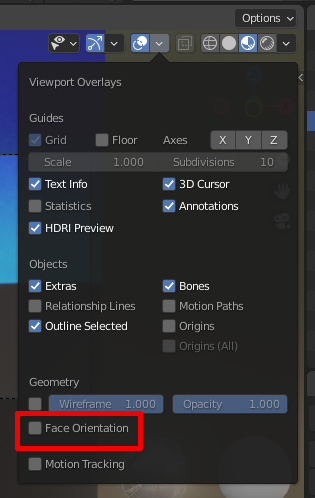
I think if you select the circle object, enter edit mode and select Mesh > Normals > Flip, you should fix it.
EDIT: btw is there a reason you are rendering at 256, I mean, the strength of eevee is the speed it renders, I think I would have it at 32 or something.
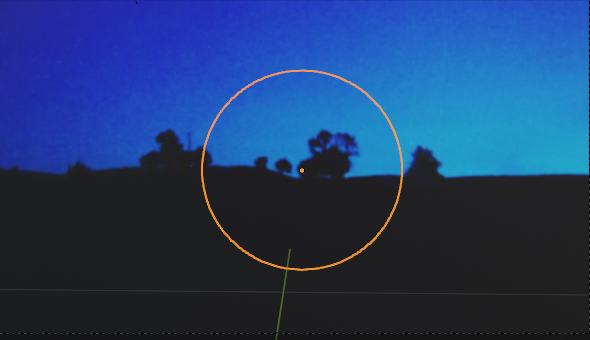
P. S.: I changed the samples to 32, as you suggested. Now the flare is visible but it’s most of the time not centered. I tried changing this by tweaking the X and Y Location in the Mapping node, but not to much avail (see here).
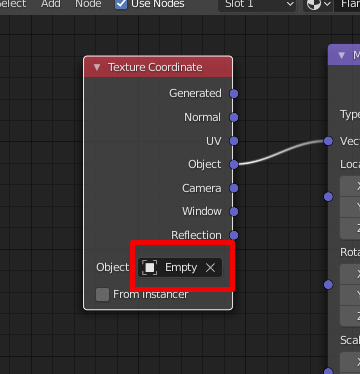
O.K. try this. Set the xyz location in the mapping node to 0 then select the circle and snap (in the 3d view) the cursor to the circle (shift s > cursor to selected). Add a empty (shift a > empty). Back in the node editor change the Object drop-down in the texture coordinate node to that empty. Scale the empty to .086 of its original size… You should see and gradient around that empty in the circle.
P. S.: It works–sort of. The flare is now only a faint shadow. The red material is not present anymore. I’ll try and fix this in the nodes setup of the Shader Editor.
The empty has to be snapped to the origin of the circle. Also I was thinking if you are going to move the circle you might want to parent the empty to the circle… Select the empty then select the circle and press ctrl p.
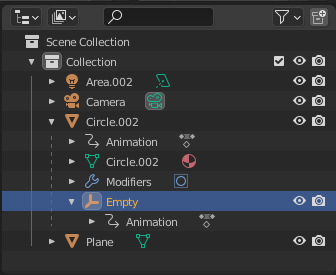
I tried to do as you recommended, but I had to select the empty in the outliner since it’s so tiny. Still, there’s no red flare visible. Also, the circle isn’t visible anymore (that is, the orange border).
That’s what it looks like in the outliner …
… and in the viewport:
Claus
P. S.: The orange border of the circle is now visible again.
The circle’s orange border will be visible when it is selected, it just indicates its selected.
I didn’t realize you had --autokey set on-- this means that every time you move anything it will set key-frames. I think you had that on because of the video. Turn that off.
Select the empty and select Object > Clear > Scale (keyboard shortcut alt s). Verify that the circle has the normals facing the correct way…should be blue in solid mode.
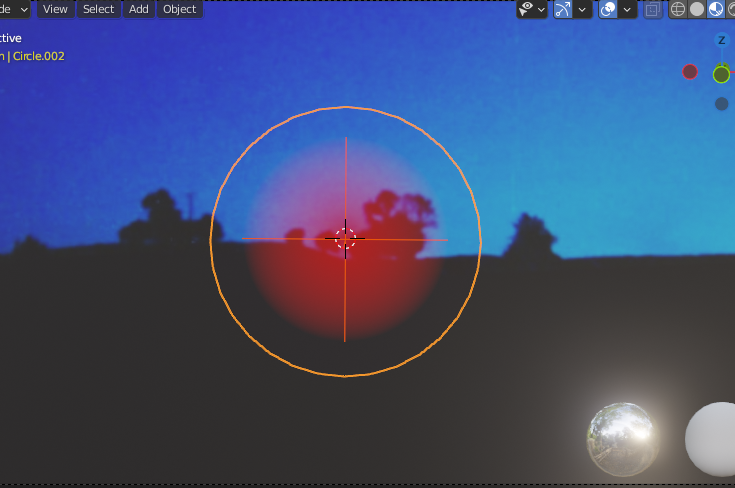
Verify the location in the mapping node is at 0,0,0 for xyz. Verify that the texture coordinate node has the empty set in the drop-down and the object output is being used. Here you could also just use the object output and press the x on the drop-down so you will not be using the empty’s location to guide the texture, just the circle’s. Show me a screenshot with both the circle and the empty selected.
Is this correct? I selected both the empty & the circle via the outliner, but when I press [Space] to play the animation, I am only getting the orange border.
