I am not sure what the best approach is for what I am trying to do is?, I have a mesh which I am masking using an animated image sequence black/white mask.
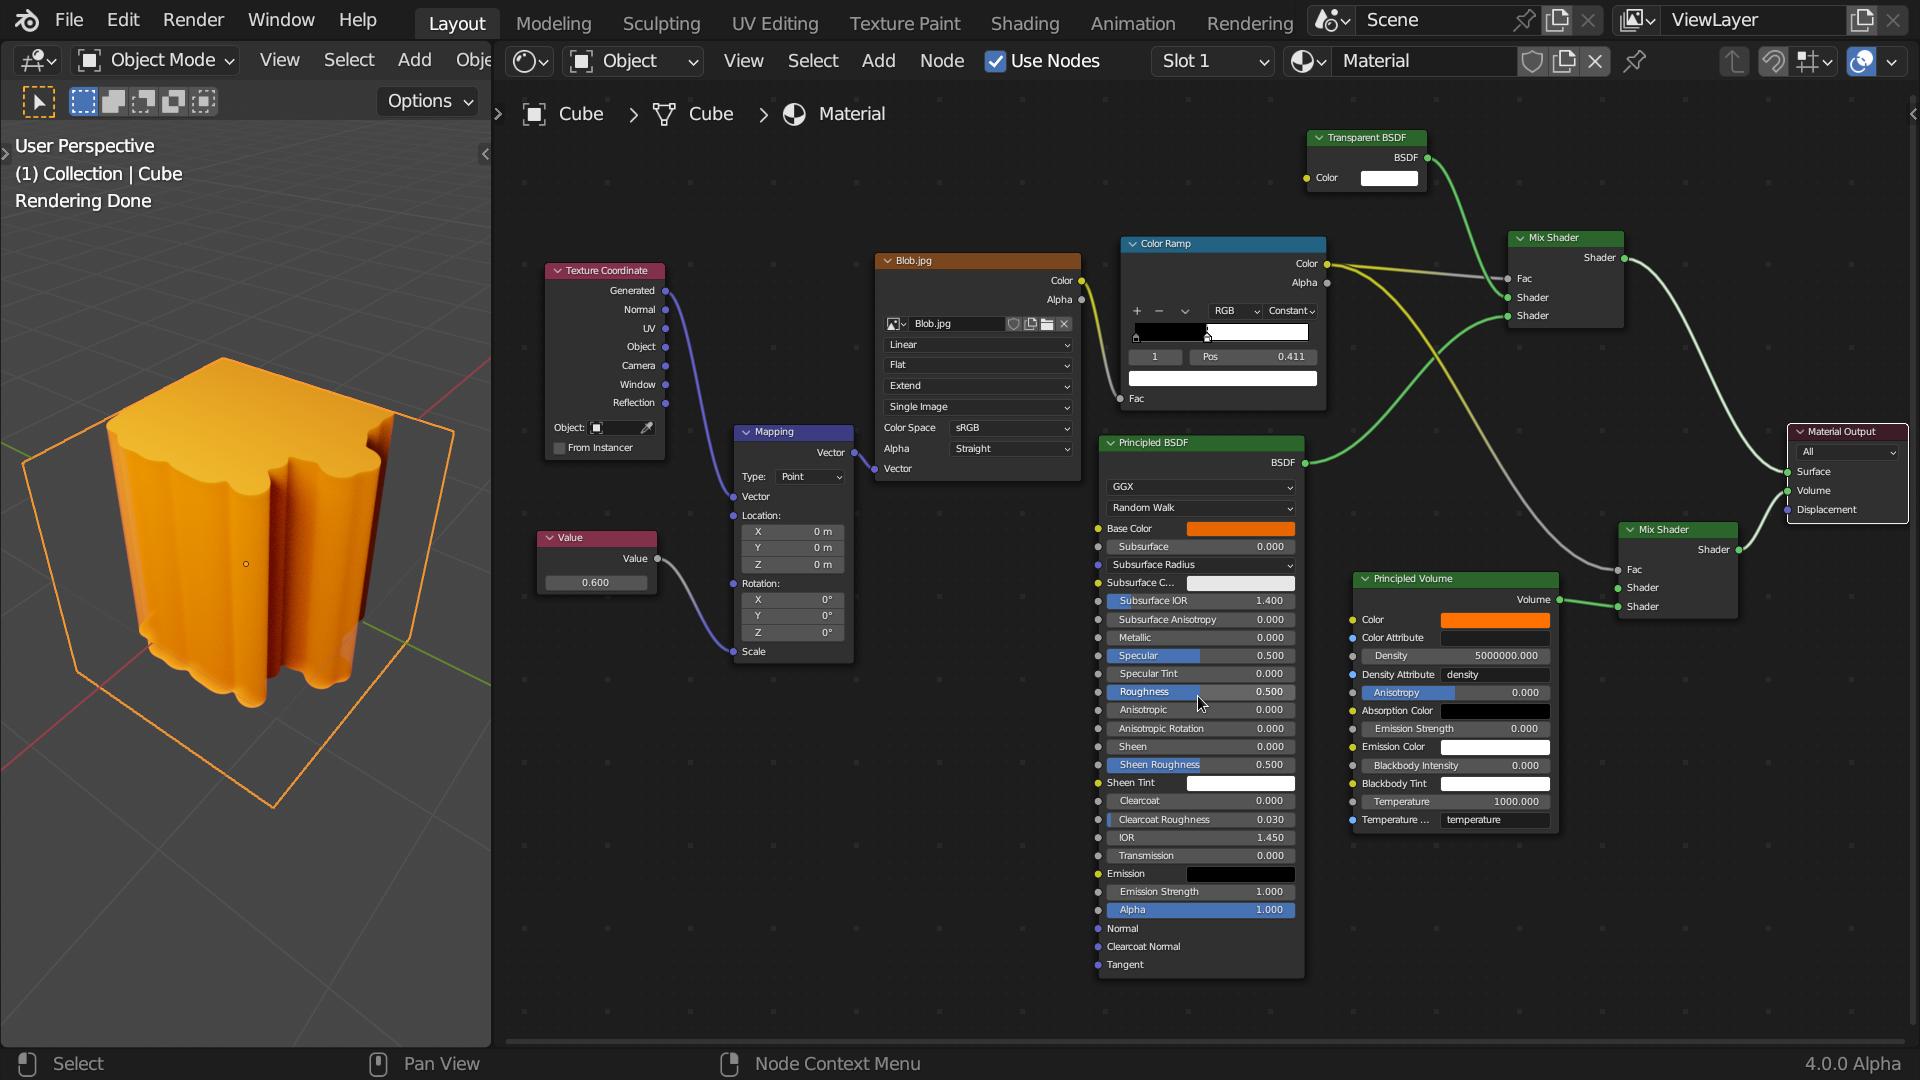
This is the shader setup for the material on the mesh
Which is plugged into a mix shader factor, for a principled shader and a transparent shader, the volume isn’t currently working due to the image sequence being a 2d texture?
I had it previously setup with a simple 3d gradient texture which worked fine for the both surface shader and the volume shader with it being a 3d texture.
The only problem comes to when you see the mesh is just a shell, I want it to appear as if its a solid material no holes. that’s why when I used the built in blender 3d gradient texture it filled this in due to me using the volume shader.
So I am just wondering if anyone had any idea of a way to achieve this? I’m not skilled in creating custom shaders or anything, I was wondering if there was anyway to make the 2d image sequence stack on the Z so the volume shader thinks its a 3d texture like the gradient for example.
or is there any easier way to just fill these holes?
Thanks for the reply, I did actually try this to begin with but the amount of booleans was getting a little crazy and the started to effect each other in a negative way.
So hence I decided to create a black and white animated mask in after effects to do more animations
If you were doing this in 2d you could animate the points that make the shape. I can’t think of a way to do that same thing in 3d other than using bones.
Why not just use a build modifier to make the text appear?
I made 2d text and added a Build modifier then a Solidify modifier.
The build follow the order the faces are made. The left part of the H looks wrong because I was lazy and duplicated part of the T. Remember to duplicate just one face to make the next letter.
In edit mode - Mesh Menu > Sort Elements you can rearrange the order of the faces in various ways.
The problem is more to do with the mapping than the fact the texture is 2D.
Uv cords only map on the surfaces of your object not “inside” it. In this case you could use generated or object cords to map the image. That way the Z axis will give you “walls” where the image goes from black to white.
It may not quite give you the effect you are after as the volume will not appear “solid” it will be more like a “thin wall” note that I gave it loads of density and even so there is a bit of leak at the edges.
One really primitive hack would be to use Input - Geometry - Backfacing with Mix Shader, to fill the backfaces with solid color (plugging RGB into surface shader output counts as shader for this purpose). Then you pick the RGB color of the backfaces to be something average of the shaded front faces, so holes are hard to notice
Thanks for the advice on using the build modifier the only issue with this is it actually part of a larger logo, which has some more detailed parts, which i think would be tricky to do it that way.
Thanks I was getting some glitching with the volume approach with the fact from different camera angles and lighting scenarios. So for now ive decided to go with the RGB colour with the backface as the factor.
Its a shame that its just a solid colour but i think it will do for the certain shots i have planned, but still open to any other ideas for this.
Thanks for the advice, Im going with your idea for now, Its just a shame that its a solid RGB colour. So im still open to any other ideas that people may have on this matter. Thanks