I have read through the forums and seen many different suggestions on how to animated a sphere into a plane and vice versa. My goal is to unwrap a globe and flatten it down on the screen (after that point its all After Effects work from there). My problem is what is the best way to do this? Keep in mind I would like it to unwrap from the back of the Globe (away from the viewer) and the corners of the globe go to the closest corner of the screen.
Eliminate the last vertex at the pole. Then with a shape key convert it to a flat filled circle. Pressing S-Z-0 will put all the vertex on the 0 value of the Z axis.
If I understand right, you’re trying to animate this, not UV unwrap it. You could do it with a combination of shape keys and modifiers. If you are starting with a UVSphere as your globe, first you have to remove the vertices at the poles and then extrude and scale down up the Arctic and Antarctic circles as tight as you need to close up the poles.Then rip the sphere open along one latitude line so you can open it up (see lower picture below; sorry I don’t know how to order attached images). Make this incised globe your Basis shape key.
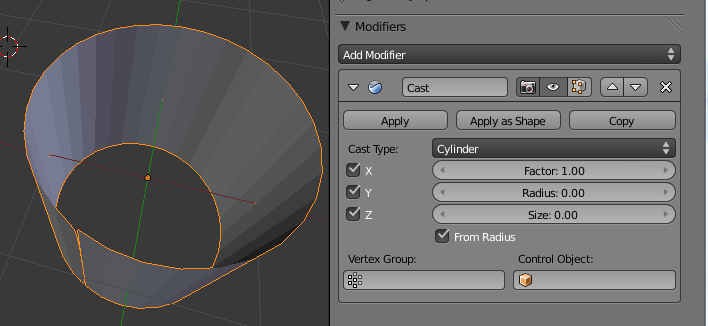
Use a Cast modifier to turn this into a cylinder. Apply the Cast modifier as a Shape Key (see picture).
You can now edit the cylinder shape key into your flattened rectangle; you could probably use a curve modifier to make this easier than pushing verts. The rectangle is your final shape key. Set keyframes on the shape keys and you’re in business.c
CD38 you hit it right on the nose! Thanks so much, I was racking my brain on this…I was in the right area with the cast modifer, but I just needed that extra push to figure the puzzle out. Now…need to learn how to flatten that cylinder with the curves modifer.
Even simpler (in 2.5x): start with your rectangle and fiddle with the cast modifier until you turn it into a sphere or partial sphere. It’s probably best to use an Empty as the reference object and move it around until you approximate a sphere. Keyframe the Factor of the modifier so it’s zero at the end of the animation (right-click on Factor slider -> Insert keyframe). This method is less accurate, but it only has to look good at the end.
I wanted to give it a try . If you haven’t finished, I think this way kinda has a cool look. I put in a short description of how I did it http://vimeo.com/15888896