Hi,
Welcome to another tutorial for anime style FX. This time we are going to look at an anime style beam attack. Like a Shinku Hadoken, or a Kamehameha.
So this tutorial will be all procedural. There’s will be no need for manipulating and vertex by hand, unless you want to.
The techniques covered in this tutorial can be applied differently to achieve vastly different results, from a power up style aura, to energy crashing from the sky.
Ok, so lets begin.
A beam is usually cylindrical, so let’s start with a cylinder. Scale it on its Z axis until its the size you want.
At this point, you may as well decide where you want the beam to be and set your camera. Anime uses dramatic angles every time.
We will need more vertex in our cylinder, so go into edit mode and use ctrl + r and add a few loop cuts, then subdivide a few times. This will give us enough geometry for our modifiers to work with.

When you look at a Anime energy attack, one thing they mostly all have in common is that they have a core and a shell, the core is usually white, or close to it. And the shell is usually where the color comes in, for both Ryu and Goku its light blue, but you can make it any color you want.

Were going to start with the core. When you look at the core of an energy attack, you usually see a strong center with a drop off and tearing as it dissipates into the colored shell.
We can achieve this with 2 cylinders and modifiers. One for the solid core and one for its outer edge. However, both parts will share the same modifiers, in fact the outer edge of the core will have the same modifiers as the center so lets make our core first, then duplicate it later to save time.
Were going to turn our first cylinder into part of the core, so its going to be white. Just put an emission shader on it and set it to white and the options, turn on back face culling.
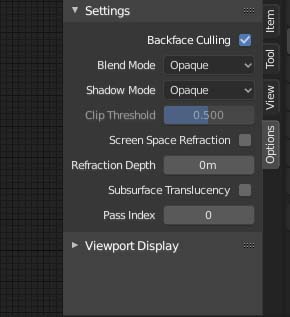
The back face culling will allow us to see through the parts that are not facing us, this will help with the look of the core when we are done.
The core is rarely an exact straight line, it has motion, usually just an irregular wave traveling forward. This requires the straight edges of the core to be displaced slightly. So lets add our first modifier, Displace.
Displace requires a texture to tell it how to displace or it will evenly displace every vertex, which can be useful, but not here, we need a texture to add the random displacement we are looking for. Just a regular cloud texture will be fine here. The displace modifier also it requires you to tell it how to wrap itself around the mesh. In this case we will use local. Since we haven’t finished adding modifiers and creating the look we want, we will probably have to tweak the strength later, so just set it to 2 for now.

Now, onto the second modifier. We are going to want to remove random parts of the core. To do this we are going to use the Vertex Weight Edit and Mask modifiers. The mask modifier masks or removes parts of the mesh based on its weight painting. And the Vertex Weight edit modifier allows us to use a texture to set the weights.
Before we can use the Vertex weight edit modifier, we need to create a vertex weight group for the modifier to use on the mesh, lets do this now. You can call it whatever you want.

Now we can put a vertex weight edit modifier on. In order for the mask to function, we need to set how the weight paint will be distributed, so we need to set the custom curve to 1 down to 0. This will mean that when we apply our texture. Any vertex with white on the texture will be set to 1 in weight paint, which is displayed as red when viewing the weight paint. And any vertex with black on the texture will be set to 0 which is blue when viewing the weight paint.
Again, as with the displace modifier, we will need to tell the Vertex Weight edit modifier how to be unwrapped to the mesh. In this case we want the masking to move, this will help us create the motion we want in our core. So we are going to add an empty to the scene, then in the weight edit modifier, set the texture coordinates to object and use the eye dropper to select the empty.
Tick the Group Add Box.
The texture to use is the same cloud texture used for the displacement modifier.
Were not going to animate it just yet, because the mask isn’t applied and we wont be able to see animation.

Add a mask modifier, and for the vertex group select the Weight group you created for the Vertex weight edit modifier. As you turn up the threshold on the mask, you will start to see holes appear in your core in the example I used a threshold of 0.35 . Looks very jagged right now, but we will change that with a few more modifiers.
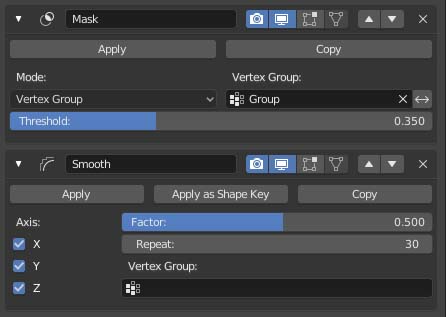
So lets add a smooth modifier, and set it to 30 repetitions.
This is your central core done.
Now we need to make the outer part of the core, so duplicate your inner core, and scale it up a bit.
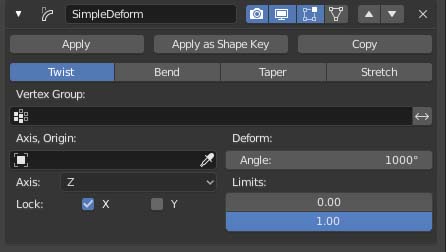
There are many options here. You can just turn up the factor of the mask to remove more mesh and maybe duplicate it and scale it up? Change the material? Its up to you. Or you can do what I did which is to create a spiral flow. I used the simple deform modifier, set to twist, in the example I used 1000 as the angle. You’ll have to type this amount in manually as the slider only goes to 30. For the angle of the twist select Z axis and lock the X value.
The edges on this may look a little jagged, so I put a subdivision modifier here to help smooth over the geometry, but that part is up to you, maybe you like the jagged look for your beam.
This is your core complete. So now we need to move onto the outer beam
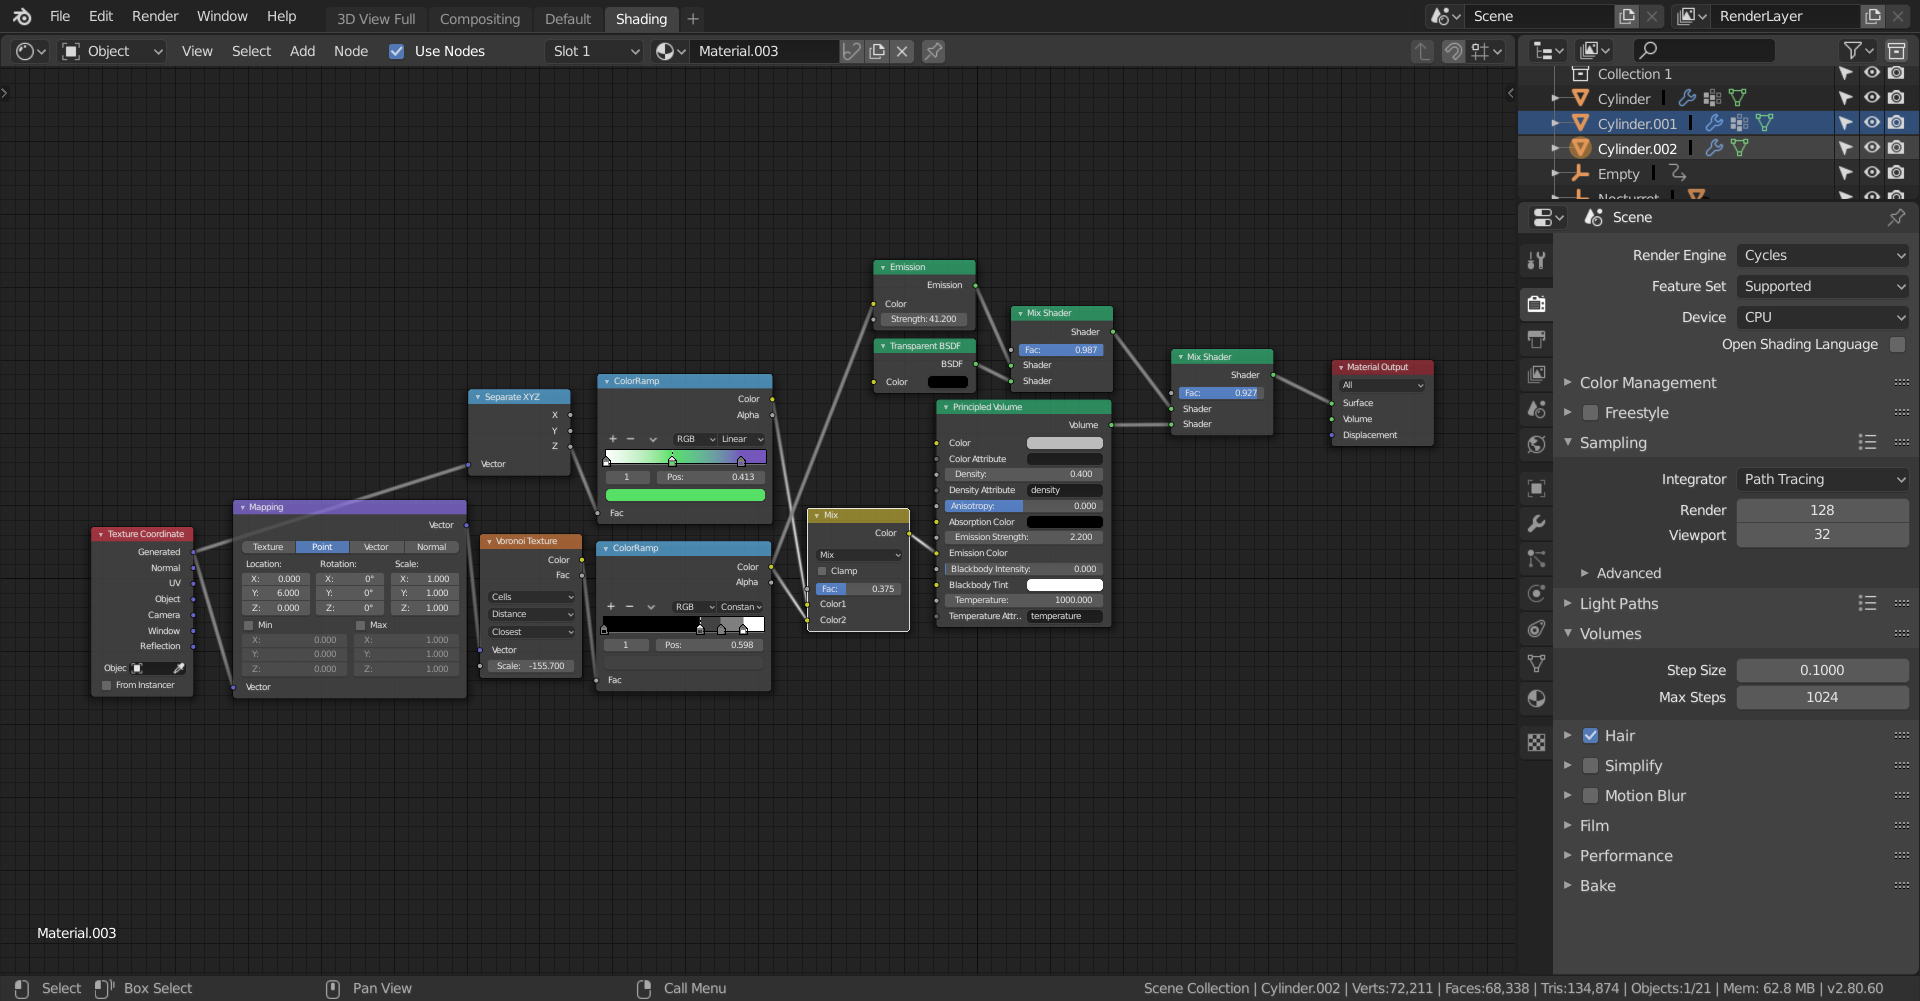
In my example, I started with the intention of just creating the beam itself, without a start up or end animation. I’m using a shader plugged into the volume rather than surface, and if like me your using Eevee, any volumetric shape will only yield a cube, so if you want a start and end animation, you don’t want to do this, unless you switch to cycles, which is fine if you want to use volumetric’s for the beam and you want to animate it in such a way that it has a start and an end, the process will remain the same, only the material will change, but the render time will increase.
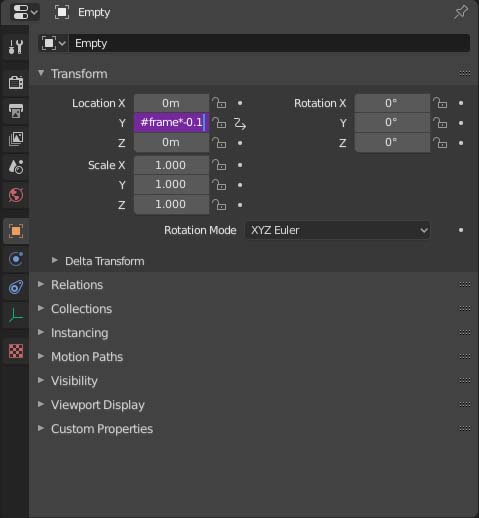
Ok, so the outer beam is simple, in the example it just a cylinder, with a displace modifier and the same cloud texture. The mapping is linked to the same empty as before. Now all the animation of the beam is controlled by a single empty, and all we need to do to animate the whole effect is to add a driver to the empty to move it in a forward motion relative to the direction of the beam. So look at the axis in your view port and decide which way if forward for the beam, then in the transform options while the mesh is selected in object mode, add the following driver to your chosen axis: #frame*0.1
If you want it to be inverted on the same axis use #frame*-0.1
The shader on the outer shell I used looks like this.

So that is it. You’ve hopefully successfully completely recreated the example at the top.
If you want to to have a start and end animation, just change the outer beams shader to not use volumetrics but surface instead and tweak until your satisfied with the look, then you don’t have to deal with the square volumetrics.
I really recommend experimentation with the modifiers and shaders to see what else you can create.
Thanks for reading.