Here we go again. After having multiple discussions with people both on the forums and outside of the forums I have decided to start making a new railgun.
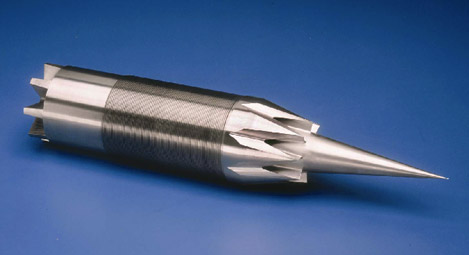
Right now I haven’t started modeling the gun itself. I am currently working on a new family of ammunition. This one will have shells(currently looking for a more precise definition) and penetrator rounds. The shells are similar to the old ones. The main differences are that the new ones have 2 copper bands and more sphere-like noses(after all, they dont need to be aerodynamic). The penetrator rounds are similar to what you find in an abrams or challenger 2 tank. Except that these will have small explosive charges in the rear of penetrator.
The shells will be made out of some sort of composite (carbon fiber maybe). They have screw-in fuses at the top with an optical fuse setter in the rear. The conductive bands will be made out of casted copper. The copper rings are heated and slid onto the shell in a way that when they cool, they will contract tightly around the shell. The sabots carrying the penetrators will also be made out of the same composite but will be filled with foam or something similar. The sabots are held together by the copper bands. Since there is no air in space, seperating the sabot will be accomplished when it impacts the target. The penetrator itself will probably be made out of depleted uranium (hence the silvery metalic texturing). The charge is inserted into a recess casted in the rear of the penetrator. The fuse screws in behind the charge.
Hmm, I might have gotten carried away with the designing stuff there. Anyway here are a few renders of what I have right now.
Ya know, you don’t have to be all THAT precise and all. I mean, I really appreciate accuracy and realism, but in order to create a nice piece of art, you don’t need to figure out how they got the copper on, do you? But w/e…
First off, I love how much thought and detail you are putting into this. The danger, of course, is that you might not be able to maintain this level of realism throughout your model because its too exhaustive, but if you can keep it up by all means do. Second, I am assuming that this is a magnetic rail gun, which means that you might be working a little bit too hard on the ammo. It doesn’t need an explosive charge to propel the shelll, obviously, and any non-ferromagnetic material you use to construct the shell is just dead weight at the time of propulsion. If your sacrificing muzzle speed for explosive content by putting depleted uranium in your shell that’s your choice, but really all you need is a little chunk of iron and put as much energy as you can into the coils of your electromagnet.
Ya see, I’m not much of an artist. Most of the fun I get out of blender comes from designing stuff (Blender3d=Legos on Steroids:)). To those of you who aren’t interested in the design aspects, skip everything between the asteriks.
Anyway, I picked uranium for the same reasons the military has. It is very dense so it puts more mass on target. It is pyrophoric (not as useful in space since the fire will probably be extinguished by air escaping through the hole but it is handy when firing on planetary targets). And due to some property I dont understand, it continually sheds metal from its nose which keeps the conical shape.
I’m am toying with a few different magazine designs. Right now I’m thinking along the lines of a box with a sort of chain system inside for handling the ordanance. Anyone have different ideas?
EDIT: Kronecker’s post didn’t appear until I made this reply. You are correct about the dead-weight thing, but the reason the shell body is made out of composite is to protect the explosive (or whatever else it might be) payload. The reason my other round is a uranium penetrator as opposed to a big steel slug is because It doesn’t do much good to batter away at the surface of a target’s armor. The penetrator is made to pierce the armor and deliver a small payload to the tender insides of the target ship.
Im not sure if I like the texturing on the copper. It doesn’t look right somehow. Any suggestions on texturing would be greatly appreciated.
First off, if you are going to make magnetic ordinance you might just as well have a magnetic feeder system to put rounds in the chamber. Just think of it as a really really weak rail gun that shoots the rounds sideways into the chamber. Second, if you are trying to be more of an designer than an artist, I might suggest downloading materials from the Blender Materials Repository (if its back online yet) or another source like that. Here is a link for some good materials
Let me know if you need help appending them into your blend file.
PS - I dont know about AAO but if AO is Ambient Occlusion which simulates light coming from every direction and is a good way to get a good look at an object without having to light it properly. However, it will significantly increase your render time, so use it sparingly.
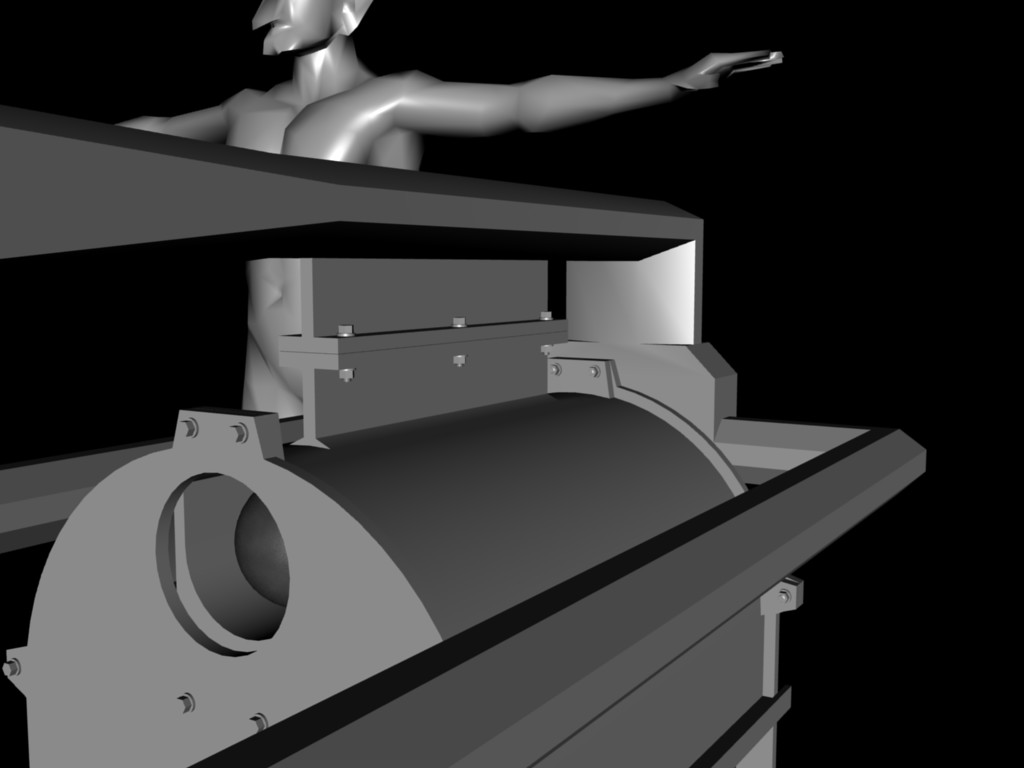
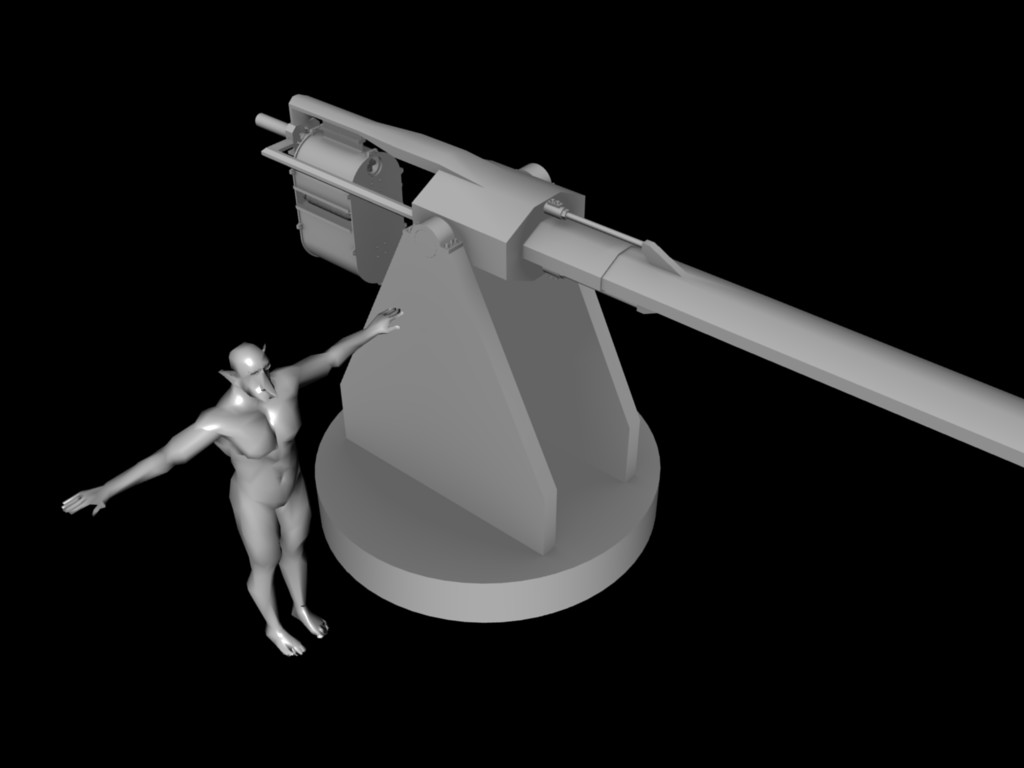
I believe I have completed the magazine to my satisfaction. When I get around to materialing, everything new you see will be made out of steel. Crewman Mike has also returned to provide a sense of scale (props again to makehuman).
I changed the top of the sabot a bit to aid in sepration on impact. To help distinguish the penetrators from the shells, the sabots now have 2 paint stripes where the shells have 1. I also did my best to come up with a bunch of easily distinguishable colors for labeling the payload in each round. I think I still need one more color though. Suggestions would be appreciated (anything but black).
I took most of my ideas about how this magazine will operate from escalators. I wont be modeling the internal linkage though (way to many objects to deal with). There are two loading gates so that the gun can be ambidextrous (one will be covered up by a plate to prevent ordanance from escaping). However I might make it so that both sides can be loaded simultaneously for quicker reload times.
@Kronecker: Thanks but no thanks on the material repository. I’d like to learn how to material myself. I see no need to use a magnetic feeding/loading system. Mechanical systems are less likley to accidently set off the explosive charges. Not to mention that a railgun operating without some sort of mechanical rammer will simply weld the projectiles to itself.
OUCH!!! MY HEAD HURTS good looking models m8 and great for you that u like to make sure that the details is errrm lets say near perfection
but could u warn me next time like on the title or something lol that was like a science lesson in gun shop
Yeah, the designing is the fun part for me but perhaps I go into a bit too much detail on the forum. Anyway I made a test video of the uranium penetrator just for fun.
Looking at the video a bit, I reckon I should have made a bit more fire and fury to it. Oh well, it was a fun mini-project that taught me a little about making explosions and stuff.
If my research is correct, a railgun works by having extremely high currents run through the projectile and the projectile is then forced out of the gun by its own magnetic field. In that process the projectile is heated quite a bit and I wouldn’t recommend using explosive projectiles at all. Also the sabots would propably not be cylindrical but as wide as possible to prevent arcing between the conductors. They would also need to be made out of a conductive material with a high melting point that doesn’t weld (propably graphite). In reality your design would instead be great for conventional gas-propelled projectiles.
That said, your design is really cool and most people would buy it:p
Nice work Sharper, I love the engineering detail you’ve got going here. Just a couple of points (tech points in asterisks):
When rendering, use some AO, a sun lamp, and give the scene a floor. It will show off your models a bit better. If you don’t like long render times, the approximate AO (AAO) is pretty good.
I’m not sure what the explosive charges are for. Railguns propel their projectiles by Lorentz forces arising from electric current flow. You need to add some kind of conducting path inside the shell for the current to flow through (projectile is the pink bar in diagram).
I was going to suggest you have the current flow through the copper band, but now I think that firing the gun would cause the copper band to fly out of the end and leave the shell sitting in the barrel.
You could make the conducting path circular (like the copper bands, but built into the shell for extra strength). Then make the shell rotate as it travels up the barrel. This means that the contact point (where the current arcs across) would move around the conducting band, reducing ablation (wear) at any given point, and giving a better connection.
Lol, thanks. You are perhaps the most informed person I have had to debate with. I did have quite an argument with myself about making the projectiles explosive. In the end, I decided that it is much more valuable to be throwing out explosives instead of solid chunks of steel. As I mentioned earlier, the shell bodies are made out of a composite with crappy conductivity. Hopefully that would suffeciantly shield the explosives.
Using wider ammunition is something that has never occured to me. I reckon its worth calculating out though. Sometime later I will work out the numbers.
Welding isnt a problem as far as I’m aware. As long as the projectile is moving at a decent speed when it hits the rails, it will keep on truckin.
EDIT: Ghazwozza’s post just popped up. The explosive charges aren’t for propulsion. They are to make more hurt when the shell arrives on target. As for the copper bands flying off, perhaps I will make indentations into the shell prior to shrink-fitting the copper. That should make a suffeciant hold. Rotation will be hard, however. The only simple way I can think of to make a rotation is to rifle the barrel. With all this crazy railgun stuff going on, I doubt the rifling will last long. I’m not sure that it matters if the conducting band needs to be protected from wear. If I am not mistaken, it will continue conducting nicley even when it turns into a thin plasma coating.
Ok, even though I’m not a big believer in overthinking the your models, since everyone else is still quibbling about the technicalities, I might as well throw in my two cents (sharper, just let us know if you don’t want anymore input on the tech stuff).
Before I say anything else though, it’s a sweet looking and believable model which is all that really counts IMAO.
Jorzi brings up an excellent point. Modern full sized, high-velocity rail prototypes are limited by the durability of the rails. Because of the sheer amount of kinetic energy involved, no known alloy can withstand more than a view shots. The weapon literally tears itself apart by friction. The heat involved is usually unough to generate a sizeable ploom of flame (http://www.slipperybrick.com/2007/01/navy-unveils-railgun-cannon/) - even though nothing present is combusting. This heat is generated directly on or around the the projectile. I’m not a weapons physicist but I doubt anything explosive would make it out of the barrel.
Which brings me to my other point. Piggy-backing off of what ghazwozza said, the idea behind a rail-gun is the massive kinetic energy involved. A successfully fired high-vel rail projectile will have enough kinetic energy to put to shame the energy of any conventional explosive small enough to be safely contained in a projectile. Example: The military was able to fire a projectile with 10.64 MJ of energy (http://en.wikipedia.org/wiki/Railgun). That’s enough energy to accellerate an 11,000 ton object to a speed of a bout 2.2 mph. In other words, explosive shells look pretty, but it wouldn’t make a noticeable difference in the damage done to the target.
Like I said though, it looks pretty and that’s all that counts
Listen to bluetygr, ghazwozza, and Jörzi. On a railgun, an explosive warhead is superfluous.
Rick Robinson’s First Law of Space Combat states that “An object impacting at 3 km/sec delivers kinetic energy equal to its mass in TNT.”
A railgun typically fires projectiles at about six kilometers per second. This means that a ten kilogram railgun projectile will hit with the energy of 40 kilograms of TNT. If the projectile was made out of solid TNT (i.e., it was all warhead), it would hit with the energy of 50 kilograms of TNT (40 + 10), which isn’t really worth it.
Ke = 0.5 * M * V^2
where:
Ke = kinetic energy (Joules)
M = mass of projectile (kg)
V = velocity of projectile relative to target (m/s)
x^2 = square x
Divide Ke by 4,500,000 to get explosive force in kilograms of TNT.
As the others noted, railguns have severe erosion of the rails, because you are striking an arc between the rails and the sabot. You need to have the rails easily replaceable.
Coilguns do not have such erosion. The trouble with them is constructing a switch for each coil that can handle the high voltages without exploding.
I surrender. My ammunition will no longer have to worry about payloads. I will remodel both types of ammunition later on.
However I wont yet give up the fact that simple kinetic chunks wont be enough to win a war. Perhaps I will have to revert back to gunpowder to propel electromagnetic, flack, chemical, biological, and thermonuclear charges. Either way, thats something to be tackled at a later time.
You will be happy to know, however, that I have foreseen the rail erosion problem on previous designs. For the smaller caliber railguns like this one, the rails will simply be durable and replacable (hence the large holes drilled into the protruding rails). For the larger caliber guns, the rails will be electroplated whilst in the gun.
About arcing across the rails: I tried to find the breakdown voltage of a vacume but I couldn’t come up with any useable formulas (that I can understand). It doesn’t matter terribly much though. I can simply replace voltage with about twice the capacitance.
@Nyrath: Dont you reckon 6000m/s is a bit too much to work with? I have been working all my calculations on 3000.
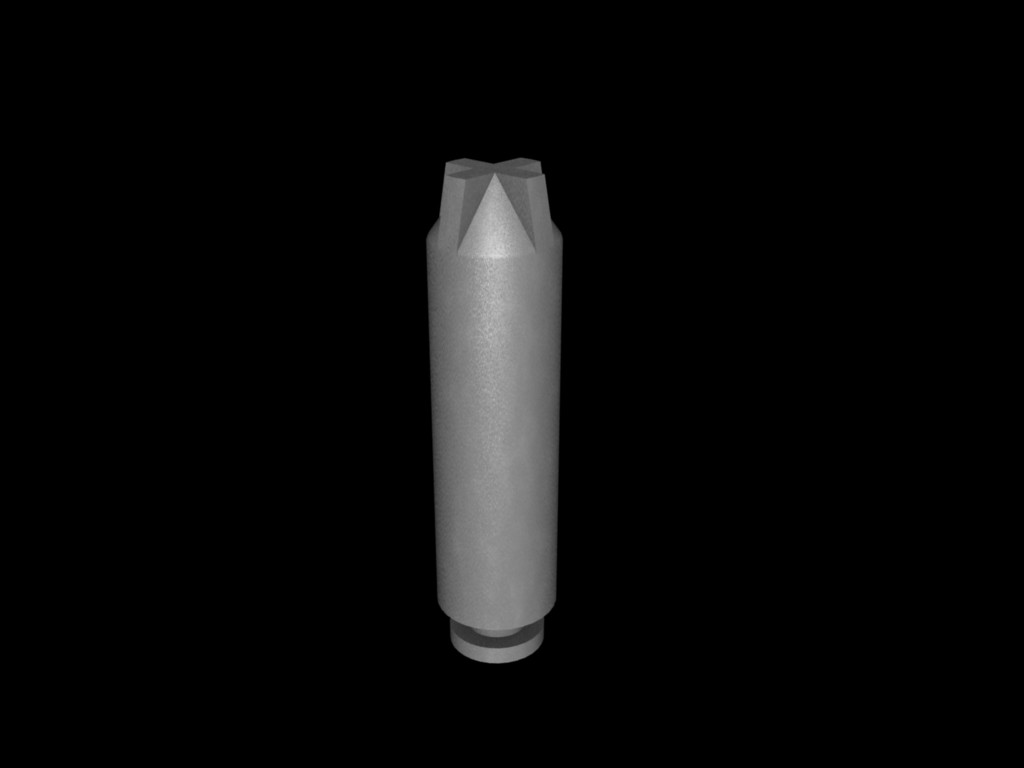
Well I have remodled the slug. I’m going for a solid steel look with it, but I’m not real sure on my texture job. This is my first serious texturing using blender’s internal texture engine. I have done similar objects with UV textures, but I am trying to test Blender’s internal versatility and my ability to use it.
As you can see, there is no fuse and no painted markings. It is a solid chunk of mass-produced steel. I wouldn’t imagine that the slug is machined hence the rough texturing.
The most noticable feature of the slug is its head. My brother brought up the point that a rounded shell has a tendency to glance off of a target. A solid face is much more likley to put all of its energy on target, but the damage is spread out over a larger area. He believed that a charge shaped sort of like a phillips head screwdriver would be a good balance between the two shapes. It makes sense to me.
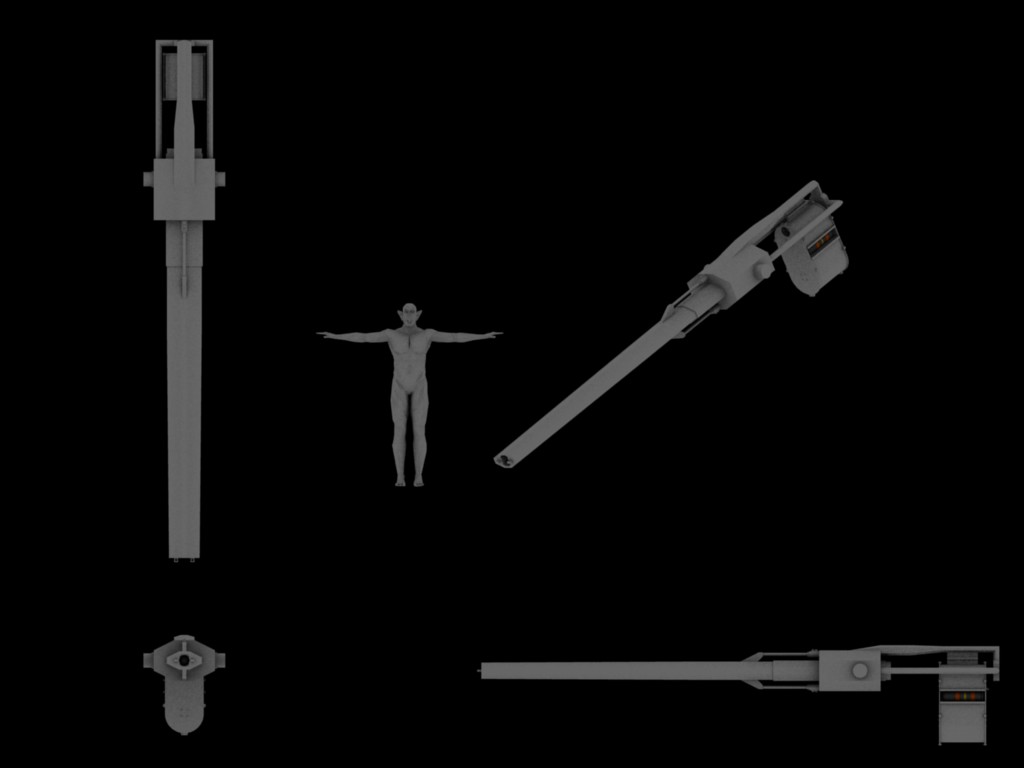
Here’s the latest on my railgun design. I have completed the rammer piston and the mount. Next I believe I will attempt Robbur’s hook method to make some electrical cables. I am slightly worried about the amount of space I have free to devote to the cables. The gun is also taller than I would have wished (1.8meters), but I will live with it. I had to use a double-acting telescoping piston for the rammer to keep it compact. Its a bit expensive and less reliable, but once again I will live with it.


 great modeling though keep it up


