I’m trying to add some hand-drawn details to my cartoon character in photoshop. I’m matching the solid color of the toon shader with my base color in photoshop, but when I plug an image file into the toon shader node It appears blown out on the surface of the model.
Settings:
Toon shader applied to model
Lightpath tabs are all set to zero.
Ambient occlusion is on with distance set to zero.
single light source. Sunlamp with the size set to 0.001 for hard shadows.
Film exposure set at 2.0
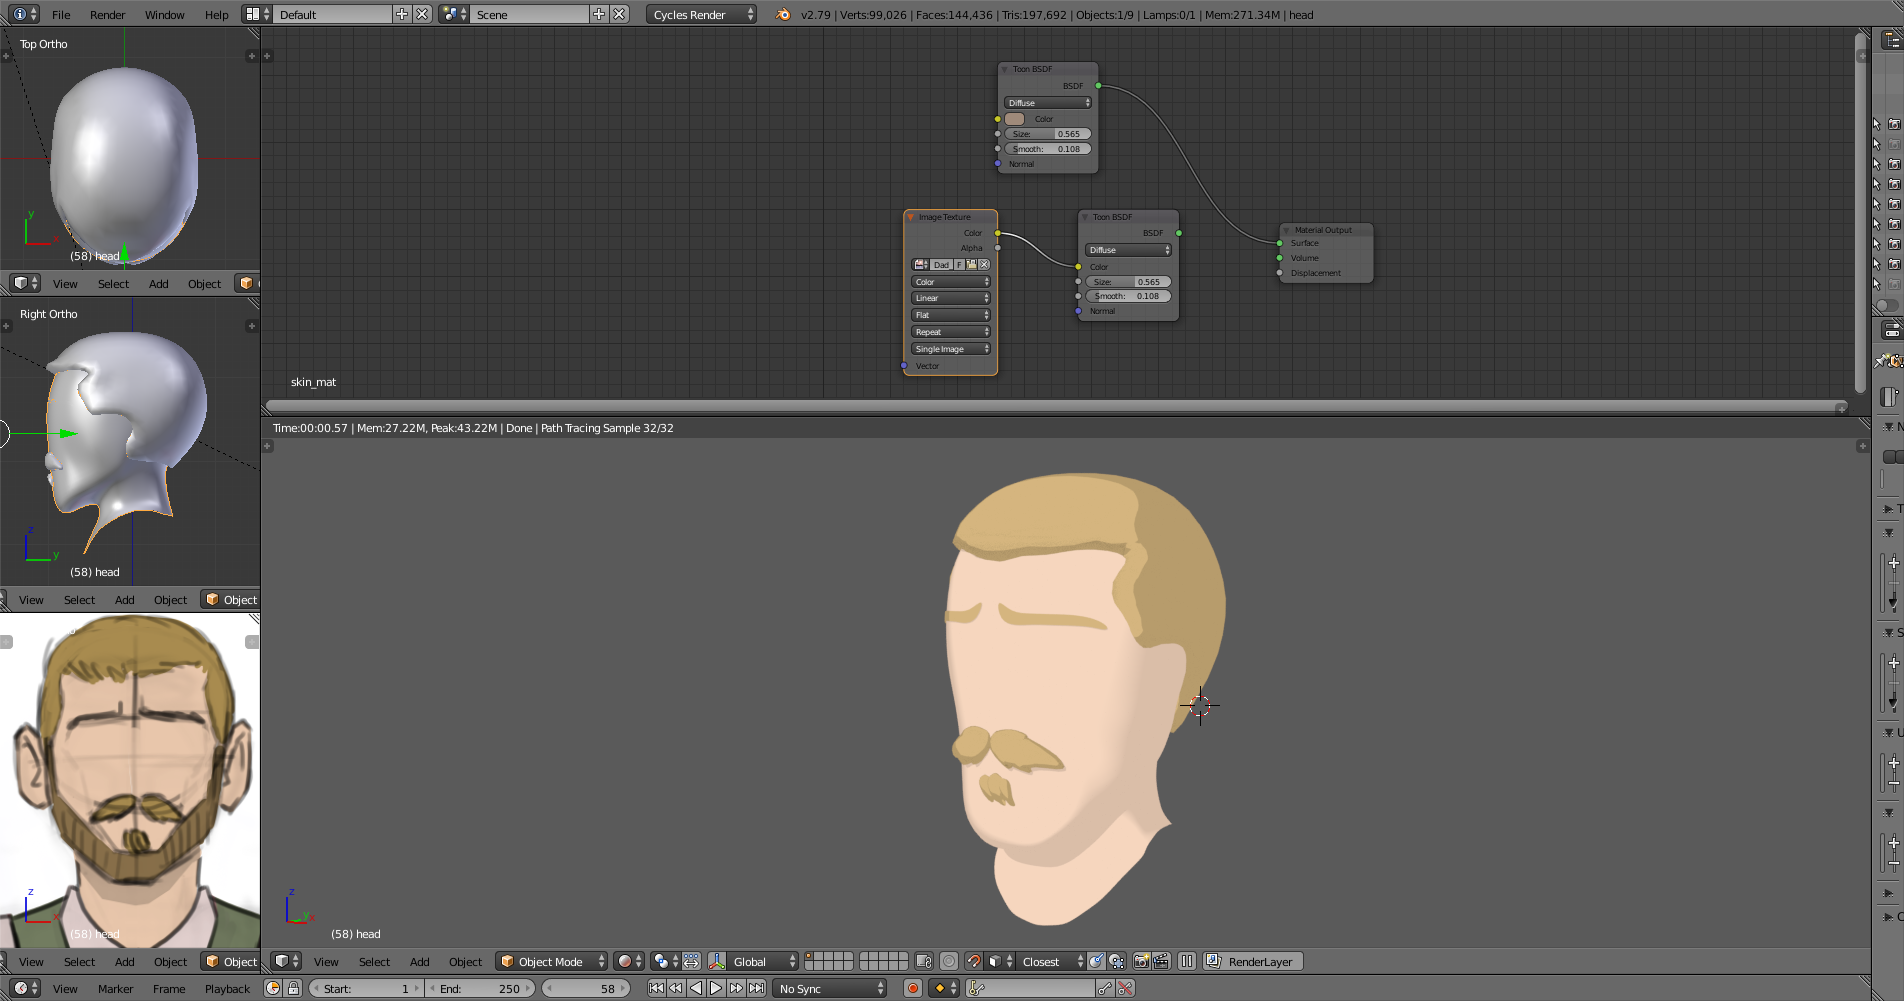
Here are some images. I have two simple shader networks here.
The first is with a simple Toon shader being piped into the surface slot. This is the color I want to use as my base color in photoshop and add detail on top of.
The second image is of an image texture node connecting to the toon shader and then to the surface slot. It’s a photoshop image containing the same color as the other shader, it’s just an image file instead. It’s all blown out. Why?
I’ve tried using the gamma node and the brightness node to adjust the brightness back to the original color. They reduce the brightness but they don’t give me the original color back.
Thanks for the post RickyBlender. This is a good tutorial for covering basic color only toon shading but I need to be able to use a custom texture map coming in via image node with a toon shader. Any Ideas there?
I think without putting anything on the vector input of the image Blender is just taking the colour at (0,0) from the image, which is white in your case. Did you try to UV unwrap?
The model does have UVs. And, I went back and added a texture coordinate node with UV pipped into the vector input of the image node just in case. It didn’t make any difference in the color of the character. Thank you for the suggestion though.