Array with parametric gradient distance

Hello there Blender community.

I would like to create a facade design, with a gradient wooden plank elements, something as illustrated in the attachment:

Only I need it in parametric editable form, ideally I would only change some value, or move with a slider and the array would react.

Is there any way to do such an effect?
Using modifier setup, or geometry nodes?

I would like to make a gradient offest increase or decrease.

I hope the idea is clear.

Thank you for your help.

1 Like

@zeroskilz @Zebrahead @SterlingRoth @DNorman

Hi gugusheep,
not sure if i get this right but this is how i would do it:


Curve_Distribution.blend (244.1 KB) → Blender 4.0

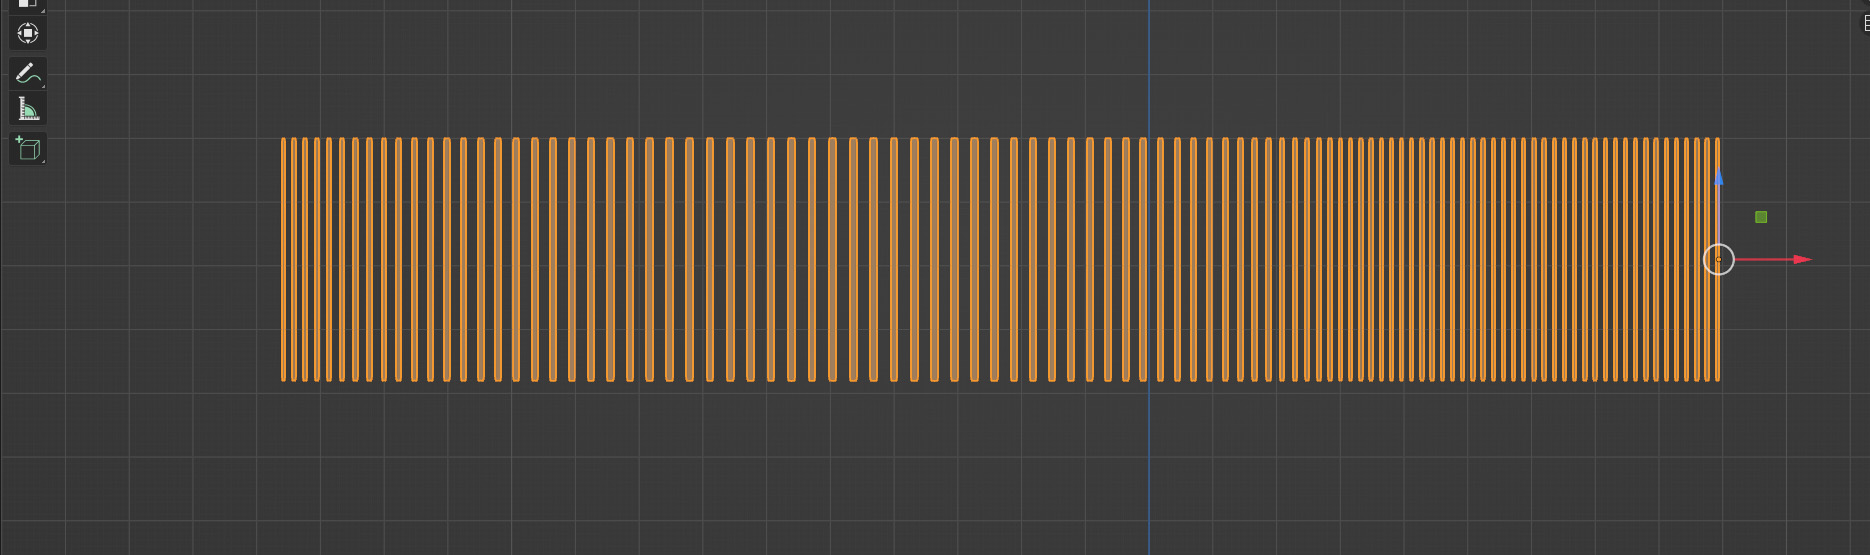
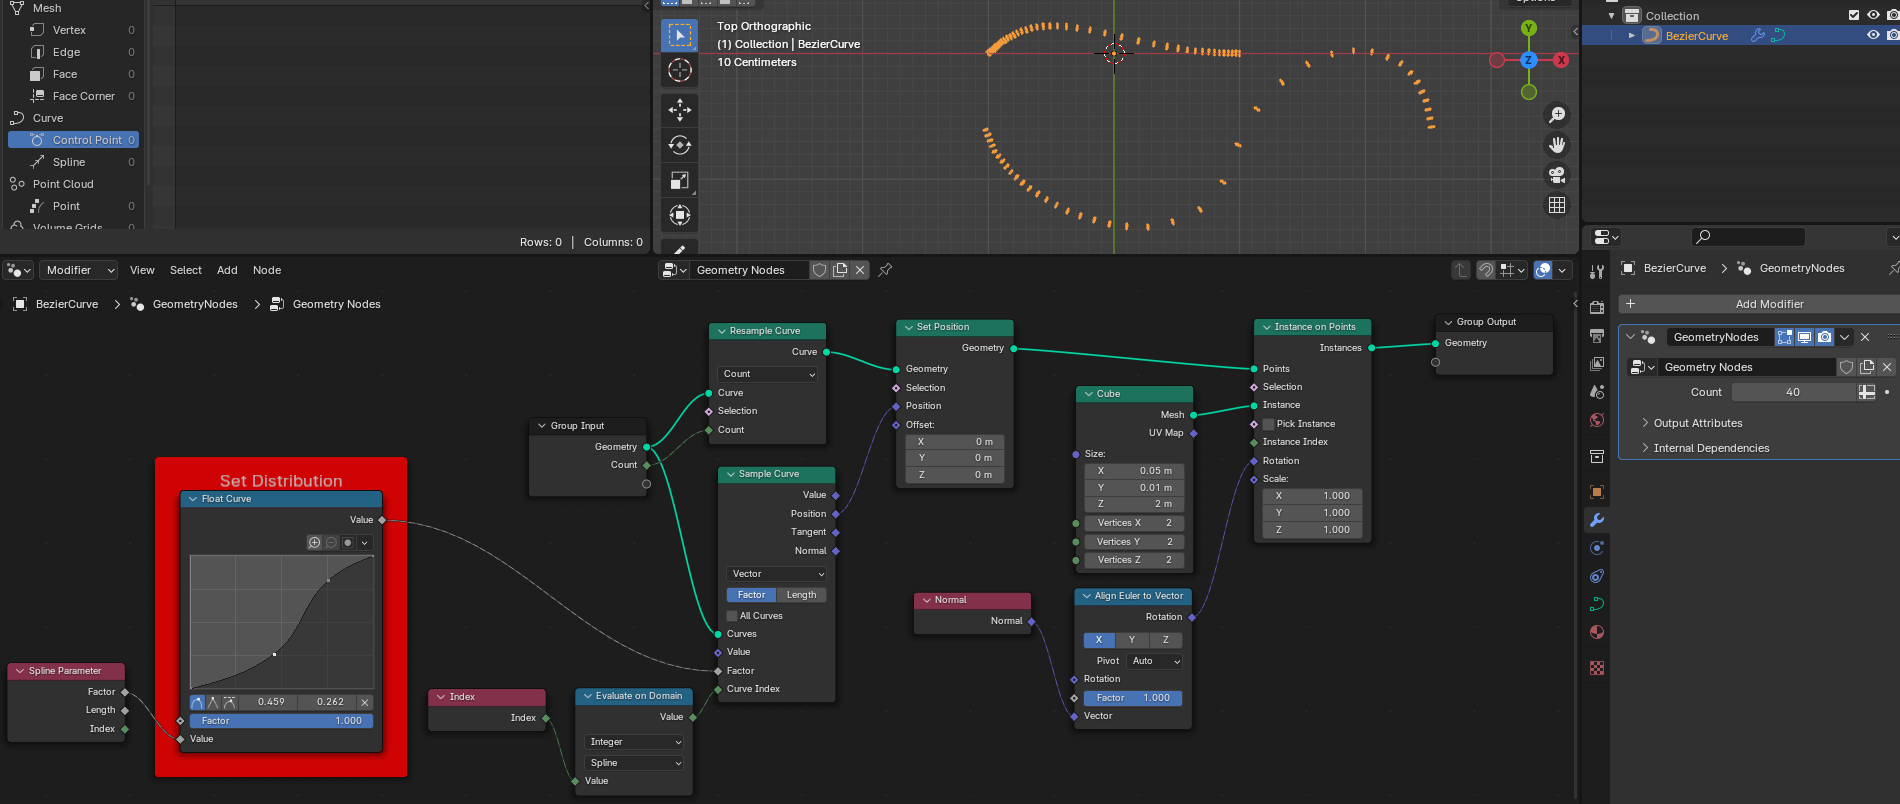
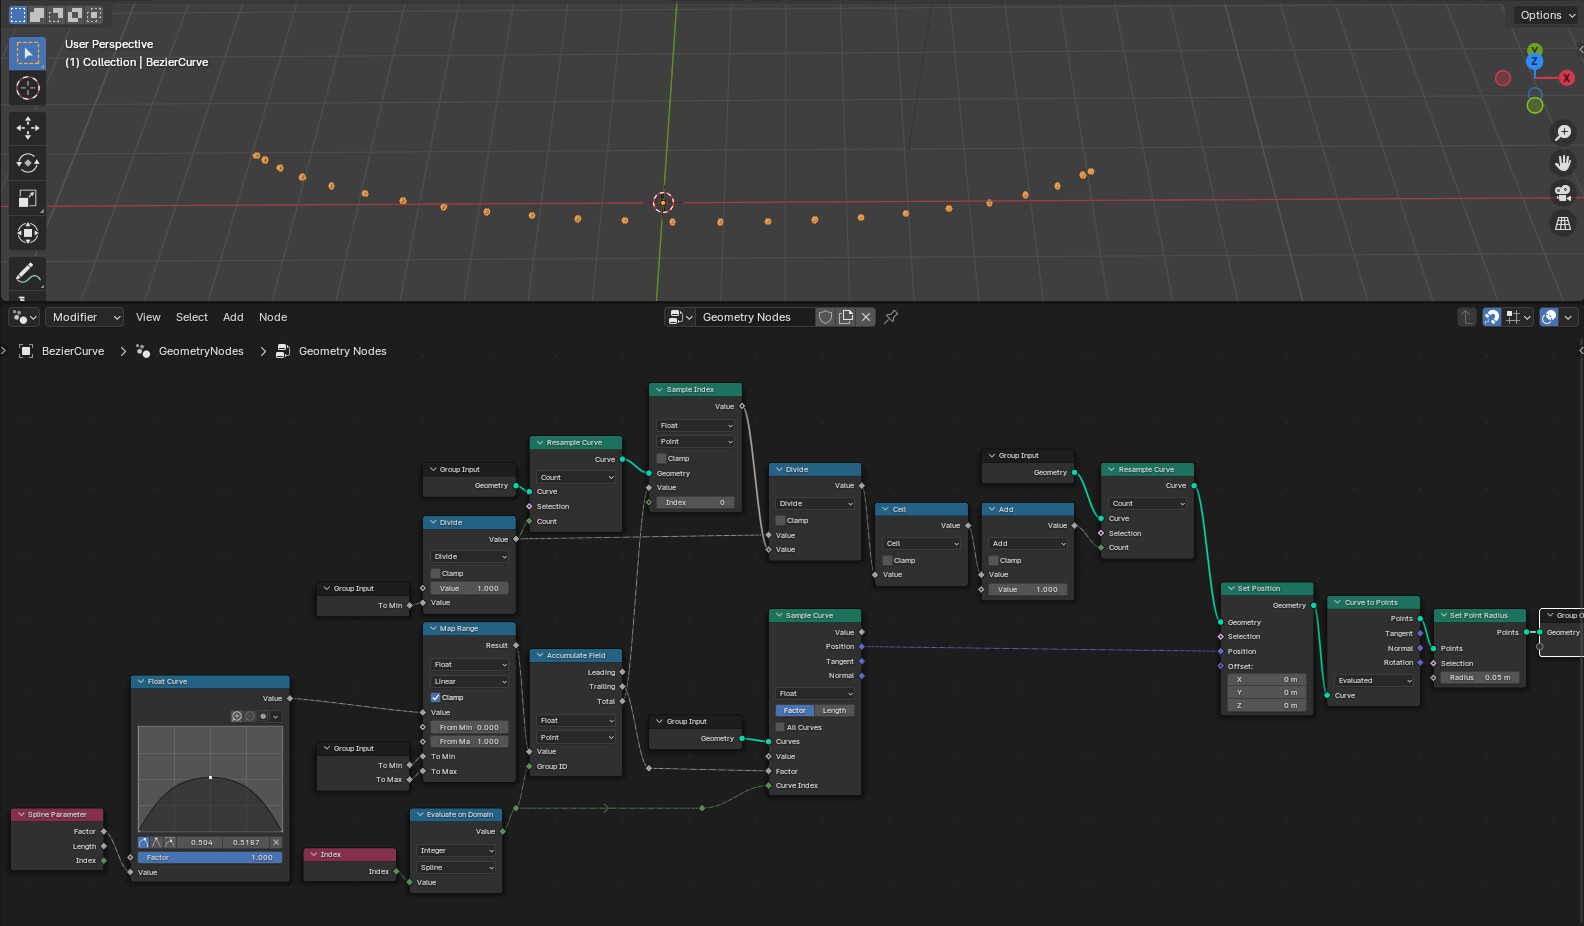
You can controll the distribution with the Float Curve in the red frame. You could also replace that one with any mathematical formula you want…
The idea is to sample the curve with an altered Factor and use that position instead.

6 Likes

Add this to the @Zebrahead suggestion to get scaling along the length of the curve…

1 Like

Thank you very much @Zebrahead

This works very nicely even with a linear curve:

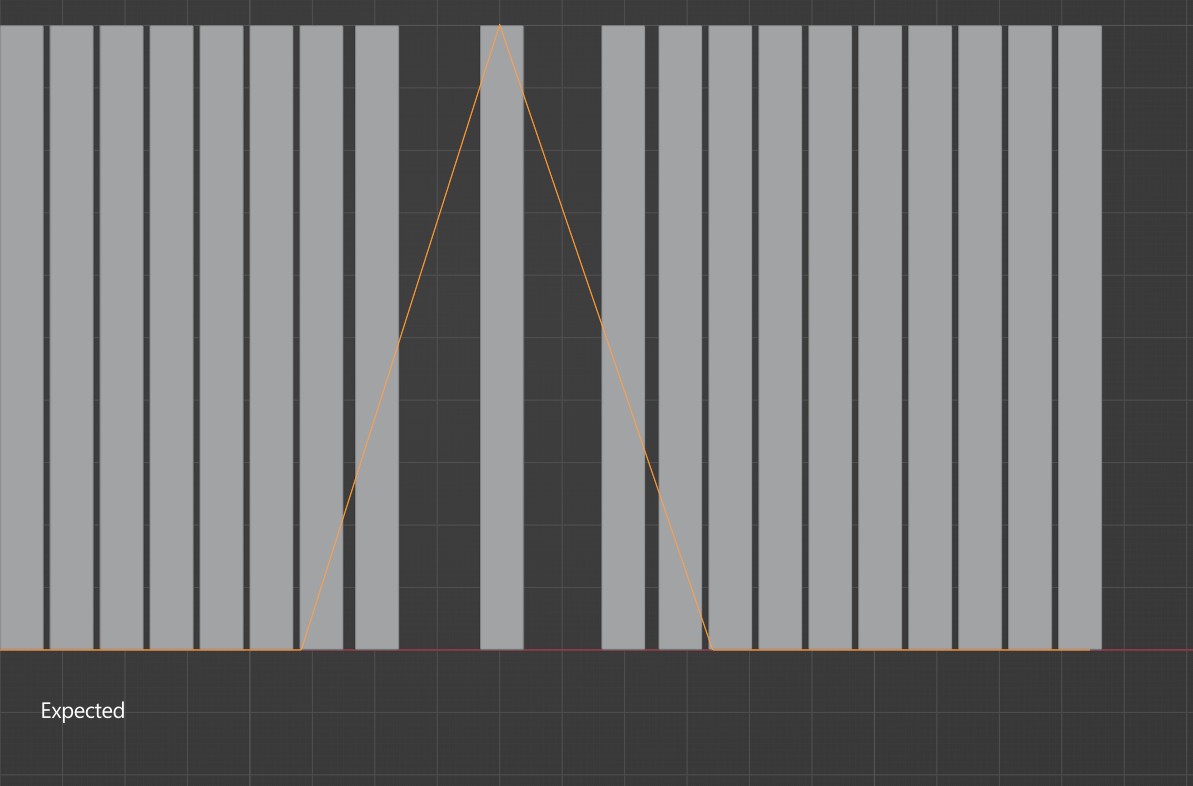
As I understand it, the curve and its increment from the default linear function (x=y) makes the array offset differences which I wanted. Thats perfect.
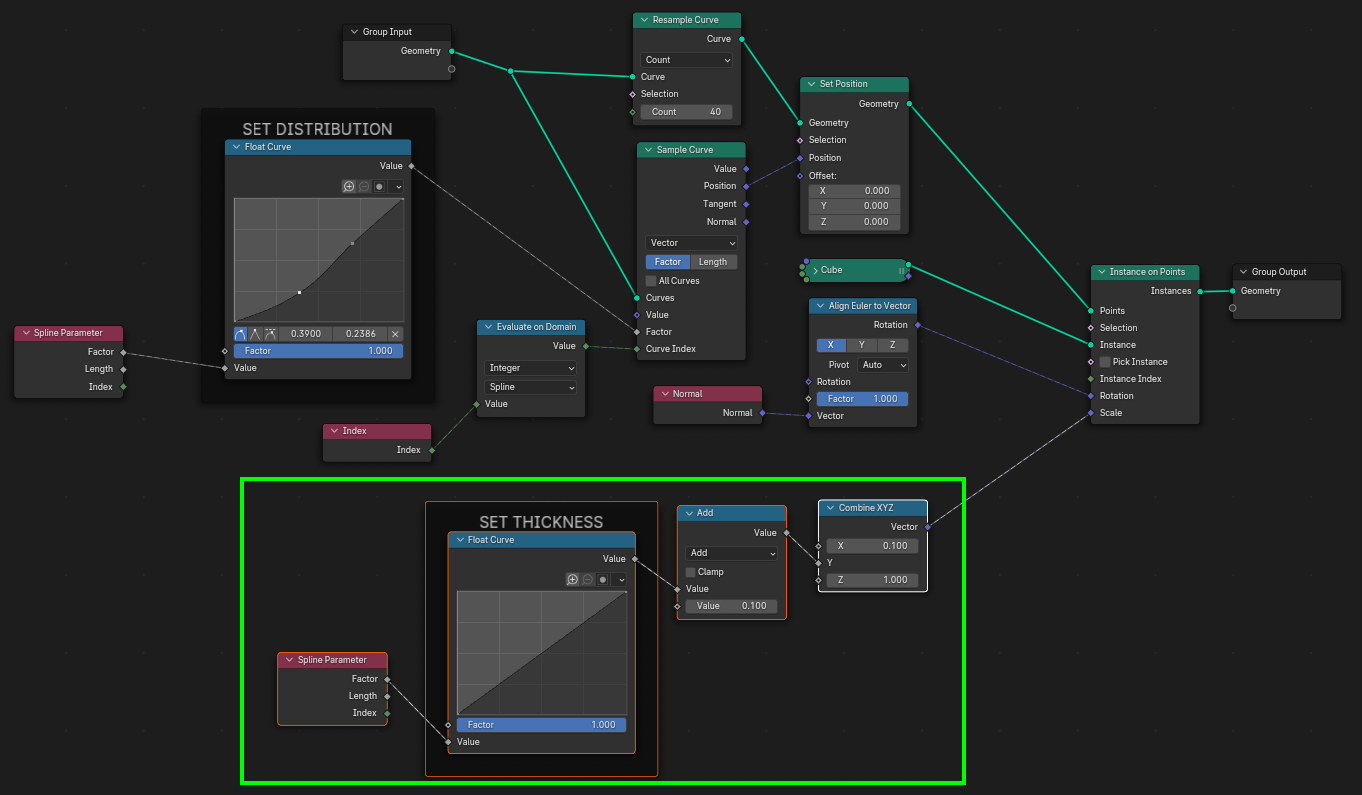
Only one thing I still wonder about - is there a way to control minimal offset? As for architecture, I need those planks to be maximally let’s say 0.2m away.

Regards
Gugu

Btw how do I convert this to mesh? (or apply geom nodes?) curve to mesh doesnt work

Isn’t that overdefining the setup?
Imagine having a line that is 10m long but you set the Count value in the modifiers tab to something like 11 → the distance from atleast one of the planks would have to be way greater than 0.2m.

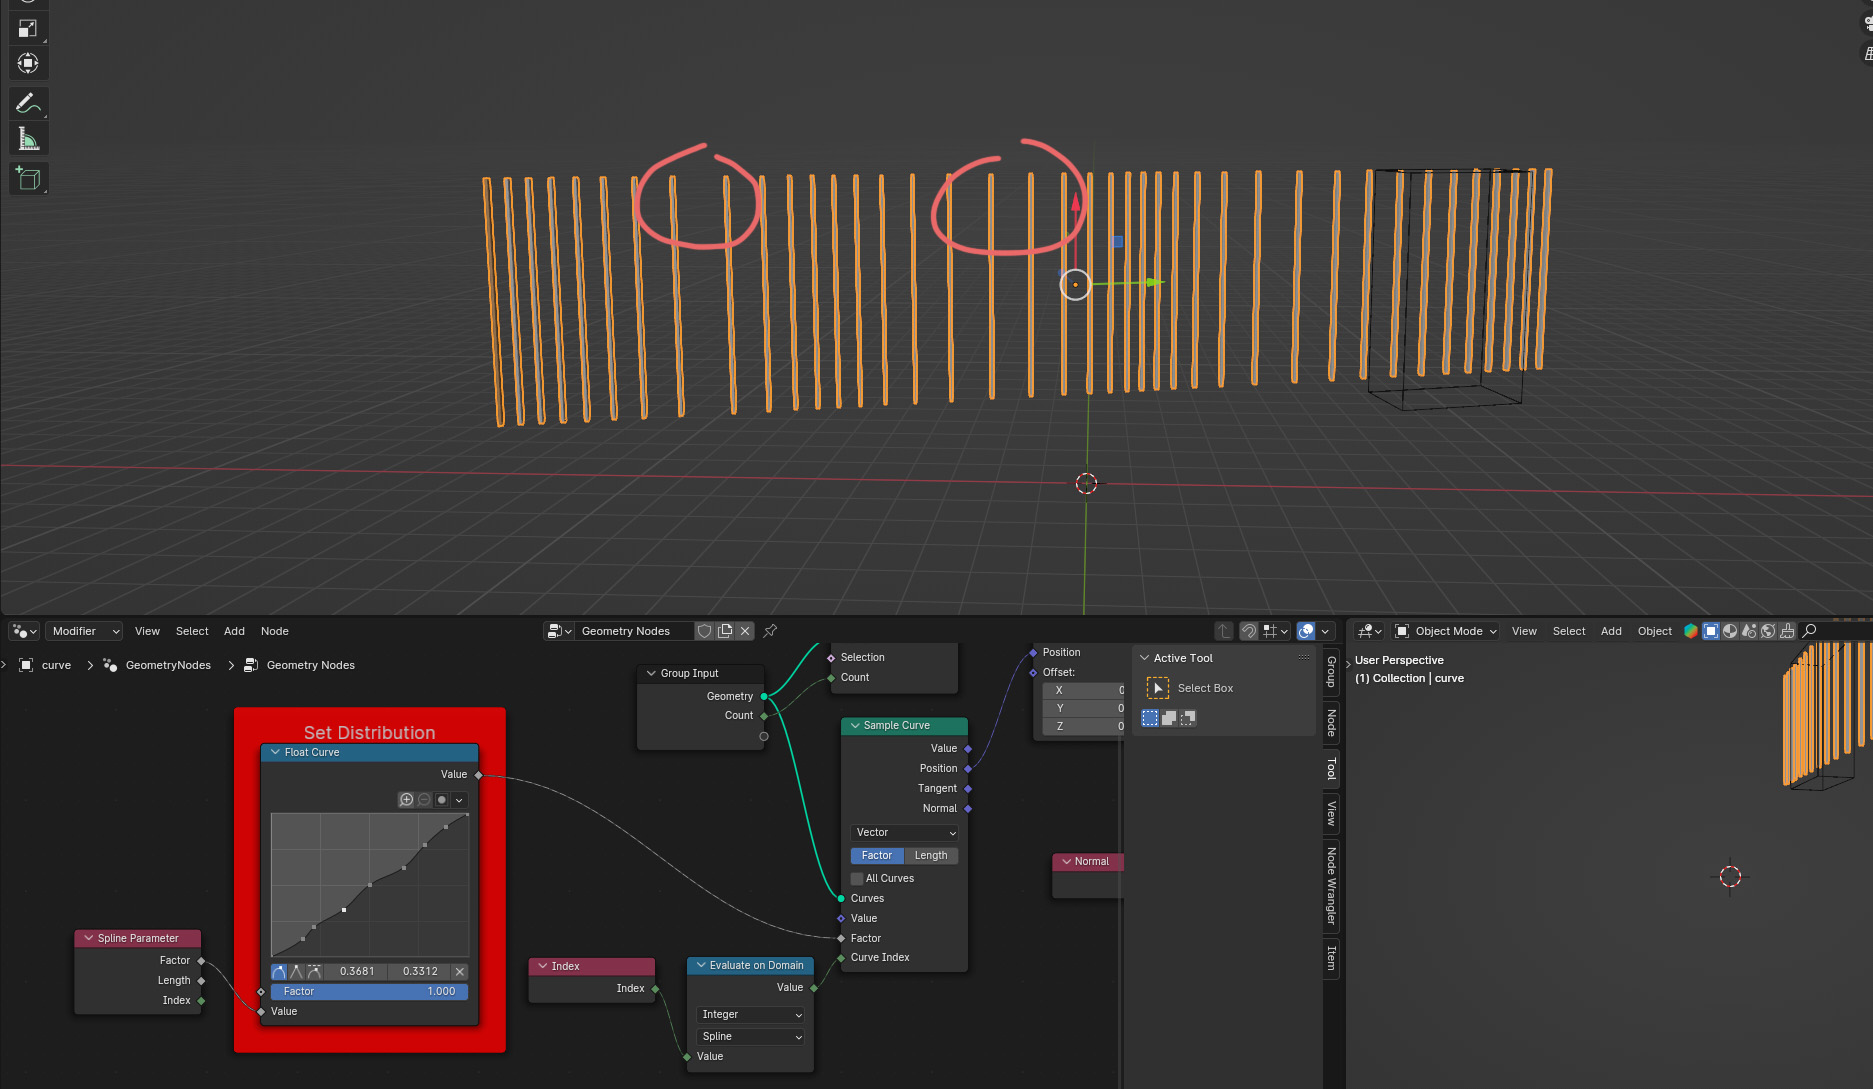
One idea could be to just subdivide the curve, where the distance between two points is greater than a certain threshold:


Place this between the Set Position and the Instance on Points nodes. You can change the value in the blue frame to control, where the curve will be subdivided.

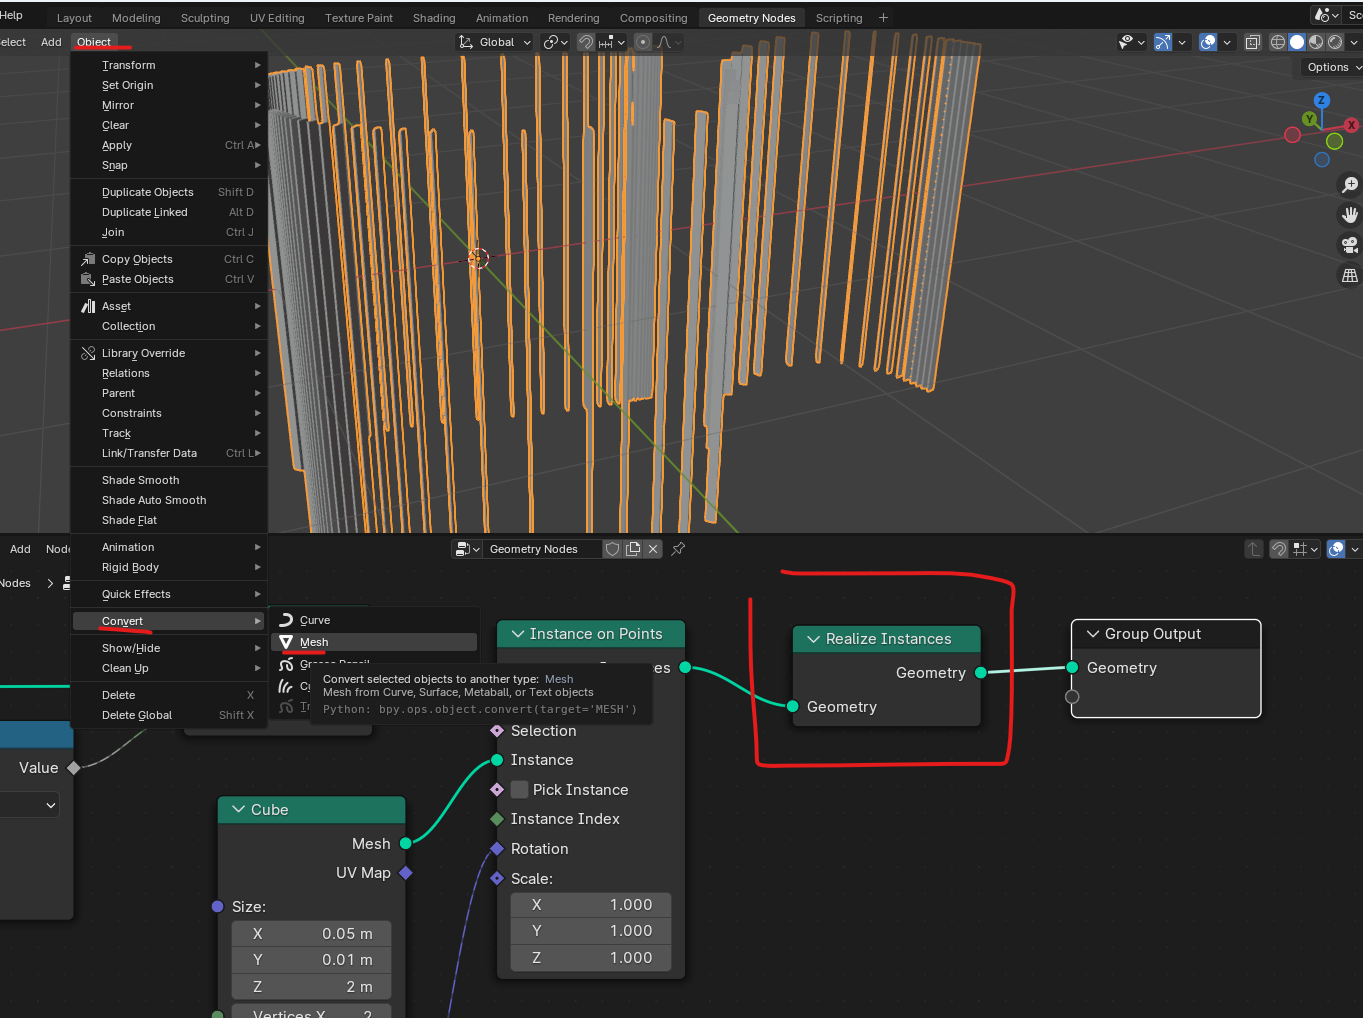
Place a Realize Instances node after the Instance on Points and then go to Object → Convert → Mesh to convert it to a mesh object.

4 Likes

Yes, thank you, you are a genius!))

The distance in the end solved me adjusting the count in modifier settings.

Thanks once again!)

Sample of our architecture with your nodes for you:

4 Likes

Thanks for showing us the sample image! Well done - it looks great :slight_smile:

Feel free to ask questions if there’s still something unclear

1 Like

I used Repeat Zone from 4.0. You can specify min and max distance between planks.
test_facade_gradient.blend (1.1 MB)

video

4 Likes

Wow that’s impressive. You guys are crazy…

Can I see your artwork? Cannot imagine what people with such an understanding in Blender do.

@Zebrahead @eelh

Very cool!

resample curve even.blend (88.5 KB)

Tried to do it without repeat zone… kinda works :man_shrugging:

… works for multi-curves but min-max defined in terms of factor… needs some work to work with length.

3 Likes

Wow, this solution is also amazing! I very like the control over the array distancing. Specially logical I find that the Y axis of the curve node defines “density” of the array

1 Like

User friendly version :slight_smile:
I used zeroskilz Z-Curve-Sweeper node group :heart: to prepare controller for raycast and to orient planks vertically in complex cases.

test_facade_gradient10.blend (2.5 MB)

  • Works with only one spline in curve.
  • Still not as accurate, due to algorithm.

4 Likes