Hello, I am new to Blender and am following a tutorial, and have run into issues trying to rig and animate using armature bones.
Firstly, when every time a new armature is created it isn’t aligned to the global axes, is there a way to change this?
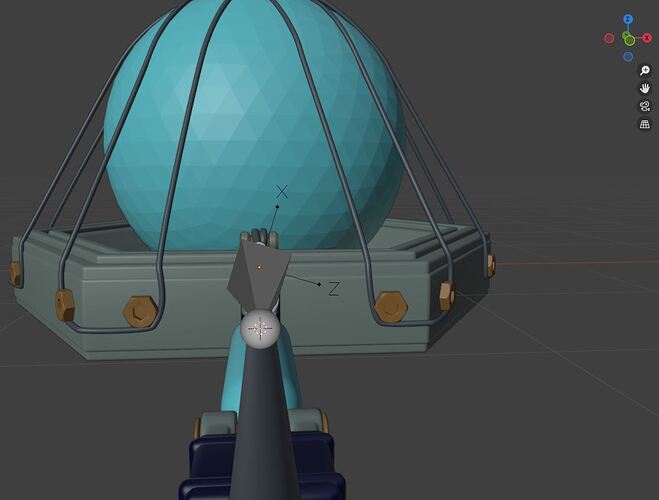
Even after rotating and fixing the alignment, when placing the end of the bone the rotation skews again as seen in the following picture
To position the bone first the cursor is moved to a selected object and then the end of the bone is moved to the cursor.
Is there a better way to be doing this or some tick box option I’m missing?
The bones being of kilter on their axes seems to be creating endless problems for me as I work through the tutorial.
It’s not clear whether you mean an armature (as in the armature object) or a bone, can you please clarify? In either case, when you create an object (any object type) or a new bone in an existing armature, it should appear at the 3d cursor location, aligned with world axes.
When you say “rotating”, I assume you mean “adjusting the bone’s roll value”? Bones are defined by their two endpoints and a roll value, which you can recalculate with shift+N if you always want it to point up, or in a specific direction (usually +Z). You can also reset the roll value from the sidebar (N) by hovering your pointer over it and pressing backspace.
You can directly move the bone endpoints (head & tail) and snap them to geometry or other objects, but sometimes placing the 3d cursor and going shift+S->“selection to cursor” is more accurate.
Blockquote It’s not clear whether you mean an armature (as in the armature object) or a bone,
I haven’t ever used blender for rigging or animation, when your saying the armature has an object I assume you mean something separate from the bone that spawns in when I use the “add” pop up menu.
If this is the case how do I tell the difference? I certainly haven’t noticed anything except the bone when I call in an armature.
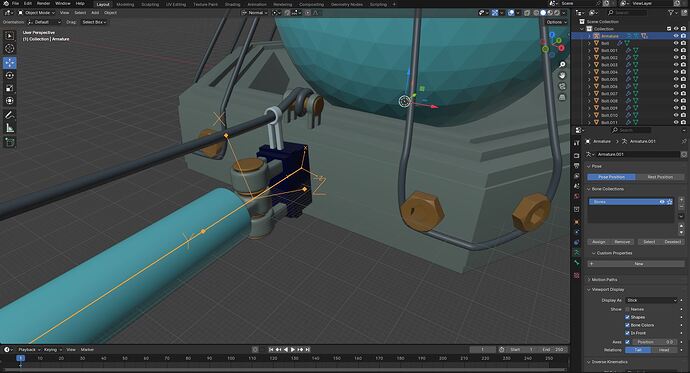
This picture should show what I mean better, the bones I’m looking at here all have wonky axes, this wasn’t intentional.
The specific problem I was have was I needed to lock the rotation of the bones on specific axes, so that the animation wouldn’t cause the hinge pieces to clip.
Do you have any idea what may have caused the odd axes orientations?
After going into blender and looking at an armature just on it’s own, outside of other geometry, I’m not sure exactly what I did to accomplish whatever is going on in that picture.
If you have answers to my questions I’d be grateful to hear them, however think that this was just a misunderstanding that caused me to make an error.
Just a part of the growing pains of learning new software, thank you for your time and patience.
I wanted to make sure you weren’t creating multiple armatures instead of multiple bones as part of one armature (I’ve seen that before). All object types have the “object” part in common; which is really just a container with transform values. Armature objects contain bones, much in the same way mesh objects contain a mesh. It’s always possible to mistake the object for the data and transform the entire armature object -make sure you’re in edit mode when you want to edit your armature.
I recommend you go through the manual (it’s not very good, but it lays down the most important basics) https://www.blender.org/manual/ or at least keep it on the side while you’re experimenting.
Tweaking an edit bone will often perturb its roll value because Blender tries to keep it pointing up. Try placing bones by setting their heads and tails first and then only worry about rolling the bone. But that doesn’t explain how it could already be angled like this upon creation, so I can’t tell you.
I recommend you don’t do that. Generally, riggers don’t restrict freedom of movement because you never know, and that’s something you can control in animation anyway. So there’s no reason to prevent it upstream.

