I’d like to attach a Hair object to the head of a human model but it doesn’t stay on the head. I tried to make it Child of the body but it detaches as the model walks.
What’s the best way to attach objects like hair please?
1 Like
By walk you mean armature deform? If you just move the object origin the child should follow, but if you use a rig / armature, you would have to rig the child object, also.
I have that issue before… If The hair Is still on Particle System It’s OK I Guess but When Convert it into a mesh it’s too much vertices… I switched using hair card instead besides it’s too much Mesh for game engine to work…
you also wanna make sure that your particles are after the armature modifier in the modifier stack. Otherwise they’ll just float there when the character moves.
Thx for the tip… I may used that for my high Poly Model later could use it As movies  Speaking of which… If I Rig It With The Head Bone… Will it work… I Don’t Know Wheter A Particle System Can Be Rig…?
  or maybe turn it into a mesh… And used soft body physics… Maybe
The particle system its self technically cant be rigged no. But the faces and vertices the hair particles are attached to should be rigged. As you can see in this exaggerated hair bounce.
However like I said before in my last comment, you want to make sure that your hair particles are after the armature modifier in the modifier stack, or the models animation will have no effect on them.
1 Like
Thx… That hair bounce is nice BTW
Thanks for your comments. The hair in my Blender file is particle based. It is just a solid mesh object in my Blender file which also contains a human character.
I wanted to include & display the hair object in my reply.
How could do that please?
1 Like
Sorry, I made an error in writing my reply - my Hair object is NOT particle based. Just a mesh object.
I Don’t Get The Last Part About Display And Include… But I Try… If Your Hair Mesh Is A Solid Object… Non Partical… U Can Rig It… And Use Soft Body Physics… To Get The Damping Effect… But It’s Depending On What Are You Achieving… Is It For Games Or For Animations… If It’s For Animations… Is OK Even It’s High Poly… It’s Depends On Your Machines I’ve Tried To Retopology And Use Shrink-wrap Modifiers To Less The Polygon… But Not Looks So Well… So I Make A Plane… Subdivide It…And Target The Plane To Particle System… And The Plane Use Hair Texture With Transparency… Since My Original Partical System Has Too Much Hair… I Re Do Re Make The Hair Manually Because I Was Aiming For Low Poly… But If I Use The Before Method Which Is Targeting The Plane To Particle System… Is OK If It’s Made For Animations Since Your Hair Is Solid Mesh… U Could Join The Mesh With The Character (ctrl J) And Rely On Armature Weight Painting Too And You Could Decimate The Mesh And Bake Normal Or Bake Everything… Turn To Be One Single Image… If Wanna Use It For Game…
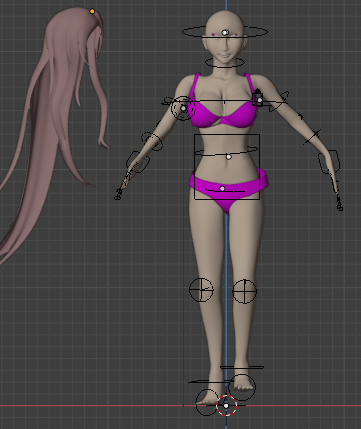
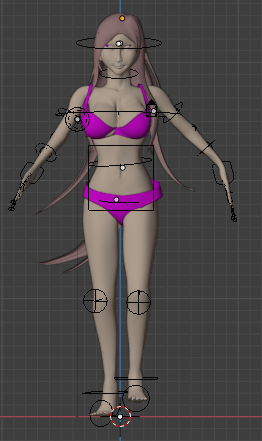
Thanks for all the suggestions. For a cleared idea, here are some images:
- woman without hair 2) woman with the hair 3) child of constraint target
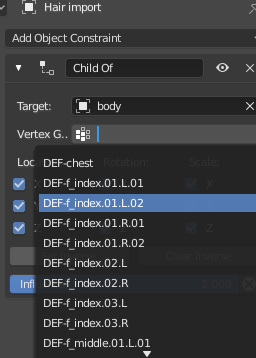
For the ‘child of’’ constraint I’d like the head bone but this in not an option.
How do I make the hair ‘child of’ the head bone?
2 Likes
This Is Good The Model… I’m Not At My Pc… But I Think It’s On Pose Mode… Select The Head Bone And Try Child Of… The Hair Mesh… Disable Scale… or Select The Hair Mesh And Parent It To The Whole Bone… Or Specific Bone After Enable Pose Mode… I Don’t Know Wheter Can Child Of Specific Bone…The Best Way… Is Making Model And Hair Ctrl J And Weight Paint Can Make Additional Bone For The Hair I You Want Specific Animations To The Hair Even After Weight Paint… If You Seperate The Mesh… It’s Still Works