Hello!
This is my first post here, inspired by a lot of frustration in trying to find an answer.
I started 3D with Blender years ago, and I love it. Recently I have learned Maya for a job, and I love the auto-keyframe function, and how it only keys the changed values which is amazing for fine tuning animations.
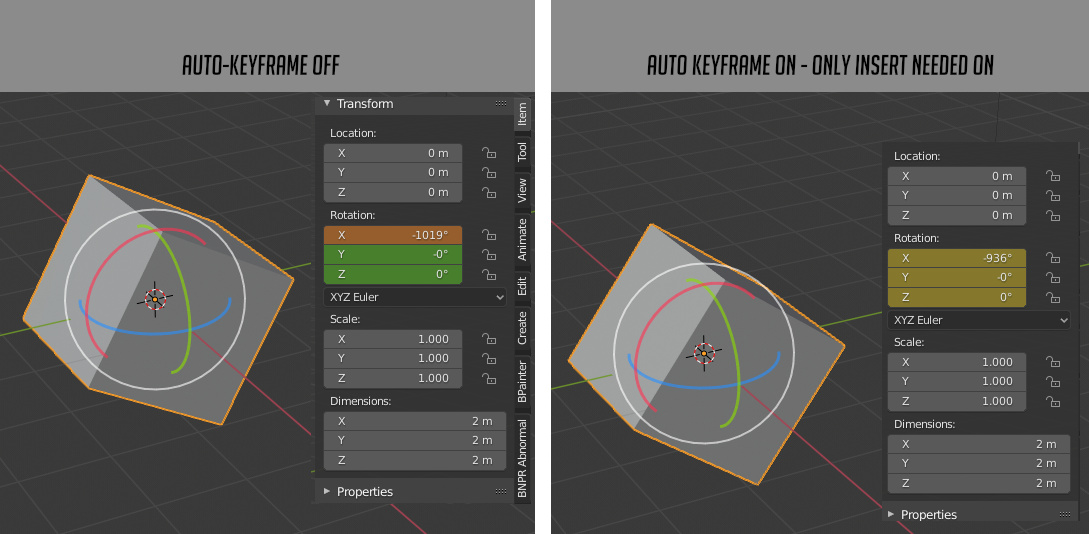
Blender’s automatic behavior is to place a key frame on everything, which is not ideal. The “only insert needed” Option doesn’t seem to help, and deletes key-frames afterwards which isn’t great for workflow.
Active keying sets don’t solve the problem, as if anything changes, new keys are added on all the active curves (not just the changed one)
Blender records which values change, which you can see when you don’t have auto keyframe on (the value turns orange instead of staying green, while the unchanged values remain green) However when auto keyframe is on, even with insert only needed, all the values get a keyframe not just the changed one. I want to know if there’s some hidden secret way to make only the changed value get keyed.
Blender already recognizes changed vs unchanged values, so I’m really hoping that there is a way to only key that value, either now or in the near future to reduce redundant and unnecessary key frames.
Thanks for your reply!
This is a workaround however when working on complex animation it becomes very tedious, I’m looking for a solution that doesn’t require extra steps. Multiplying it across all the actions taken while animating, it becomes extremely tedious and non-intuitive.
The current system works alright for blocking perhaps, but for fine tuning it’s very frustrating.
I’m pulling my hair out
I suppose I could animate everything by sliding values in the transform menu, but it seems ridiculous to have to do that when transforming with a local gizmo literally achieves the same thing, but is more interactive.
If there isn’t an option they should definitely add it. After working with Maya and Blender I can see it being a big hangup for Maya artists to make the switch.
I’ve removed my other reply after I discovered my main issue is likely due to EULER order, (Rotating locally along an axis doesn’t necessarily comply with the rotation order creating extra keyframes as Blender applies it, not sure how I didn’t notice it before.)
Overall, I didn’t miss your point I understand what you meant. It’s just not the solution I was looking for. I see Blender is trying to be more intuitive but the lack of control with autokey is frustrating.
Modifying rotation in between keys will only key the one I modified and works great! When creating keys however it will key everything. I just want it to function like it does between frames all the time.
After looking into it more I don’t see that it’s an option anywhere, so I’ll have to stick to working around it.
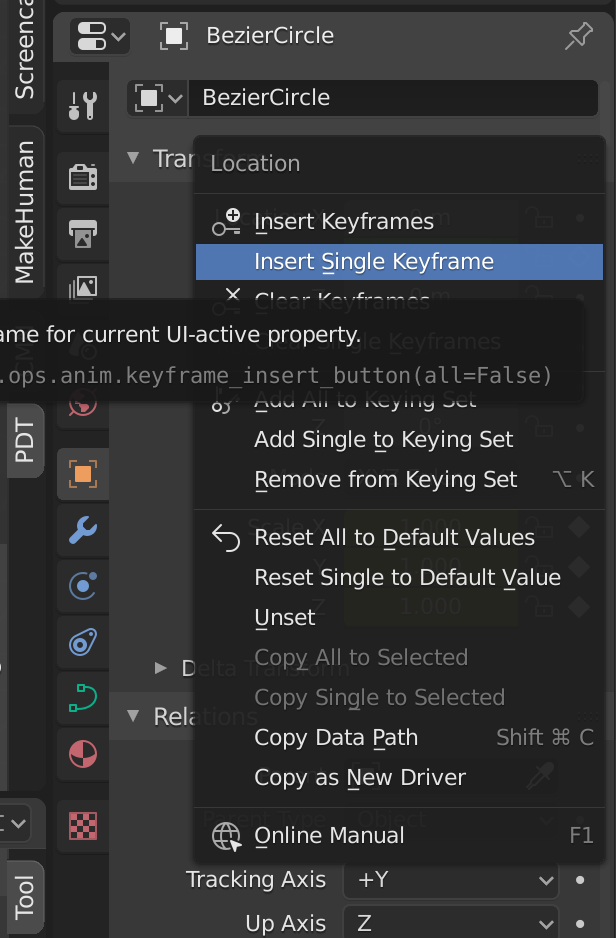
1· In Blender go to : Edit > Preferences… > Animation > Keyframes > Auto-keyframing > Only Insert Needed
(you have to coche Only Insert Needed)
and that’s not all,
2· Active the autokey
when you move your props (or whatever) it work like allways, puting a keyframe even if the value doesn’t change, but not exactly
3· You have to select what you want animate, press ’ I ’ in every channel you will animate (X/Y/Z in the Location/Rotation/Scale) at the beginning of your animation, like frame 1.
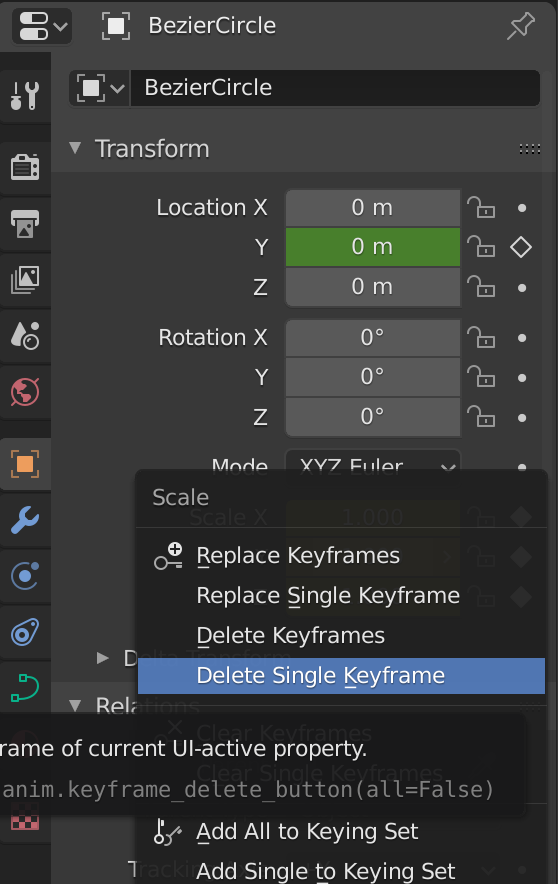
4·Do the same, put every key in every channel you need, but at a different time, like the end of your animation, like frame 250.
5· And inside the frames 1 and 250, you can translate/rotate/scale, move your character without putting keyframe in unmodified value.
But just between the frame 1 and 250, if you do it outside that will not work, and put keyframes on unmodified value.
I hope that will help even this conversation comes from 2020.