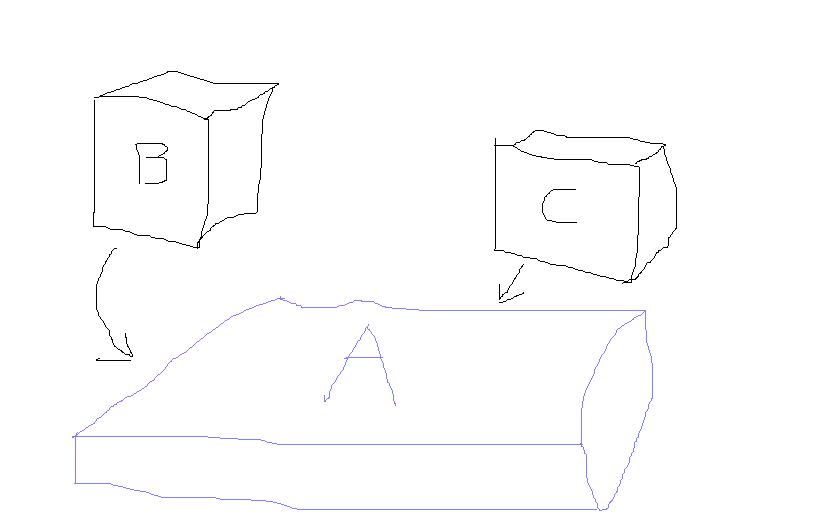
Please observe the first picture. I have three objects A, B and C. Now, I
move B and C in such a way that they partially overlap the volume that is
occupied by A.
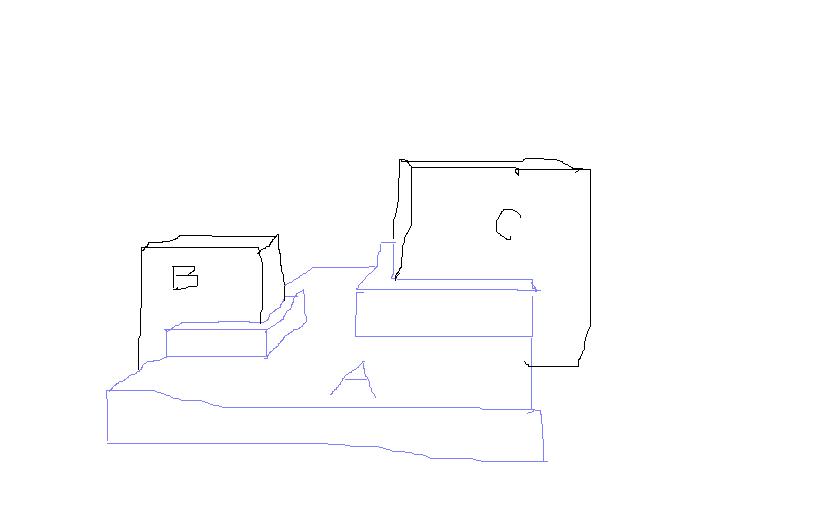
What I would like to achieve is depicted in the second picture; a skirting
/ plinth / mould / rim (henceforth called skirting) is to appear as if to
crease around B and C automatically. I do not mind whether the skirting is
a seperate object, a set of seperate objects or some deformation of the
mesh of A. As long as the skirting has the same material as A and the
skirting changes along new movements of B and C I might make at a later
stage.
The question is, how do I do this in Blender (2.49b)?
I ran into this problem while working on a small (non-photo realistic)
project for interior architecture. Object A is actually the floor. Objects
B and C are walls. I’m making the skirting manually now as separate
objects but it takes too much time; when I change the position / size of
the walls, I have to change the skirtings as well one-by-one.
Your input is appreciated greatly. If possible, I would like to achieve
the result without scripting.
for the Cube B
select Cube B in object mode
duplicate the Cube
tab into Edit mode
change to face-select-mode
move the top-face down to the height of the skirt
move the other side-faces along the face-normals to make the skirt-thickness
then tab out of Edit mode
now you have 3 object: the floor, the Cube B, and the skirt
select only the objects skirt + floor
and do the “boolean operation union” (w-key or use menu-drop-down)
after this check in edit-mode of the floor, that the floor has the new union with
the created skirt-object and if it is what you want, you can delete the 3.skirt object.
another way would be to stay with the seperate skirt-object for using a different material…
The method you outline is indeed one way to achieve the result in the second picture. The problem is, however, of management:
After I executed the steps you described, let’s suppose I want to move object B to a different position. The skirt would stay in the old place. I have to manually remove the stationary skirt and redo the same method to obtain the skirt for the new box position. What I am looking for is an automatic way for this to happen.
It would speed up the design process significantly for me, as moving around walls is an operation that I have to use very often. The less steps are required to move around walls with the skirts, the less time it takes to finish the overall project.
If you select the wall and the skirting, then use CTRL+J to join them they will be a single object and you can move the wall and skirting together.
Indeed, if you add some loopcuts near the bottom of the wall you could extrude the skirting out from the wall and they will already be a single mesh. (Use ALT+S to scale along the face normals.)
@paradiddle
nearly full solution,
sorry for not mention the boolean-modifier option,
i did not tell it, because my blender version crashs when using
multiple of these modifiers in one stack ----
that is the reason why the blend-example does not use
the union-modifier to generate one mesh from floor and the other
union-intersection object.
The box to cut of the upper part is on layer-2
and uses union with the bigger boxes (surrounding the middle box),
while the skirt is made as the intersection. This ends with three 3
boolean-modifiers for one skirt-box-object. And the skirt moves
with the parented object.
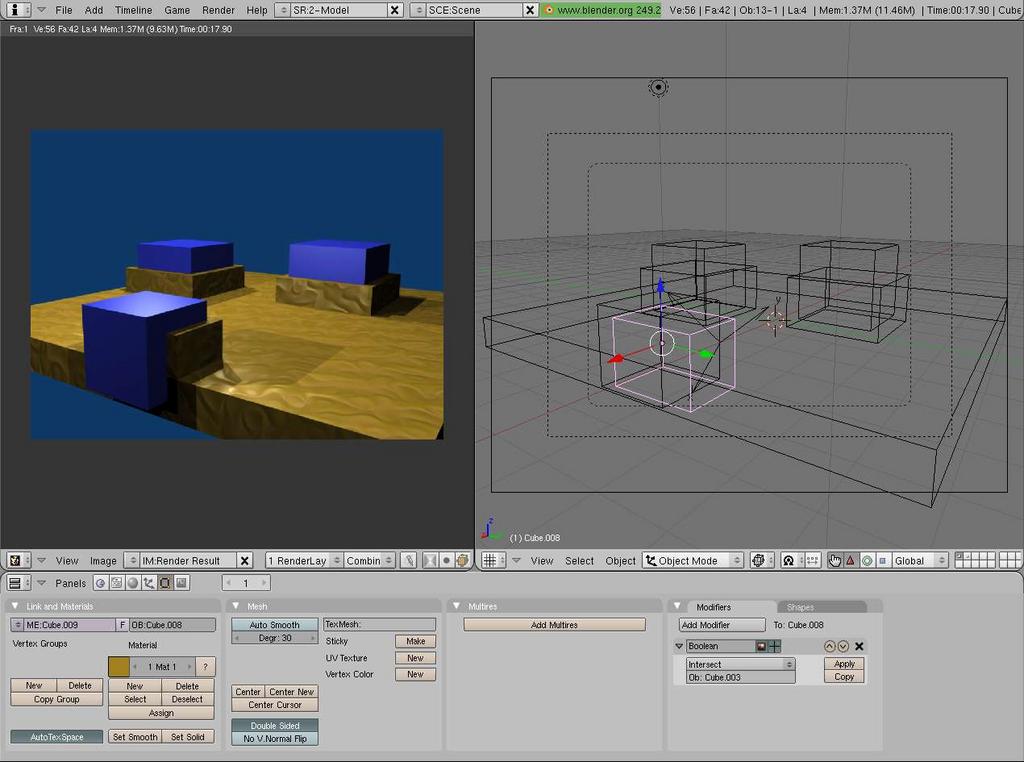
so - one picture to get the idea,
and the small blend-file
edit: i love the ideas of finding the basic shape, form - from which
the full figure is made. I always admire those artist building
a complicate looking thing, based on simple clear and efficent strokes.
This stuff is great!! It’s exactly what I was looking for. Thank you very much!
The thing I like about your solution is that it is based on standard Blender functionality that is combined in a clever way and it removes cumbersome effort from my work flow. I would call this type of solution “excellently engineerd”.
Test-dr has posted a .blend file in this forum. In the file, you can find all the details how it is accomplished.
To summarize: the skirt is an intersection of an invisible cube on top of the floor and an invisible cube around the wall. The invisible cube around the wall is a child of the wall. Therefore, moving the wall ultimately results in the skirting moving with it as well.
that is very cool… its near parametric modeling, which is utterly awesome, but something that isn’t really easy with blender… there’s mosty script stuff or novel work-arounds like this. thanks for the blend file, will be interesting as a little tech demo
thanx paradiddle for the posted explanation, thats the way i did it and
i thought from the huge count of RickyBlender posts, he would want a
somehow very sohpisticated explanation (sorry if this sounds offending).
A search in the forum will come up with some solutions using animated
textures with alpha-value to mask out parts of objects and do some
kind of slicing, cutting and look inside.
With the boolean-modifiers one can get easy similiar things,
so here is the monkey-suzanne,
boolean-union modifier with a cube (the blue halo box)
it’s definitively an interesting way of showing this auto skirting for moldings
and can be usefull and easy to use
but just to clarify my intent here!
the use of boolean in blender has always been somewhat difficult cause the resulting mesh are not frequently very good for the final created mesh!
so i can see how you can move the object along the other one while the boolean modifier is there
but if you apply this modifier to get the final mesh it may not give a nice object
it depends if you have closed object ect…
so that’s the problem i was addressing here in the sense that even if this work with the boolen modifier it does not insure that if you apply it you will end up with a nice final object
you may have to modify the objects and even then the final applied boolean modifer might not give a good final mesh/object