ver1.3.0 Add significant functions such as progress bar, preview render, all cameras, user scripts
I made many improvements and added options.
- Preview render
- Added “All cameras” option
- Added “All view layers” option
- Added “Resolution” option
- Added “Render Engine” option
- Added “User Script” option
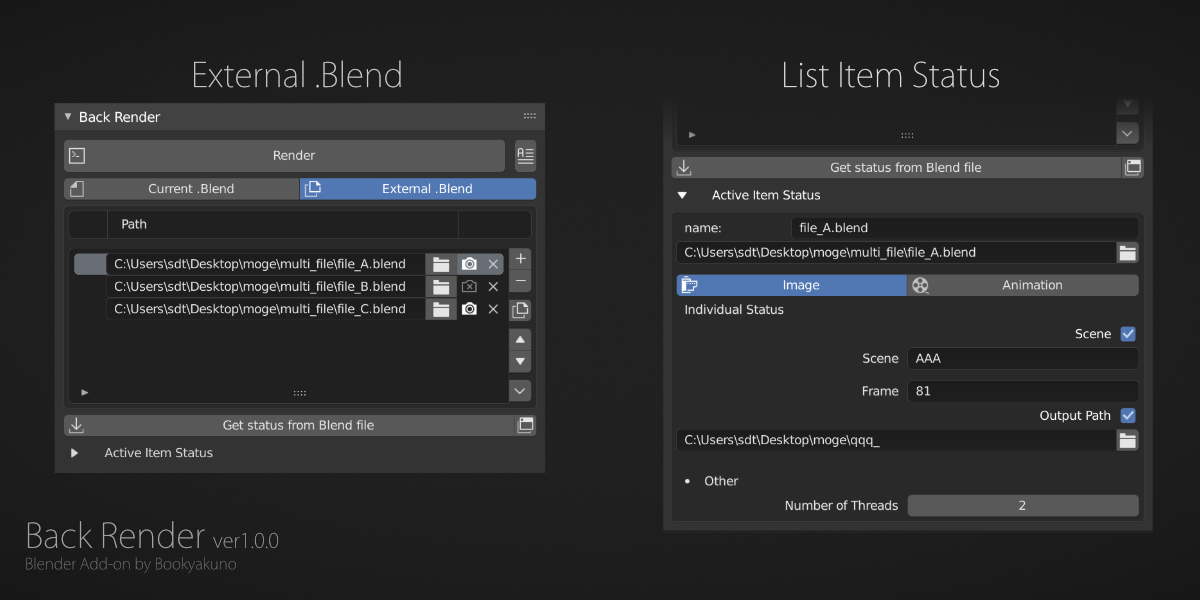
- Supports all scene options in external blend files
- Added count display
- Change menu layout
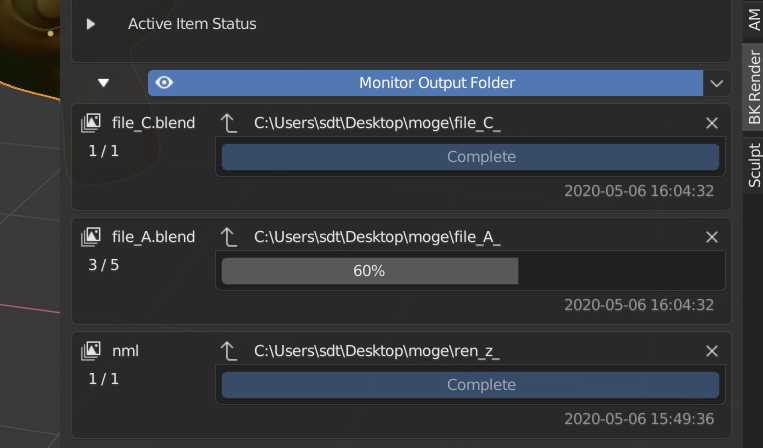
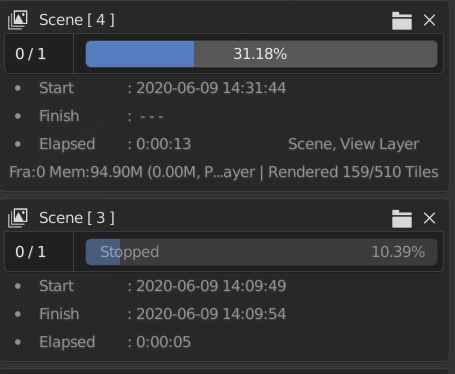
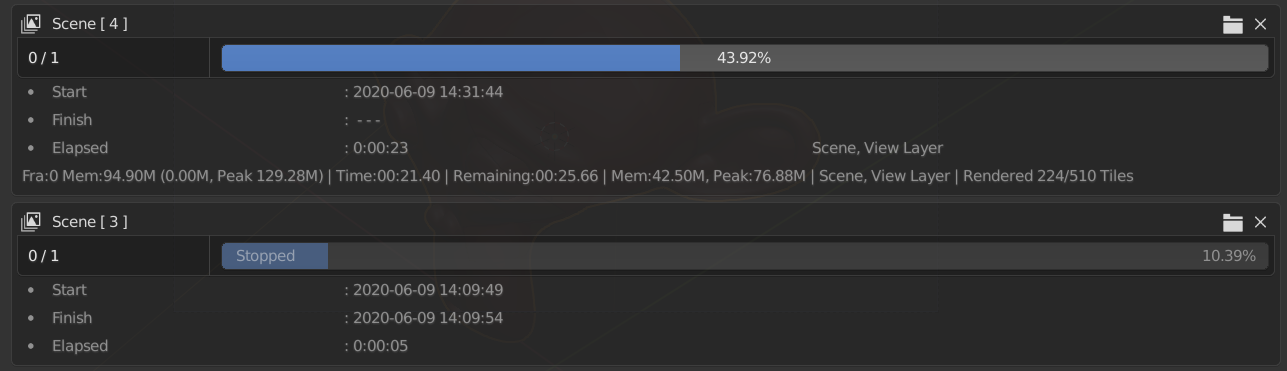
Add progress bar
You can now check the progress of the rendering job being processed.
- Rendering start time, finish and display elapsed time after completion
- Show the progress of the frame currently being rendered
- Log files are stored in the [log_probar] folder inside the add-on
- Delete the progress bar item and it will be moved to the trash at the same time
- Abolition
- The existing function “Monitoring the output image file” was abolished because it had many bugs and was a pseudo function.
- The ability to manually add progress bar items has been removed
- Currently rendering from bat file is not supported
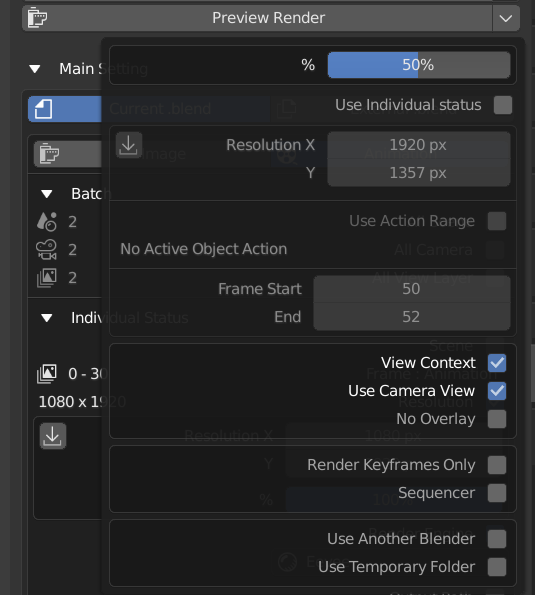
Preview render

Create a viewport animation, save it as an .mp4 and autoplay it when done.
This is useful for previewing motions and checking external Blend files in advance.
Various options allow you to temporarily change the rendering settings.
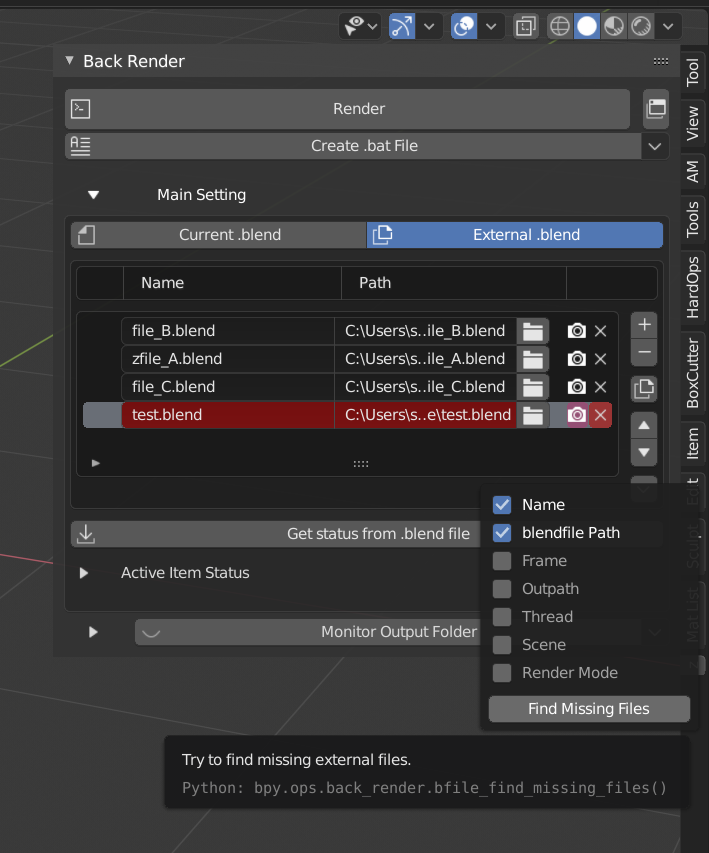
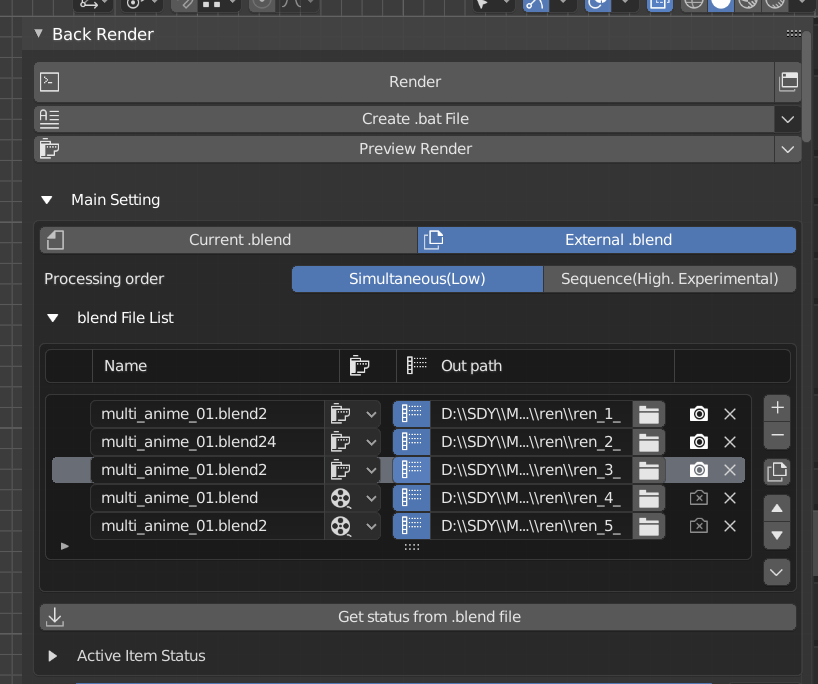
If the menu display is “External .blend file”, create the active blend file in the list.
Option
- Resolution X / Y
- Resolution percentage
- Frame start / end
- Option to fit the frame range of the action of the active object
- Only the frame range of a specific motion can be rendered
- Save to temporary folder
- Save to a temporary folder instead of the specified destination
- It will be deleted after quitting Blender, so it is convenient when you do not need the file.
- View context
- Render in the current 3D view
- Overlay invalidation option
- You can hide wireframes, etc.
- Use camera view option
- Always use camera view instead of current viewpoint
- If you don’t use view context, it will render in shaded view without overlay hiding
- Render only frames with keyframes
- sequencer
- OpenGL display using Render Sequencer
- Use another Blender
- Launch another Blender to open the current Blend file and render
- It doesn’t load the current Blender, but there is a problem that the active window moves to that
Added some option
Added “All Cameras” option
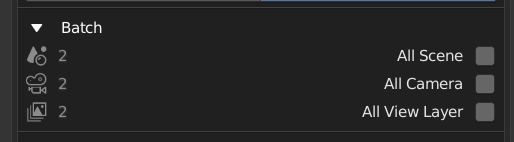
All scenes, all view layers, and all camera options can be used together.
- Renders viewpoints from all cameras
- Cameras with render enable / disable settings disabled will pass through
- The camera name is added to the file name of the output path
- “Folder by camera name” option
- Classify into folders with camera names
- The camera name will not be added to the file name
- When executing from a bat file, add-on installation is required for the rendering environment
Added “All view layers” option
- Render all view layers
- View layers with Use view layers disabled are passed through
- The view layer name is added to the output path filename.
- “Folder by view layer name” option
- Classify into folders with view layer names
- No longer add view layer name to file name
- When executing from a bat file, add-on installation is required for the rendering environment
Added “Resolution” option
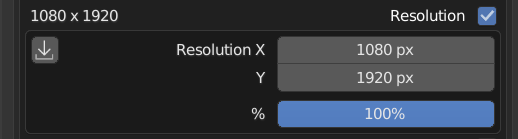
You can set a different resolution from the settings in the blend file.
Added “Render Engine” option
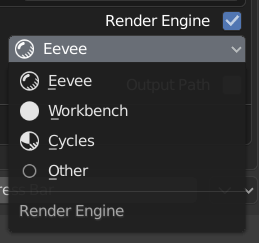
It uses a different engine from the settings in the blend file.
- You can choose from Eevee, Workbench, Cycles, etc.
“Other” settings
“Other” is used to specify something other than the default render engine.
- You must enter the capitalized unique name specified for each engine
- You can get the current engine name with “bpy.context.scene.render.engine”
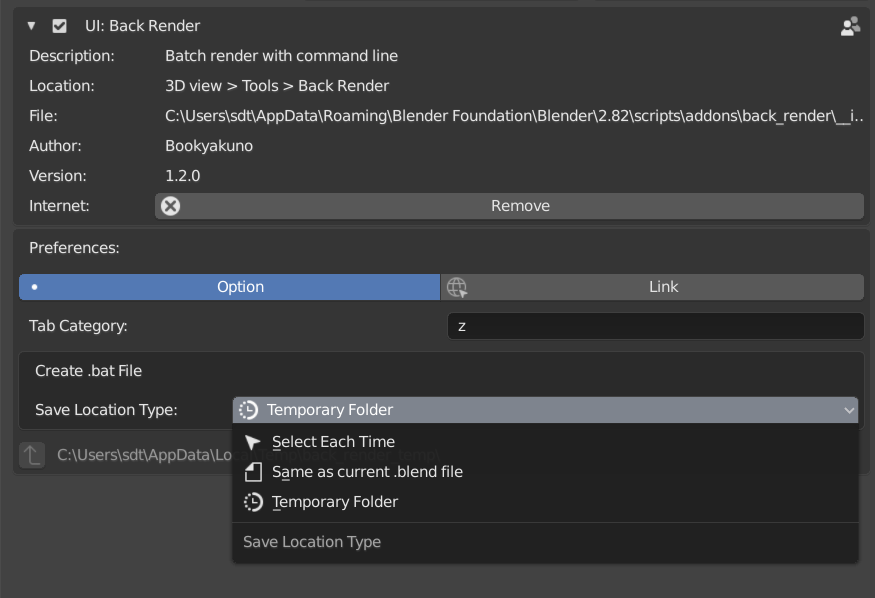
Added “User Script” option
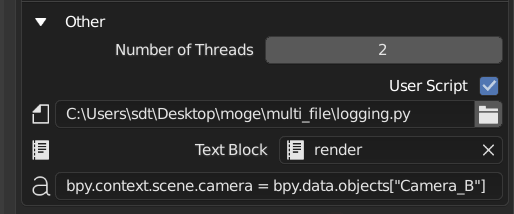
User scripts can be run before rendering.
You can configure individual settings that you don’t like in add-on settings.
There are three methods available depending on the situation.
User script file
- Specify the location of the .py file to use and execute
Text block
- Executes with the text block in the current blend file
- Useful for running multi-line programs that are not as filed
- “” Is not used as it is, so “” is automatically converted to “'”
One line user script
Execute a single line of program.
If you’re new to Python, it’s easy to paste the execution history that is displayed in the info editor.
Example: Change the scene camera to the camera named Camera_B
bpy.context.scene.camera = bpy.data.objects["Camera_B"]
- Convenient for simple execution
- You can use “;” as a line break
- You can use this to execute even multiple lines
- “” Is not used as it is, so “” is automatically converted to “'”
Supports all scene options in external blend files
- Added " Divided folders by scene name " option to all scene options
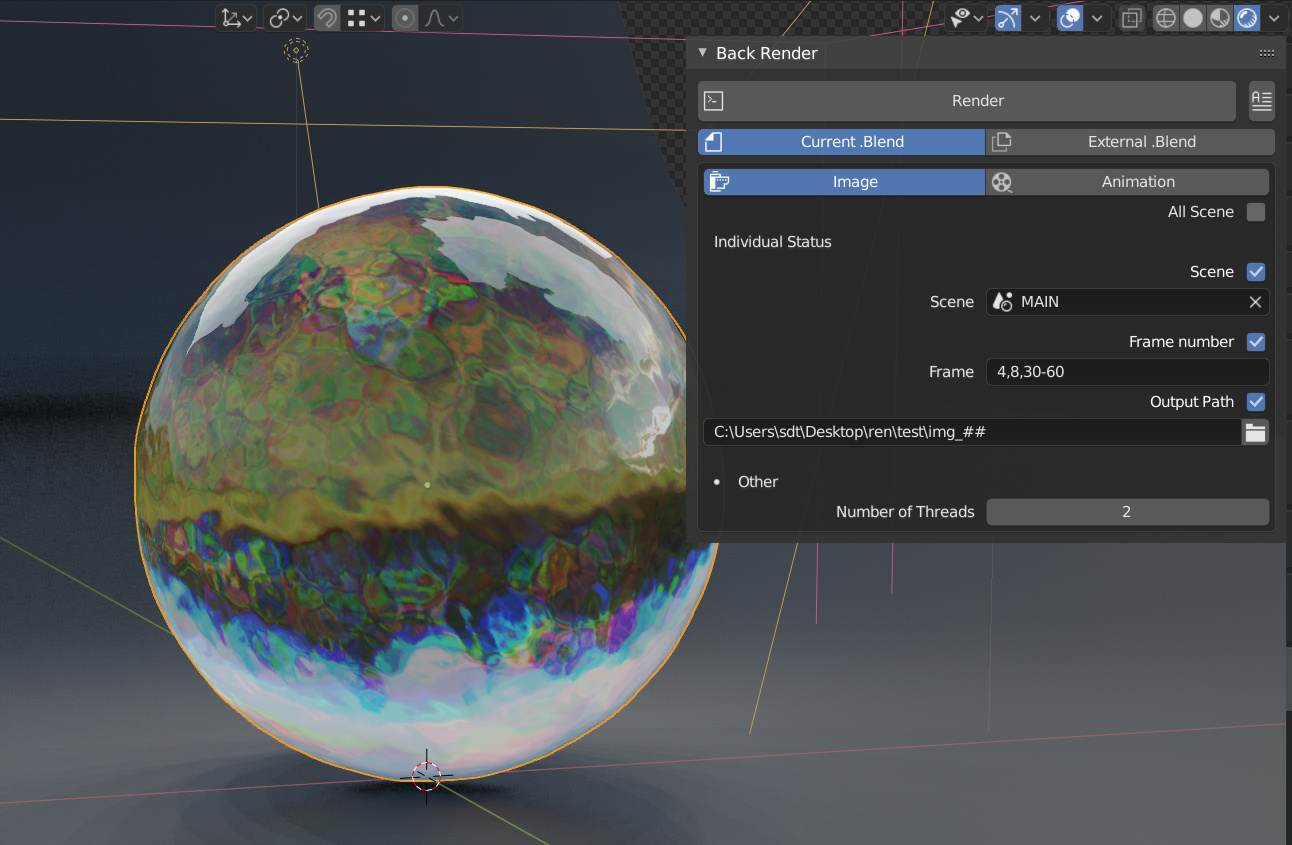
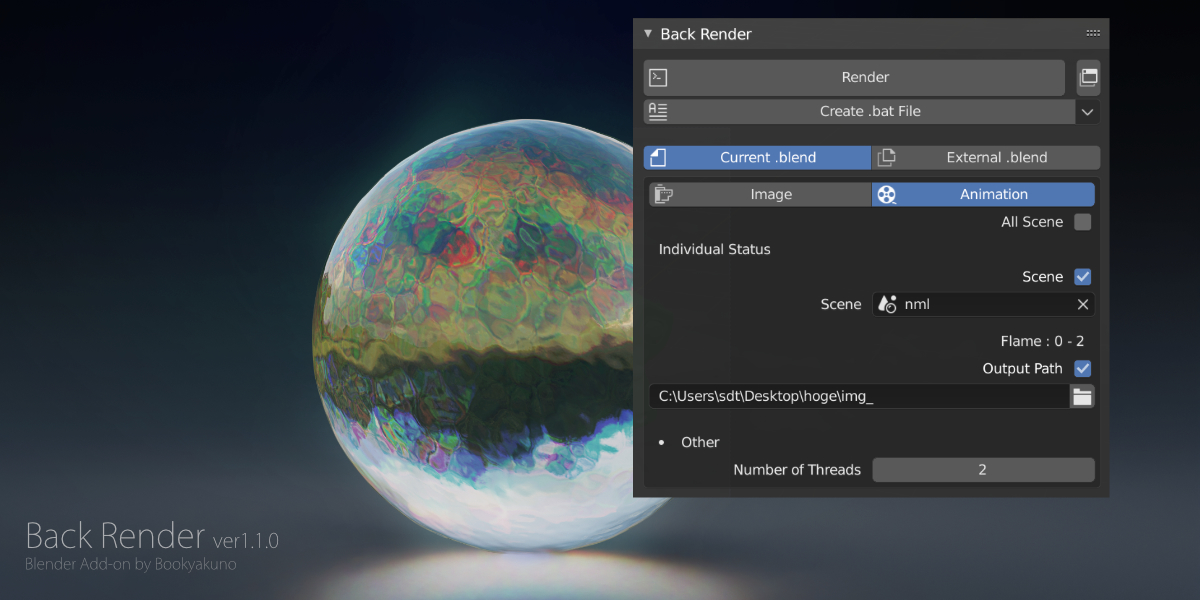
Added count display
The number of frames, the number of scenes, and the number of cameras are displayed.
It is displayed on the left side of the option menu.
- The number of frames shows the total number of rendered frames
Changed
Change menu layout
With more options, we’ve adjusted the layout to make it more visible.
Made it possible to collapse detailed options.