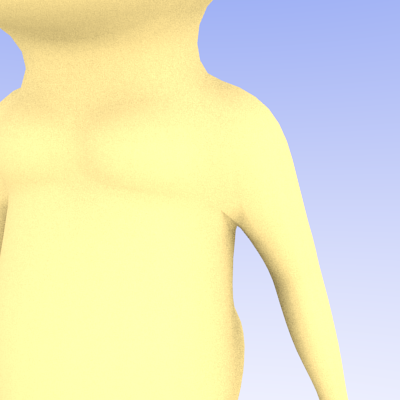
When I rotate the arm in my model about Y by as little as 45 degrees, it causes terrible deformation in nearby parts of the model! How do I fix this?
Here is the model:
WebHelp.zip (1.34 MB)
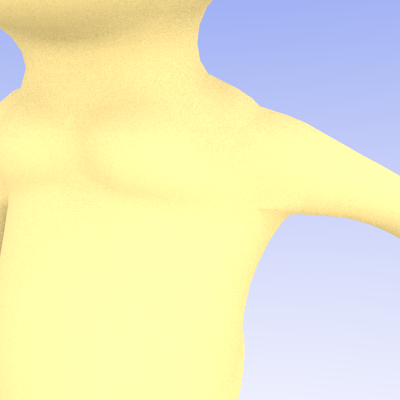
Here is what happens (bad quality, sorry):
When I rotate the arm in my model about Y by as little as 45 degrees, it causes terrible deformation in nearby parts of the model! How do I fix this?
Here is the model:
WebHelp.zip (1.34 MB)
Here is what happens (bad quality, sorry):
Search for ‘blender weight paint’ on Youtube and you’ll find a bunch of helpful tutorials.
Or roughly in short:
Go into Pose mode for the Armature so you later can select the bones when in Weight Paint mode (might want to set it to X-ray).
Select the mesh, change the mode to Weight Paint in the 3d View, and get the T-menu for the brush types. Select a brush (Add or Subtract you’ll be using most)
Select a bone and start adding / removing influence (You might want to check the ‘Auto Normalize’ field in the T-menu so all weights are automatically being leveled to 1). Play with the brush strength…
Okay, I get how to do it… from a technical standpoint. But none of the “tutorials” cover the artistic side, teaching what to do in general, so that you have something to go off of instead of trial and error.
For example, there are many tutorials that show the general way to do topology, for arms, legs, and heads. But there are no tutorials that show the general way to do these things with weight painting.
There are a few tutorials. Google “modeling for animation” and you may get some winners. Not all are videos, though, you may find e-books, blogs or images.
The main issue of your figure is topology. There is an 8-edged pole at the front of the armpit (there is also a 6-edge pole at the front of the shoulder/neck). Generally speaking, a pole should have no more that 5 edges. I’ve added a screen of the left inner leg for comparison.
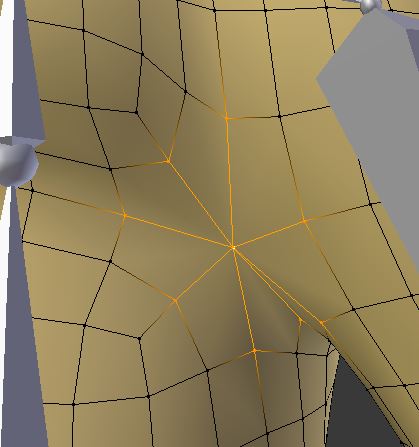
armpit, 8 edged pole
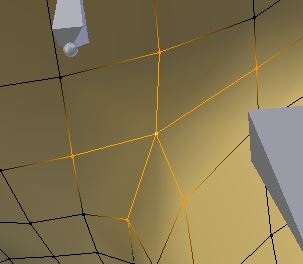
inner leg, 5 edged pole
I would recommend looking at this video. Its for Maya, but everything can be done in Blender. It should help you get a better idea how to work that problem spot when modeling a character in A-pose. There is also the excellent Blenderella video, but its using a T-pose.
Tutorial about topology and poles here
Also, check out this blog post
Finally, some tips (unrelated to weight painting or topology):