I am writing this guide for two reasons. 1. To demonstrate how god damn confusing it is to get this to work and show all the possible pitfalls, 2. To help others because this information seems to be frustratingly lacking, and 3. So it can be reviewed by the community. I hope this gets picked up by google search as the first result.
In order to bake selection to active in the typical scenario of having a plane that has a decal shrinkwrapped to the target object (with a small distance offset), you must flip the normals of the target object. At the same time, the decal object, whether the normals are inward or outward facing makes no difference.
MESH PREPERATION
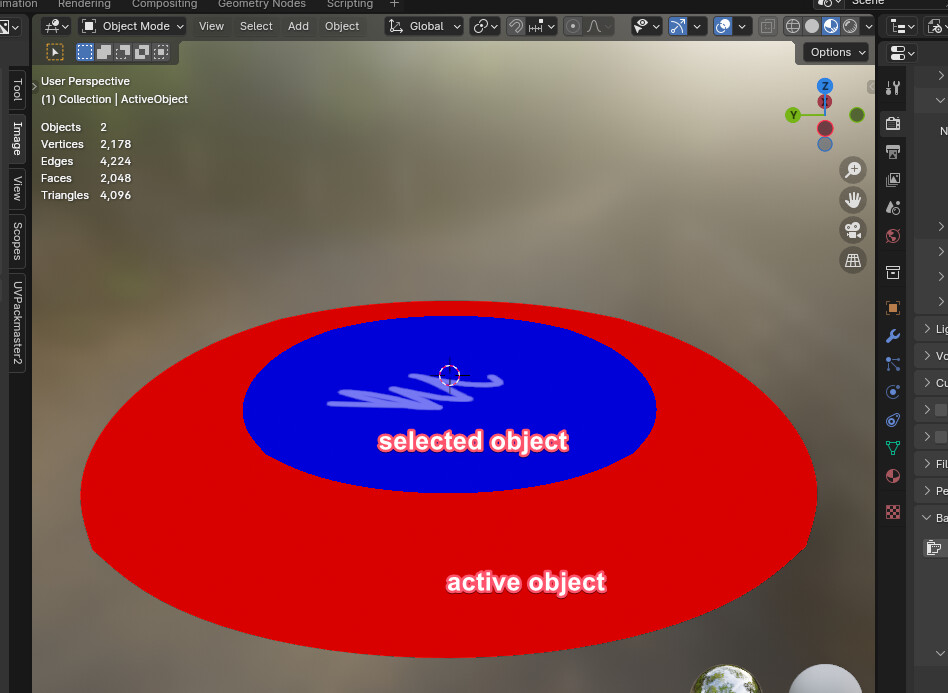
In order to bake a decal, the active object must be RED (as displayed by Face Orientation), as in the red must be facing the decal object. Red or blue doesn’t matter for the decal object.
BAKE PREPERATION
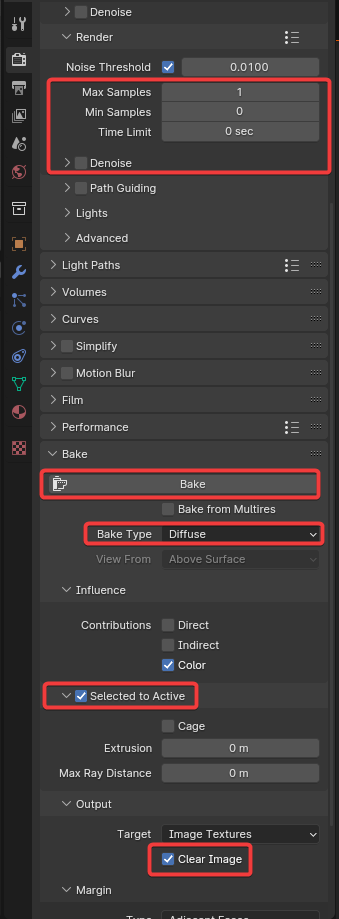
In order to bake a transparent image, bake type must be set to Diffuse Color only, and within the shader. 1 sample is enough. Also, it is convenient to have Clear Image checked to clear any pixels to transparent before baking.
SHADER PREPERATION FOR DECAL
For the decal object, it must use a Principled BSDF. Create a fresh Principled BSDF to avoid certain settings altering the results, for example, the more metallic, the darker the results. The shader must have its alpha set to 0 where you want transparency.
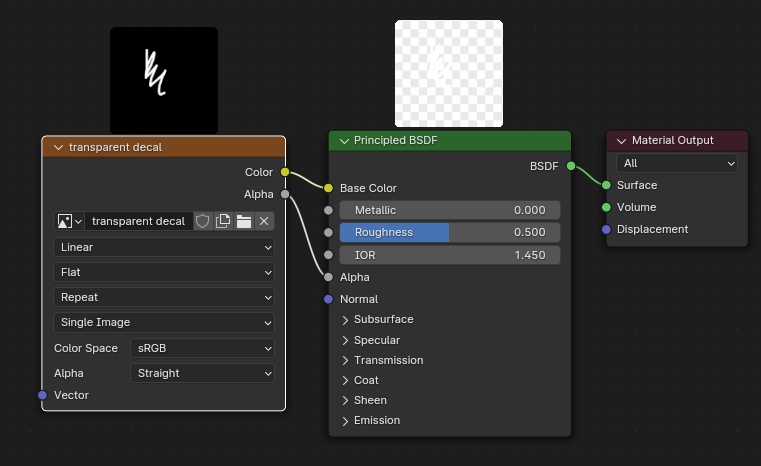
IMAGE PREPERATION FOR ACTIVE/TARGET OBJECT
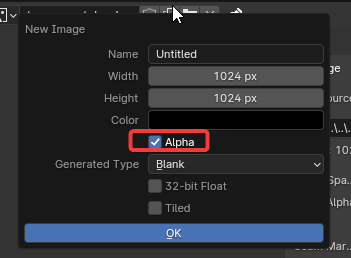
Go into the shader of the active/target object. Ensure the image node you want to bake to is selected. Ensure that the image node IS NOT set to RGB (no alpha). This happens by bringing in an image without alpha and then trying to bake transparency to that image. This can also happen if you make an image without the alpha option check marked.
IN ORDER TO SEE RESULTS
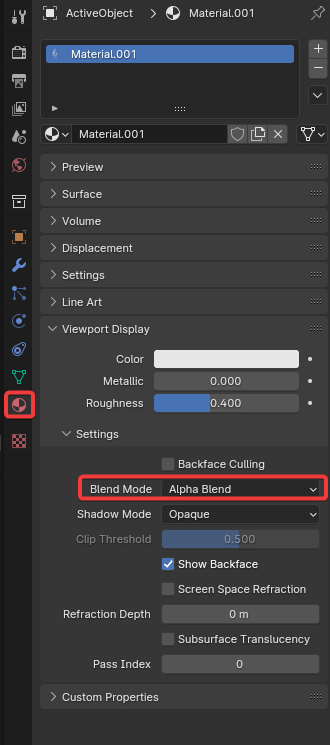
Set Blend Mode to Alpha Blend on the active/target and decal object’s material. This could get confusing as it may cause the object to visually disappear with certain render modes and settings.