how to combine and bake ORM map in blender with example
Hello,
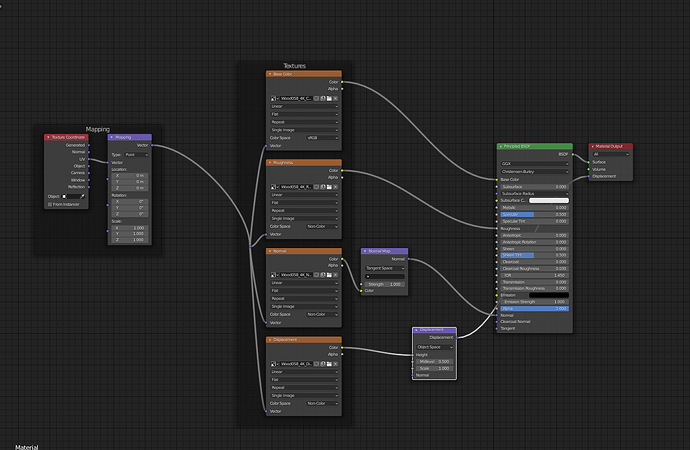
If you mean, when you download a texture, how to apply color, roughness, normal map DX & displacement textures to an object - you need to download your texture images at first, then go to shading tab and add nodes as shown below:
The first image texture will be the colored one
The second one - is for roughness
The third one - is Normal map DX
The fourth will be a displacement map
Or, if you already know about UV mapping, you need to unwrap your texture at first and only then add it via shading tab. Google “how to add a material to an object”. There’s also various tutorials on YouTube.
You can also check out https://ambientcg.com/ - there’s a tons of free textures for Blender.
A little tip: when go to shading tab, instead of adding all those nodes manually, you can select your Principled BSDF and press Ctrl+SHIFT+T, this will open a pop-up when you be able to choose all of your textures images at once.
base color ,roughness and ambient occlusion map
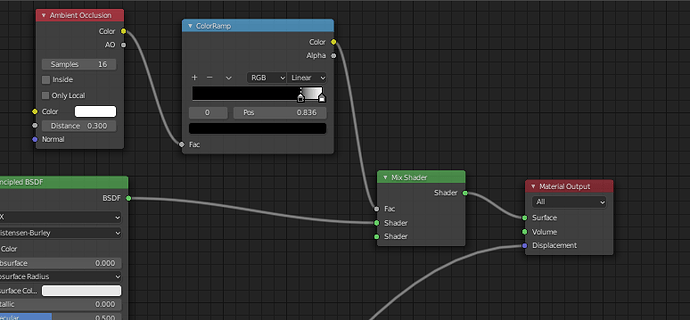
how to add ambient occlution
Fine ,But I have ambient occlusion map, Roughness and base color map.
how to combine and bake ORM map to single image texture
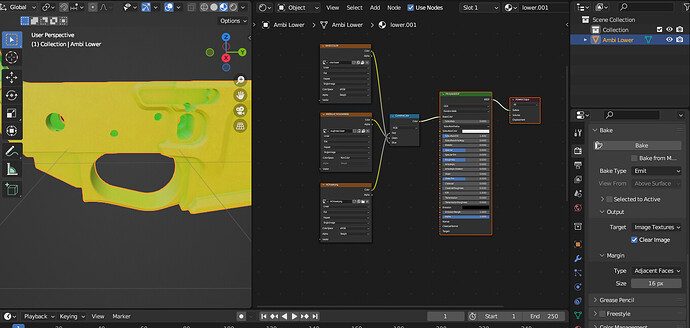
I already combine.This is wrong please tell me solution
please give some example
Sure: its called Substance Painter ![]()
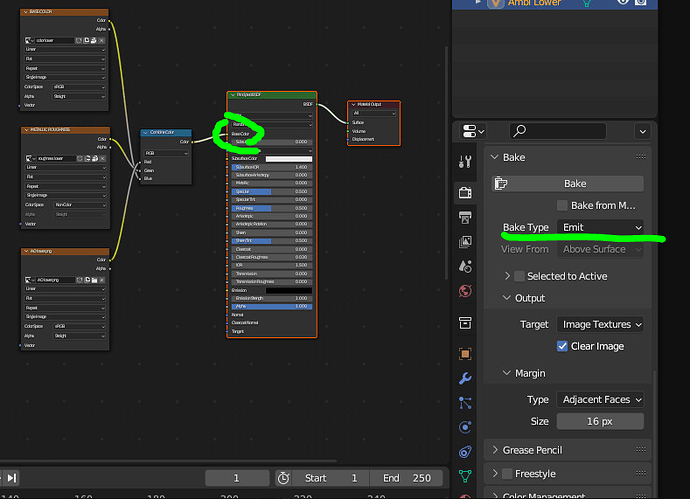
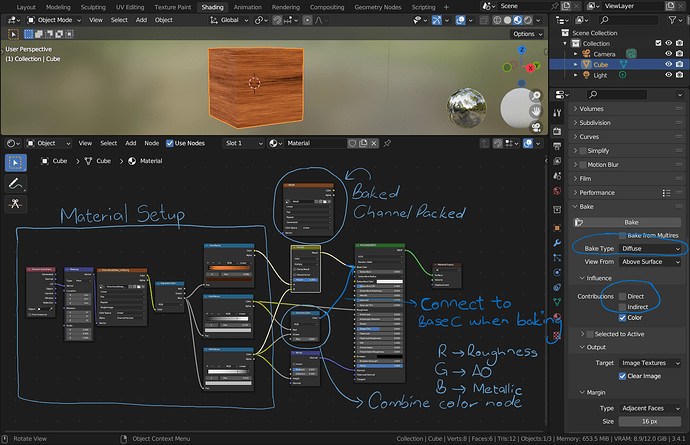
The bake type should be set to diffuse since you’ve connected the combine color node into the basecolour(diffuse). That should give you the result you’re after.
sorry I am beginner , how to use combine node please share your screen shot
Essentially, what you want to do is to connect the image textures you want to channel pack into a Combine Color node…connect them whichever way you desire(in my case I connected the roughness into the R(red) channel and the AO into the G(green)channel and left the blue channel as 0 for metallic value. The output of the node is then connected to the base colour input of the material.
Remember to create a new image texture and create a blank image texture with the resolution you desire and set the colour space to linear. On baking, have the image texture as the only selected node within the material and then bake.
The result will be the channel-packed texture.
Here’s the blend file, feel free to reach out if you need any help.
Also, check out this topic; they explain indepth the entire topic on channel packing in Blender.
