I’m trying to curve two sides of a cube. One side with a concave curve which includes two of the edges of the face (imagine a semi-circular cutout which spans the entire top of the cube), and an adjacent side (which includes one of the curved edges) with a convex curve which does not include any of the edges of the face - so this side just has a gentle bulge to it. This second curve is two dimensional, while the first curve is one dimensional (if that makes sense).
I think that this is a pretty simple thing, but my understanding of Blender is very basic. I’ve tried using the curve modifier but apparently that can only be applied to the whole object, not to just one face. I’ve also tried just subdividing the mesh and dragging some vertices manually, but in order for that to work I’d need some way to set it so the adjacent vertices are deformed along with it… Anyway, any suggestions are welcome.
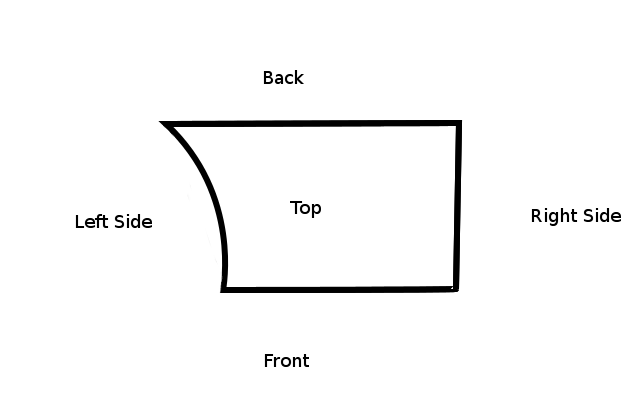
If my description of the cube is confusing I can try to clarify, but it’s just a cube with a slight bulge on one side and half a cylinder cut out of it.
No demo blend file or even image of what you want to achive supplied with your post !!! Just a vague description.
Tools to look at
Ctrl+R to add a loop cut
Ctrl+B to bevel edges. Allows multiple segments and variable curve profile Boollean modifier to add/remove shapes
I’m not sure that “vague” is fair, I did make an effort to be as descriptive as possible. Though perhaps with limited success. I realize that’s it’s difficult to visualize a random object from nothing but a description like that. So okay, I’ve drawn a couple of pictures:
I’m hoping that helps. The first picture shows the cylindrical cutout, and the second shows the bulge on one side.
Not quite sure if I follow all of what you’re wanting to do, as Richard said, without some sort of visual reference of what you’re trying to achieve.
As for making it apply to just “one face”, have you tried using vertex groups? Select the side that you want and make it a vertex group, then in the modifier, give it the name of the vertex group. (The curve modifier supports this option, I checked… though I haven’t actually tried using it.)
Thank you, this seems like a good approach. I’m having a hell of a time getting it to actually work, but it’s moving the correct vertices in the right way. I just can’t get them to look like the curve.
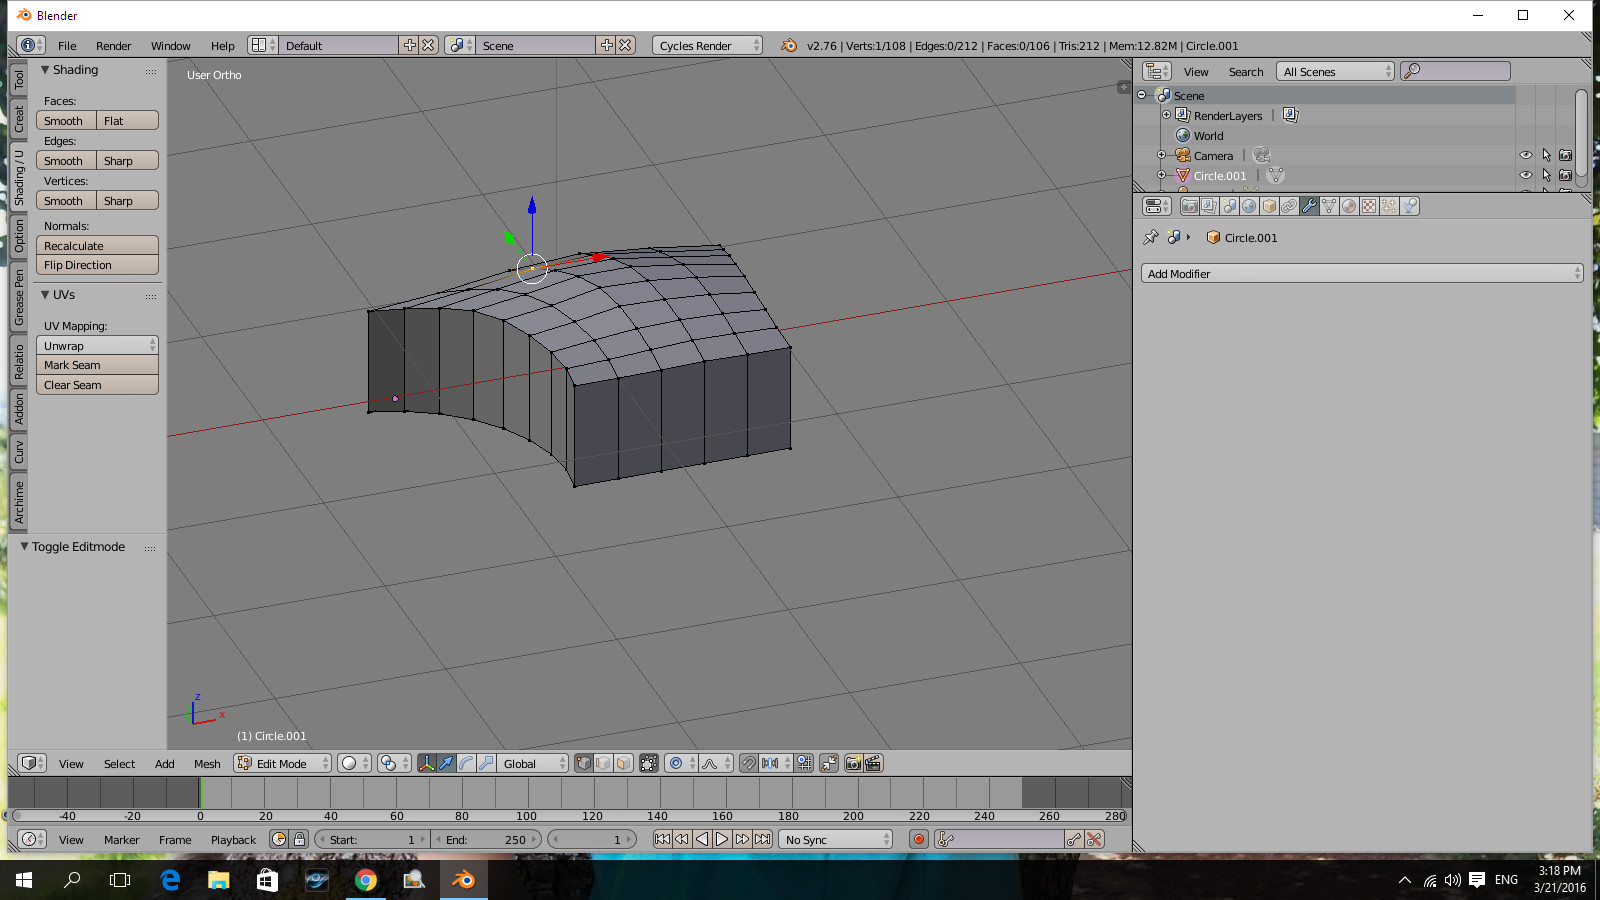
If I’m understanding correctly, a simple approach is to insert a mesh circle, delete verts to form the arc of the curved side, extrude the top and bottom verts so they are aligned on the X axis, extrude one of them to form a right angle and merge. Subdivide so as to match the number and alignment on the curve and make them into faces. Cut in extra loops to form even quad faces and apply a solidify modifier.
Well hey, thanks. I never would have thought of starting with a piece of a ring like that. In the end I used the Boolean modifier and a cylinder to get the cylindrical cutout, and to get the bulge on top I subdivided the face and then turned up the “smoothness.” Why that made it bulge upwards I don’t understand, but it did the trick.
I didn’t even know proportional editing existed. That is going to be very handy, thank you.