Keyshot has some sort of deal with them and they made a bunch. There are other similar companies as well, but I was curious what the best way to get something fairly accurate might be. Especially since I’m working from home, i don’t have the library with me. I always have models to scale. Just wondering if there might be some good tricks to build something close.
For example: Here’s a mold-tech page
I need to make MT-11540. You can see the basic size of the noise pattern, and you can see how it ends up looking straight on. I’d Love to be able to just use a black to white noise map, and tell it to be .0018 inches deep, or .046mm (46 micrometers). But not sure if that would be accurate at all. It’s not really very accurate in keyshot. I always have to scale things.
It’s really too bad that no one has scanned them all with that cool subtance “cell phone” scanning setup which would give really accurate normal maps. So I have to rely on procedural and eyballs. But that’s harder when just looking at an image.
You can do that,to some degree.Because Cycles is not so good with very tiny bumpmaping or normals.
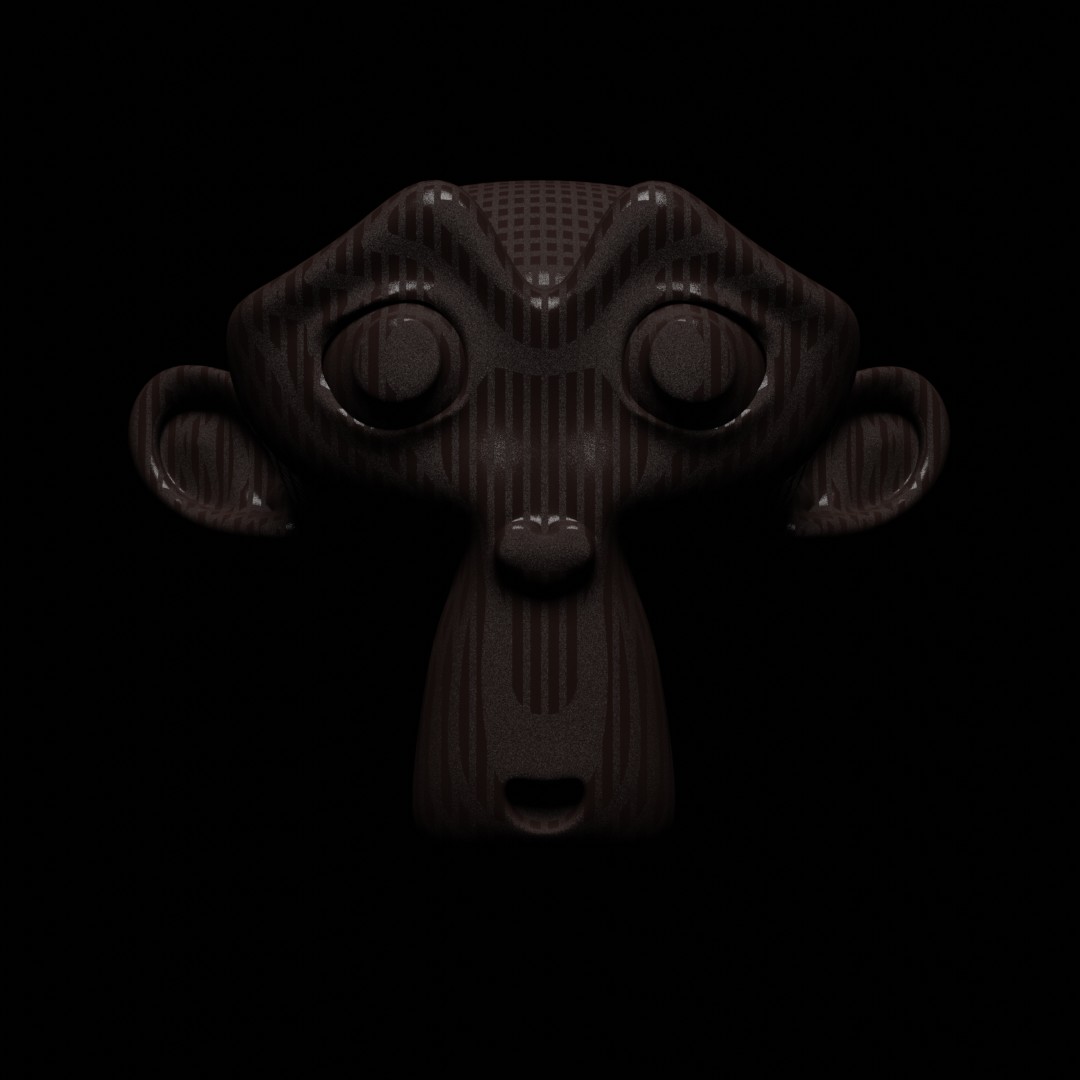
For my Carpaint shader however i have build a voronoi " texture generator " with scale in micrometer,to get the normal distribution of the metallic flakes.Here in the last posting you can see a testrender.
If i understand you right,you want a normalmap with a noise with a scale in 46 microns ?
For a simple bumpmap,just scale the noise or voronoi texure to the 46 microns.Since these are procedural you got the noise tex in your scale then,that should look similar to your sample if the camera has the same lens values and distance.
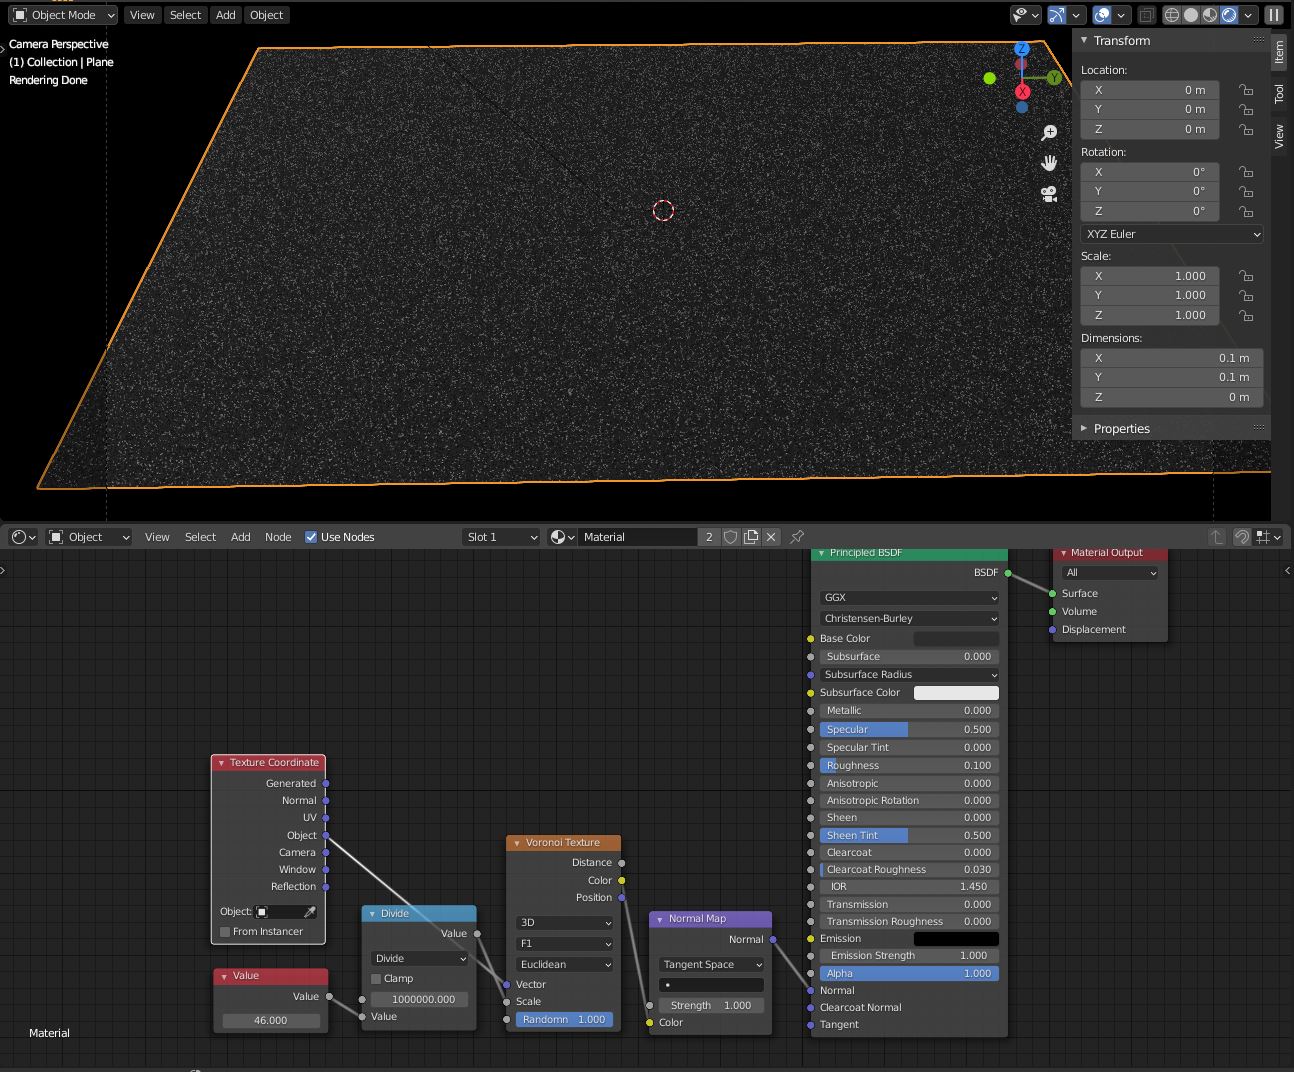
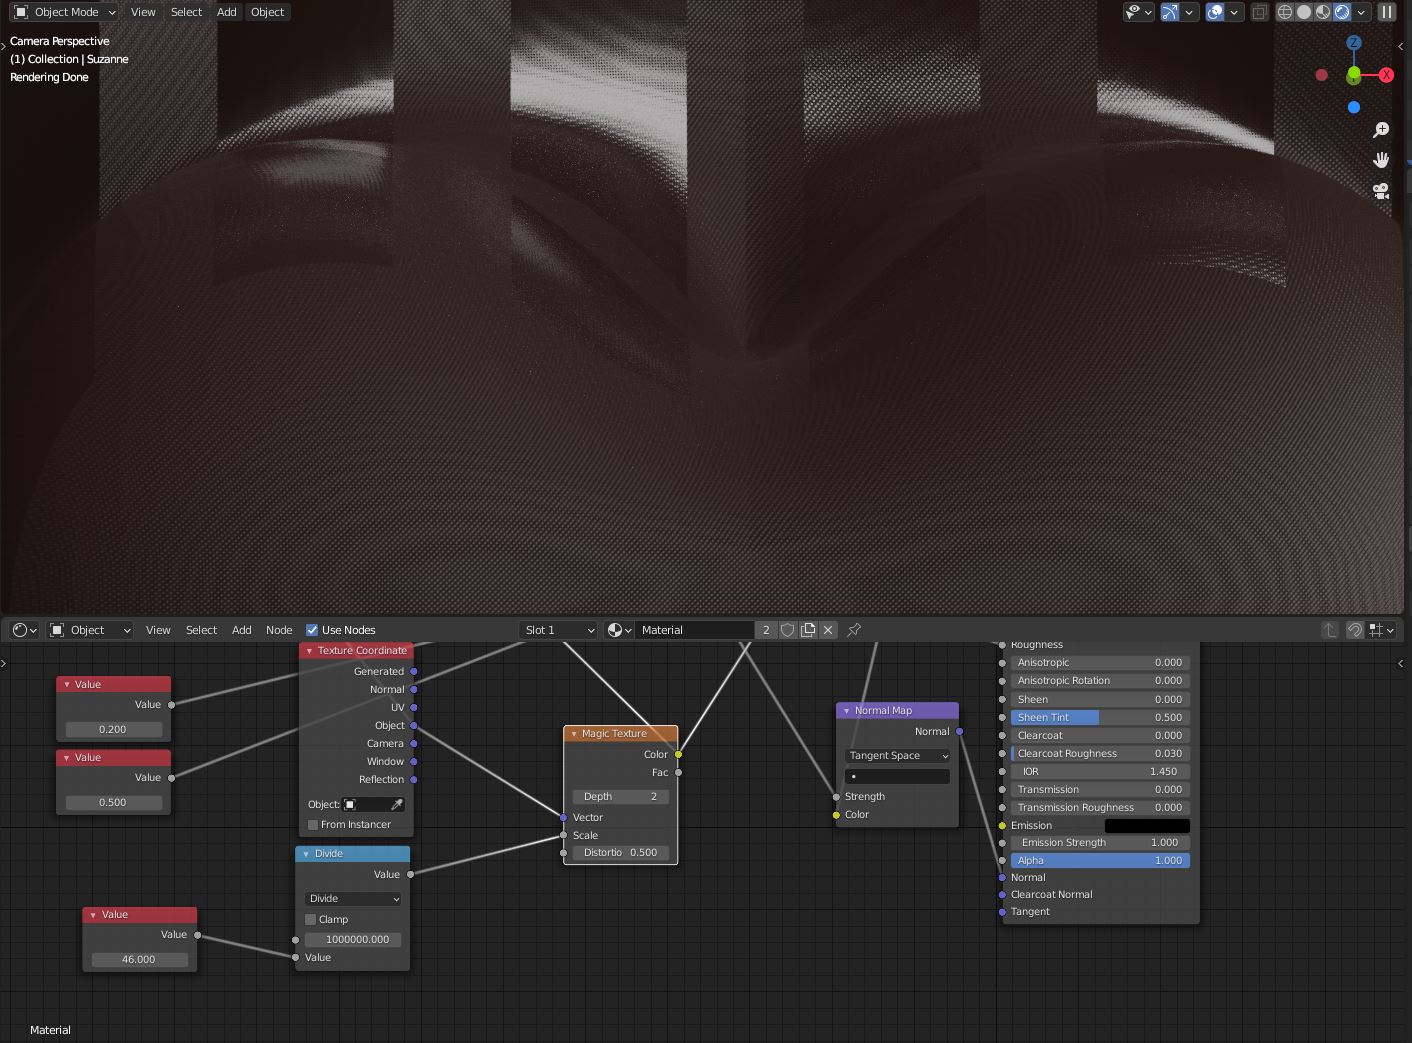
You need to use the Texture coordinate object output for this,if you want to make a own normal map from this.(its easyer to calculating from)
The pro of a procedual method is that you can zoom in and out like you want
Here a basic example,as start.A plane 0.1 x 0.1 m plane with a almost black material with 0.1 roughness(similar to the plastic).With a small area light at 45° from the side.
Then you can try to fit the look with the Normal map strength
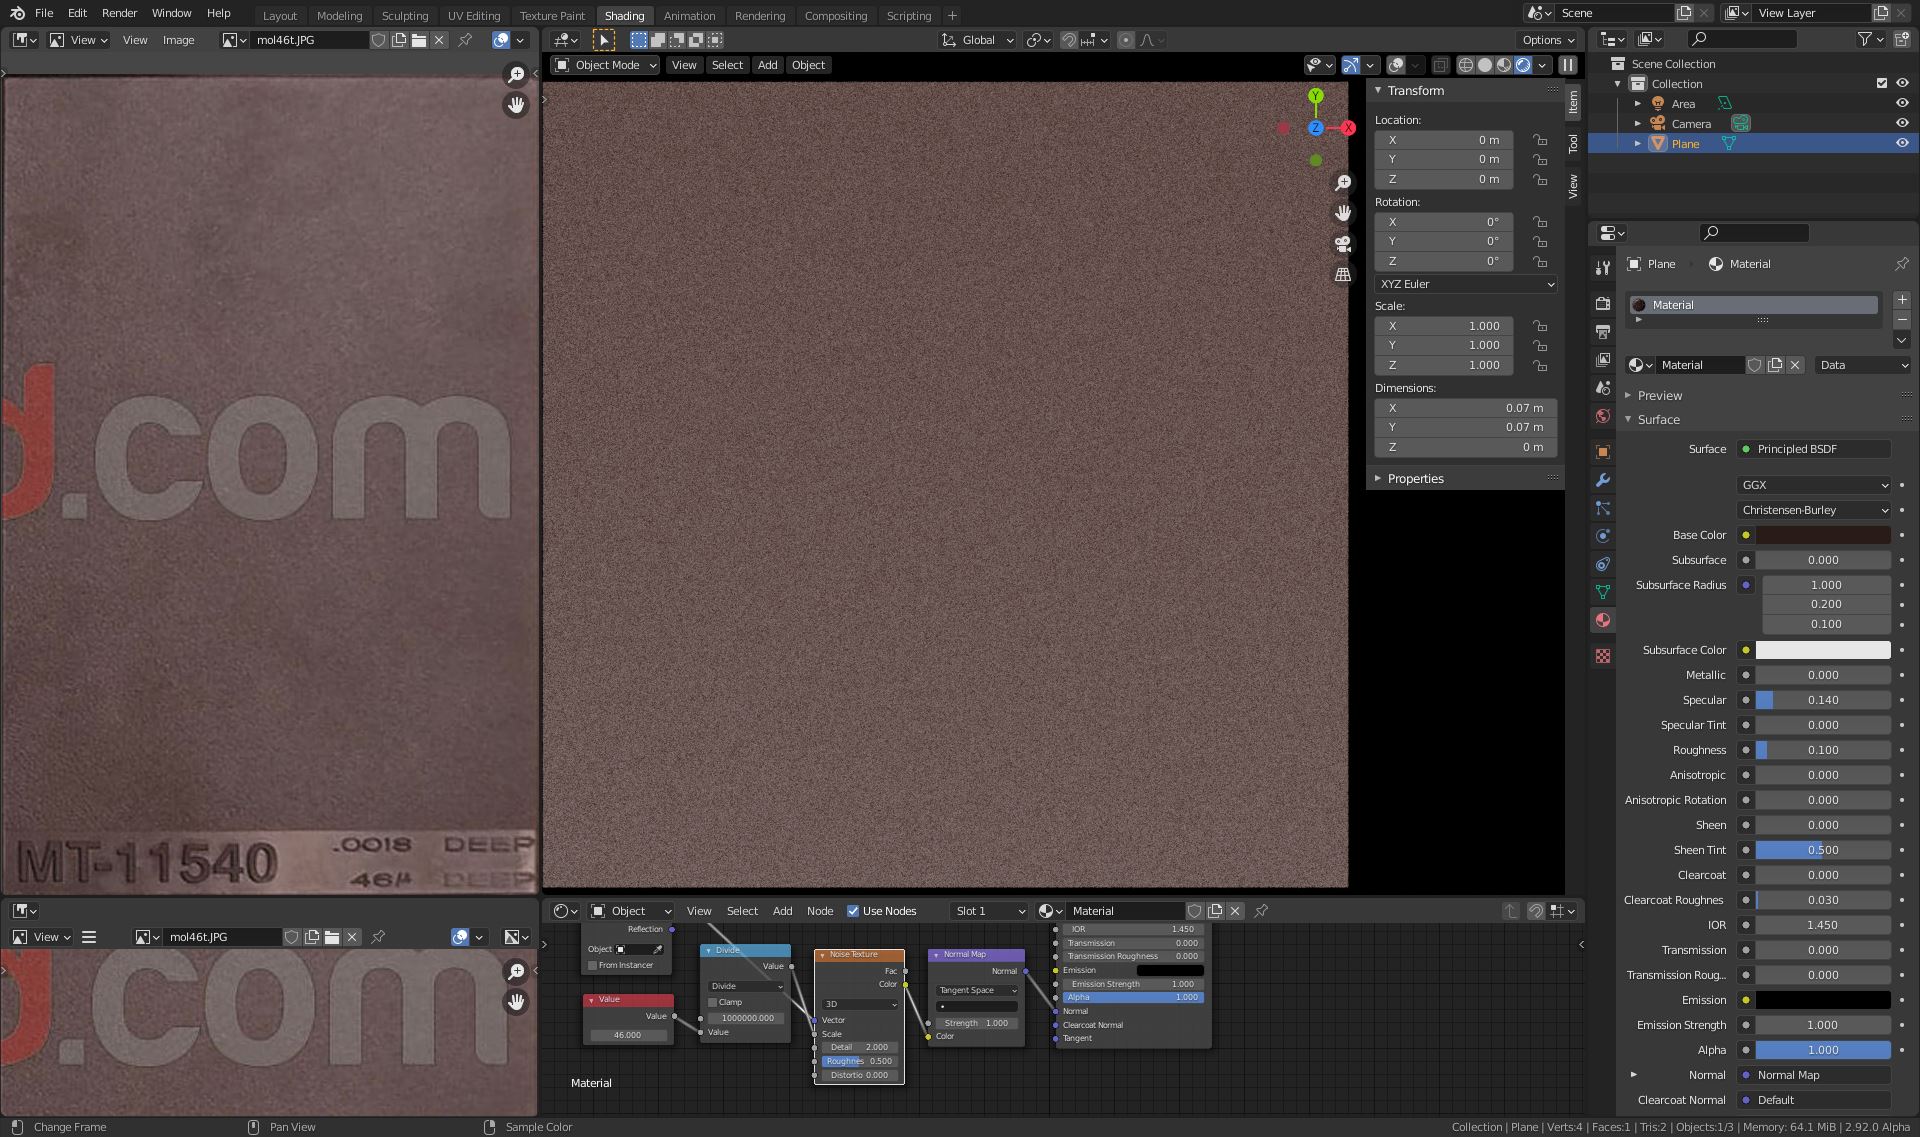
edit,I have seen that each sample is 7 x 7 cm,so i scaled it to this size.Then i reduced the specular to keep the colors the same saturation.And changed to noise texture.I must say that the mold-tech pdf preview samples quality could be better,for better comparision.
Is scale in blender always based on meters, regardless of what you have selected in units? That could explain why I have had such issues getting physics to work well when dealing with small objects, if that is the case.
Anyway, thank you for that. I was experimenting with it. I’m not so sure the “object” method is working great for me though. In my test scene it’s fine. But I was just trying to do that with a model that I purchased. The scale seemed different for different object, and I applied scale to everything. But I’m now noticing that I can select a specific object. That way it Should all be the same, right?
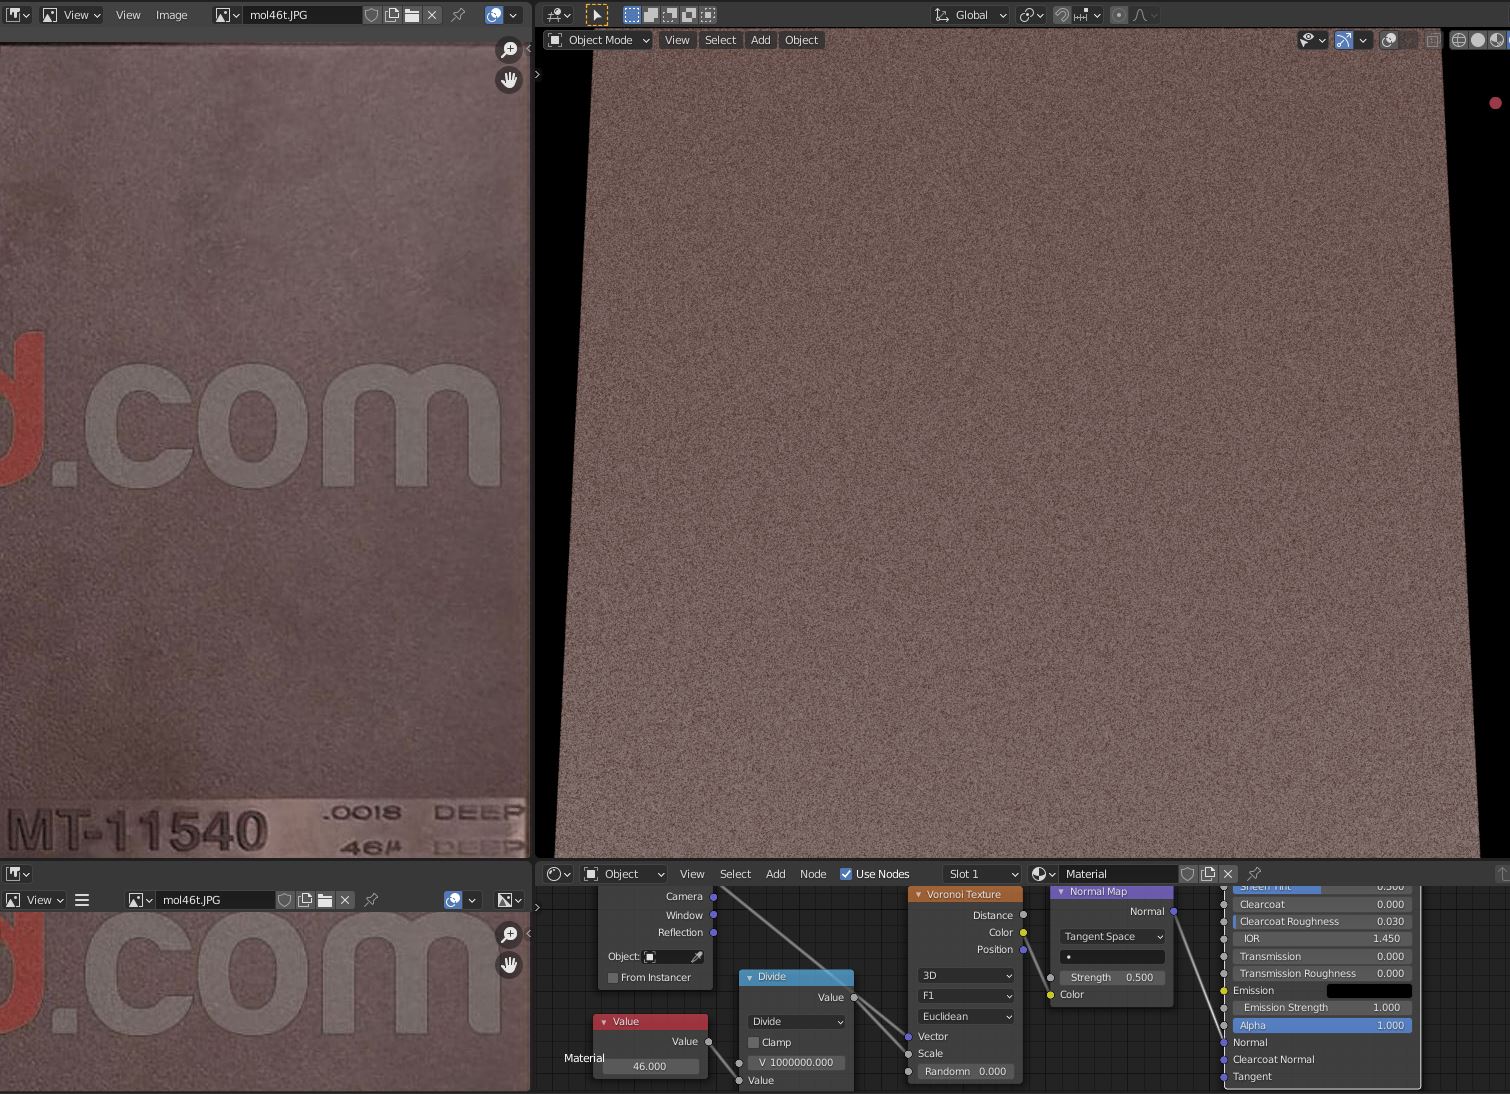
I also wasn’t using voronoi when I was trying it out, and was using the noise texture. I like the look of the voronoi F1 smooth for this.
I wonder what the bump strength is based on. Some software gives units to that (although it may not actually mean anything). From black to white, it should be simulating a certain unit right?
Yes the default scale is 1 BU or 1 meter.You have to apply the scale to your object,otherwise the UV’s or object coordinates doesnt fit.Look at the second example i posted,the scale should be 1 after apply,but the dimensions must be fit.(in this case 0.07 m = 7cm)
You mean the normal map strength?In short, the RG values represent a angle of the normal.from 0 to 90° max.
The blue channel represents the direction the normal is pointing(1 pointing outside,0 pointing inside)but is sometimes different in other render/game engines.
this is the color conversation
normal = (2*color)-1
For the strength,assume you have full red green and blue values from the noise texture,then you get the full 90° normal angles at this point.If you reduce the strength to 0.5 then all max angels get reduced to 45° and so on.At 0 you have no normal angle effect at all.
Here one of many examples in the net
As you maybe noticed, you have not a bump effect like in microdisplacement,but this would need to much RAM and would slow down you PC.
However, i guess it is for the overall look,so this might be enough.I have avoided the roughness value in the examples before,to make the normal texture roughness effect of the normal map itself visible,if that makes sence.
I have a new setup with roughness added.to get a overall appearence from 0 to 100% (50-60% most enough)with normal map and roughness mixed together.
You need the object coordinates,otherwise you have no vectors for the texture.Yes the scale should applyed (1).As sayed,the dimensions of the object could or should be different.(ie a head object of character has a height dimension of maybe 0.2 m at the scale of 1.