Hello, Please take a look at the attached images and blend file.
I am trying to bevel a curve (well lots really) in the form of a right angle triangle with end caps that follow the right angle out. So basically a capped end that forms a pyramid.
I can’t for the life of me figure out how to do this, it was pretty easy in sketchup but having difficulty here.
labeled “bevel” on lower left is standard curve bevel with 0 resolution. Unfortunately this produces a diamond shape and so I would have to find a way to trim bottom .
this is just #1 with a bool modifier trim. Still would have to find a way to pull out the bottom line of the cap.
is same curve but using a bevel object of a profile curve. Works better.
is #3 but converted to mesh and then individually hand pulling out the bottom of the cap to complete the look of a pyramidal extrusion.
Isn’t there a decent way to accomplish the look of #4 easier? I have been through all the options I can find in the curves menu and tried all kinds of different bevel objects…
A bit concerned about the overlapping geometry of the bevel at corners too. How does one get rid of that?
Oh also, does the notation tool really not have a typed option? Sorry for my crap handwriting via mouse!
Thanks for any help!
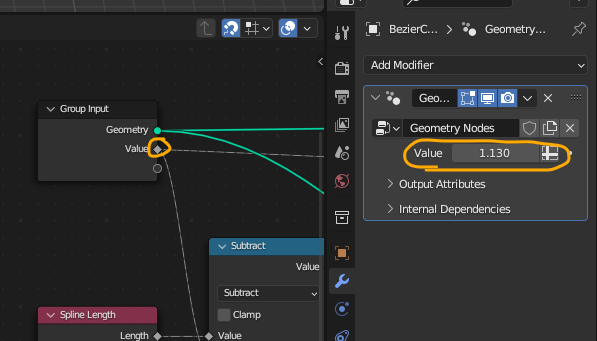
That Geo Nodes setup seems like it would work pretty well. Do you mind sharing the example file with me? Also thanks for clarifying I’m not losing my mind when looking for a setting that is not obvious!
Thanks very much for this solution. I was able to implement that kind of node tree which is beyond my ability with nodes.
Not sure what it is doing in corners however. And though I experiment with the variables, I can’t tell how to alter the angle of the end cap being pushed out from the curve geometry. Can you explain how that works?
Otherwise it is an excellent solution that seems like it would work quite well with my curves. Thank you,
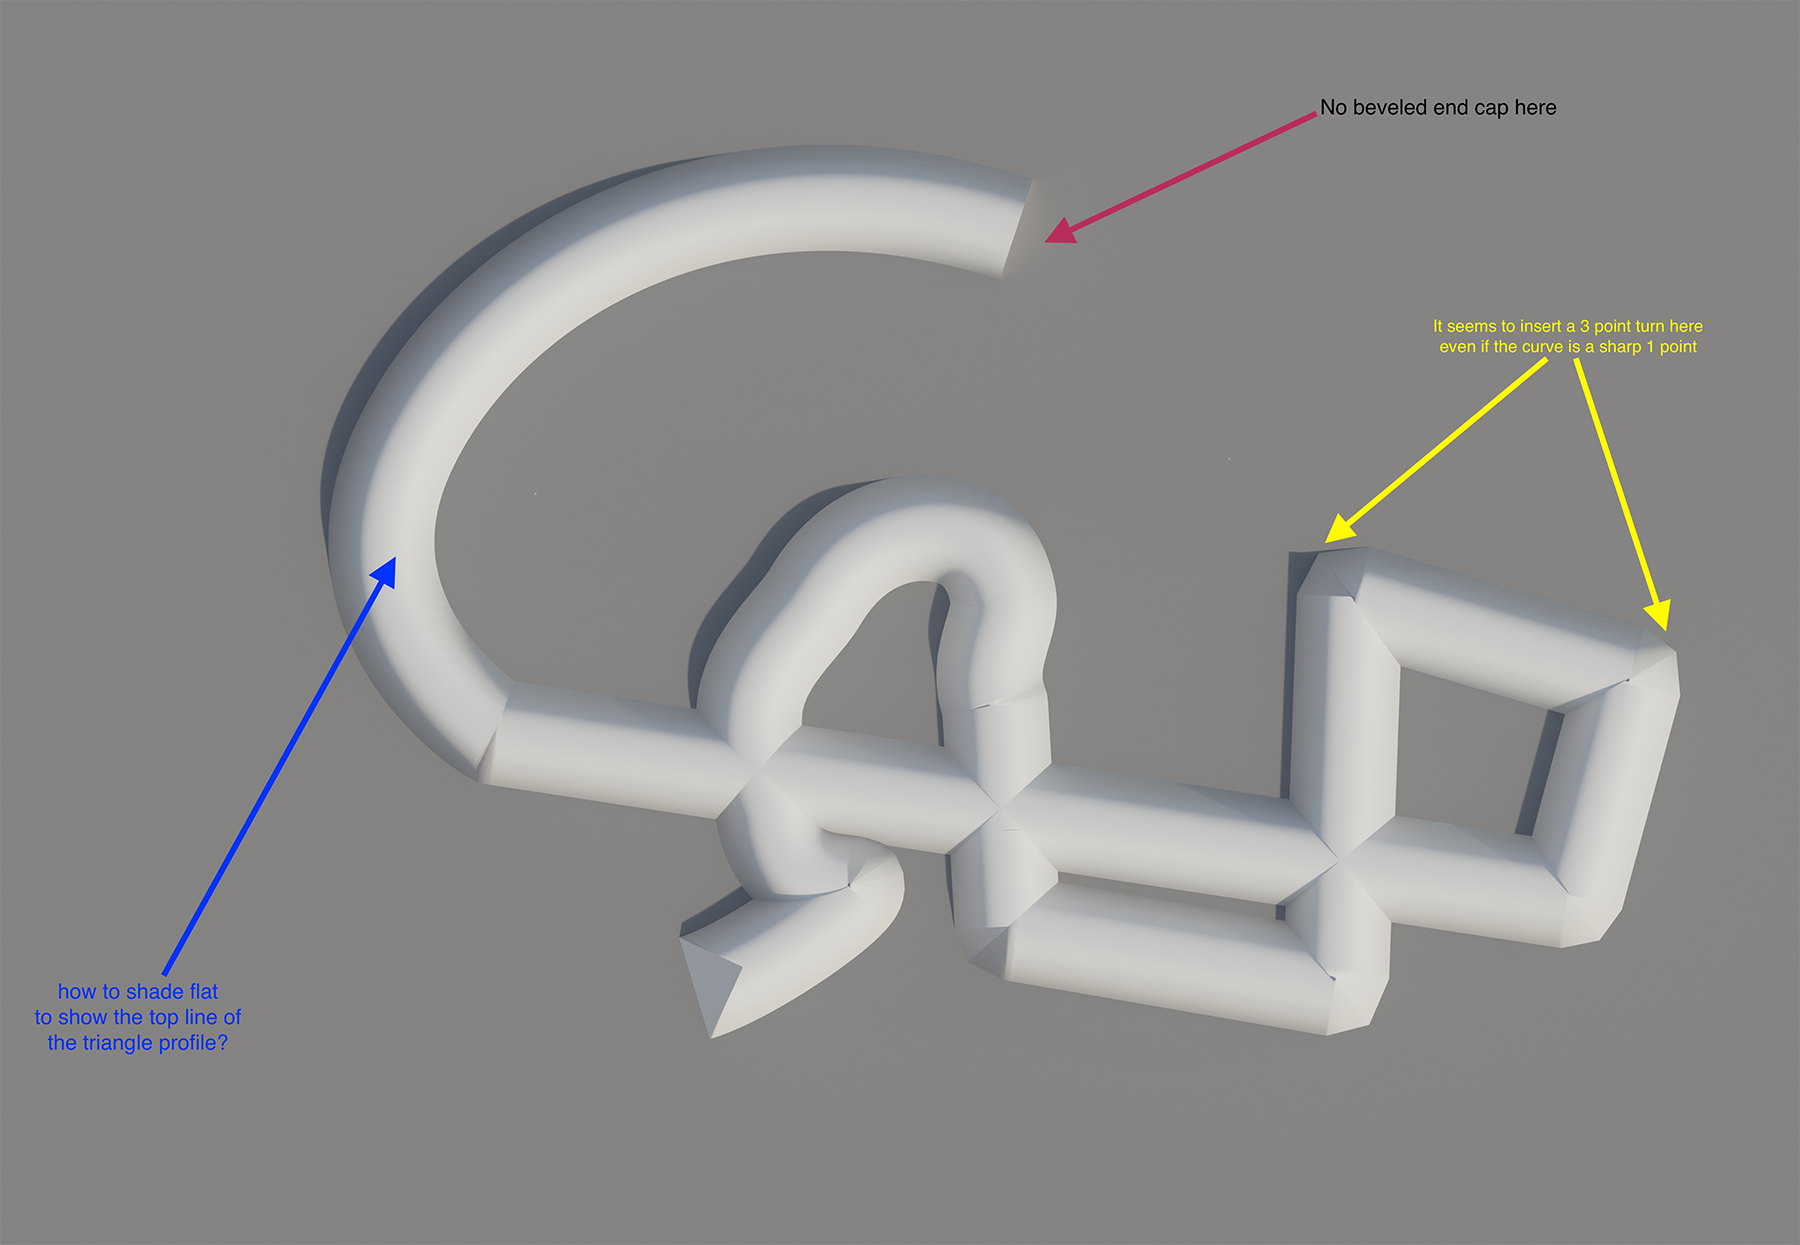
That did it, but after several hours I am still mystified by a few things. It seems to be shading smooth and I can’t get it to shade flat or find a node that shades flat. Odd as it seems I can find a shade smooth node but not a shade flat one!
And if you see in the attached image, on a sharp corner as indicated in the yellow arrow it seems to insert geometry. Is this because I have made my curves in some weird way?
While it worked for me on both ends, this time it didn’t work on the end that I completed the curve on, indicated by the red arrow.
Thank you for the node group, it helped my learning to follow your method. But I also see that the only way I could get mine to work was for the vector multiply node to be “-1” whereas yours is “1”. Maybe that indicates that I did this incorrectly?
I still want to hear about how you did this in Sketchup…
Sounds like you’re looking at the whole thing upside down, or the Curve has a -1 scale or 180 rotation… as usual in Blender, it is best to apply scale and rotation before doing modifier stuff.
Hi!,
Honestly haven’t used sketchup in quite a while since i transitioned to Blender. And it wasn’t stock usage. I believe a plugin by someone who went by Fredo6? It was a bevel converter, not sure if it was working on a path/curve kind of line or an already 3d shape though.
The orientation does say Top Ortho when I hit num 7. But it helps you suggest this, cause I do see that when I enter 1 instead of -1 it comes out of the bottom. Maybe there’s something funky about how I’m making curves?
And the sharp angles, is that a kind of mitre issue? Or do you think I can mess with the curve itself to achieve that? Thanks!
Apply your transforms: Ctrl-A → Scale, Rotation. If that doesn’t fix it, maybe try dropping in a Reverse Curve node at the start of the network.
Yes, use vector-type handles on sharp corners to reduce the polygon count which will make sharp angles “cleaner”, but even so, refer to my previous comment on how there will always be some situations where manual cleanup will be required for objects that will potentially be foreground elements.