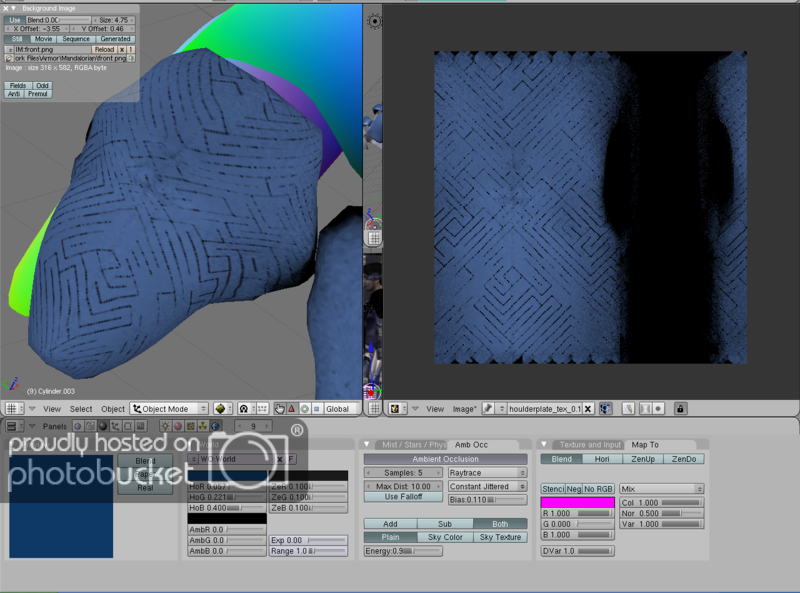
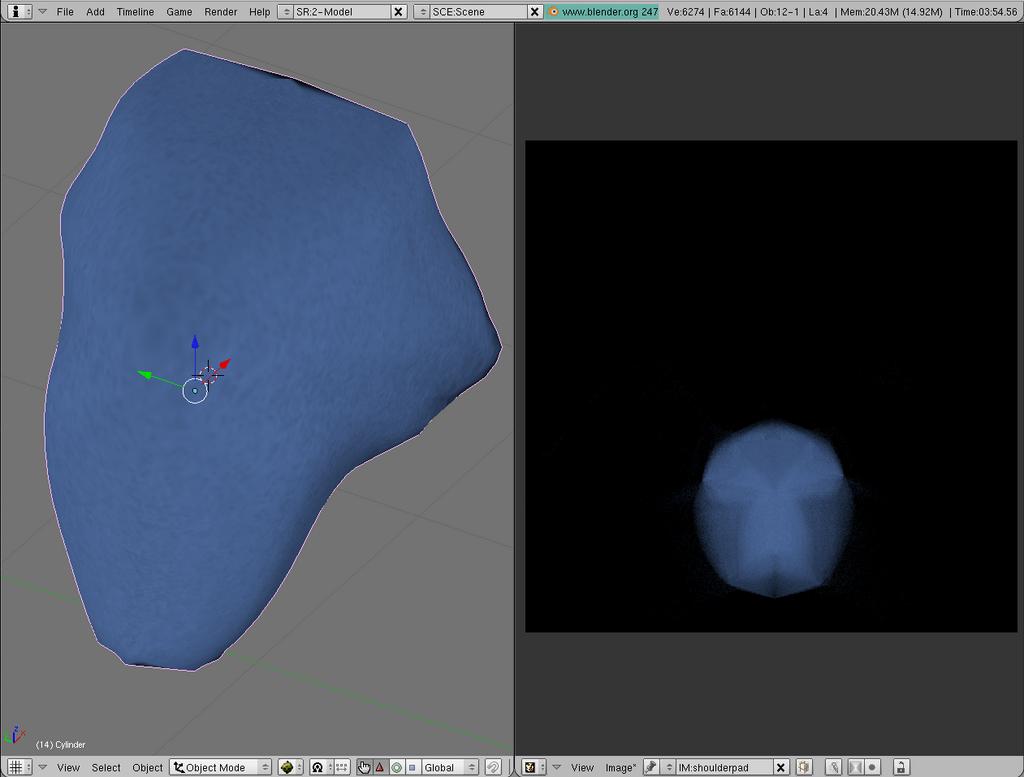
The texturing and lighting forum hasn’t been any help. Thought I’d try here instead. Every texture I bake in my current project has started looking like this:
I don’t know why, or what I did to cause it. It wasn’t happening to begin with, and I can’t remember changing anything notable to make it happen. It just stopped working properly.
These lines are exact diagonals across faces, from one corner vert to the opposite. It’s like pixels just not getting filled in upon rendering.
The cause of the problem is something to do with ambient occlusion. If I disable it completely, it doesn’t happen. However, AO is essential, so that’s not a good solution. Setting AO mode to approximate makes the lines fainter, but does not remove them.
Also, something odd I’ve noticed, if I create new objects in the scene, they don’t suffer this issue, even with the same material.
Can anyone tell me what’s wrong, what I might have done to cause this, and how to fix, or work around it?
Can’t really tell what’s wrong but as a work around you might want to try is to bake AO as a separate texture apply that to the armor and them make a texture or full render bake.
Yes bake AO simply bakes the ambient occlusion pass which is a simple greyscale image.
If this happens in the AO pass it seems that you are having faces shadowing themselfs or you have faces that are totally occluded (these are black in the render) cover faces that are not (non black).
Changing the margin setting had no effect at all on this issue.
How would I have faces shadowing themselves?
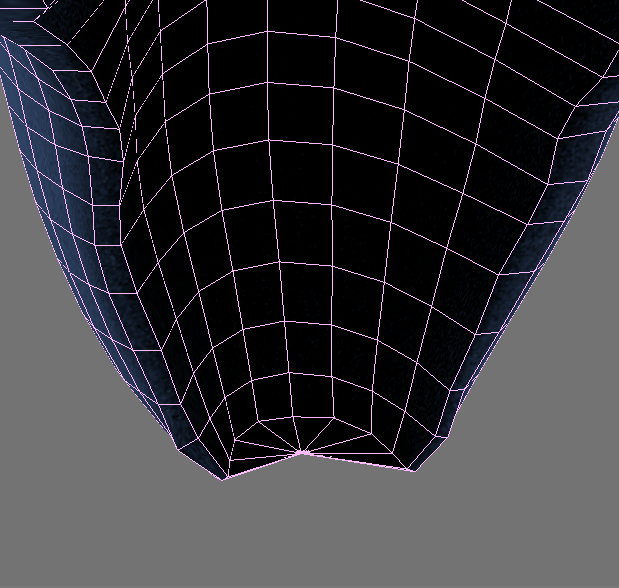
There are a few completely occluded faces, but these are bunched around the poles of the object. The black lines are all over it.
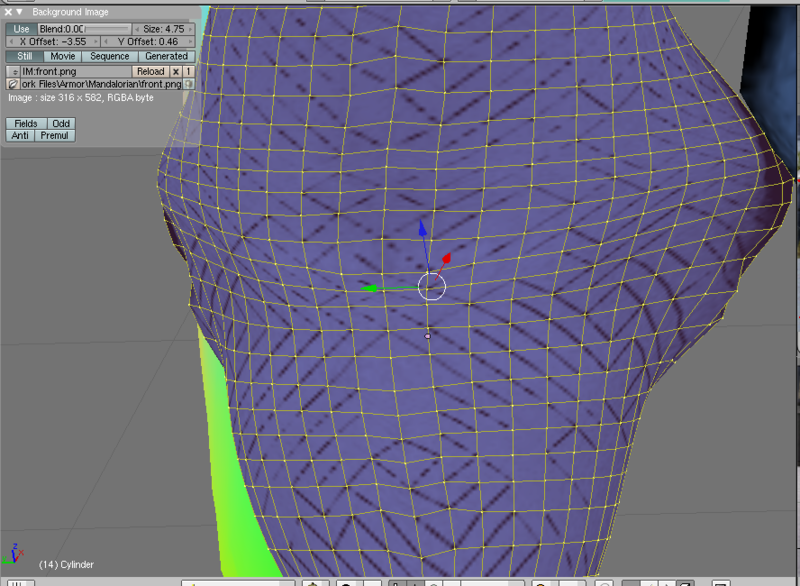
Here’s a picture of it in edit mode:
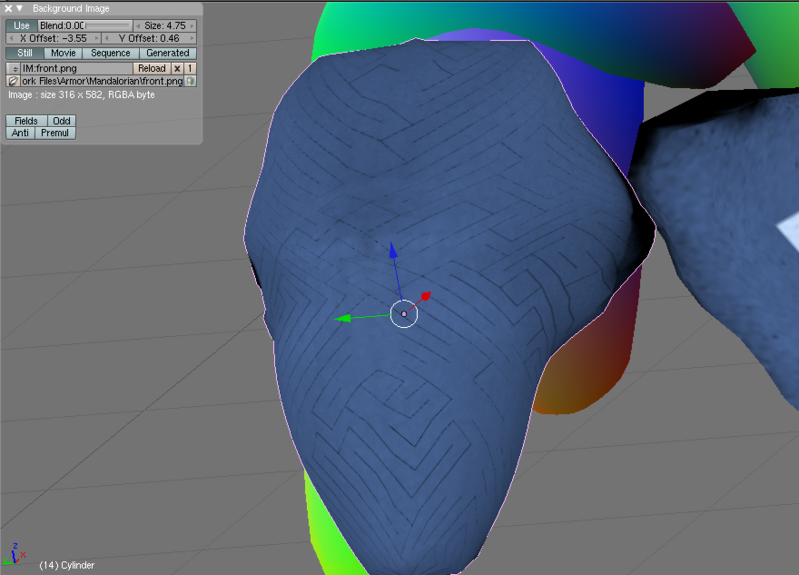
You can see the black lines are exact diagonals across square faces, 1 pixel wide. As far as I can tell, being one pixel wide is a constant. The smaller the texture, the more noticeable they are. The images here are done with a 256x256 texture. Here’s one with a 1024x1024 image.
As can be seen, the lines are fainter. They remain 1 pixel wide while the rest of the image scales up. This leads me to believe it’s unlikely to be anything to do with occluding objects, aside from the other fact that there ARE no objects to occlude.
Rendering at 16x my intended size for everything is hardly a good solution either though, and makes things take a lot longer. I really need a solution to this
Has nothing to do with occluded faces - the black lines are between the triangles that are baked in the editor.I got a limited version of this when I changed your AO setting to ‘add’ only instead of ‘both’.
I’ll let you know if I find something that helps.
edit: even adding extra lamps in the scene doesn’t change this output.
edit2: adding a subsurf modifier and bumping to level 2 almost rids the image of the black edge pixels in the triangles - maybe use the subsurf modifier added to the mesh just for baking, then get rid of it after you have your images.
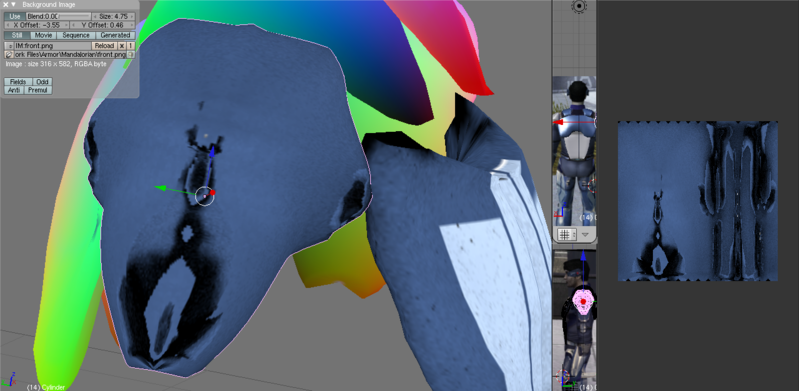
Well, this is what happens with Bake Selected to Active:
There are none of the little black lines. There’s also no coherency or apparent logical order to shadow placement. This option doesn’t make sense at all. Can anyone explain how to use it properly?
I may be wrong but… don’t you simply just need to remove all your doubles?
I removed 60 doubles from the shoulder pad you seem to be having trouble with.
I wasn’t able to render an image because I couldn’t get my head around how you had everything setup, but that’s more to do with my lack of knowledge than anything else. But surely getting rid of all those doubles must have an effect.
Have you tried only to bake the front faces of the pad and see if that produces the lines as well? I’ll have a go at it when I’m at home and have some free time for it.
I think it is a case of just removing the doubles and slightly tweaking your poles. You just need to work harder at getting a cleaner mesh.
Here are some screen shots of your model without any black lines that i managed to get after removing the doubles and changing the couple of quads you have near the poles at the top and bottom into tris.
Unfortunately I don’t know how to unwrap a mesh so that it is laid out in a nice flat square shape in the UV editor to make maximum use of the baked image. How do you do that if you don’t mind me asking? I just had to mark some seams and unwrap it that way, so you can see there is some stretching going on.
Hope this helps anyway
EDIT: you also seem to have quite a few vertices that poke through or are imbedded in others parts of you mesh which may also be a factor in your problem with the lines. I think you should try to make sure your all vertices are visible and not poking through other faces.
EDIT2: Now that I’ve spent more time looking at your blend I think the main problem might have actually been the way you had it UVmapped. If you mark seams on the model and then just do a simple unwrap you’ll get a UVlayout that will require some work getting rid of the stretching but it won’t have any of the black lines showing in the way that your UVlayout does.
I’ve also found the solution to your problem with the shoulder pad thing rotating after you finish the baking process. At some point you have accidently set that object to be the camera by pressing ‘CTRL 0’ with it selected. You need to select the actual camera in your scene and set that as the active camera by pressing ‘CTRL 0’ again.
They create objects with uvmapping and such already done, which are simply deformed into the required shape. On export, the vertex location data is mapped into an image, using pixel colors as vertex coordinates. See the attached PNG for an example
Things like uvmapping and such are static, and preset in SL, so the textures are baked to accomodate that. Therefore, anything requiring custom UVMaps isn’t going to work well.
Have you ever actually managed to get this script to work without leaving black lines on your baked textures? Maybe it’s just not doable. I can see traces of black lines on your breast plate aswell. Do you have any examples of where it has worked without leaving any lines?
Yes, many, many times, it has worked fine. More specifically, it worked fine in this scene, up until something made it not work. I just have no idea what that something is. I had all of the objects created and in their current form at that time. I was messing with material and AO settings.
If AO is enabled there, and using both mode, there are a few very small black lines. But it’s a tiny fraction of what’s in this image, and is barely noticeable. Maybe there’s something in the material causing it, or some setting, I don’t know. I’ve done many scenes where the problem never appeared, in most, it’s very subtle and easily ignored. I’ve always had tightly bunched poles like this. Never before has this issue manifested so strongly as in the scene I started this thread with. There’s got to be something in there that causes it to be so strong.
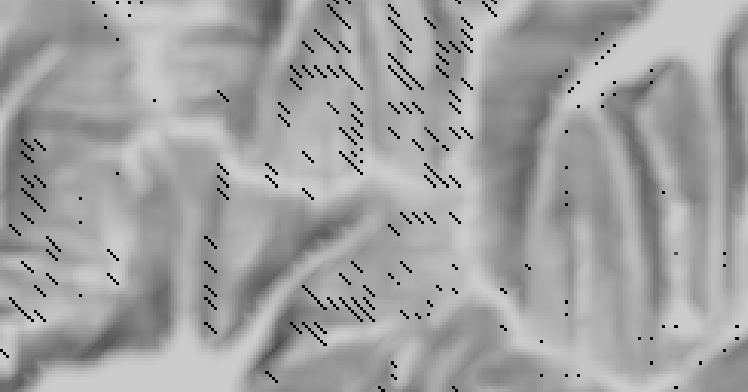
I have been having a problem like this when trying to bake (NOTE: I do not have AO turned on at all)… I get little black lines and some random pixels…
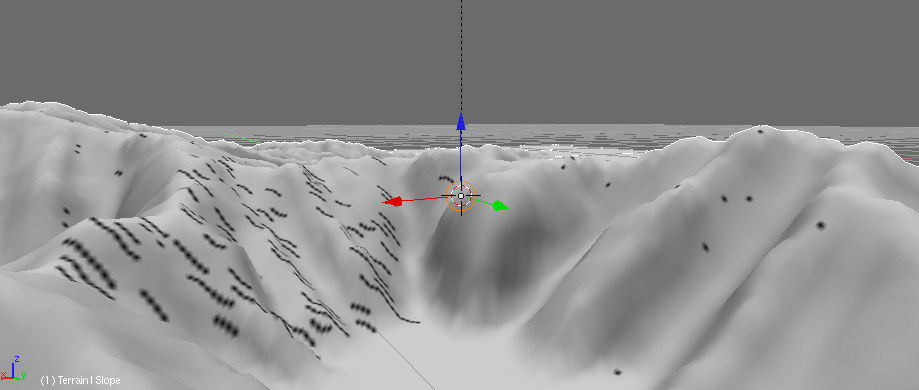
I am trying to bake a texture which indicates terrain slope. My terrain mesh has a simple white material applied to it and a sun lamp above it pointing down. The mesh has no modifiers applied to it.
I just can’t seem to figure out what causes it… :spin:
This thread’s pretty old but I don’t see a solution so I’ll put in my two cents. I had the same problem when I was trying to bake my lightmaps and what I discovered is, as craigomatic said, it’s a problem of adjacent triangles and resolution.
The image map that you’re generating is rather low resolution compared to the pixel-area of the surface you are applying it to.
For each surface/mesh that is exposed to light, there is an adjacent surface/mesh on the map (adjacent in UV-space, not necessarily 3-d space) that is in shadow.
The result is that your texture map looks like one colored triangle next to one black triangle (check that, is this what you see?). When the texture is applied to your model the image is interpolated because the resolution is comparatively low (as it probably should be) and as a result the black from one triangle is bled into the color of another. This occurs at the edges of your polygons, which are triangles, which is why you see these black lines form.
Try using “SmartUnwrap” instead of “Lightmap Pack” when you unwrap your UV coordinates. This way, triangles that are adjacent on your surface will be adjacent on the map (hopefully), and the interpolation will blend two adjacent triangles and not generate those black lines.
Another thing I ended up doing which may not be a help to you was to remove all of the faces in my model that were in shadow. I don’t know if this helps you, but you may have to edit the UV map by hand to get things in the right place.