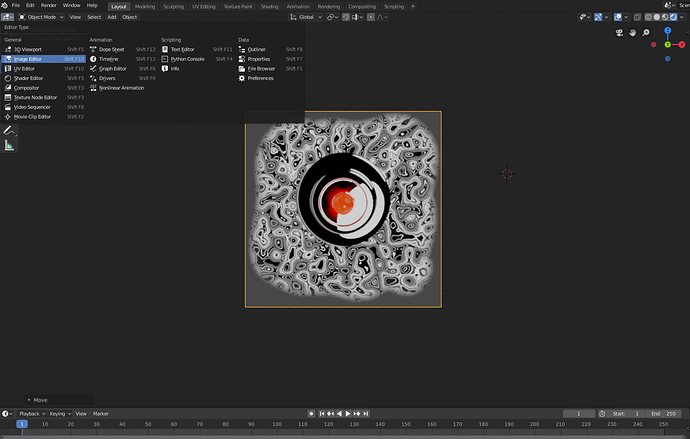
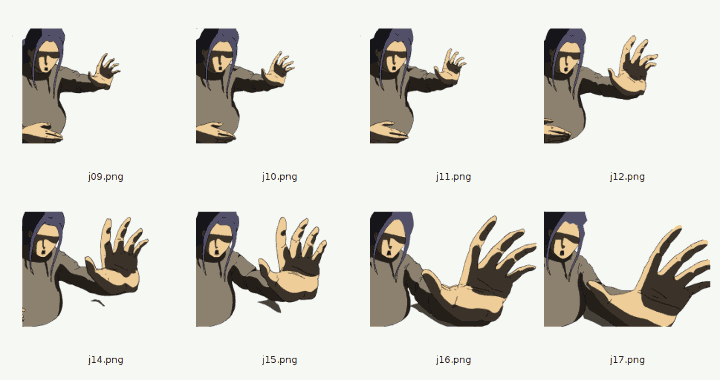
So I was really excited when I found out blender’s grease pen was getting major updates in 2.8. Specifically the time that could be saved with 3d backgrounds. But after trying it out, there are a lot of really annoying ‘problems’. Enough that I’d like to bypass the grease pen entirely. So whats the best way to import frames from another program into 2.8?
If you are talking about just using blender’s video sequence editor to import frame sequences from something else and turn them into a video, then you just change to that editor then press shift + a > image sequence.
Btw, what issues did you have with blender’s grease pencil? Most of the time its just simple stuff. You have to remember that its not really a raster based tool, its a type of vector. For example, you have to change to a material that has its fill turned on in order to use the paint bucket and other stuff like that. Heres a video from the developer youtube channel that explains most of the basic stuff:
So I’ve been using clip studio to animate for long time now. Painting each background for every angle is easily the most boring part for me. So I’ve always thought that making 3D environments and positioning frames within them would save a lot of time and allow for a grander scope.(story wise) Similar to the how the Kairos animation was made in this article
https://www.quora.com/Can-Blender-actually-make-cartoon-figures-or-do-we-have-to-import-them-from-elsewhere Now I’ve seen people import frames as textures on flat squares and were able animate them in the timeline somehow. but that was a while ago and after an update like 2.8 I wasn’t sure if there’s a better way to do this. ps. I’m sure the grease pen could do what I want with enough practice but clip studio’s been my go to for long enough that continuing to animate characters with it would be nice
Well, if you don’t need to incorporate the 2d elements with the 3d elements, then you don’t need to do anything fancy. Just import the frames into blender’s video sequencer for editing. If you want to use 2d foreground characters animated in an outside app, then you’ll want to animate each frame with an alpha channel (just make sure everything but the character is transparent and export it as a png), then import them as a texture mapped plane.
Theres an addon that comes with blender that makes this easy called “import images as planes” (edit > preferences > addons > import-export: images as planes). Make sure you check “animate image sequences” and “shadeless” in the bottom left when you import your images. Now the texture that is on that plane should be animated, and when the scene is rendered, it should have proper transparency. If you are using eevee, you need to go to the plane’s material settings and change the blend type from opaque to alpha blend.
EDIT: I don’t really do 2d animation, but if you have any questions about setting up that plane so that everything works, then feel free to ask in this tread. I should be able to help you get it to work.
Thanks for pointing out the plugin. I try’d to do a test with an image(creepy teletubby) and the only issue is the edges of lines but that shouldn’t be problem with 100% opacity lines
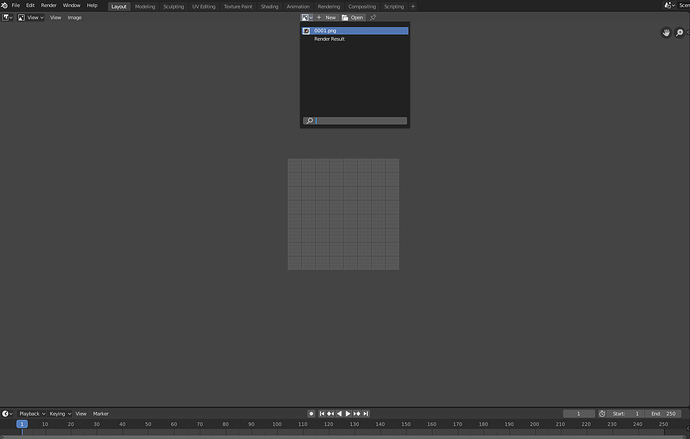
Now if I imported multiple frames with "animate image sequences ", would it just animate automatically or how would I control frame rate/ what frame I want it to start from? Can you key frame each image your self?Try setting the alpha to premultiplied mode. First switch the 3d view to the image editor:
Next set it to view the image sequence you just imported:
Now press n to open up the n-panel. It should contain options on how to handle the images alpha channel. See if setting it to premultiplied works. If it doesn’t then try channel packed mode:
Its also worth mentioning that these same settings can be changed in the shader editor. You select the node for the image and in the n-panel’s item tab under properties you should see all the same settings.
It will play automatically as though it were a normal video. You can set the start and end frames for the image node in the shader editor, but you can’t manipulate each frame.
If you want to use this method, then you’ll have to make the whole animation in clip studio, and just use blender for the 3d background. This is the whole reason why people were excited about all the new features that were added to grease pencil. Now it’s actually possible to animate everything inside blender with no drawbacks. I know you said that you’d rather do as much as you can in clip studio, but the grease pencil isn’t really hard to learn. I at least recommend that you watch that video I linked to earlier. It explains most of the stuff that trips people up early on, and only takes 16 minutes.
I’ve watched the video a couple of times, doesn’t really address the issues I got.
1.He mentions making the grid you draw on visible, his seems lock to the x axis where mine rotates with the screen so anything I draw is going to have lines both in front and behind each other if I change my view at all
2.I set opacity to 100 and yet I can still see through my “strokes” and looking at the materials didn’t really offer a solution either.
3.I enable onion skinning and then enable it in overlays and still nothing. I double checked the 2D template file where it does work and my settings match it. (Not sure wut to do)
(the video’s ui doesn’t completely match up either, cause its from the alpha.) I would like to use grease pencil but I got some speed bumps
Yea he’s using the built in snapping. You can turn it on in the header of the 3d view window (It should also be on by default in the 2d animation workspace [File > New > 2d animation]):
Also, if you rotate the camera, and need to get back to looking at your drawing head on, that workspace has a camera aligned in front of the grease pencil object, so you can just press 0 on the number pad or go to View menu > Cameras > Active camera to get back to the perspective you had when you first created the file. Pressing 1 on the numberpad to switch to front view works just as well.
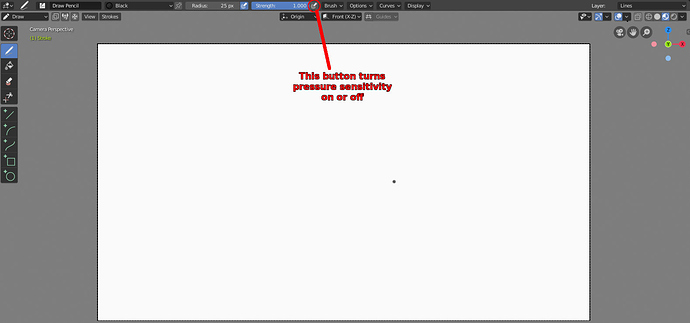
I think you left pressure sensitivity on. If its on, the stroke won’t be fully opaque unless you press down hard:
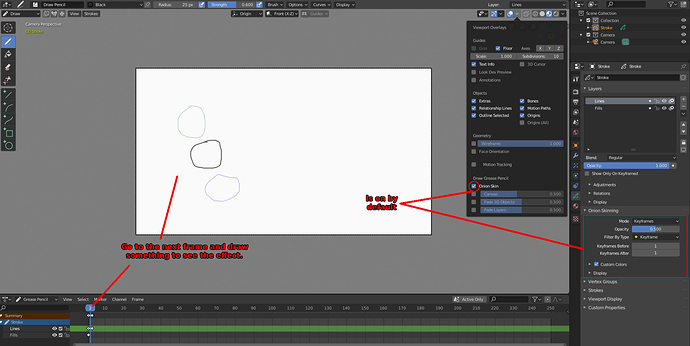
From what I can see, the 2d animation template has onion skinning on by default:
If you press the right arrow key (as in the directional arrow key, not the “correct” key) to go to the next frame and either draw a new frame, or move the previous stroke in edit mode (use ctrl + tab to shift modes), it should show you your previous frame in green. Here’s a more recent tutorial on using the grease pencil to animate a bouncing ball. He’s using the beta, but it’s a lot closer to what the current layout looks like:
https://cgcookie.com/tutorial/animate-a-2d-bouncing-ball-with-grease-pencil
It’s a paid site, but that particular tutorial is marked as free, so it shouldn’t ask you to sign up or anything in order to watch it.
The onion skinning not showing up was because there’s a an option for it in the layers box on at the end of the layer. Mine were unchecked. So, those were the main things confusing me, thank you for the help
It would be interesting a tutorial on how to import sequence of external images (x-sheet) similar “lst” of papagayo. I do that for sheeting in synfigstudio
https://4232.cf/tutorial-x-sheet/
I have a question on the opposite end here, when exporting! I brought in the png sequence, animated it moving on a curve in the 3d space, and am trying to export that animated image plane as a glb. I keep getting an error message, however, and am wondering if this process is even exportable?? Essentially using 2D animations in AR space. Thanks!

