Hi guys
As mentioned in topic, I apply armature on a character and it crash Blender. I had tried to follow tutorials and did it successfully on a simple human body. However, Blender crash when I apply it on my project, character with more details and accessories.
Is it because of massive mesh? Too many unnecessary geometry/ subdivision level too high? But I think my character is still simple compare to those exquisite model I had seen on internet…
Or are there any other common issue that may cause Blender crash easily when applying armature?
hello,
do you have some screenshots?!,
of the modifierstack would be helpful,
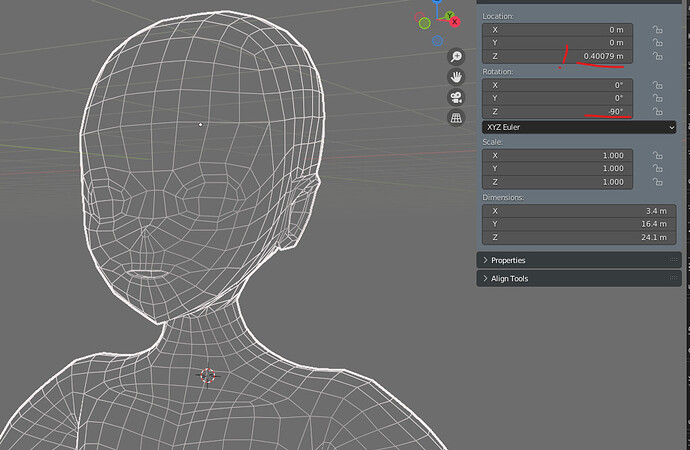
in general the geo should set to 0 rotation/translation and the scaling to 1,
how big/small is the figure
did you run mergebydistance to avoid possible duplicate points.
which version/hardware
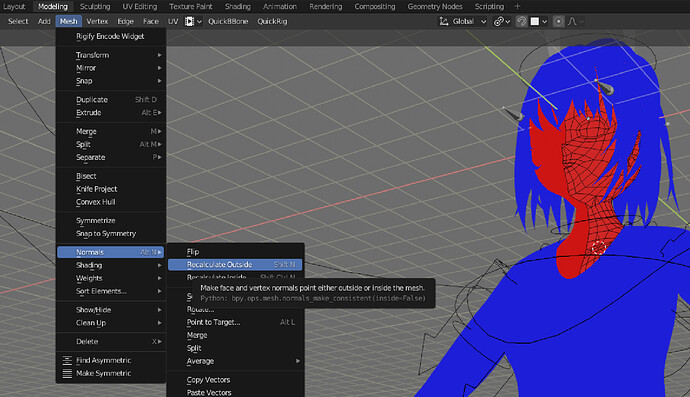
did you check the normal alignment.
did you try another geometry as a test
mute/delete the subdivision-modifier
delete the vertex groups if there are already older ones
Here’s the blender file link
https://drive.google.com/drive/folders/1DHiCuK3aDWvHG2ArPJncLUzplB-xIJN1?usp=sharing
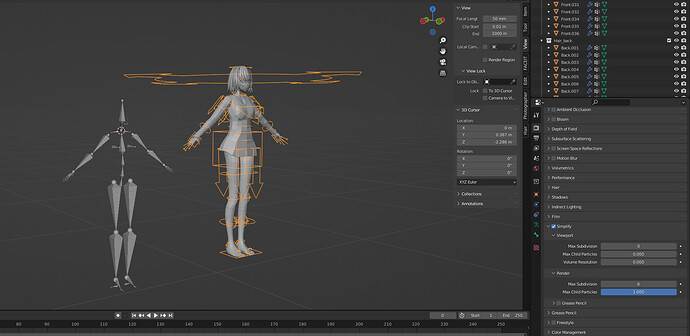
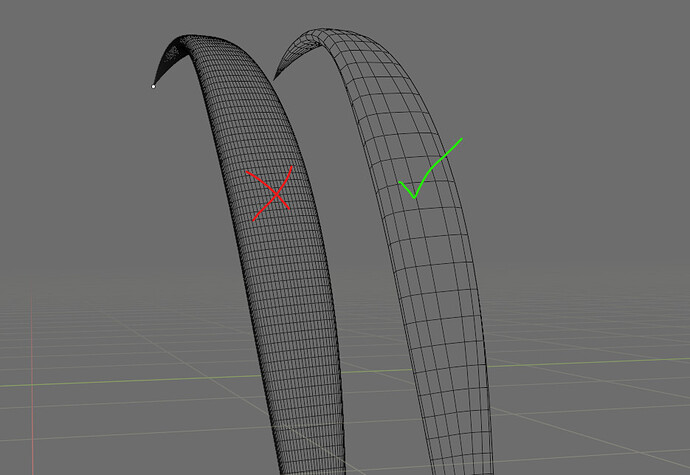
Hi! I have successfully applied your geometry to the armature with empty weights. It’s true that your hardware might not support the modifiers you’re using. Try to use “Simplify” like in my screenshot, or hide the modifiers and see if it works. Also, your hair strands have waaaaaaaay to many faces, and even my PC have a hard time using the viewport with them, so it would be wise to optimise them to around 10K polys
Also, you should apply the scale to your meshes before proceeding (Ctrl+A > Apply Scale), and you also should select the meta rig, go into edit mode, and move it up so the feet touch the ground, then re-generate the rig. Here is the .blend file with the fixes and mesh parented to the armature (Blender 3.1) Cheers! https://we.tl/t-XdLl81R78o
I was able to rig it without crashing
but then I noticed the already mentioned points
the normal ones from the body are misaligned
the translation-rotation/scaling is also not set to zero or 1
the hair strands can be reduced very much they are now unnecessarily high resolution.
otherwise as already mentioned by spiotrx ![]() keep it simple
keep it simple
and actually the figure/rig is not on z 0
you should correct some points otherwise the animation will be
tough and no fun because you have no fast feedback
![]()
@walt1 @spiotrx Thank you for all the help!
I just have time to try and I can apply the armature now.
But there’re new problem that the influence area of each armature bone are too large.
I used the ‘with envelope weights’ to apply the armature, it should be ok?
Or I need to adjust each bone’s area in weight painting mode…?
“Envelope weights” are usually too large, and are used in some cases. Your rig looks simple enough for the option “Automatic Weights”.
However, if you want a good result, you will always have to skin it manually with weight paint mode, and add some additional bones for things like the hips when the legs move up and stuff.
If you want to learn Rigify more in depth, I recommend CGDive on YouTube. But if you just want a fast rig, then automatic weights is the way to go.
Ok, I get it.
Then that’s the next topic I need to study. I will have a look on CGDive.
Thank you bro.


