Hi there!
I try to paint my textures inside blender as much as possible,
but sometimes I need to make some adjustments (especially when blurring),
so I take the texture to Krita.
But when I save the file in krita and reload into blender the color is different, it’s ok because blender is in filmic color management…so…is there a way to save from krita using some “compatible” color space that makes more linear the workflow?
Anyway, you guys how do you fight with this color space changes?
A lot of thanks guys!
Use Standard- this gives you 1:1 color. You can switch back to Filmic when you’re done with the texturing
1 Like
Renzatic
(Professor Emeritus Billy H. Wafflesmith XIV Esq.)
4
Filmic is more about how the camera grades the colors in your scene, rather than an actual color space used throughout Blender, isn’t it? I’ve always thought of it as being more of a post process effect, something placed on top of the sRGB standard, rather than replacing it outright.
Renzatic
(Professor Emeritus Billy H. Wafflesmith XIV Esq.)
8
While we’re waiting on this guy to answer…
Here’s what I mean. Whenever you switch between Filmic and Standard under Color Management, you don’t see any difference in the colors. Rather, you see a difference in contrast. From my experiences, Filmic evens out your light areas, so your highlights aren’t so blown out, but makes the spaces between your lights and darks more…er…contrasty.
That’s why I’ve always thought of it as being more of a color grading scheme, rather than a color space wholly separate from sRGB.
BbbBBbbuuUUuuuTTTTT…
…there is a Filmic sRGB color space you can select on the texture nodes, which makes everything look like it’s been run through a color burn filter when chosen.
My perspective has always been- if you copy a HEX color in a different program and paste it into Blender, it will match visually with Standard. It won’t match, at all, in any way or capacity, with Filmic. This may however be less about Filmic’s color management and more about how Blender handles external colors? It’s not just purely external, though- you can see the same thing by loading an image into Blender and sampling a color from it. There again, the color will not match when you paste it unless you’re using Standard. The only way I’ve ever found to get accurate color across Blender, and also across other programs, is to use Standard
2 Likes
Renzatic
(Professor Emeritus Billy H. Wafflesmith XIV Esq.)
10
"Filmic clamps light energy and brings it all down washing color out. Standard clips the bright and has hotspots but it’s set to the screen colors like on Web.
Think this… The color is 32bit but the screen is 8bit. So filmic clamps the 32bit white to 8bit."
So I guess if you’re wanting to produce an HDR image, or you just really like the look, use Filmic. If you want exact colors, do like what you said, and use Standard.
Using the standard for texturing and ending in filmic…maybe adjusting the textures with a curves node a bit to correct the color if needed…
I only try to clarify the workflow, as I said, I try to do the most in Blender, and Im not against Filmic in any way, quite the contrary, I think the result it gives is fantastic…
Exact colors is a tricky thing in 3D when you consider lighting.
Just like in real life, are we really seeing the true colors ? or they are mixed with the ambient lighting ( color and intensity) ?
Is she really a smurf ?
But, back to the subject :
Filmic allows to use much more correct lighting in the 3D scene by compressing higher values.
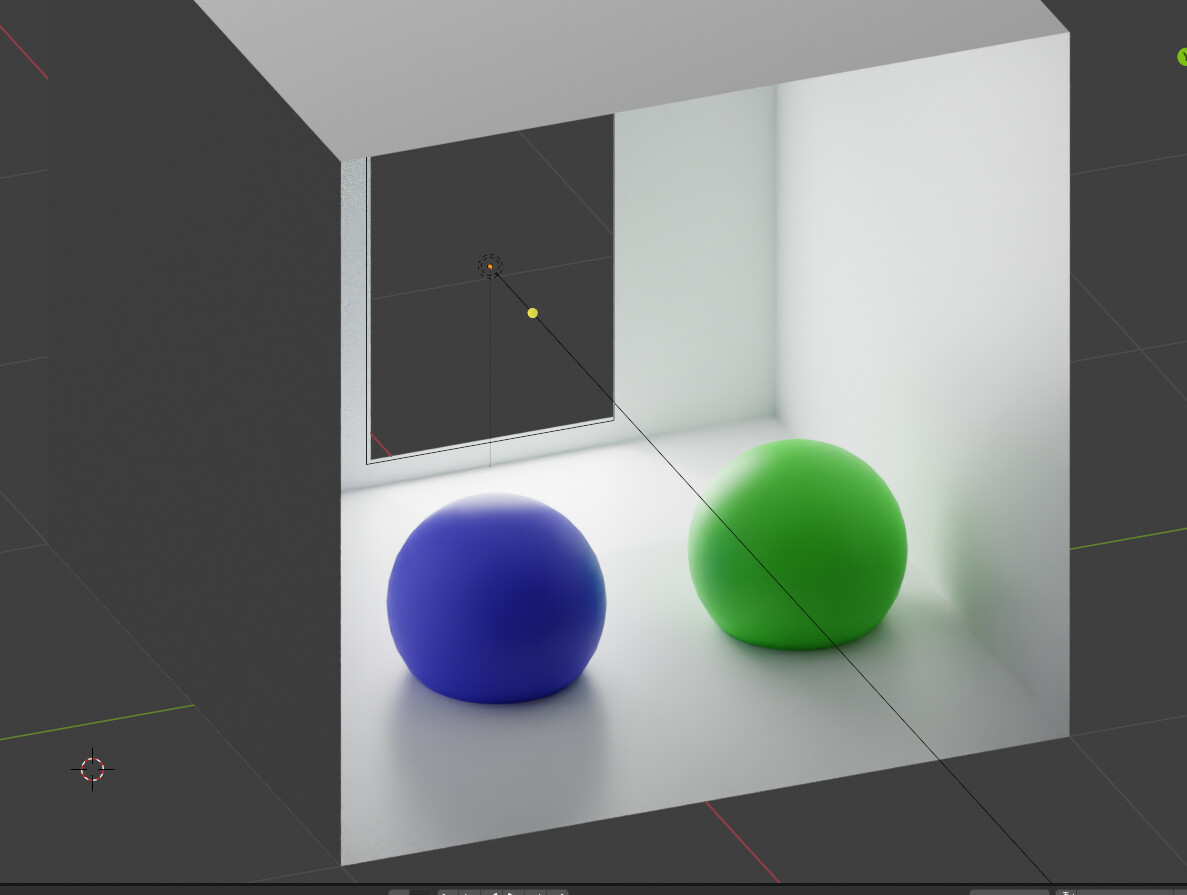
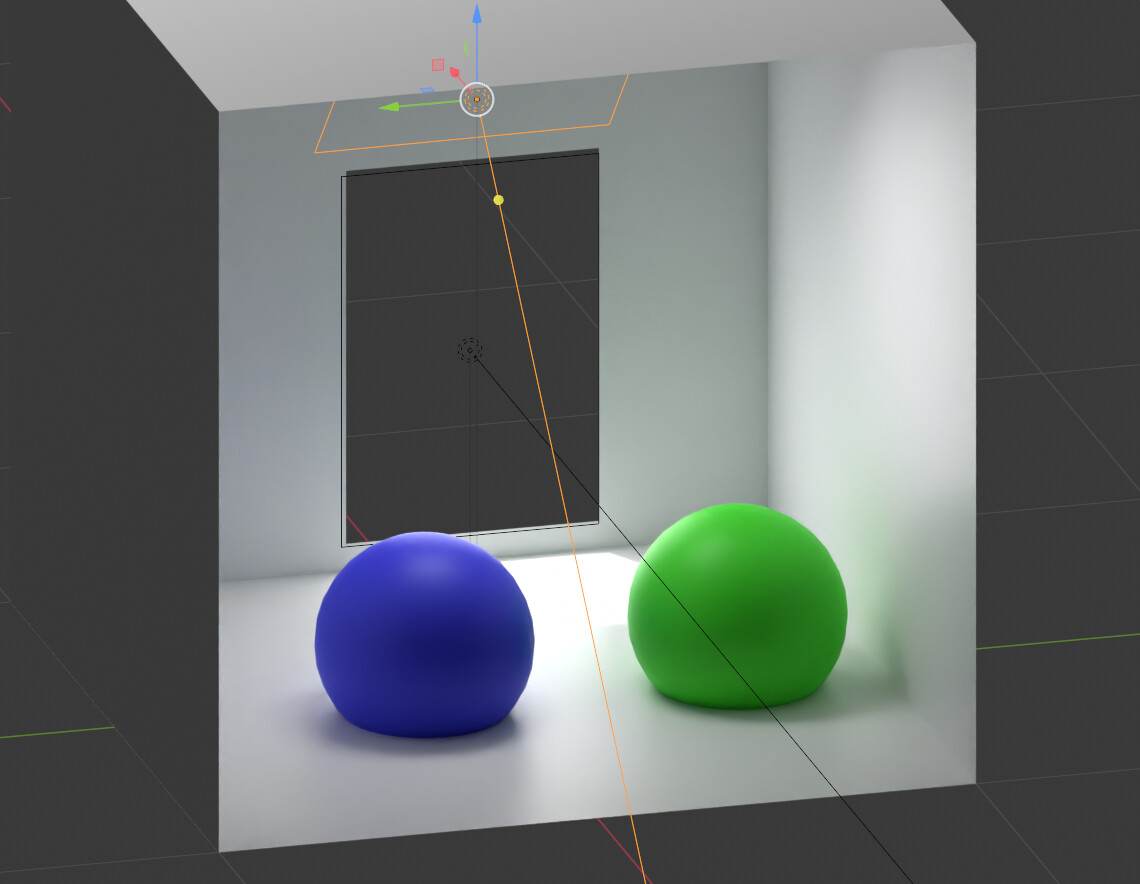
Let’s pretend this is an interior rendering,
This is filmic :
It’s kinda ok, but since I’m trying to avoid clipping I loose a lot of the actual bounced light, and this is a simple example.
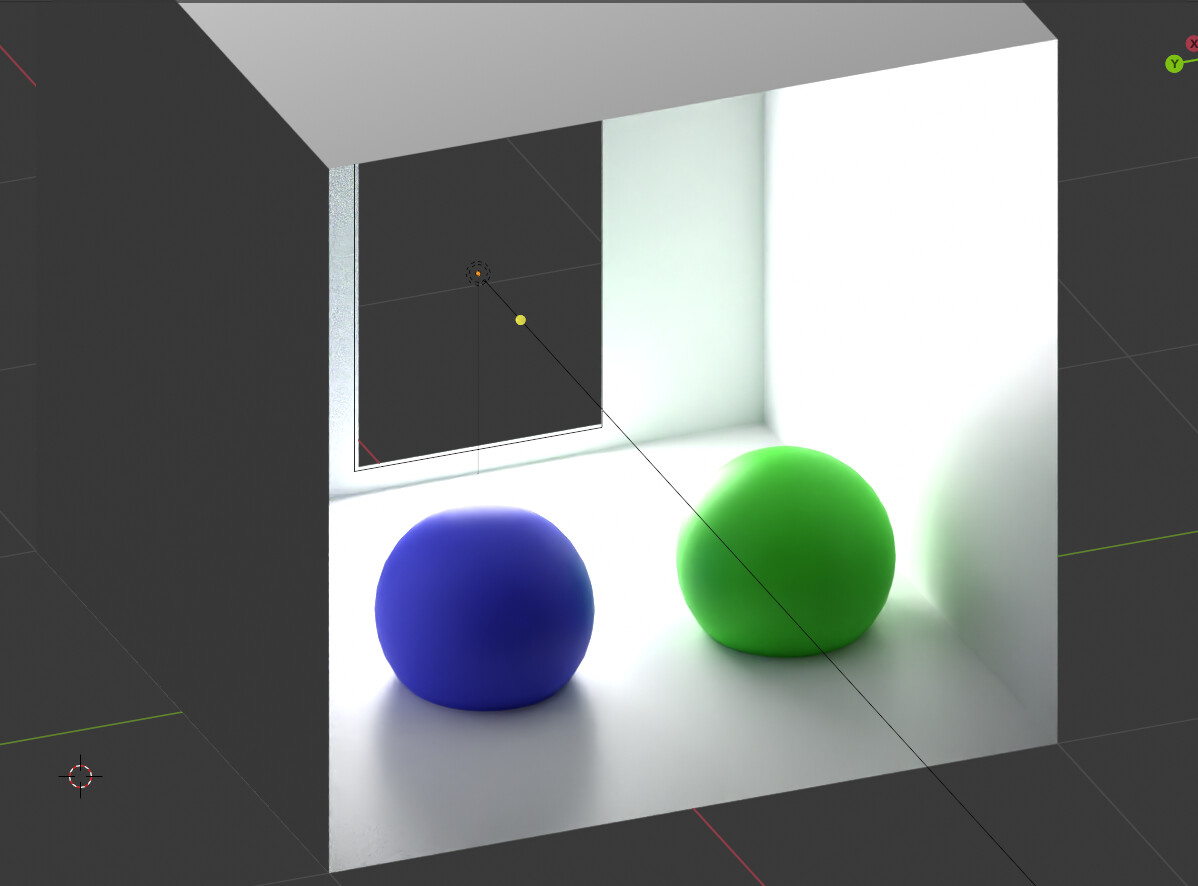
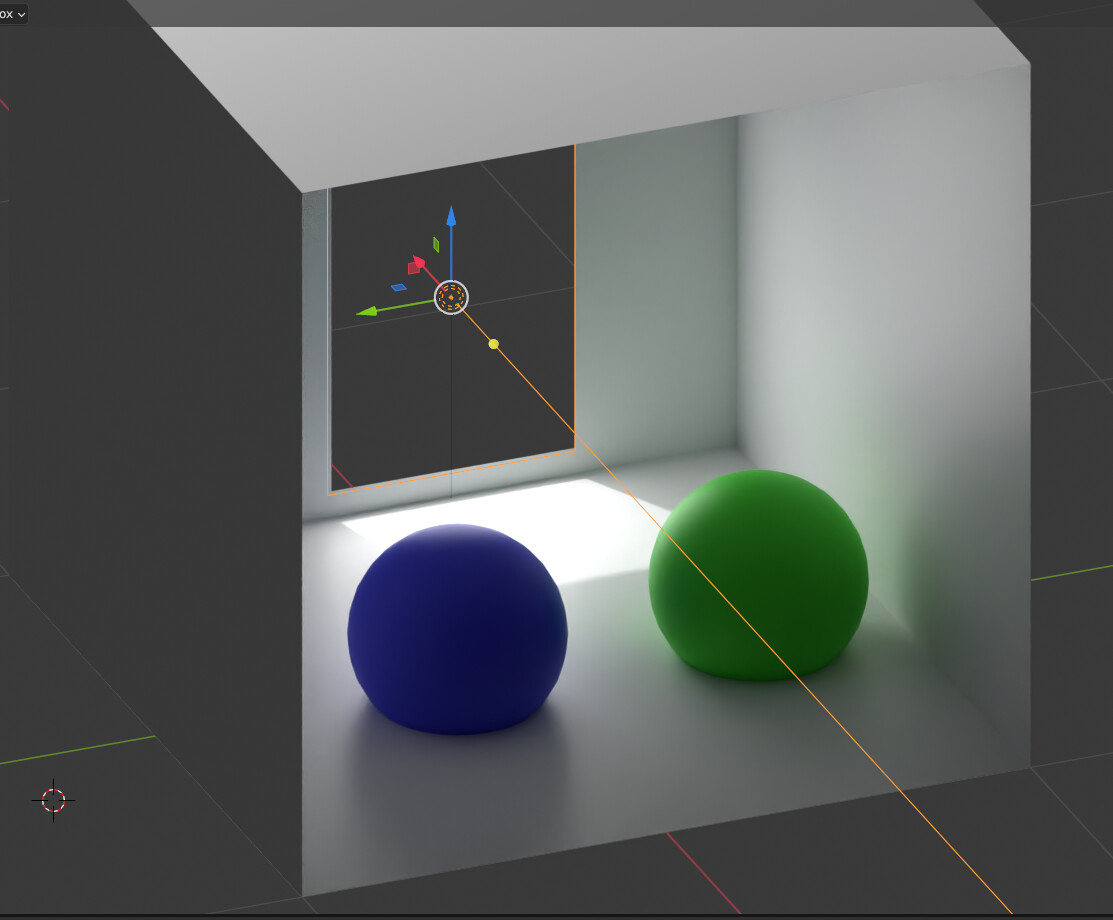
And that’s basically what everyone was doing before people started to talk about filmic tonemaping,
Aces and such. We tried to reduce light intensities so they fit in an acceptable range instead doing accurate light calculation and then convert that to a visible range on our screens.
What filmic brought is the ability to be much more closer to real light scenarios.
But sure it implies a bit of grading after render.
My advice is unless you are into NPR where each color is clevery crafted and you want 1:1 match with your original palette, I suggest to use filmic, and if a color is a bit off like a client logo color, you do a quick grading pass and change just that.
When texturing, the idea is to think about the “albedo” (it is not) as being “lit” by a single source, right at the camera. That is, the “reflected light” (it is not) is zero to one hundred percent. A close approximation of this sort of normalized texture range is to encode the texture with your display’s inverse output transfer function. That is, the rather vague “Standard” transformation. This makes sense when painting, as the values can only ever be zero to one hundred percent “reflectance”; there is only one assumed “light”, no complex focusing effects, or other things.
When rendering, the idea is to make a picture from the simulated rendering tristimulus as it is not a picture yet. That is, there are many lights, focusing and bouncing effects, and the idea that we desire a picture from the render data. In this case, Filmic, or the experiments around AgX / SB2383 etc., would handle the task of taking the render tristimulus data, and forming them into a picture. Rabbit hole here of course.
When creating NPR renders, the way I prefer to frame things is “What affords the author the greatest density of information in the pre-picture picture?” That is, we don’t want the render data, and we need a picture formed in an elegant and high density manner. That is, NPR can always posterize a range of colours, but if the goal is the option to posterize or collapse colour ranges down from a larger range, this is impossible if the pre-picture formation has botched the output. Using “Standard” for NPR is the sort of thing that is less than optimal as a picture formation chain, and can lead to this sort of sparse and distorted result. Frequently, better results can be had using a tuned picture formation chain prior to the NPR pass. This is because it can often afford the NPR passes smoother graduations, and “denser” colourimetry in the pre-picture formation. This density can of course be discarded as required, but is impossible to generate after the fact.
Thanks for your input! That makes a lot of sense to me.
Can you clarify what this means in practice? I apologize for my denseness, I’ve read through your hitchhiker’s guide to color management and the whole Filmic V2 thread but this stuff just doesn’t sink in easily for me
I promise that no one on the planet understands what a picture is, and that means that your willingness to pose a question is the furthest thing from “dense” that I can think of. It’s helluva wise to pose a question!
NPR is an incredible thing. As a broad concept, we need to consider NPR as a sort of “picture of a picture”. Why do I say this?
Take for example an incredibly simple and ridiculous setup. A simple achromatic sphere of R=G=B, “lit” by a pure “blue” channel lamp. That is, the range of the values in the render data are all 0.0, 0.0, 0-inf. Now what do we want to do?
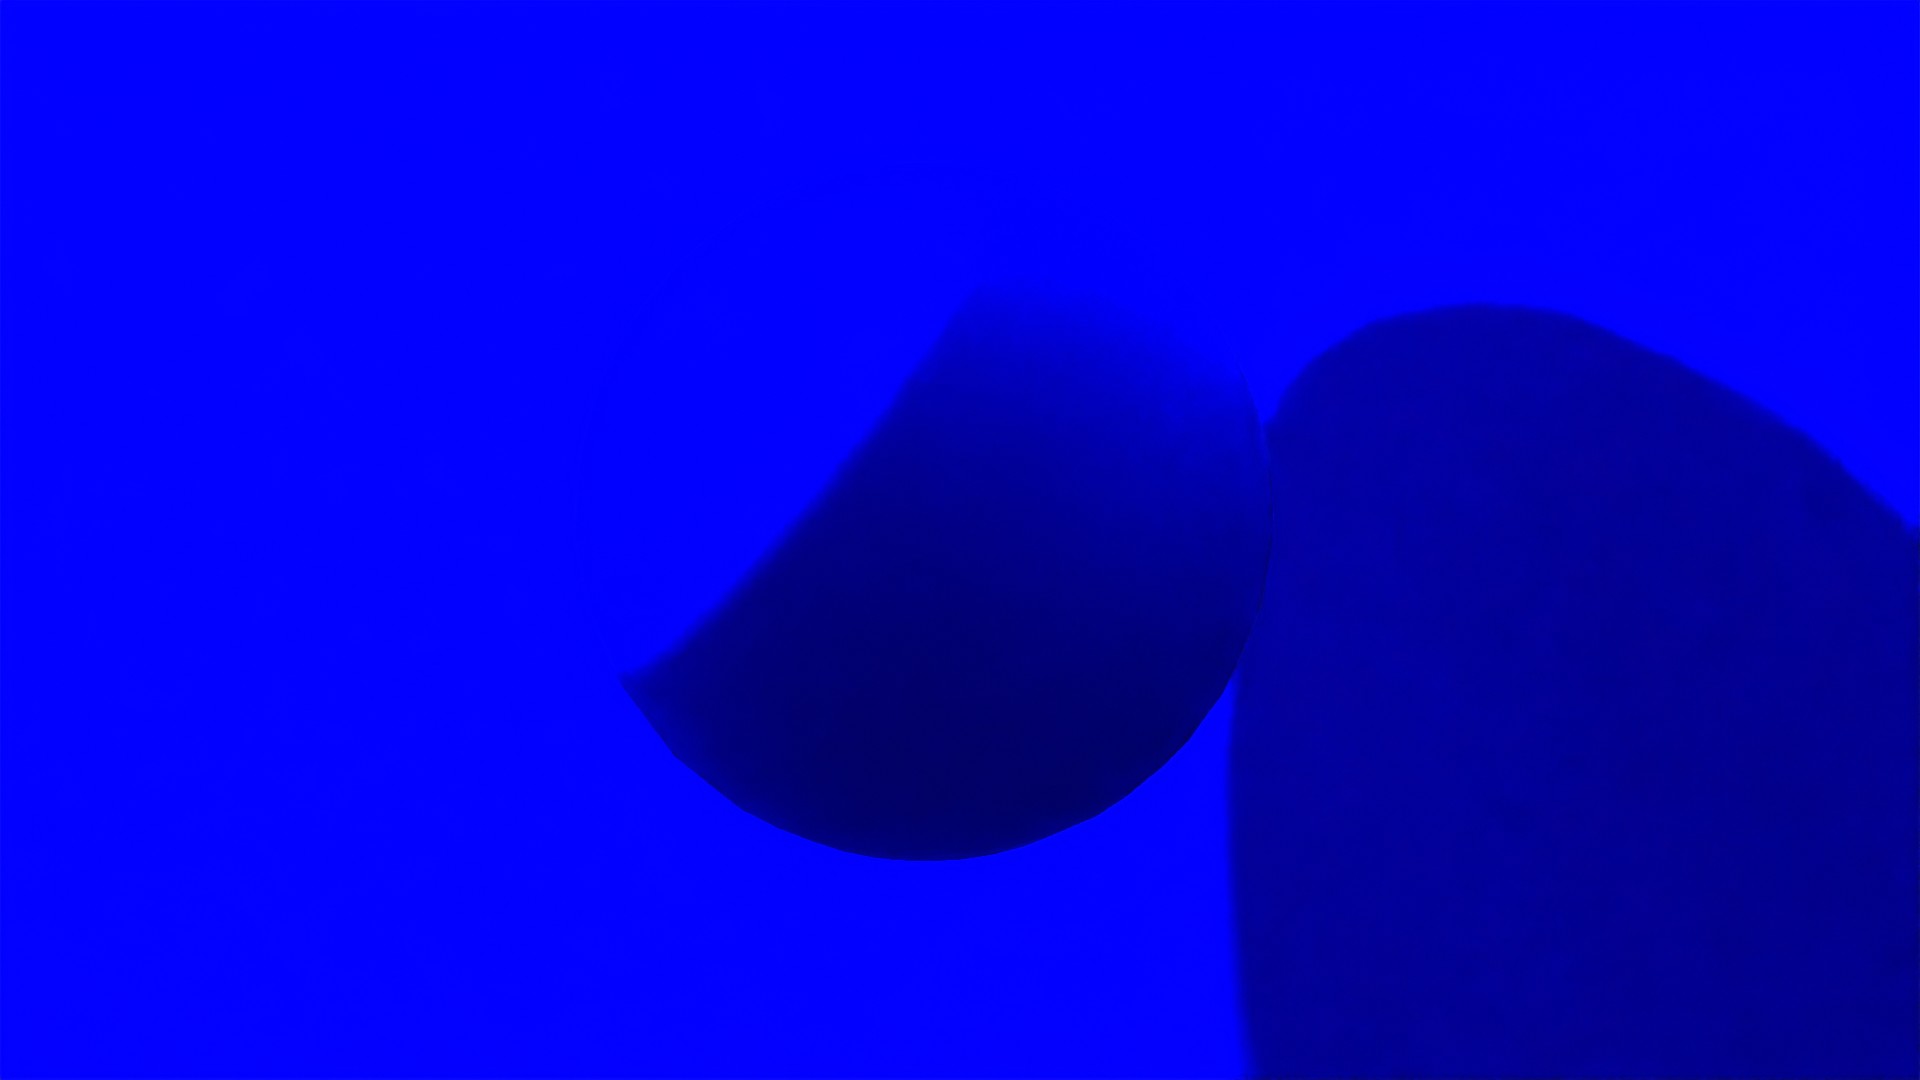
Most NPR techniques typically assume a pre-formed picture as an entry point. That is, if we use a simple “clip” as with the “Standard” encoding, there is a picture formation stage! It just happens to be a peculiar clip. We might end up with something like…
As we can see, for NPR, we have very “sparse” information in the picture. The NPR pass could throw information away, but what we have is a problem in that the pre-picture is less than optimal in terms of structure. For an NPR pass to be more effective, it would likely want a more elegantly formed picture to build on top of; the picture would want a sphere that attenuates in chroma toward the “light”, providing a visual cue of “brightness” and permit a legibility of the signs within the picture. This would provide a pre-picture that the NPR pass could grab and use as a “white glint”, or a Miyazaki stylized shading, or whatever creative approach is required.
It is worth noting that none of these sorts of desirable picture RGB values are present in the rendered data set! These values need to be formulated and constructed during the picture formation process!
With the “Standard” entry point as a pre-picture, the results will almost always be less than optimal due to the sparseness within the pre-picture information.
Well…i found what I was doing bad…
I was saving the file from blender with “save as render” option enable, so blender save it with the color management “follow scene”…btw I save it as png 8bits (maybe not the best option XD)
Next I open the file in krita, dont see any differences BUT when I save it, krita saves as sRGB, which is logical because I have not changed any color space in Krita.
So what I learned from this thread is, thinking in Filmic as a “realtime post-processing” (@troy_s please dont kill me hahahaha).
This way you know that the colors you see in viewport (EEVEE) obviously are not the same as the Image Editor, and saving the file as plain sRGB make it compatible with external editor (as far as I experienced)
@troy_s , again, your work and your knowledge are from other world, reading you is like reading to hawking XD,
thanks to all you guys, I really learned a lot with this
Maybe a bit offtopic…
Because i understand that the choosen R, G, B “elemental colors” are nothing else than an “average peak value” of a full spectrum of the vision of the Cone cells… and the need of any standarization even using old CRT as reference ( ← extremely double simplicifation ) i always thought it is very interesting to look at color management (CM)…
… but to be honest didn’t do it very intense yet
At least i learnt from you ( … also in the thread at devtalk mentioned at the bottom and now realizing i never liked a post of you …) that even if people who use CM on a daily basis… might be not the specialist/experts they are thinking they are…
(Additionally refereing the thread J (@joseph) mentioned before:
Even if i have to read them twice, thrice or more… and store them in my subconscious to maybe understand them a little bit more next time …
.
.
( Or a bit offtopic here but over there…
It’s always a pleasure and pain (it is not ) to read some of you answers at::
I like to think of filmic as simulating film emulsion, pre dating digital photography. Where you could pretty much over-expose forever and not lose details, except if going too far and you’d get emulsion noise instead. And as such, a no brainer approach to over-exposure without blowing out, but instead loose color accuracy. In the real world, a photographer would control the lighting to avoid blowing out the highlights (too much). In circumstances where lights cannot be fully controlled, shoot multiple exposures and composite in post using sRGB and some kind of local adaption contrast/tone-mapping approach. We don’t have to capture multiple exposure, but we’re free to use sRGB and tone-mapping instead. But at least with Blenders “tone mapping tools”, this isn’t a no-brainer approach anymore, and personally I’ve never been able to use this with even a hint of success. So for me, filmic has been a life saver, even if color accuracy is compromised. If color accuracy is your thing, go sRGB and battle over exposure using light control and/or other local contrast adaption techniques.