You’re very kind, thank you!
I’ve made it work, but as I understand it, this replaces just the diffuse colore of one color at time, right? It’s not aimed in reducing procedurally the number of materials.
Or am I missing something?
A procedure or an algorithm is required would do the job.
One needs to measure somehow if a color is “close” to another color. Then a dynamic or static clustering of the diffuse colors is performed.
Dynamic color clustering
Color clusters are somehow calculated dynamically. A resulting diffuse color is calculated for each cluster. The resulting diffuse color is set for each material within each cluster.
Static color clustering
A limited set of diffuse colors that describes somehow the whole color space, is set in advance. One finds the “closest” cluster color for each diffuse color and sets that cluster color for the material in question.
1 Like
Happy new year! o/
I got some LIDAR in UTM format, I wonder if OSM data can be matched on that. By default it doesnt really match up.
Hi @John_514,
It’s possible to use any geographical projection with the blender-osm addon. The details are available in the documentation.
1 Like
Oh… I should be more careful when reading… Thank you.
Please read the message till the end!
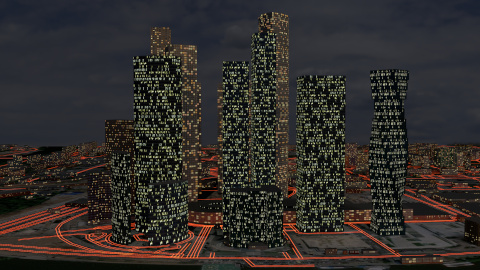
Found an interesting video how to create a night city scene manually out of blender-osm import:
But blender-osm (premium) can create lit windows automatically! Simply set the field “Percentage of lit windows” to some value (e.g. 30):
The blender-osm addon (base version) is available for free now at https://gumroad.com/l/blender-osm. Please spread the word!
Thank you all who purchased it before for the support!
The next release of the premium version is under active development. Please expect the news about it soon.
7 Likes
The source code of blender-osm addon is back at Github:
The further funding of the development will done by selling the premium version with assets. Its source code is also available at Github.
Export of terrain texture is implemented!
Texture unpacking to an external file in a couple of clicks is still required as described in the documentation.
Get the base version for free or purchase the premium one.
The latest version of the addon is always available via the link in the e-mail from Gumroad.com.

1 Like
A great tutorial “Create any City in Blender in 20 Minutes” using the blender-osm addon by
CG Geek:
2 Likes
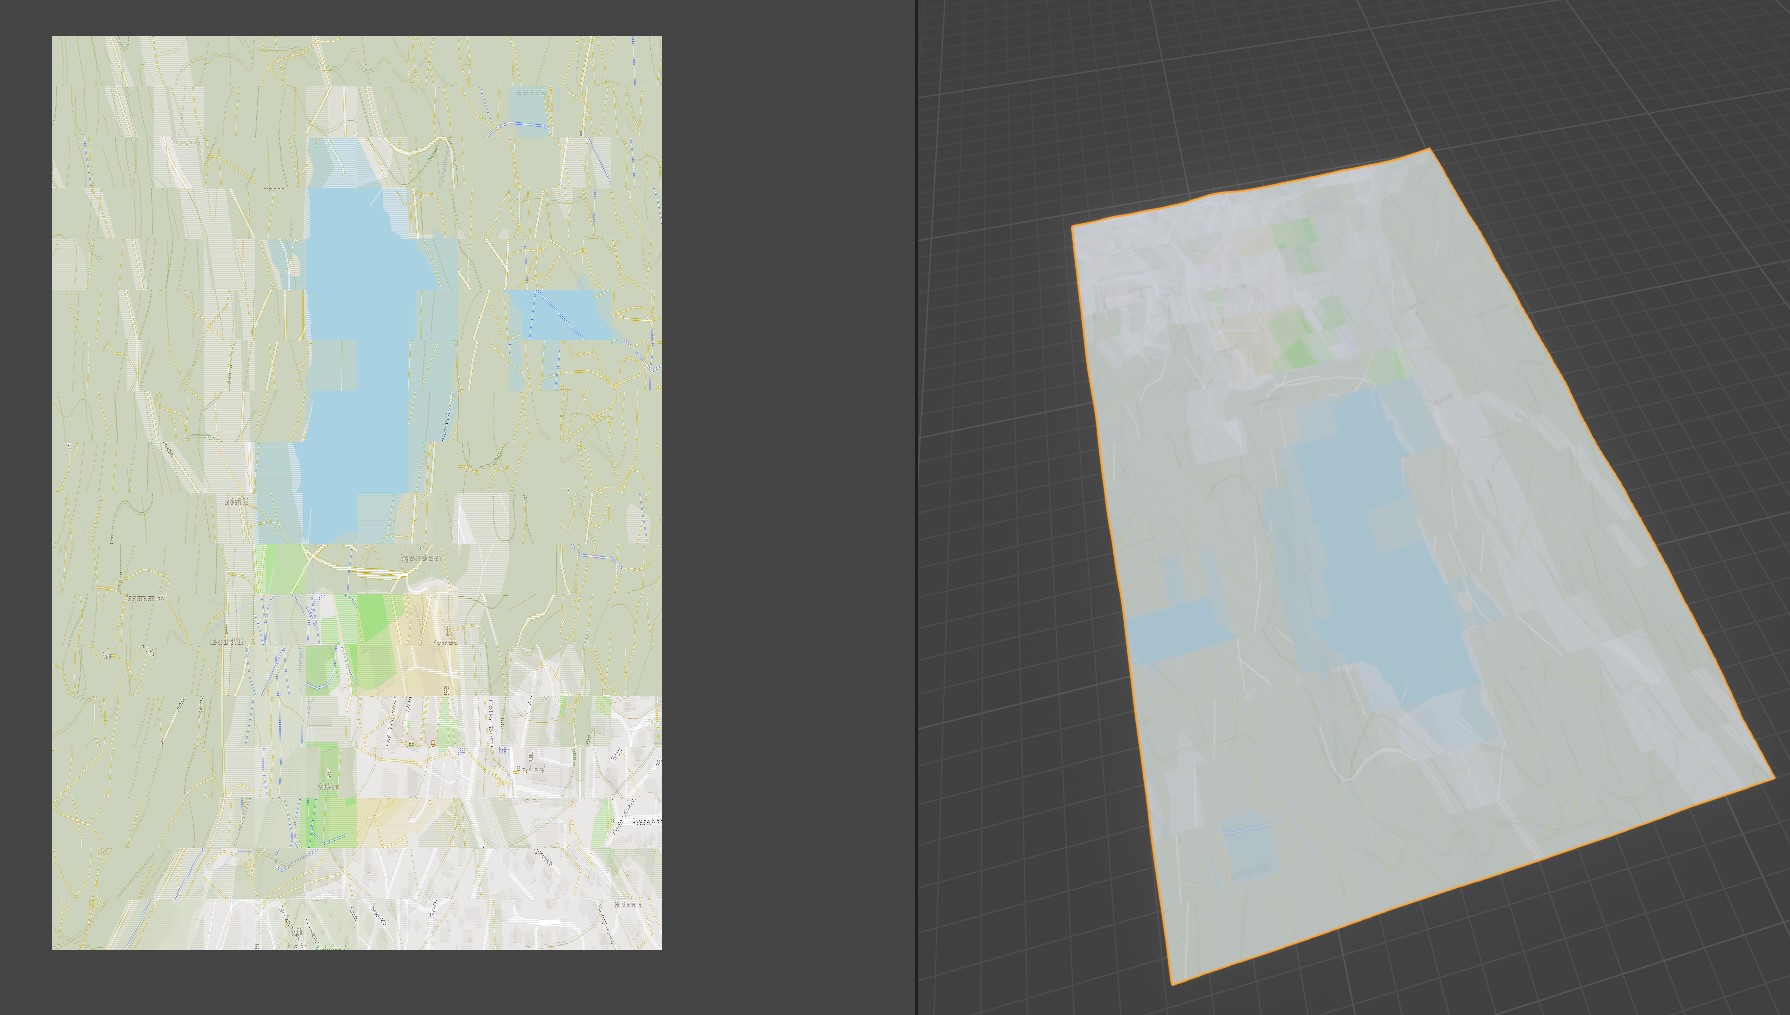
Hi, I’ve downloaded the free version of the plugin. How would I be able to use custom styled map instead of the sattelite image provided? Basically I would like to be able to use the styling I do in mapbox studio, and use that style on the overlay image in blender
Hi @hak
Set the overlay type to Custom URL as described in the documentation .
Copy the URL template from the Mapbox Studio:
- Press Share in the list of styles or at the top bar of the Mapbox Studio editor.
- In the section “Develop resources” use the settings as follows:

- Press the button “Copy” to copy the URL template to the clipboard
- Paste it to the “URL template” field in the addon panel
Thanks for the quick reply! I’m testing it out right now. I get the right map, but the tiling is all wrong. Do you know what is happening?
I don’t see your how-to guide in the documentation, so you should absolutely add it in there, as it’s really helpful!
Please send the URL template via a private message. I’ll test it out.
Sure! Sending it right away
@hak,
I removed @2x from the URL template and it worked for me. I haven’t found out yet where to copy the URL template ready for use.
1 Like
Hi vvoovv,
I purchased the full addon yesterday. I was wondering if it would be possible to add a button to run the building generation on a custom shape?
I have also been playing with your material nodes and I was wondering if you could provide some info.
I have read the documentation on custom materials and I think I know how that side works, But some info on the order the building creation is done in would be helpful.
Forgive my long winded post, I do get to an actual question…
All my tests so far a based on your “commercial_ground_level_emission” material nodes.
Basically in the nodes I am selecting different level indexes to have more control over how buildings look.
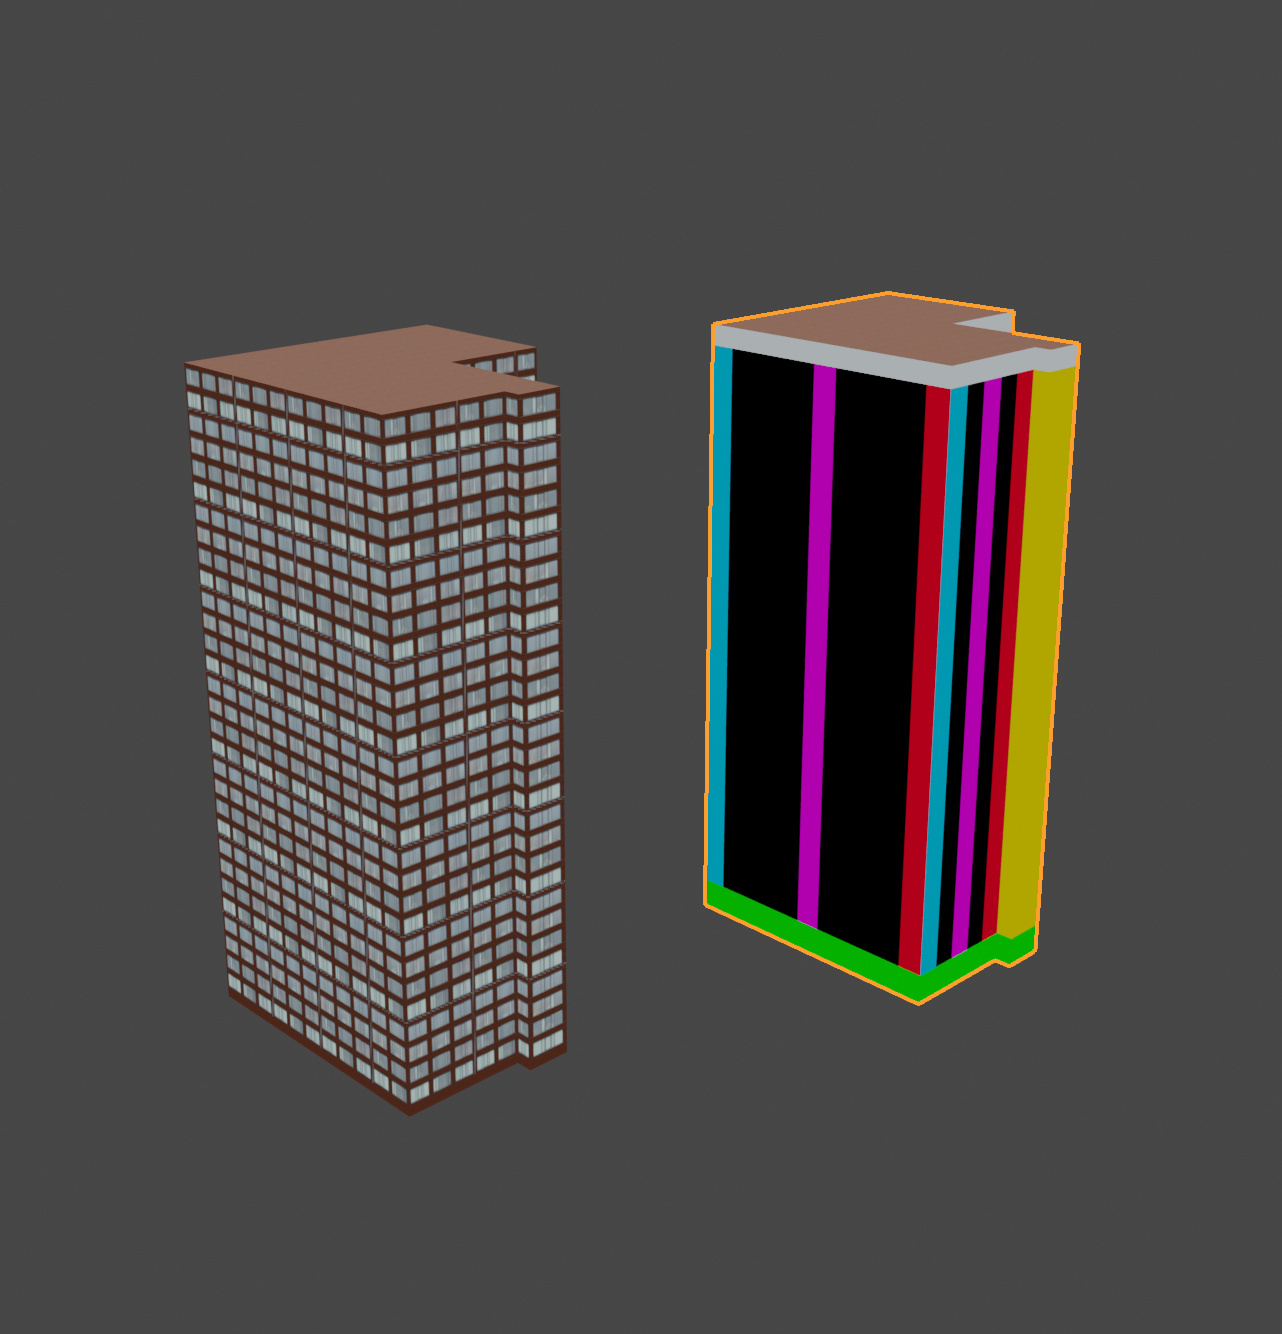
I can for example easily select the first and last window in a row to change their appearance,
check if a face is at least 2xtile wide. things like that. The image below shows a debug example.
blue = x first
red = x last
pink is the mid tile ( I still have to check for odd or ever tile numbers, but thats easy enough)
yellow is faces that contain less than 2 tiles in width (to avoid some stretched parts)
green is first floor
white is top floor.
Now the question. Does the material influence the height of a building during generation?
or is it just the node group “FacadeOverlayGroundLevel” dividing up the faces to best fit the texture after the fact?
I noticed that once a building is generated using a different material won’t fit by default.
Also, the ground level vs non ground level, It might just be the osm data I am using but since most buildings are just extruded shapes aren’t most of the facades starting at ground level? could you give a bit more info on this?
Sorry for the long winded post. The addon is great. Genius move using the data UV map to store face widths and heights!
Hi @Mark_Ferguson,
Just to note for the other thread participants that we also discussed your case in the private mail exchange.
Building generation on a custom 2D shape fits better in the new upcoming version. The new version will supports facade styling. The only obstacle I see is how to represent buildings with inner yard(s).
May I ask you what is the goal of your experiments? Are you going to create a facade with multiple textures and only one Blender face? Those textures represent the ground floor, the last floor, the left part, the right part and the middle parts.
A material doesn’t influence the building height. A face is created first, then UV maps (including the one for the face width and height) are set, and then a material is applied.
It’s possible to do a kind of 3D modelling in OpenStreetMap by providing a footprint for each significant building part and attributes for it (the number of levels and on which height above the ground it starts). Take look at Manhattan. There are a number of buildings with parts starting at some height above the ground.
1 Like
Hi @vvoovv,
Thanks for the explanation.
I’ll see if I do as well explaining what I am doing.
I will continue to use the same building as my last post. The process seems complicated but your node group has done most of the heavy lifting.
The aim is the same number of textures per building as you currently use. But it would not have to be limited to that. It could be expanded to add decals of various kinds. Dirt, drain pipes, wires etc. on a separate texture sheet.
Firstly I set the ‘Number of tiles U’ and ‘Number of tiles V’ back to 1.
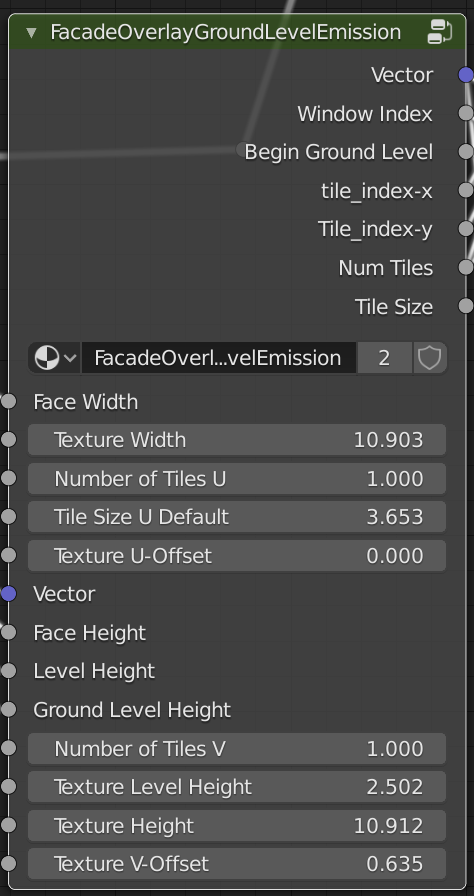
This means the output vector of the node group is one window wide repeated.

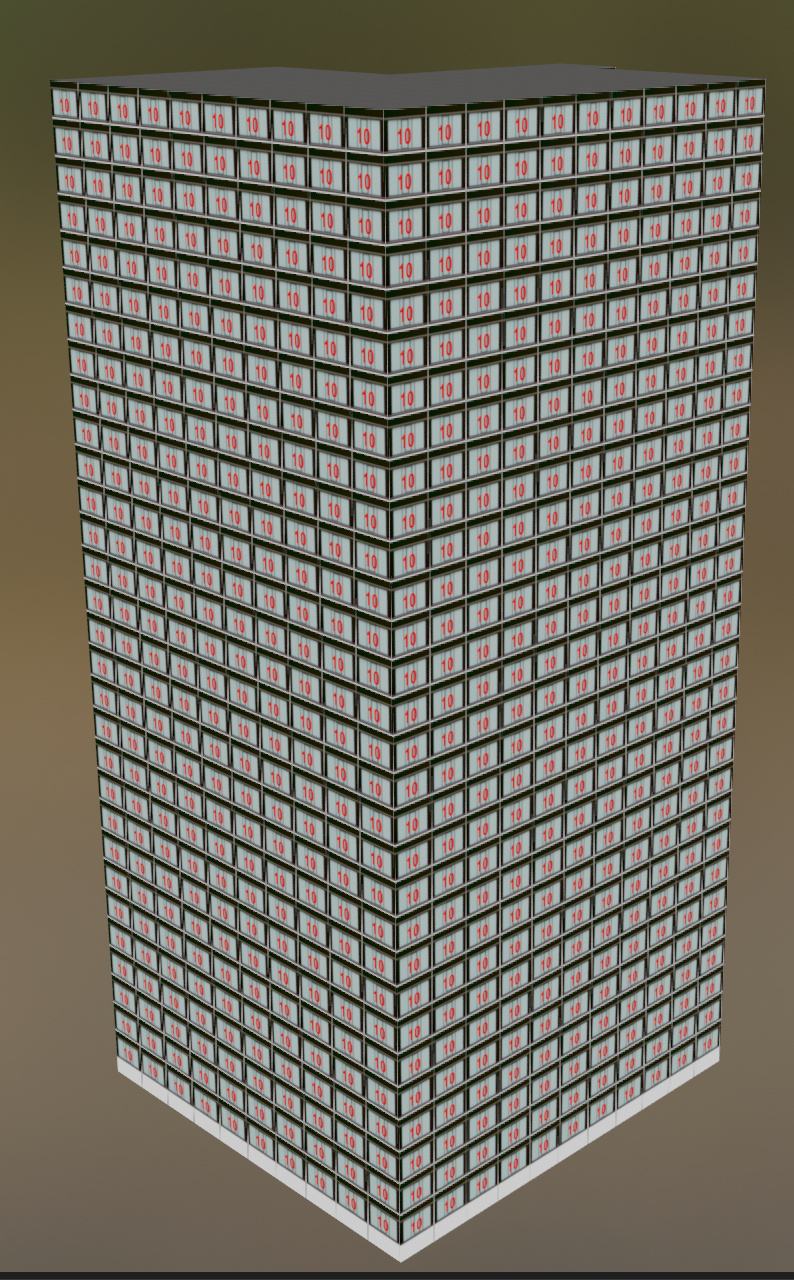
I have taken your img_2161 and numbered the tiles like so:
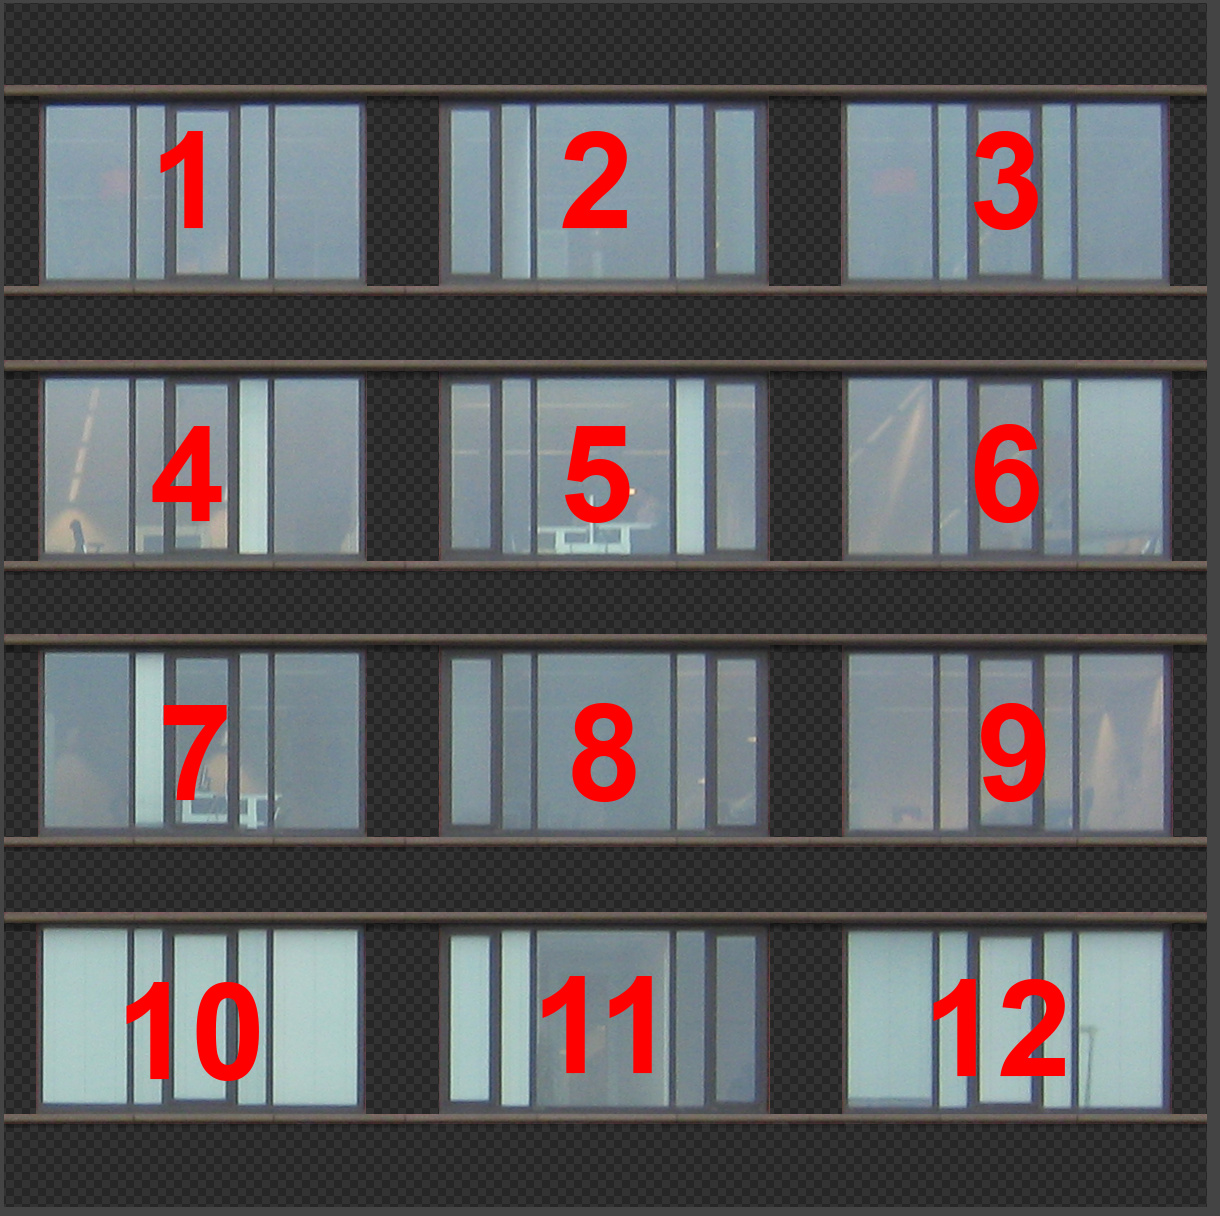
As you can see in the image every window is now number 10. the lower left of the texture.
if I now split the XYZ output of the node I can add .33 (1/3 of the texture width) to the X value and window 11 will be used.
If I add .25 (1/4 of the texture height) to the Y value window 7 would be used. etc
So I can create and offset for each widow the mix them back together using the selections I have already created and then plug that into the image texture.
So for example
windows 1-3 could be upper floors
window 4-9 could be mid level
and windows 10-12 could be the ground floor.
the offsets for 4-9 can even be randomly mixed using the values you have already created for lit windows.
The output of all of this is just a vector that plugs into one image.
To add yet another layer of variation, If each building has a vertex colour added (I have been testing using random vertex colour for connected faces) This can be used to randomly mix a set of images that contain the same underlying tile structure.
I will email you an example file later. I can’t share it here as it relies heavily on your node group and that is part of the premium addon.
I hope this made some sense.
Hi, I am working a lot with 360degree VR.
Due to this I do render a lot of 360 images.
In an interior that’s not a big issue, you model everything and than fake the window view.
Outside its much more evolved, but there is a slow tendency that clients want more than just a static movie or rendering.
Let’s say you want to walk completely around one inner city building and have that look fairly real. You would perhaps take some photos of streets leading away from the building, but often adjacent building and trees stop you from taking pictures of everything.
I do own the OSM add-on. It’s really helpful to get the ground and general building shapes.
Still there are no real facade textures and the heights and rooftypes are not correct for most buildings.
There are also great tutorials to create “a” city and there are also a few city modeling add-ons which help in creating such a generic city.
Usually these cities are made up of some set of more or less generic building blocks at randomized scale. Textures are also randomized. So, as a backdrop it might be ok. But closer not so much.
They can look very cool and surely are great for a game or product backdrop.
BUT they are not REAL.
So the tricky part is if you want the actual buildings of a real existing city and not just rough building approximations with generic windows on it.
It becomes even more tricky if you have a smaller city without skyscrapers.
Especially as most of these are not even available on Open Street Map or Google in 3D.
So here is the question to those working frequently with actual real cities and architectural exterior models.
What is your preferred work flow to create those kind of real environments in the most efficient way?
Which add-on and resources are you using?
Are you using drone shots & photogrametry (very often we are not allowed to fly extensively in cities).
Are there ways to extract Google Earth models and use that as a reference when adjusting OSM models?
Where do you get your base data from?
Do you model everything?
Could you be so kind and share a bit of know-how? That would be so cool!
Maybe we should even start a separate thread for this. I put it here because OSM is based on the real world.
Thanks for diving into this.
Pretty