4.1.1 builds are done, lots of screens and videos I need to make, will take a while. Probably make some screens and text description in this thread before I got to bed. Then make some walkthrough videos and salespitch type of stuff to post around wherever I can think of.
Should be pretty good, but there’s always something, so let me know if anything is acting weird. Custom mouse cursors haven’t changed for Mac and Linux. The only ones that work are the ones that already exist in regular Blender: Sysem, Cross, Cross Dot, Cross Minimal, Dot. The ones I made are .cur files, those either aren’t looked for in the same way, or are the wrong type of file for those OS. Will look into it for a later release as well as any other feature requests from before.
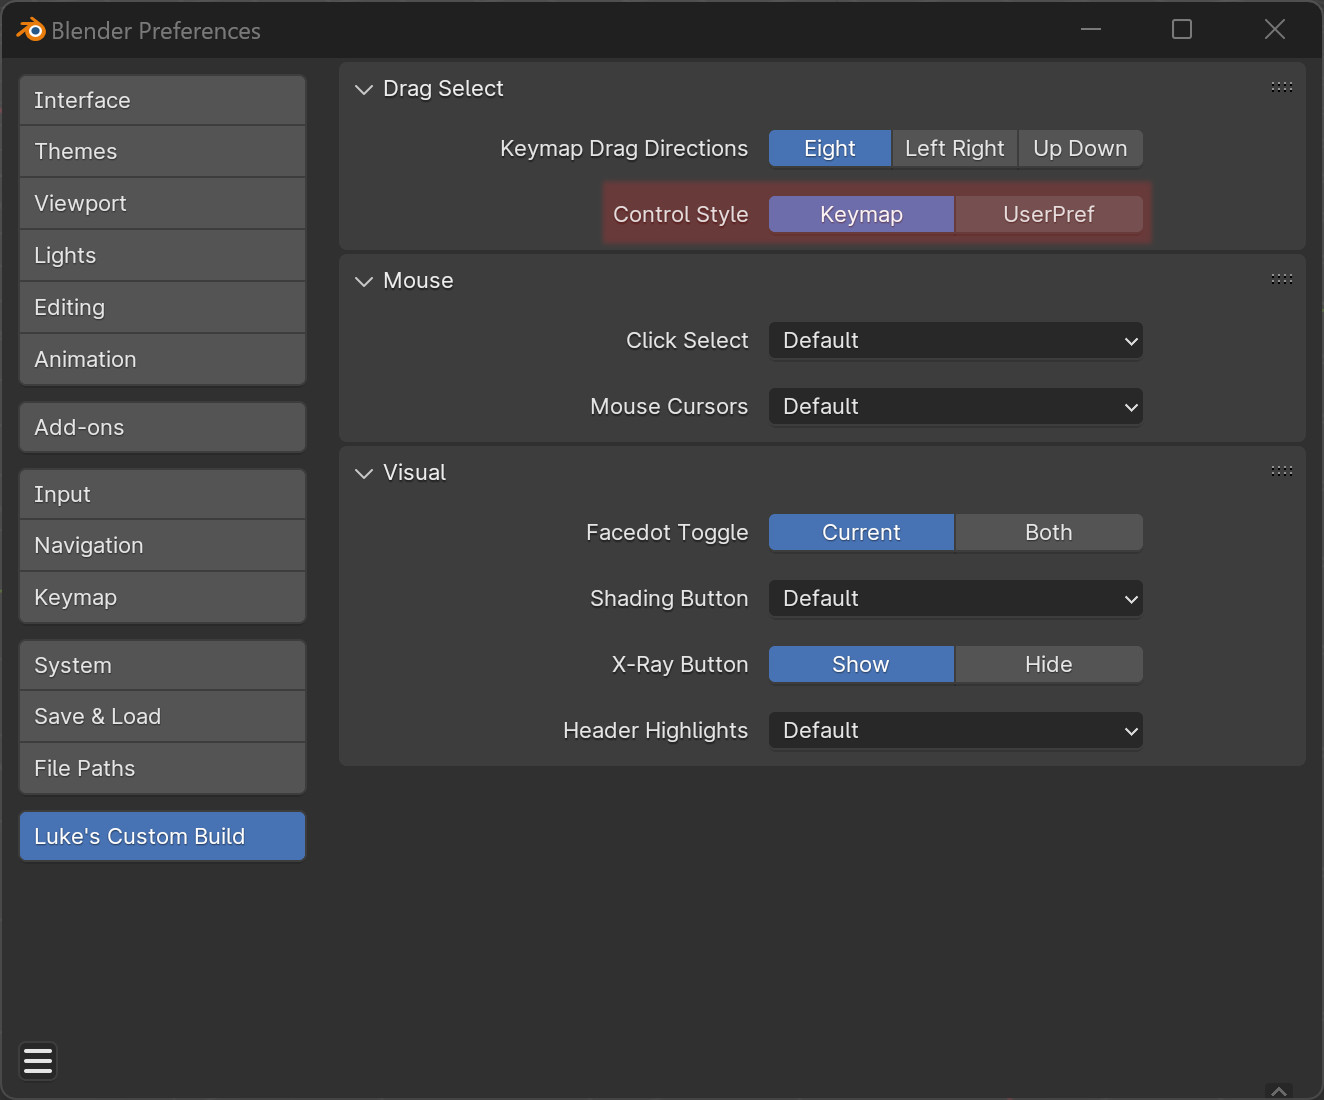
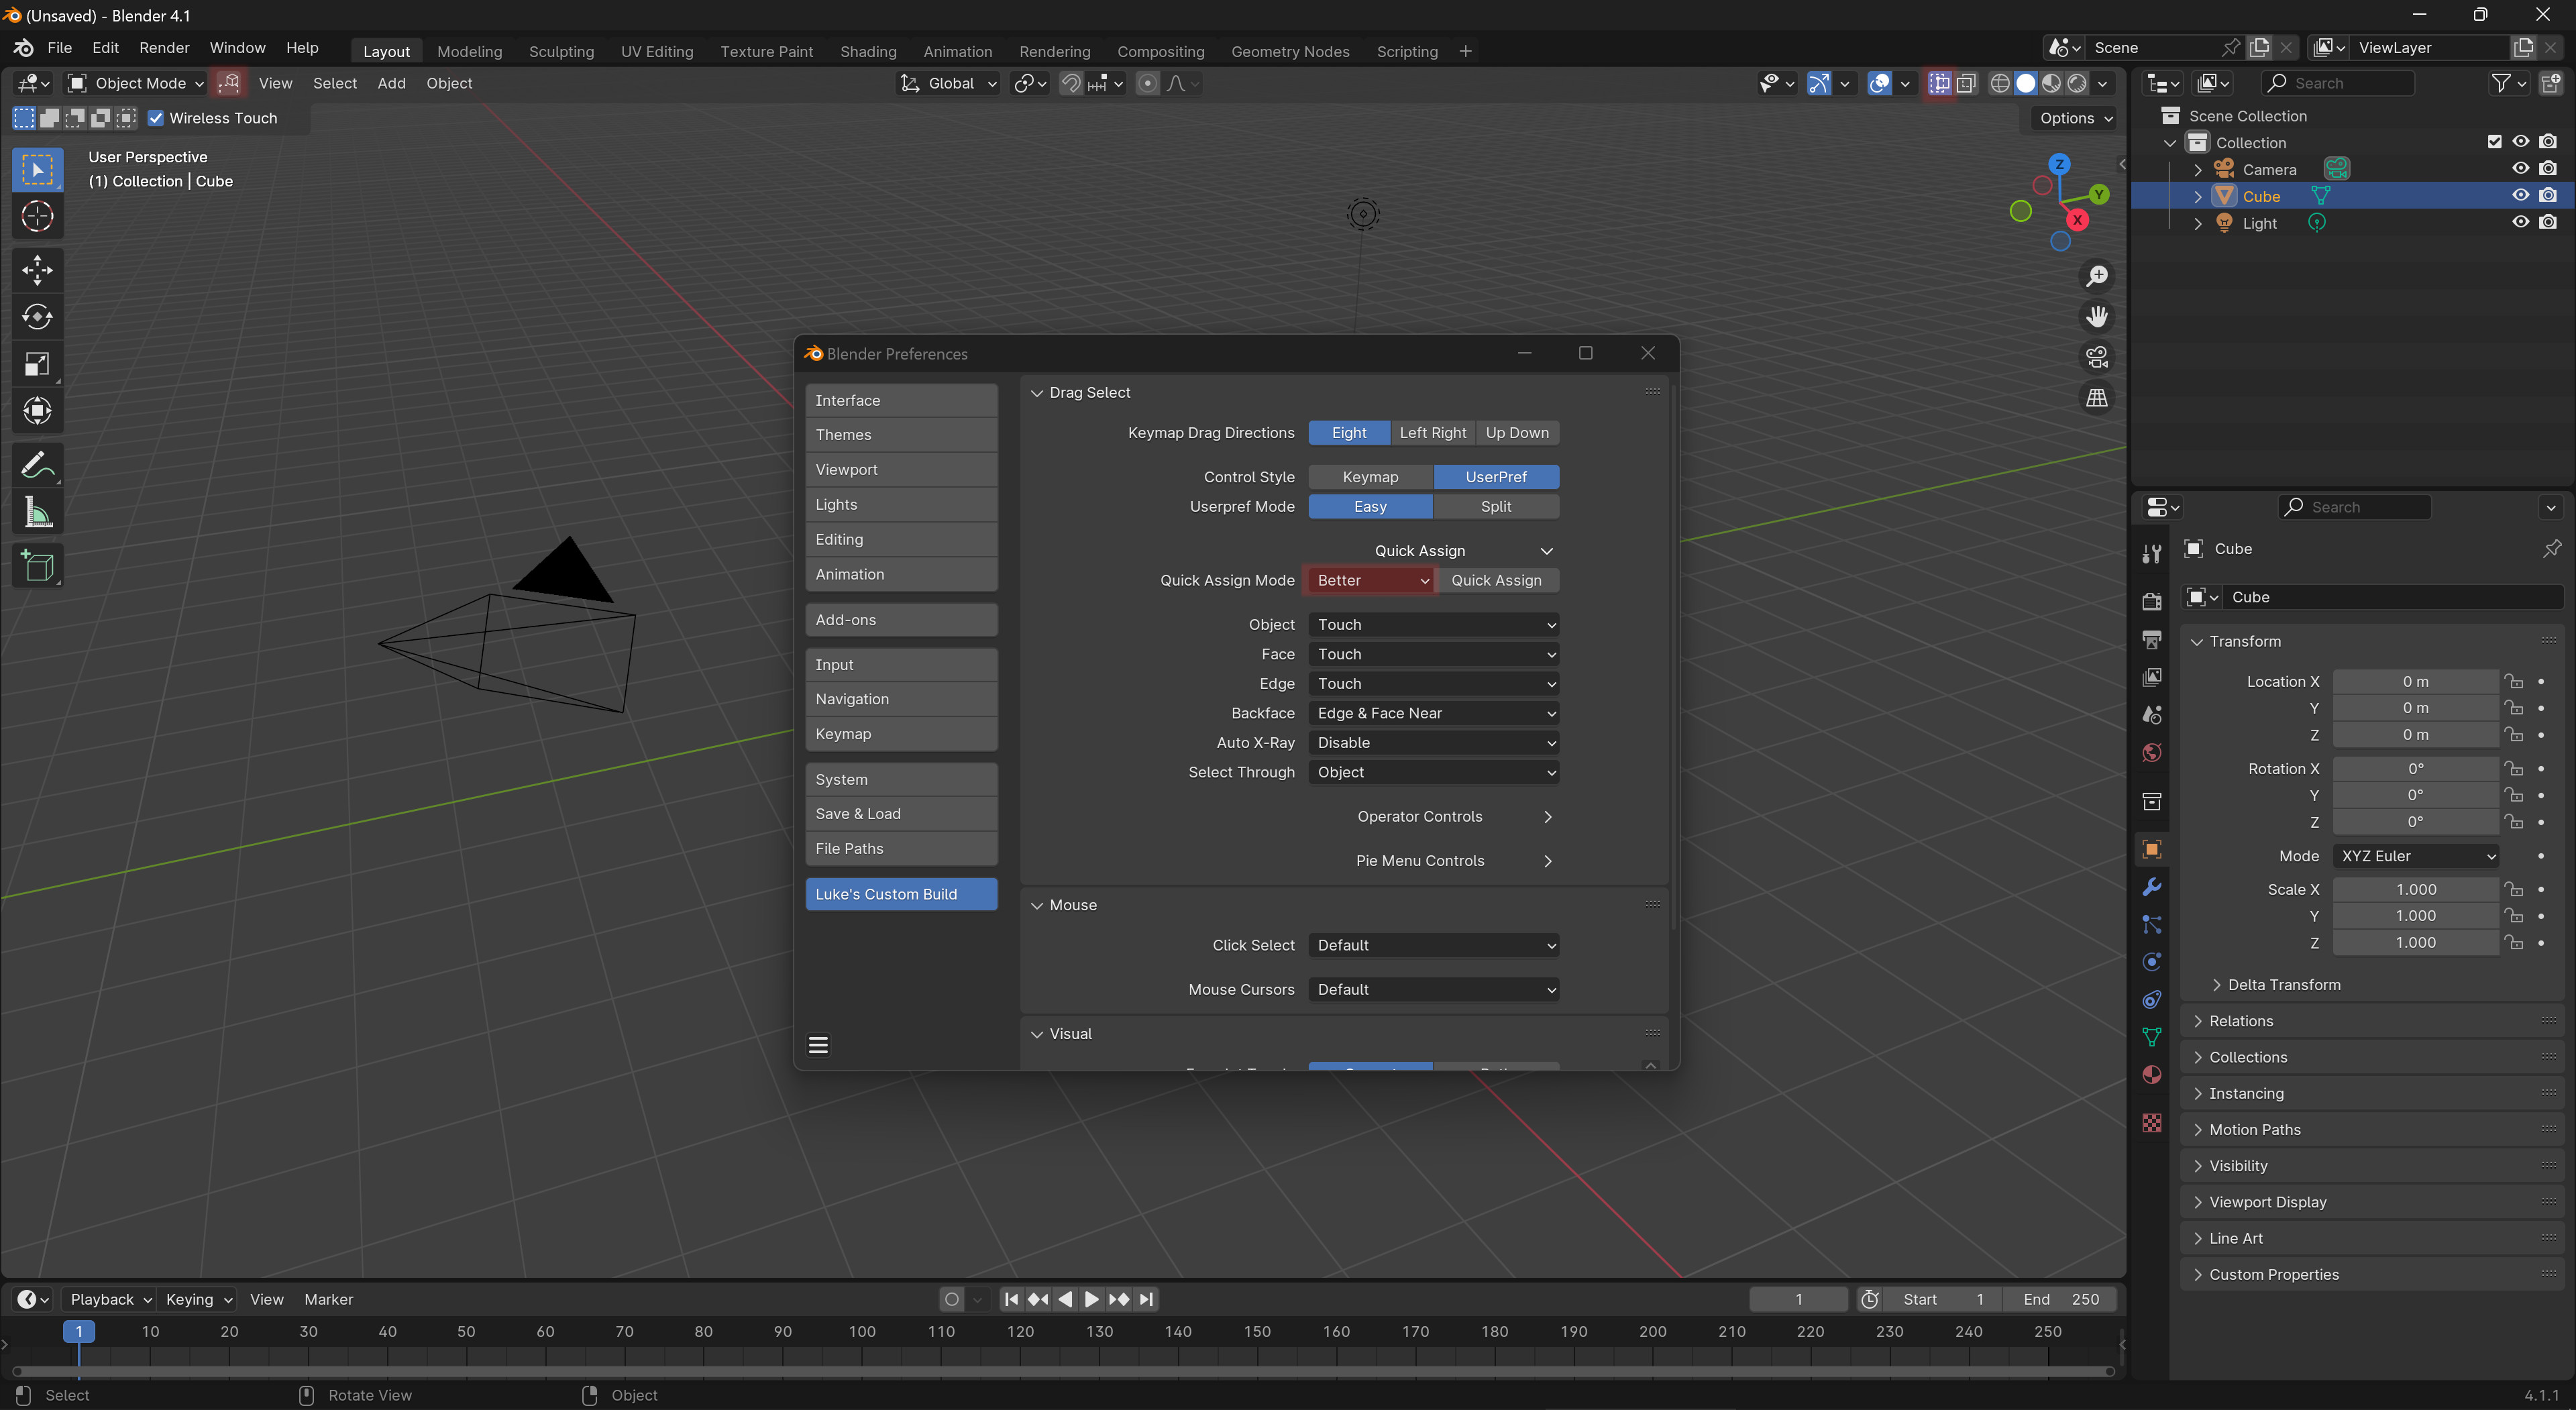
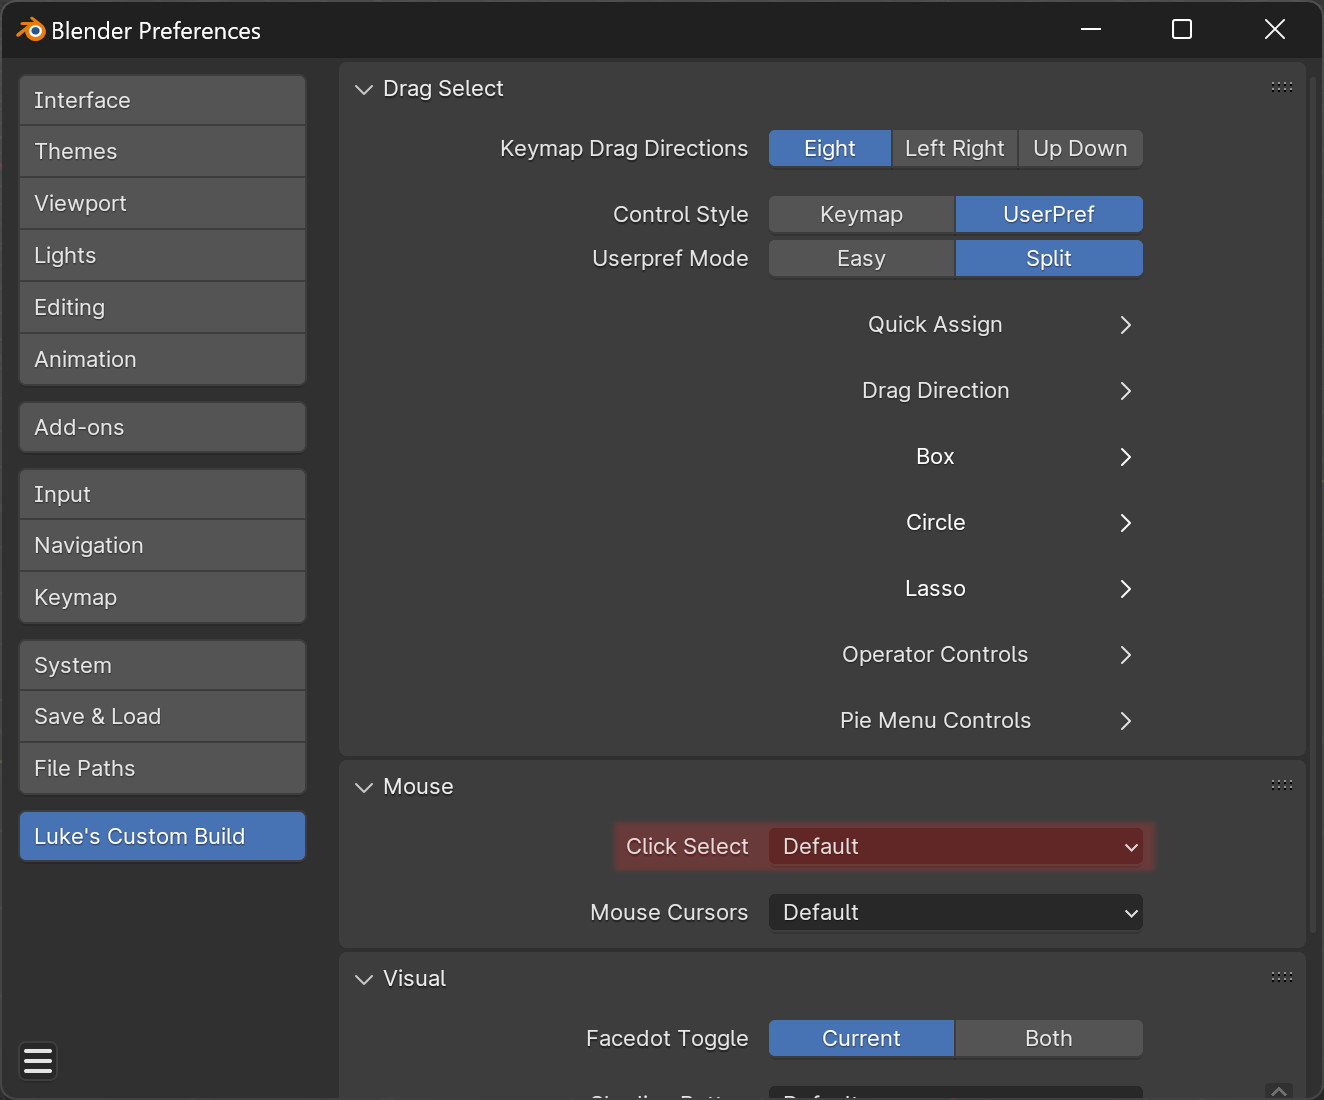
At the bottom of Edit->Preferences there’s Luke’s Custom Build, a new section for the things I added.
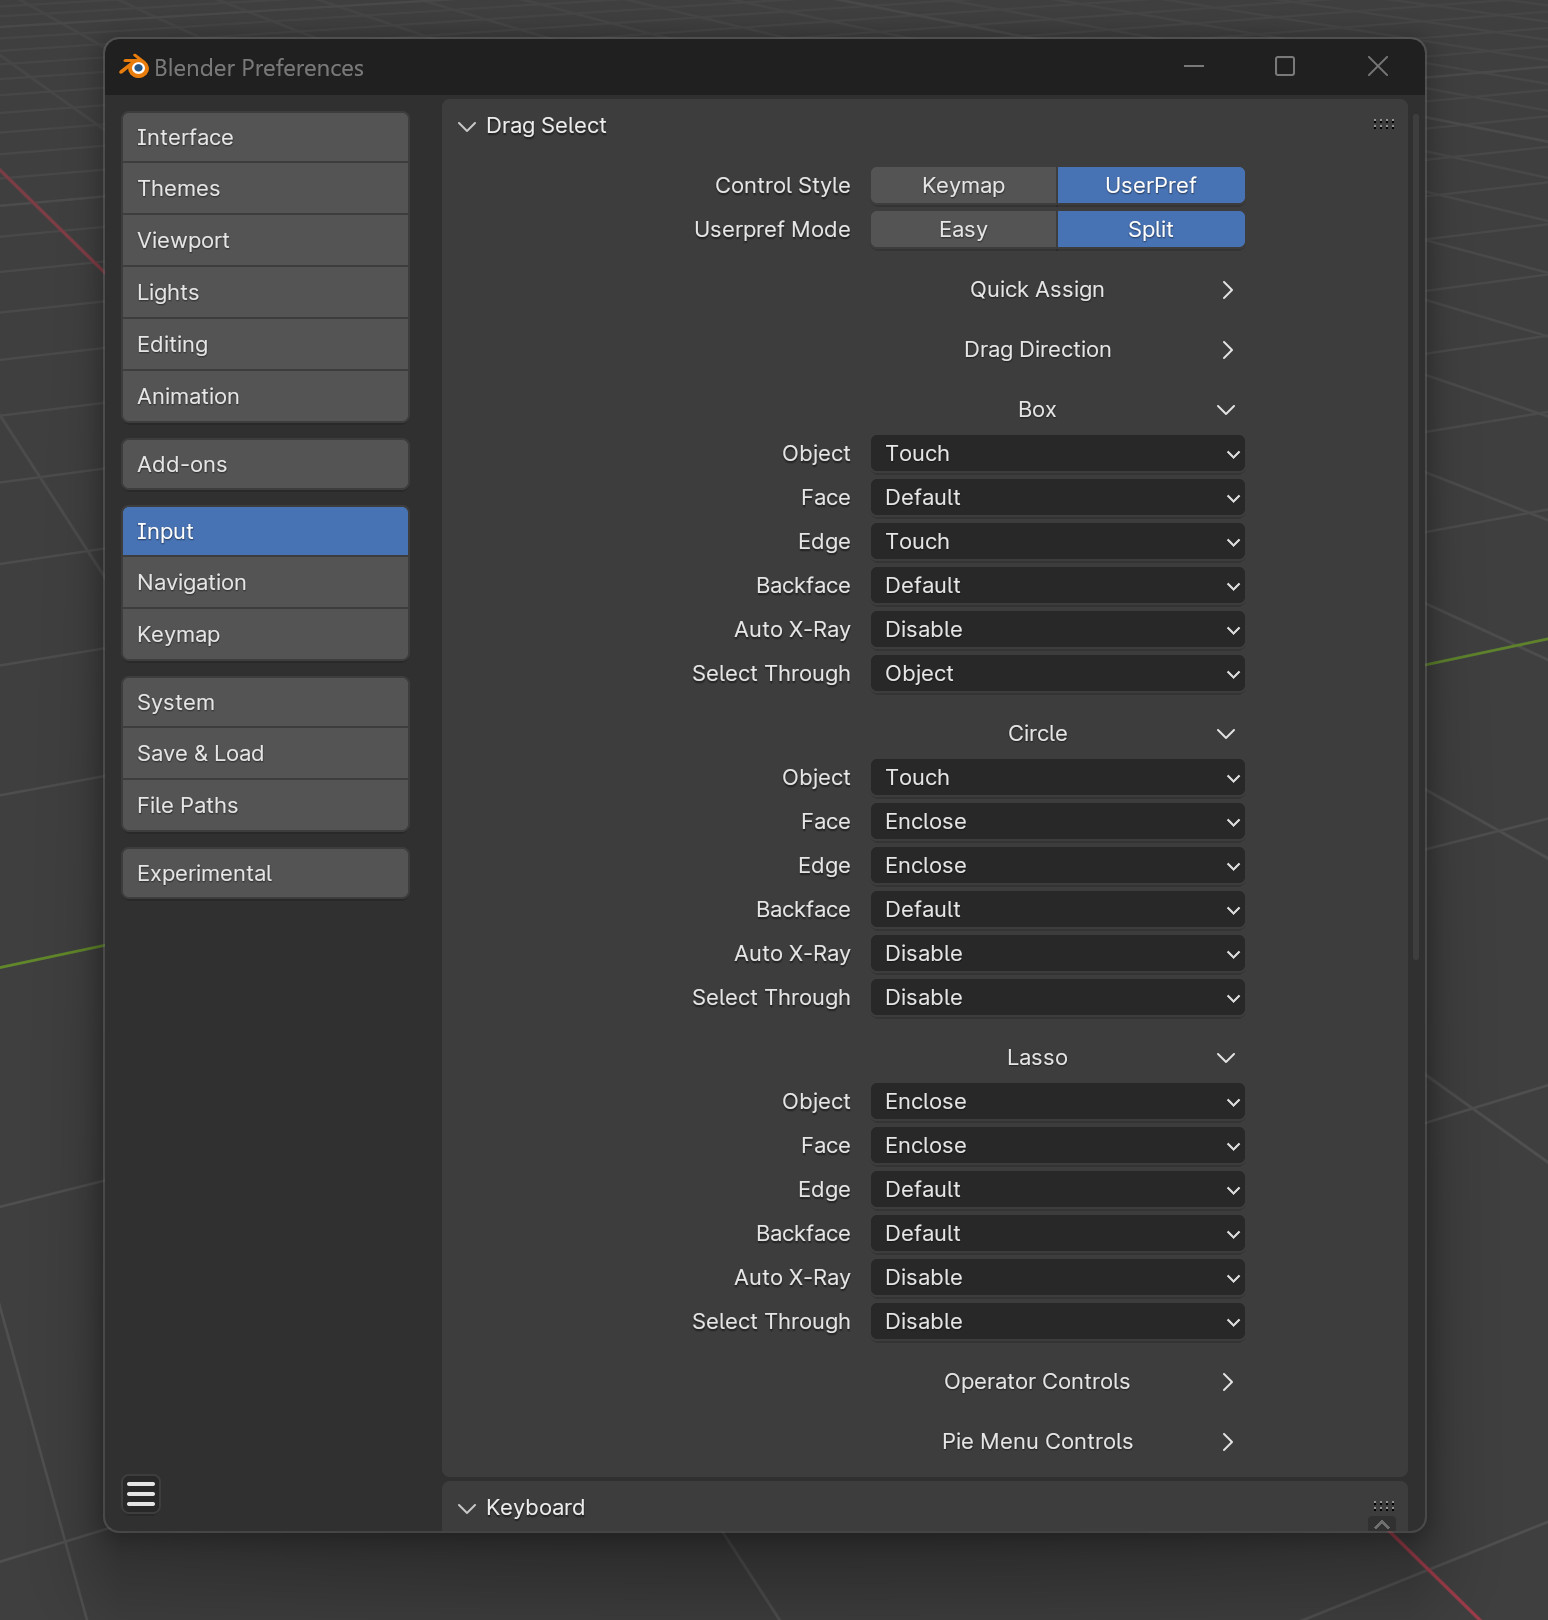
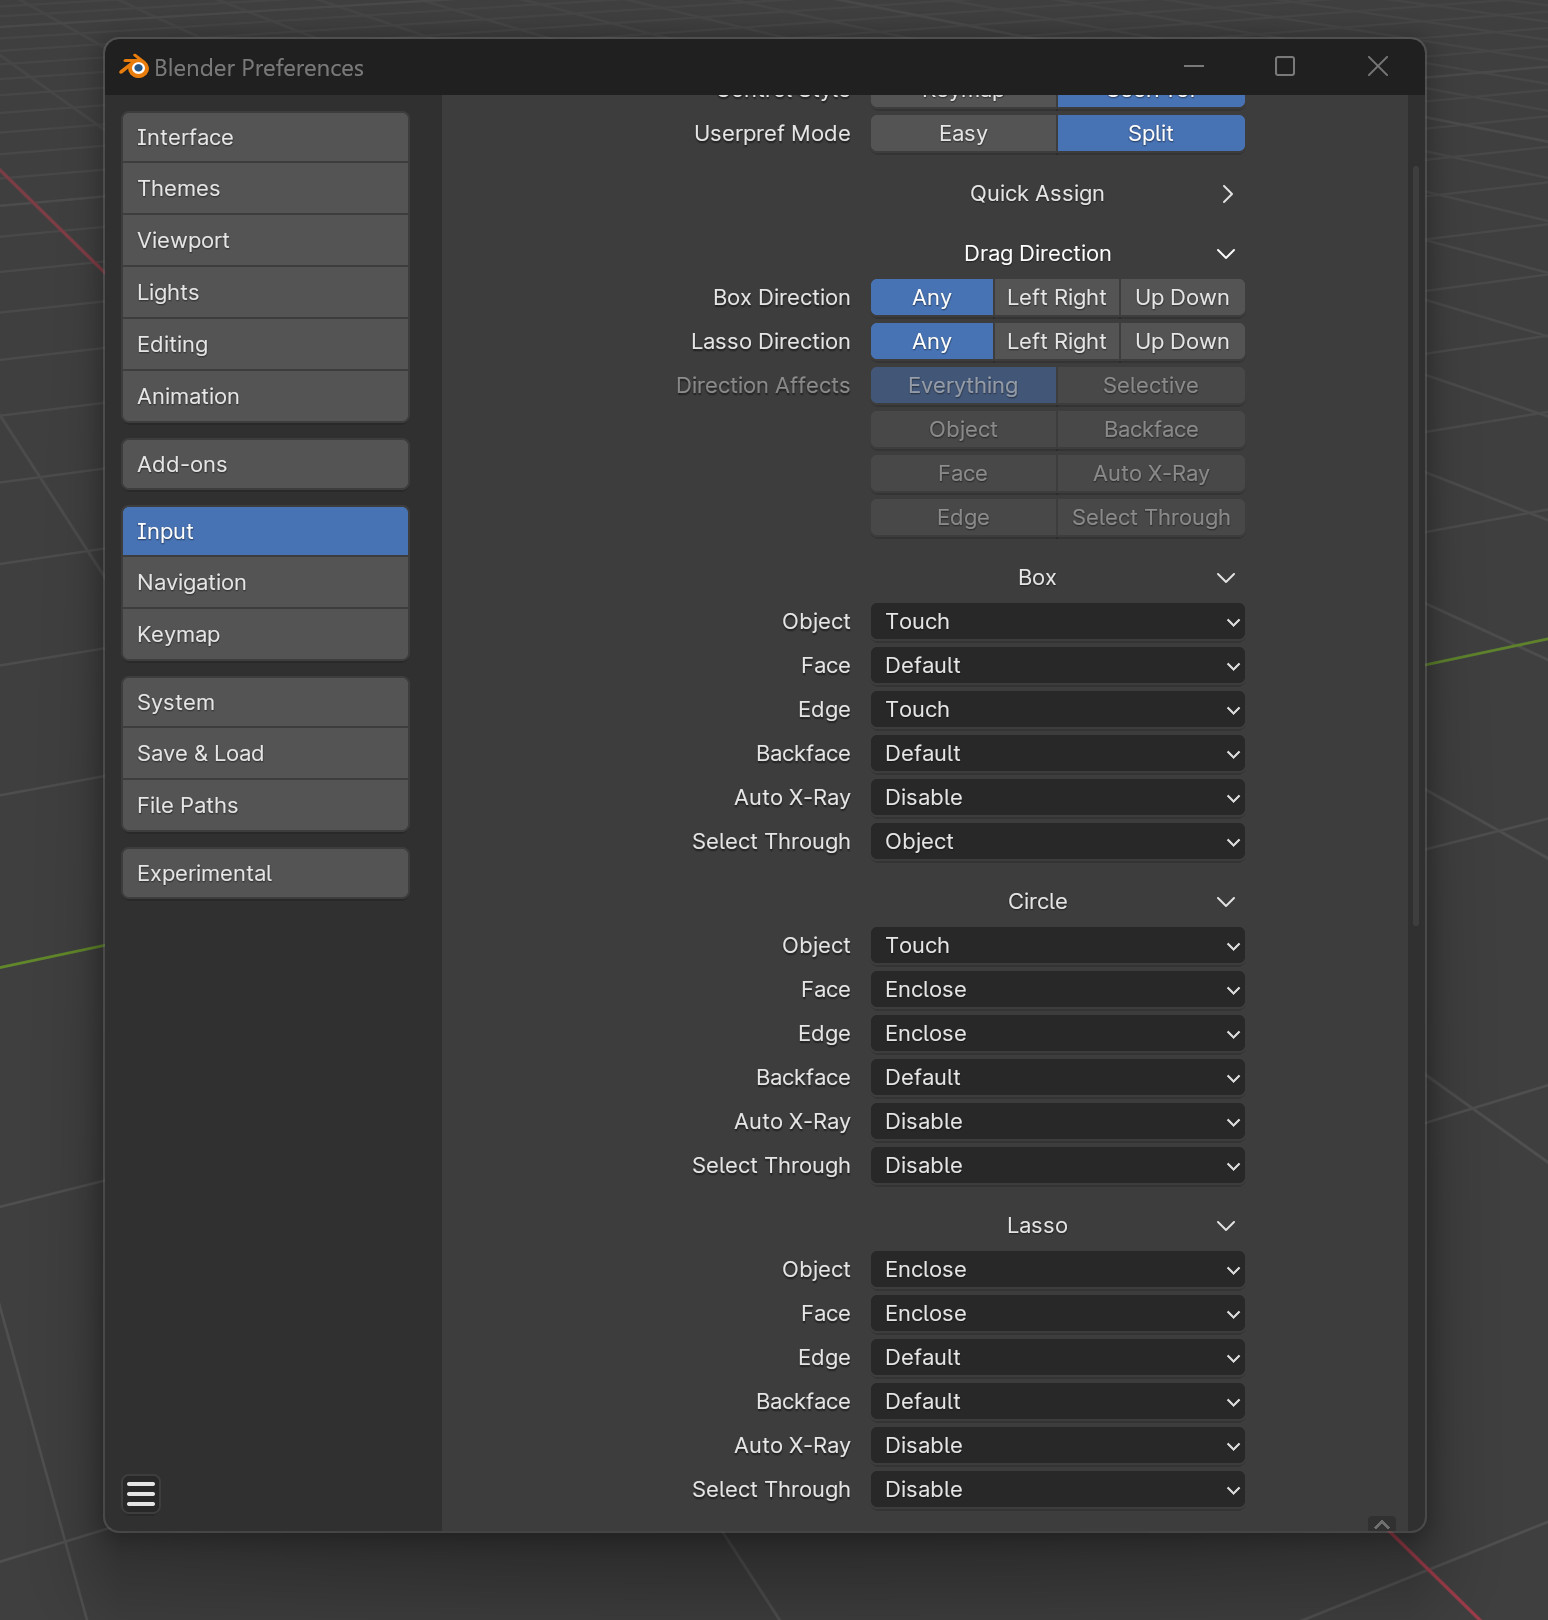
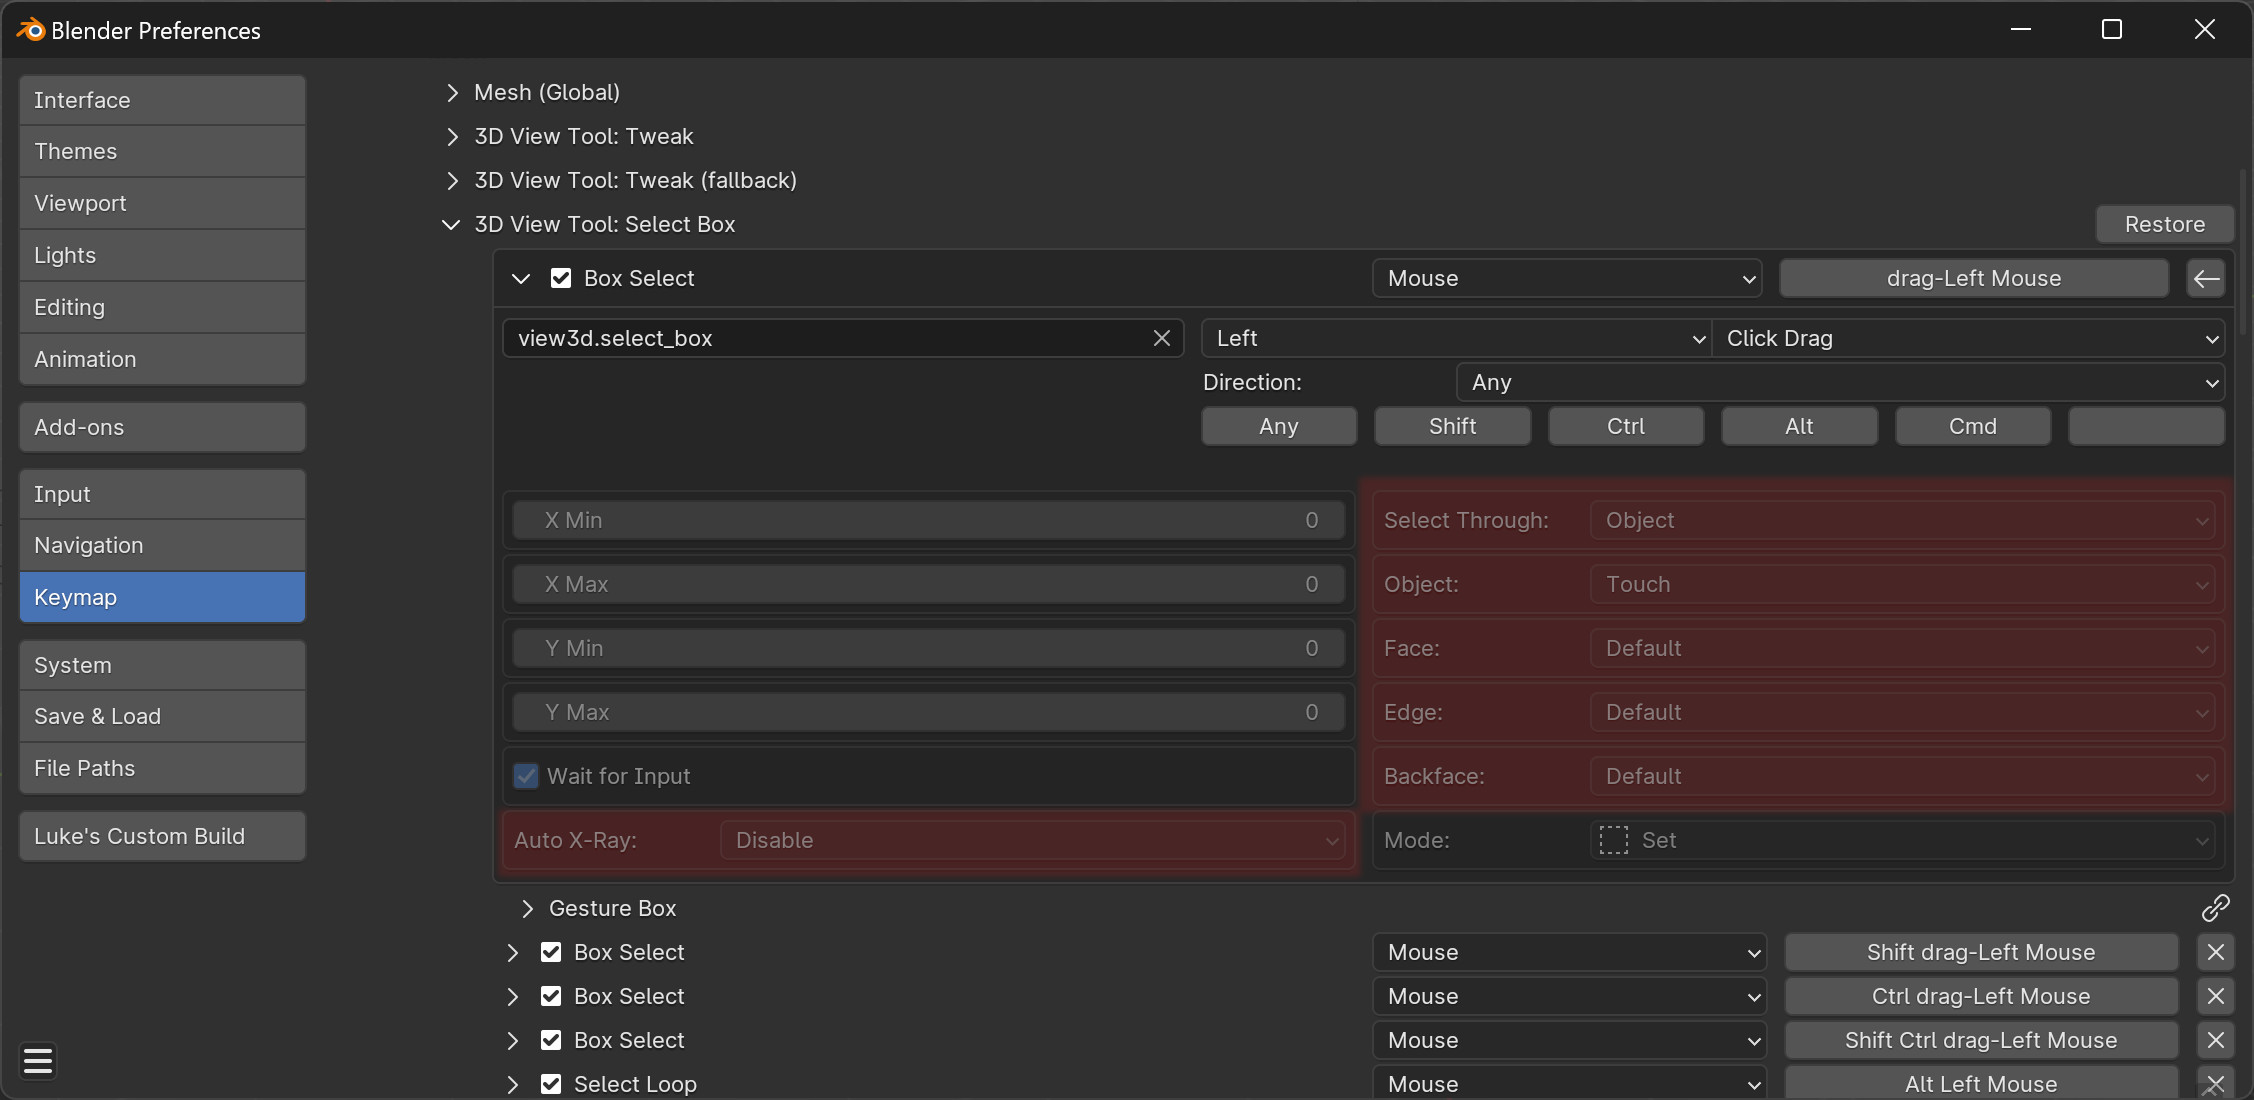
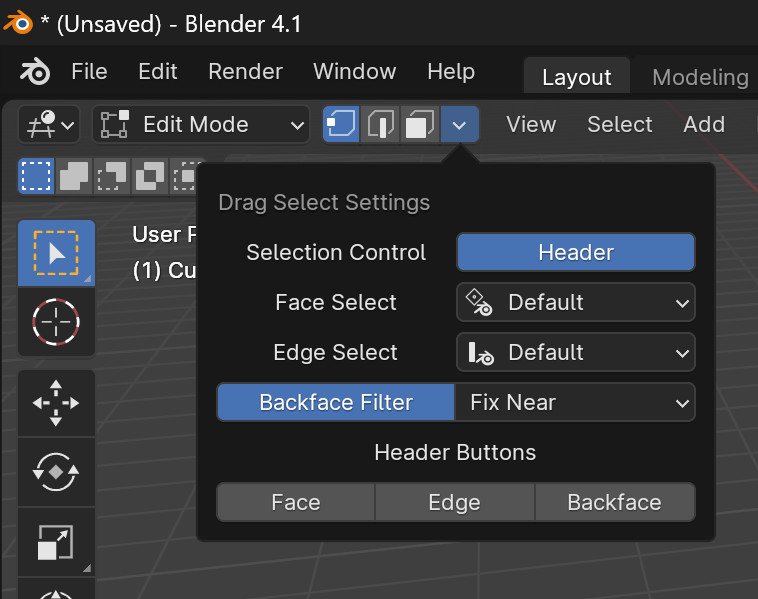
Unless you want drag directions, or need box, lasso, and circle to work differently from each other, you should leave it on Easy instead of Split mode.
Quick assign will set things for you. Select a preset from the dropdown, then click Quick Assign to execute it. I’ll add any preset you have, so make a request.
edit: I’m going to change the formatting of this. Didn’t think about it before, but now that I’m looking at it, it’s kinda stupid. Just going to call it “Preset” instead of “Quick Assign”, remove “Quick Assign Mode” text, and the “Quick Assign” button that makes it happen will be called “Apply”.
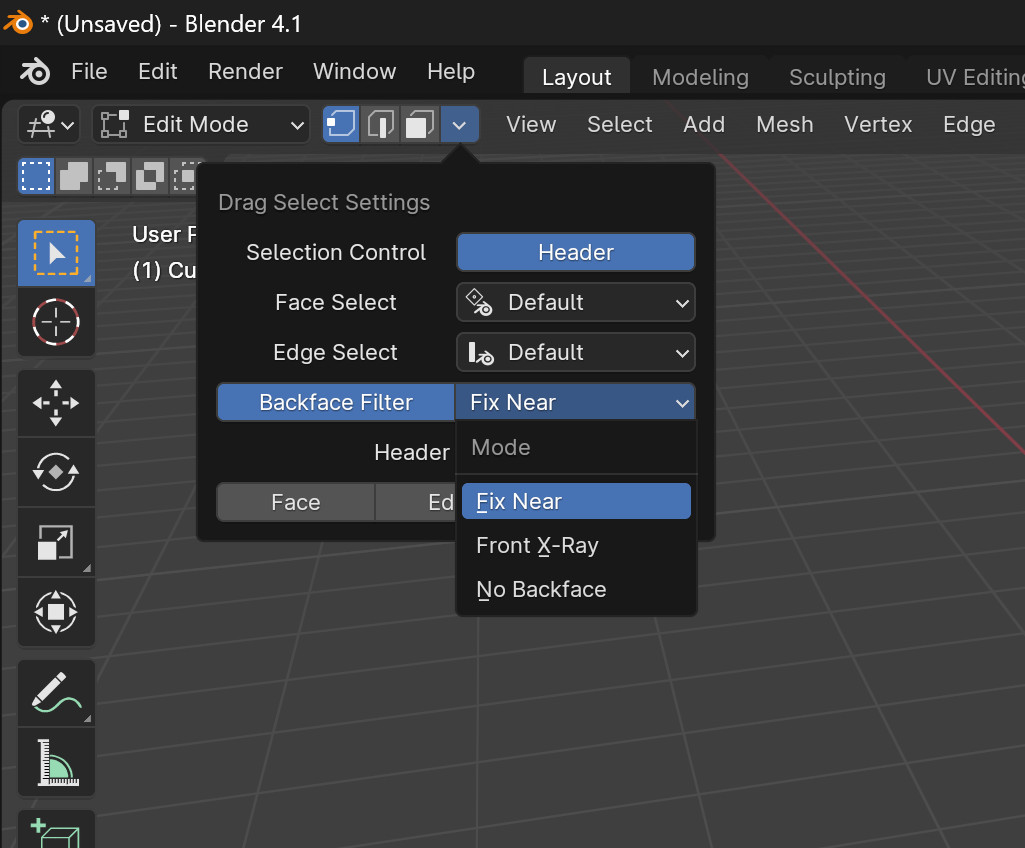
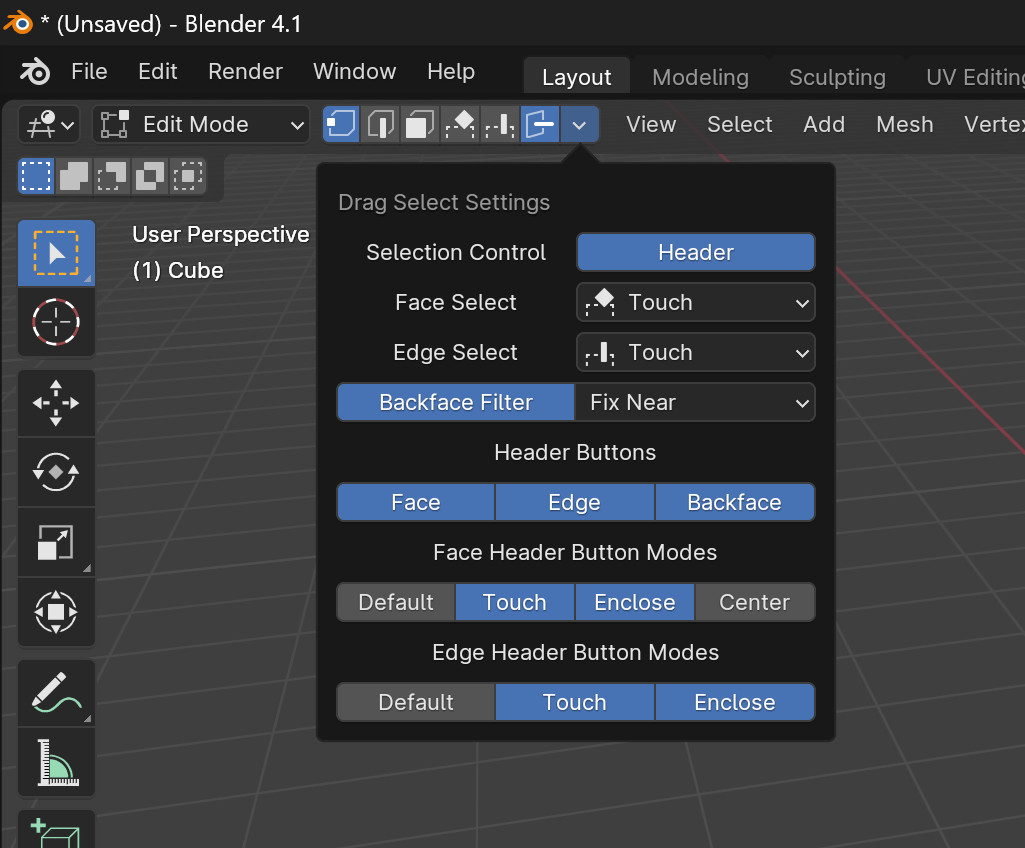
The Better preset is what I will probably be using. Notice the header icons that show up.
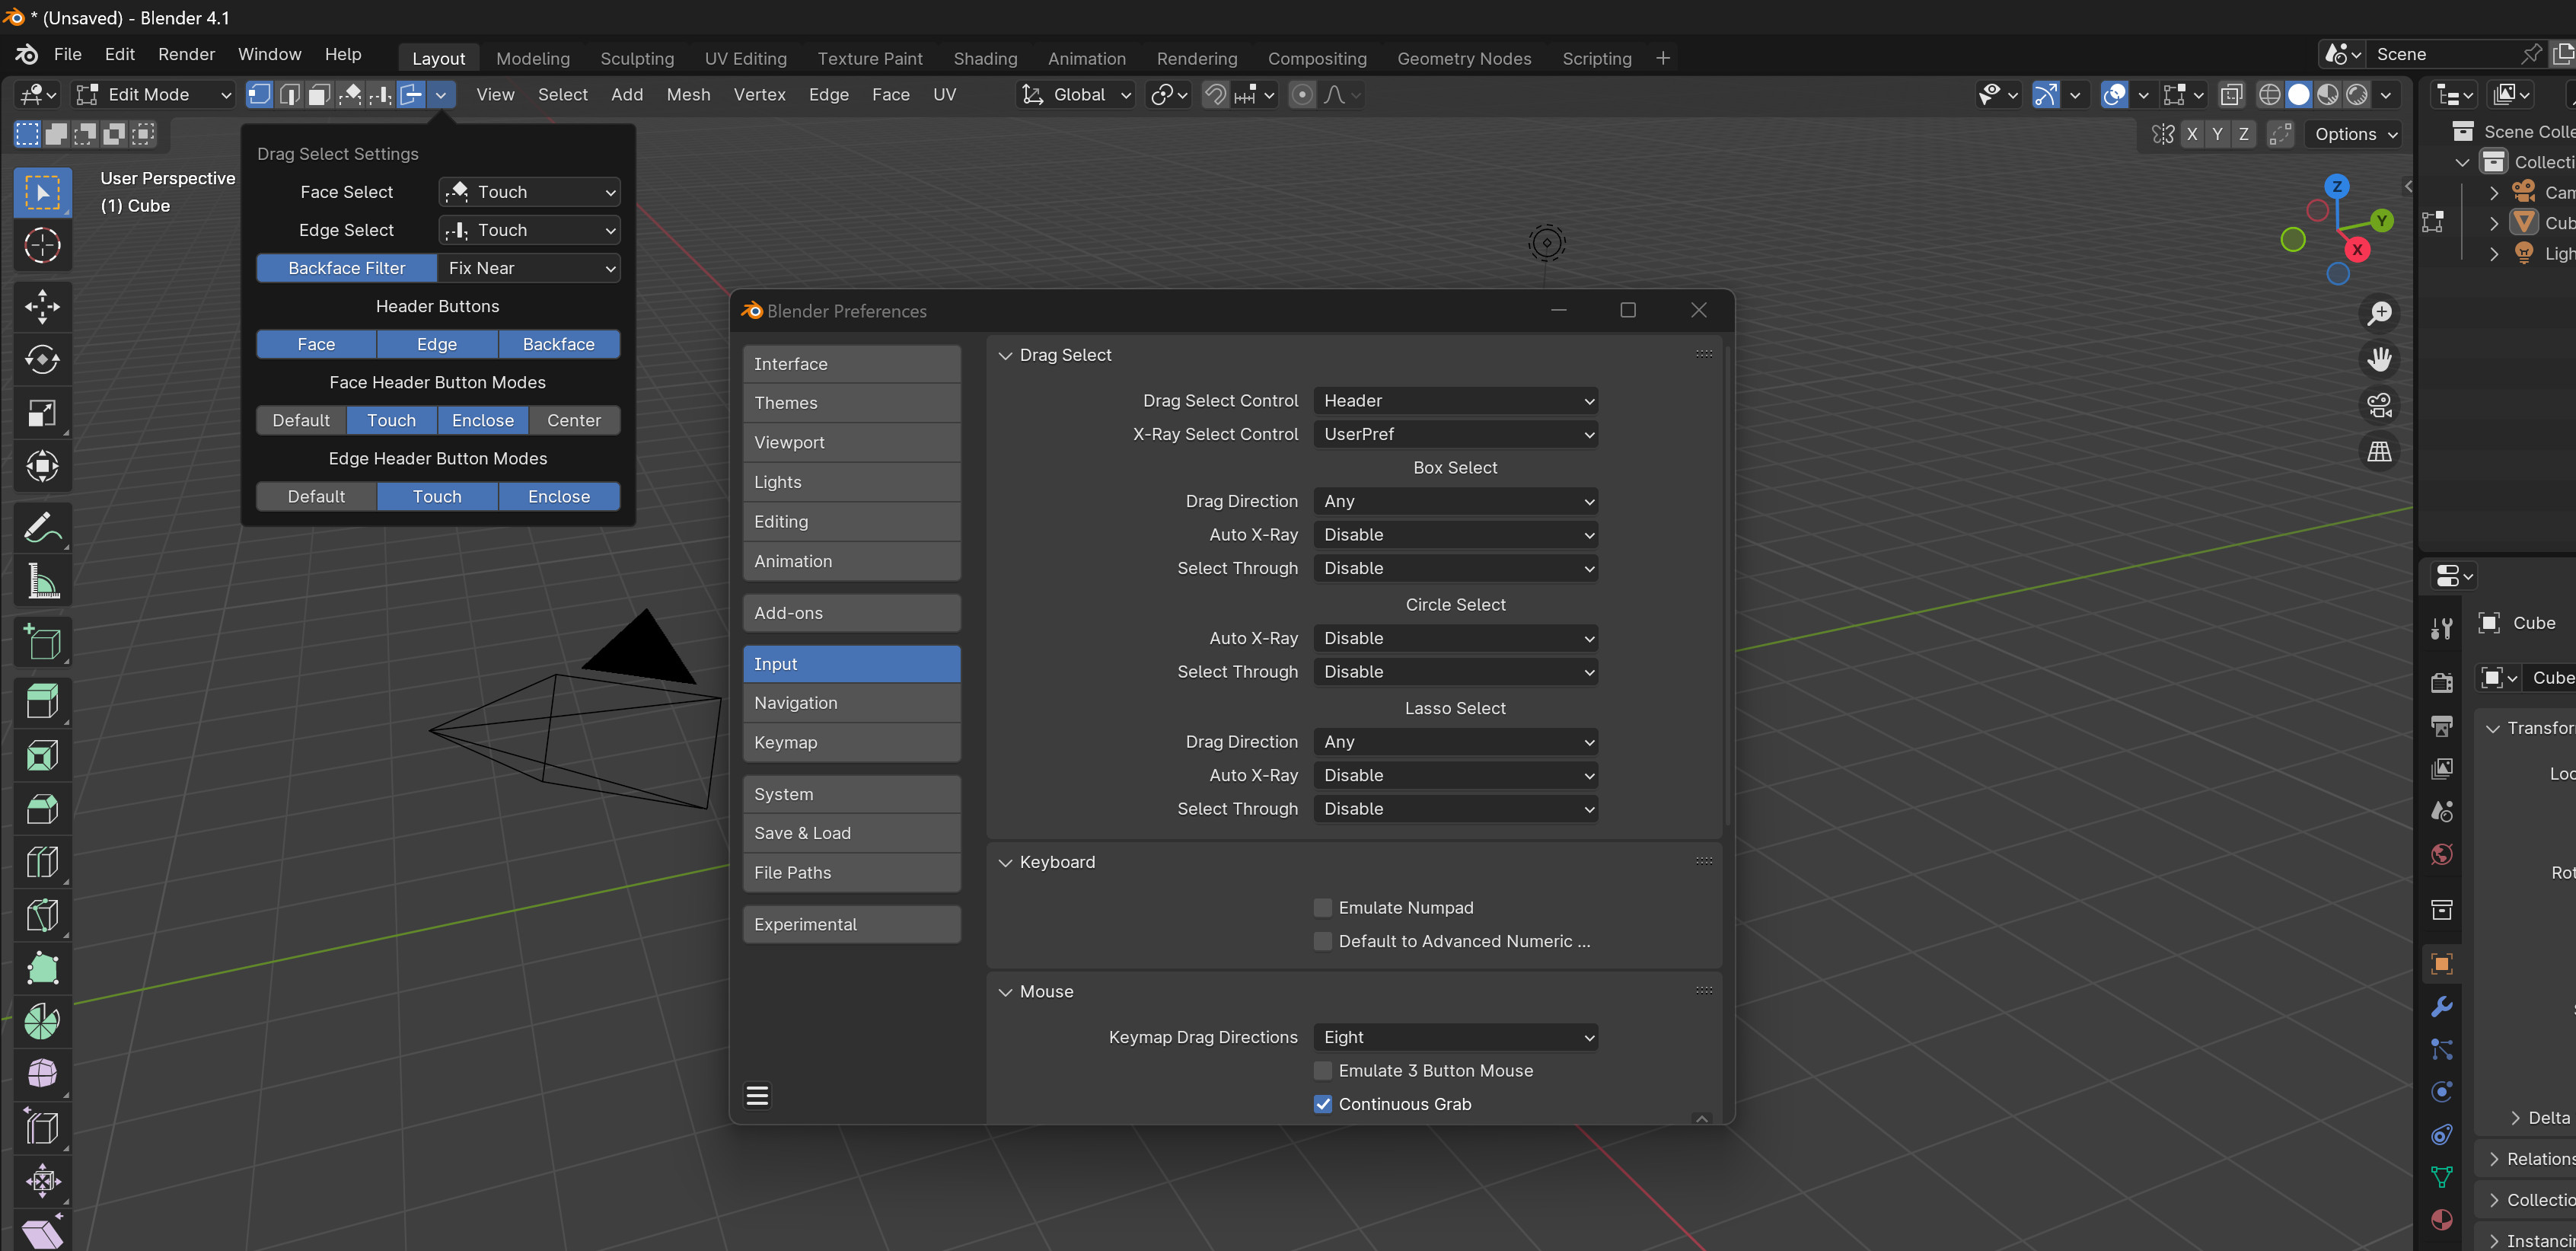
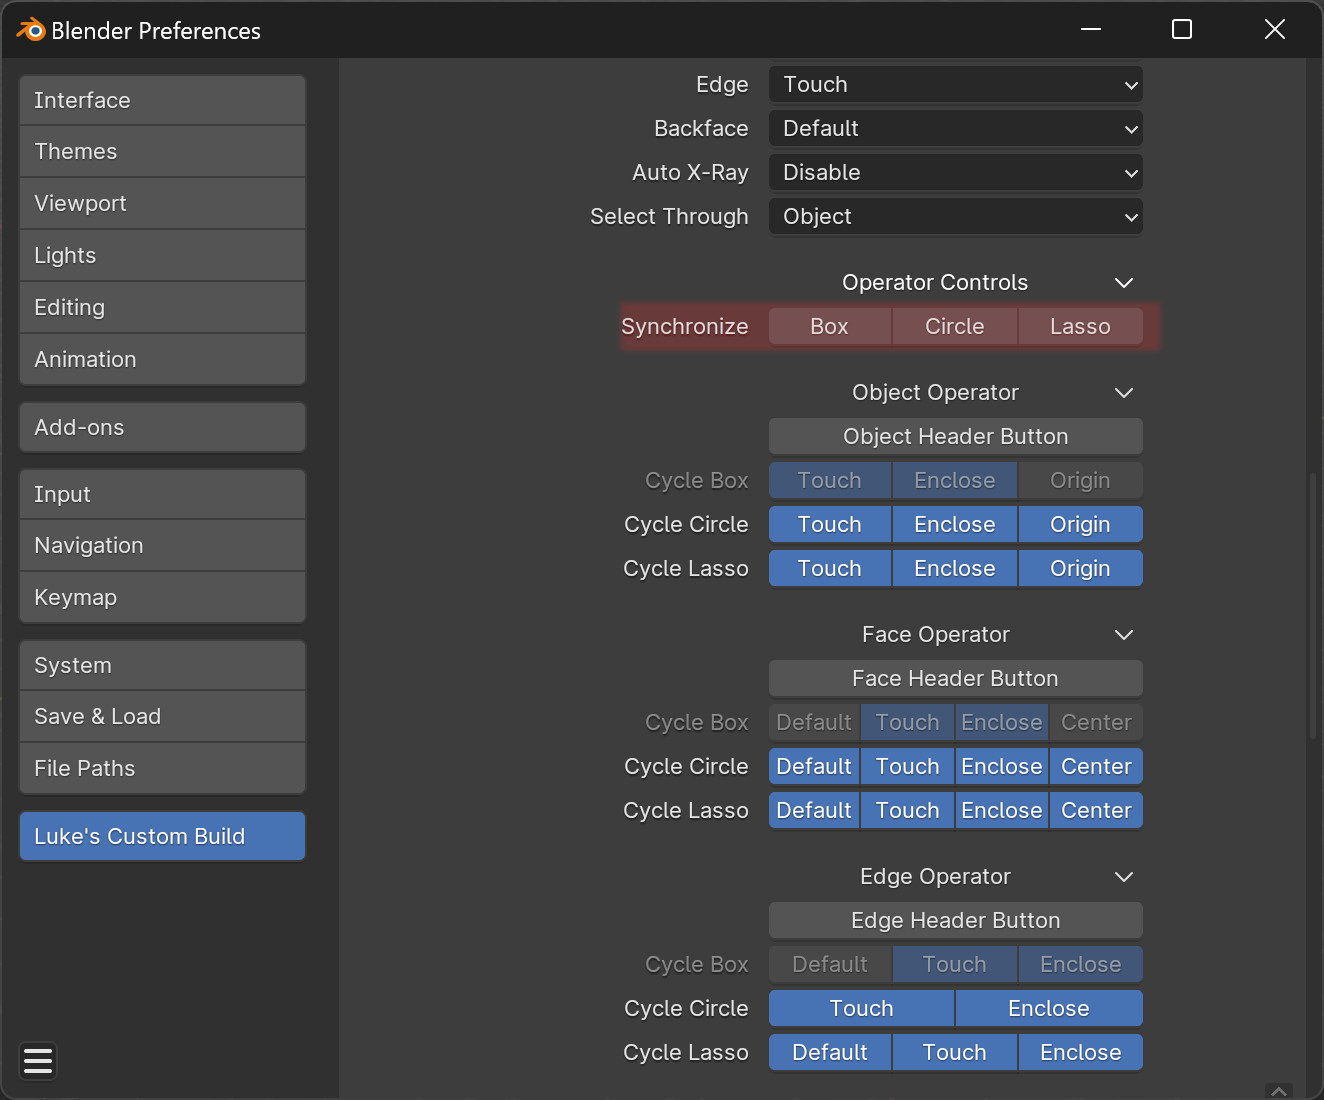
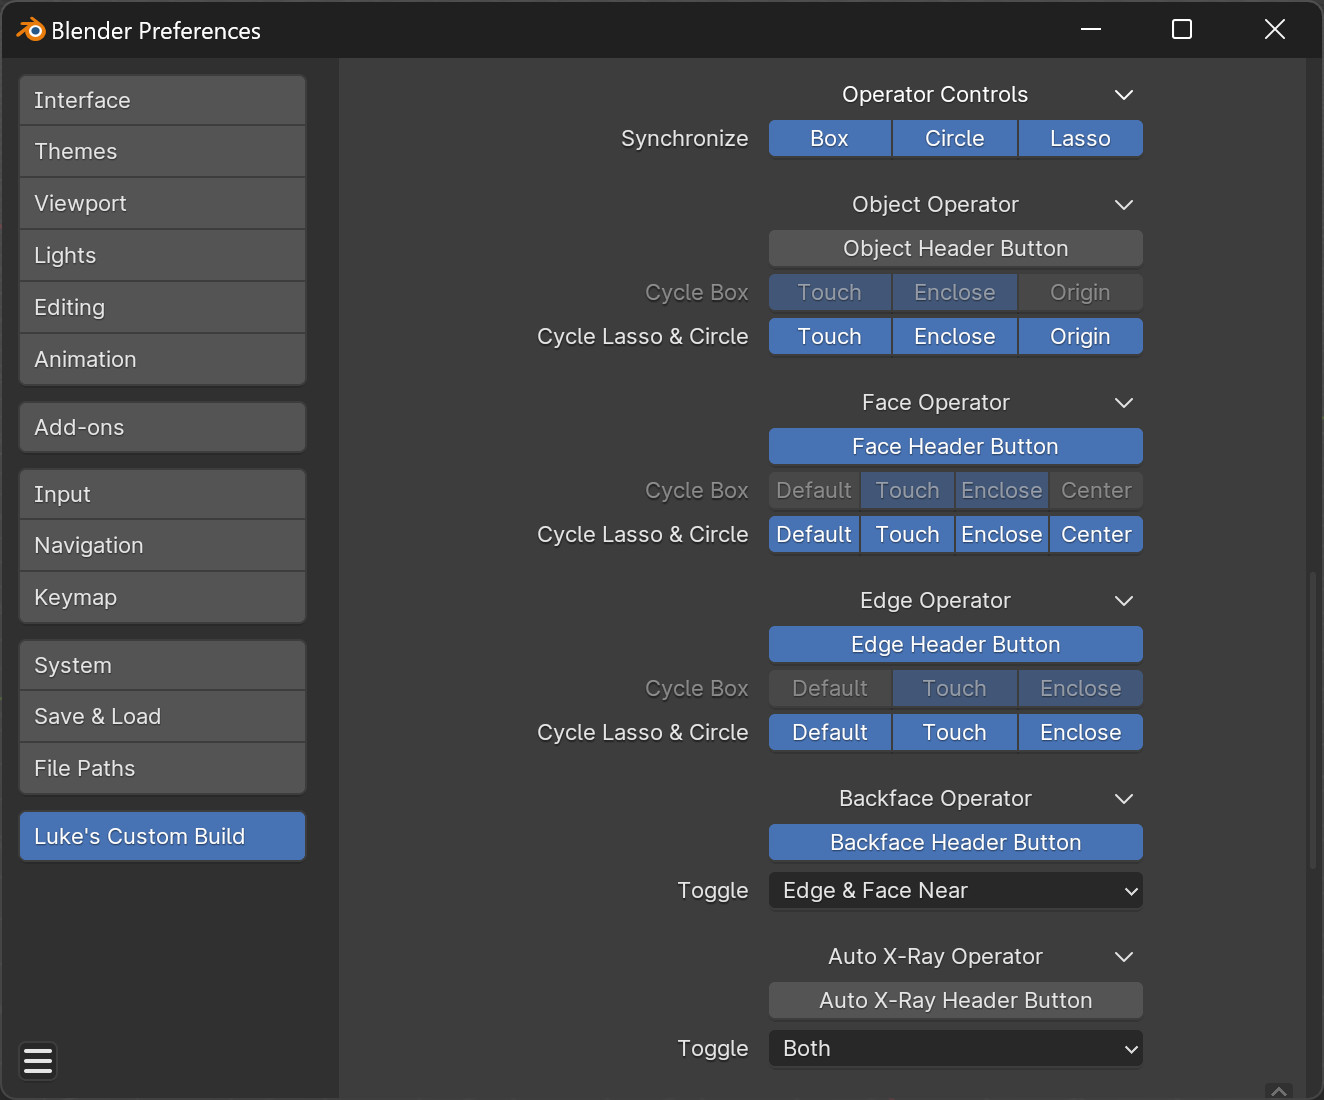
The operator controls allow you to customize some operators that will change settings quickly. Either by clicking the optional icons in the header, assigning those to a keyboard shortcut, or by using the pie menu I created, more on that later.
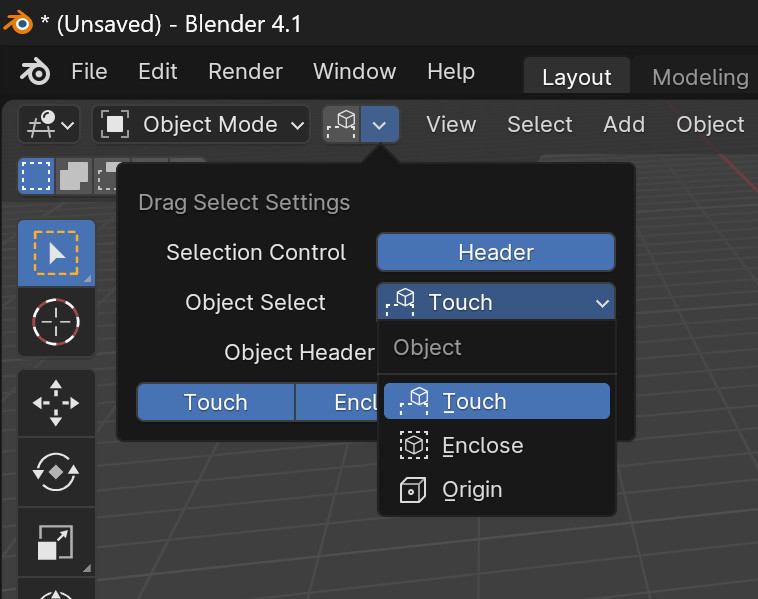
Object, Face, and Edge operators will cycle through your choice of selection modes. Enable whichever modes by clicking on them (next to Cycle). The icons in the header and pie menu will change to show you which mode is currently active.
Backface, Auto Xray, and Select Through operators allow you to toggle the feature on and off. Backface will toggle it in one of the two modes it works in. Auto Xray and Select Through will toggle either in both Object and Edit mode, or whichever mode you are currently using.
If you are using directional control, any non-applicable operators will be greyed out in the header while that tool is active.
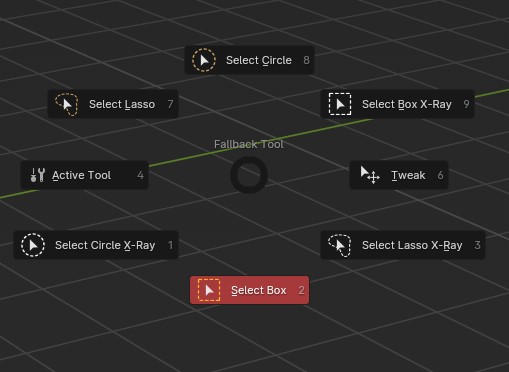
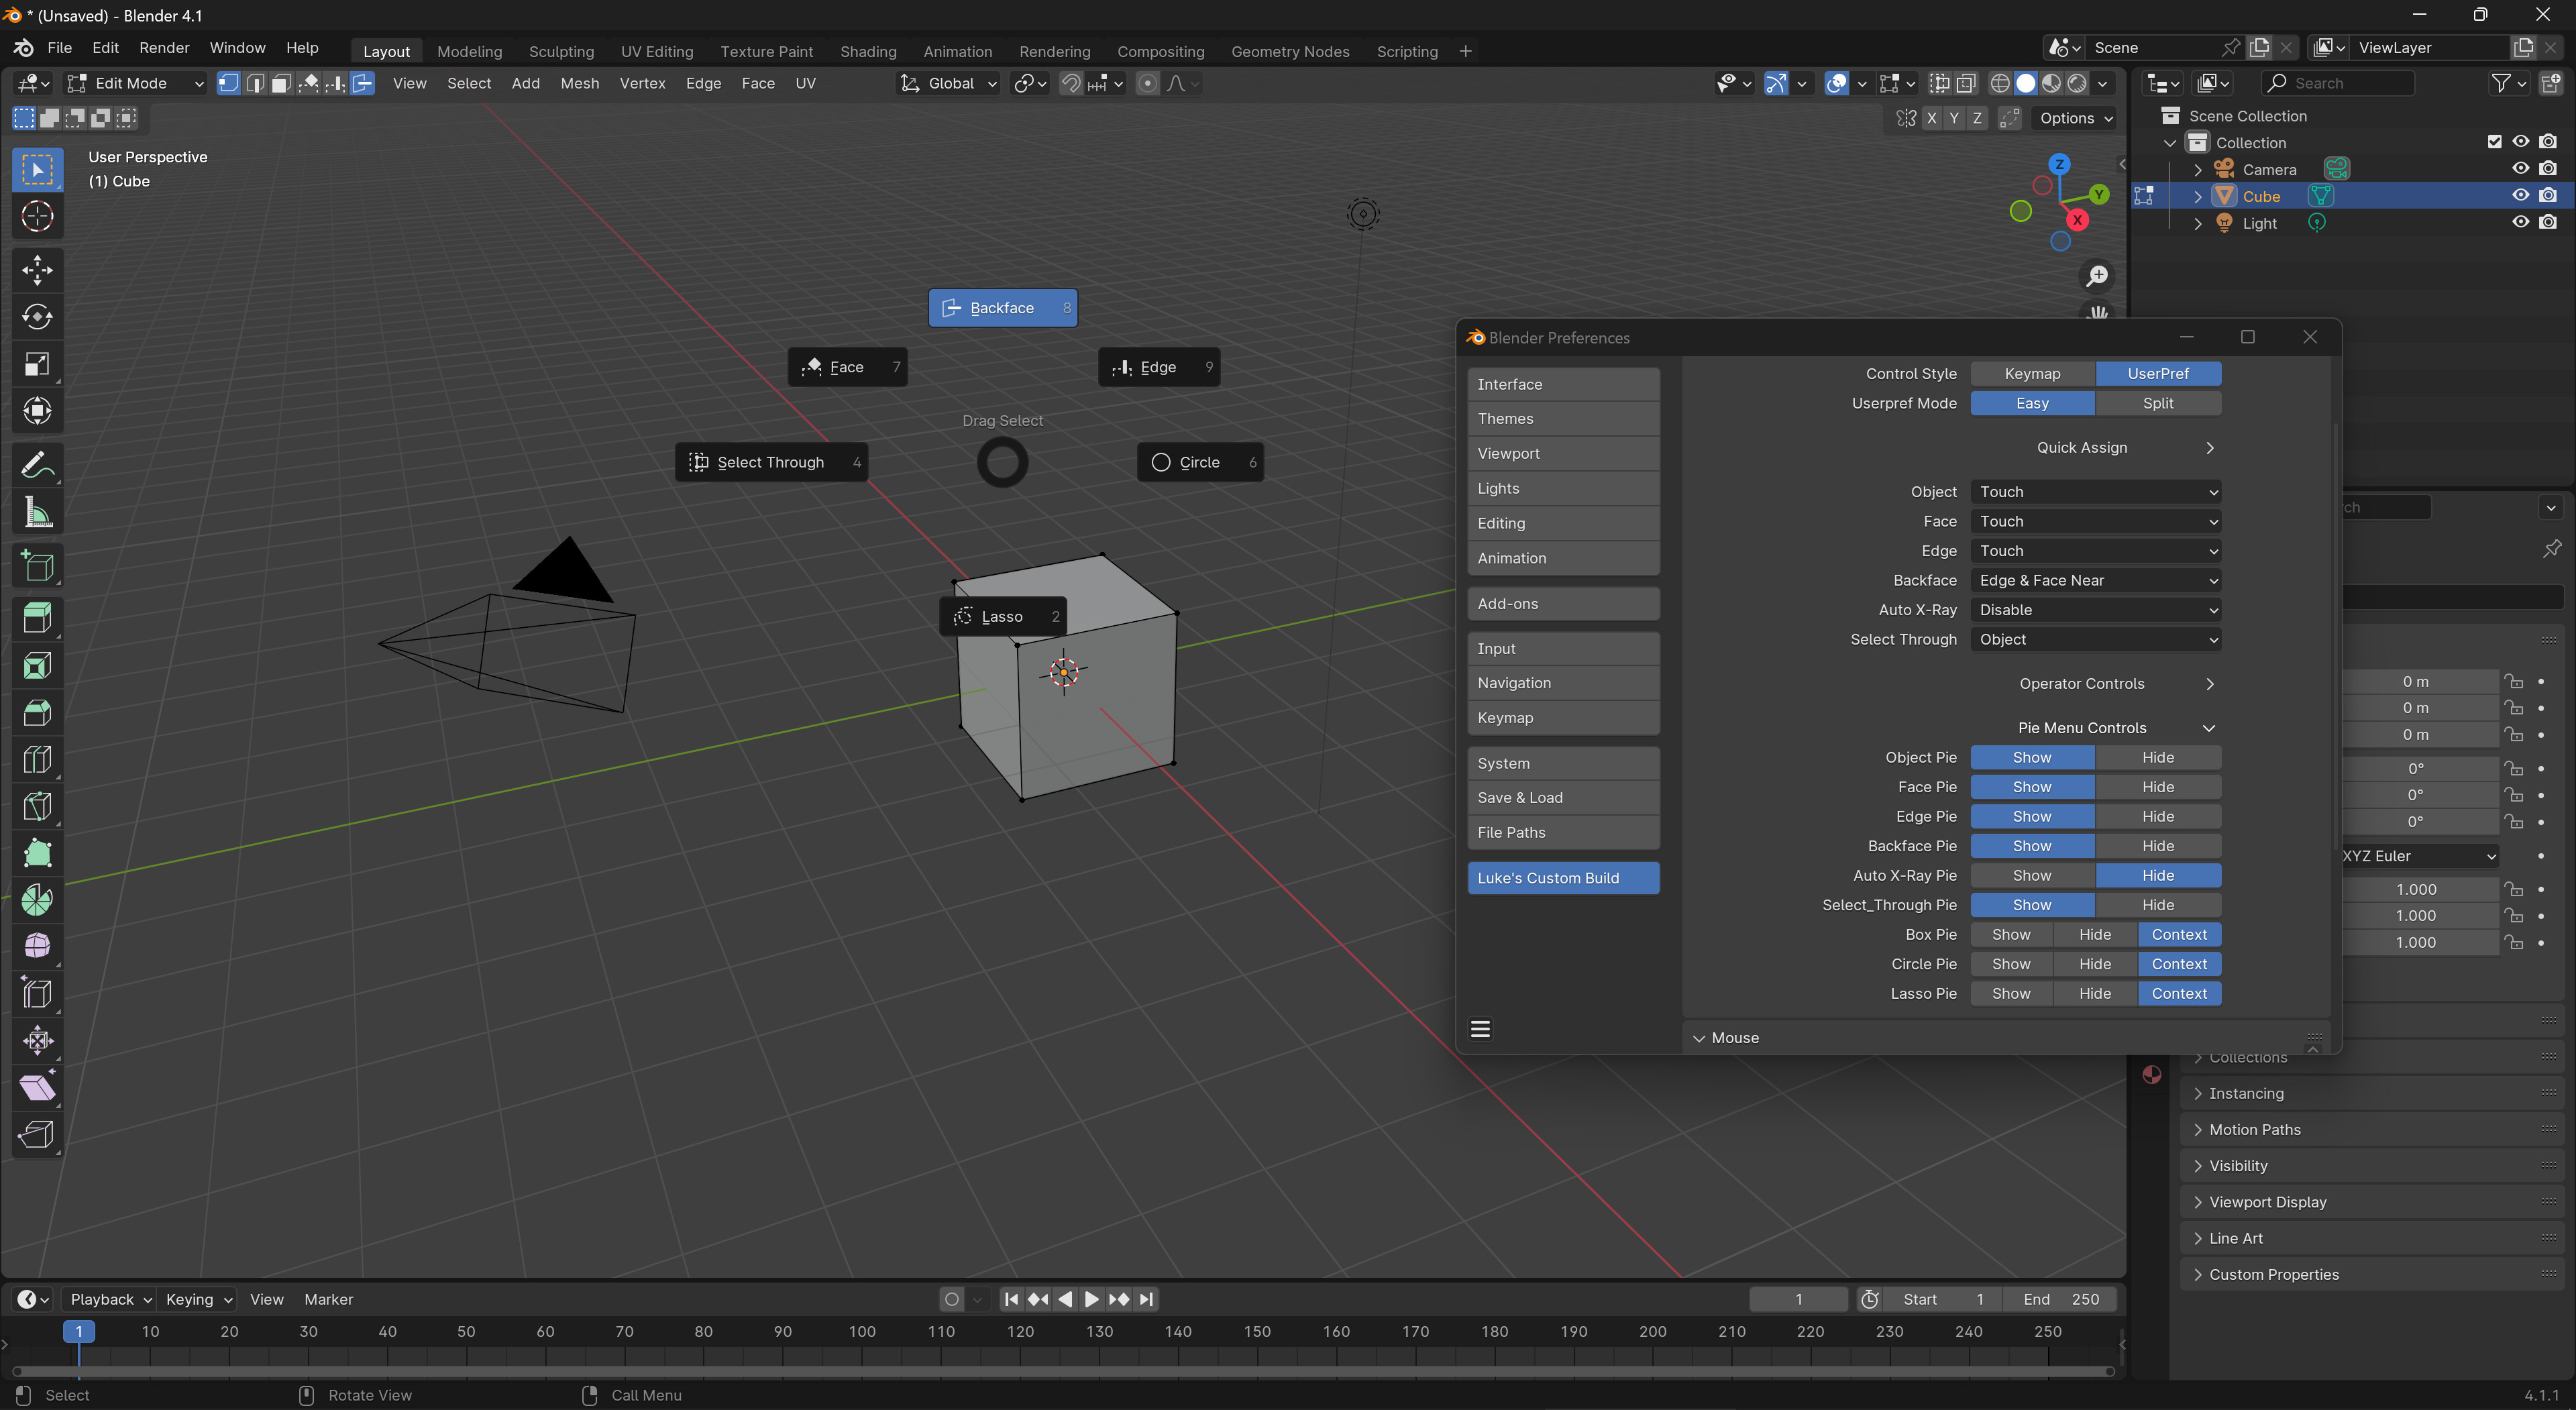
The pie menu controls allow you to show and hide any of the features in my custom pie menu operator. You’ll need to add this operator somewhere in your keymap, the tooltip for each pie menu option has the full name of the operator (view3d.pie_drag_select). Just type “drag” or “pie” in the keymap search and you’ll see it. Context view for the selection tools means that you won’t see the operator for the tool you are currently using. Edit mode stuff isn’t visible outside of edit mode, same with object mode. This custom operator is also in
space_view3d.py so you could modify if even further if you feel like.
The icons for object, face, and edge will change, and the backface, auto xray, and select through icons will light up, to reflect their current state. If you are using drag control for box or lasso, any non-applicable operators won’t be visible when you call this pie menu with that tool. If you are using a non-selection tool (with something other than box, circle, or lasso as the fallback tool) the only things that are visible will be the box/circle/lasso tool switchers.
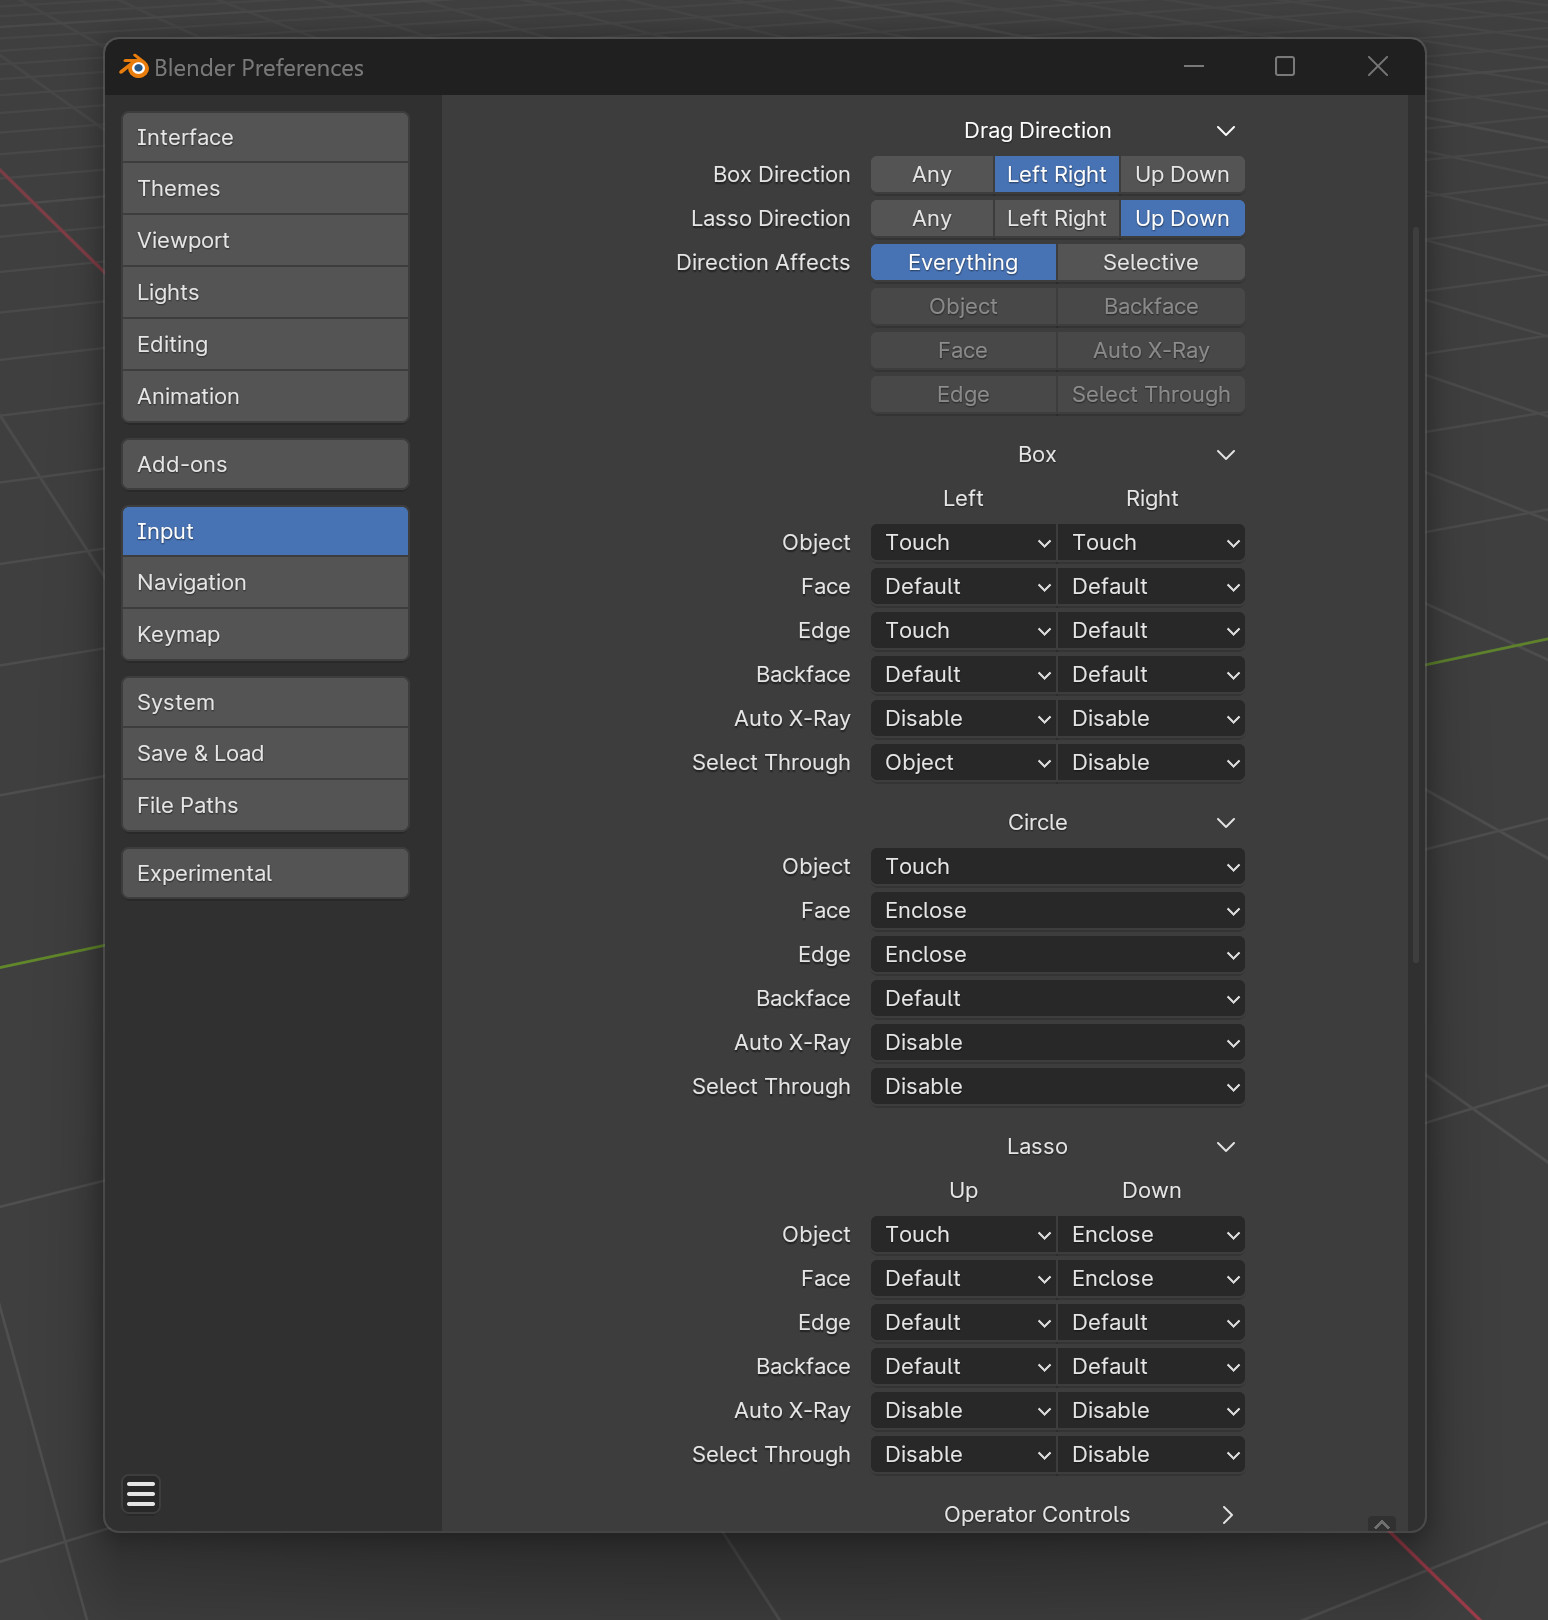
Directional control is only available in split mode. I could add it to Easy mode, but it kinda contradicts the name and intention of that mode. Assigning drag directions is more flexible than the keymap, you can use left right for box and up down with lasso for instance. But you can also use directional control in the keymap and userprefs at the same time. Video will explain this better, but basically, you do directional control in the keymap for things like Extend, Subtract, Difference, Intersect, and then userpref drag control for stuff like Select Through, Touch, Enclose, Backface Filter.
For example, you set the keymap to up/down, and userprefs to left right:
Up + Right = Extend + Touch
Down + Right = Subtract + Touch
Up + Left = Extend + Enclose
Down + Left= Subtract + Enclose
Pretty flexible if you have a reason for it.
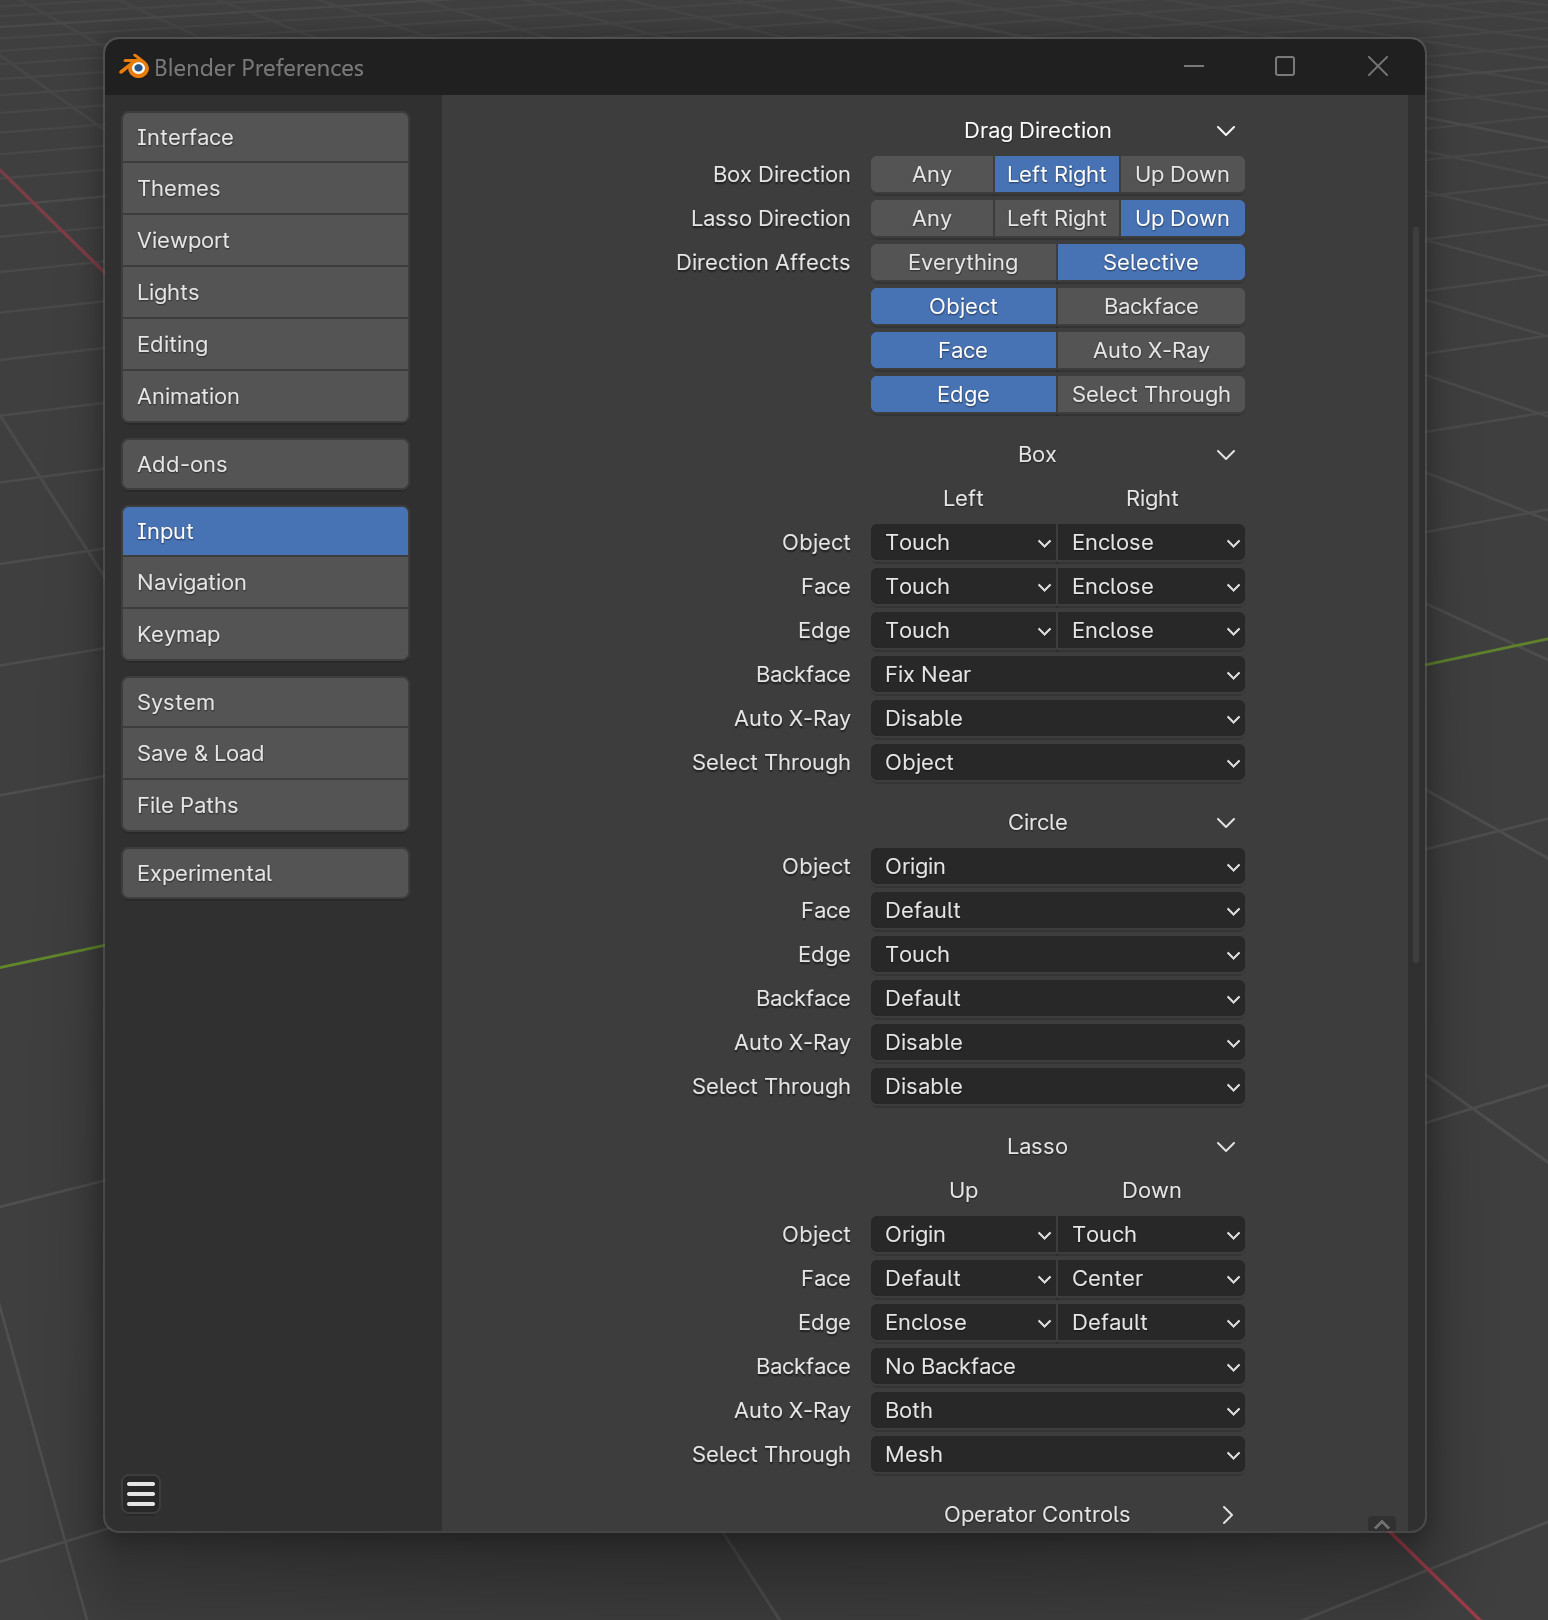
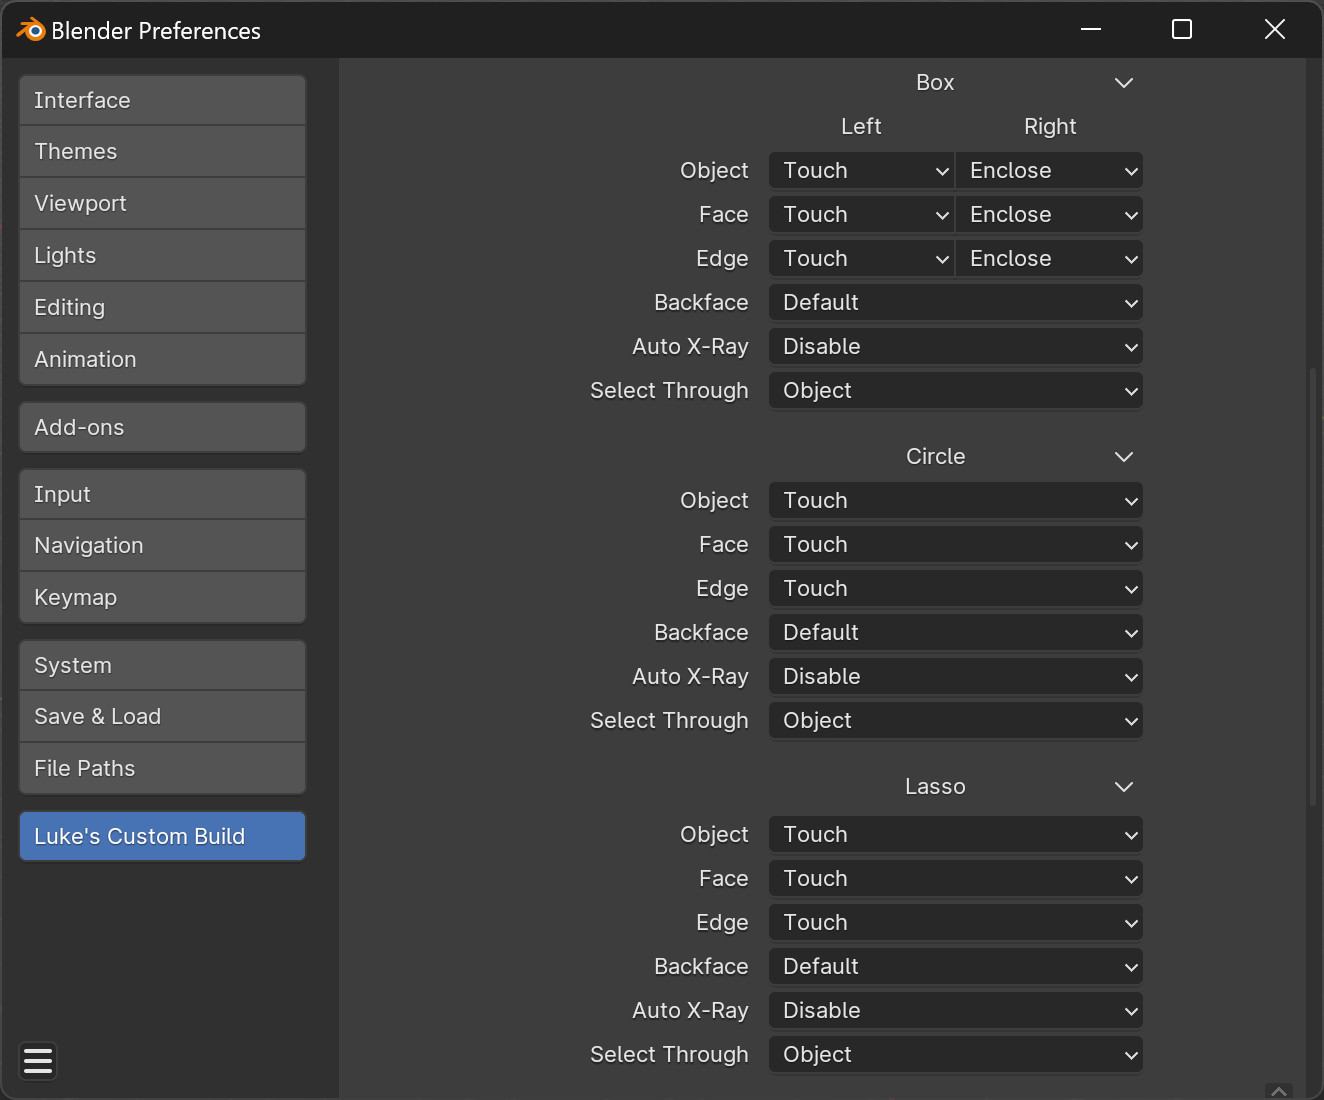
Selective drag control lets you decide which features use drag direction, and which features use operator/pie control.
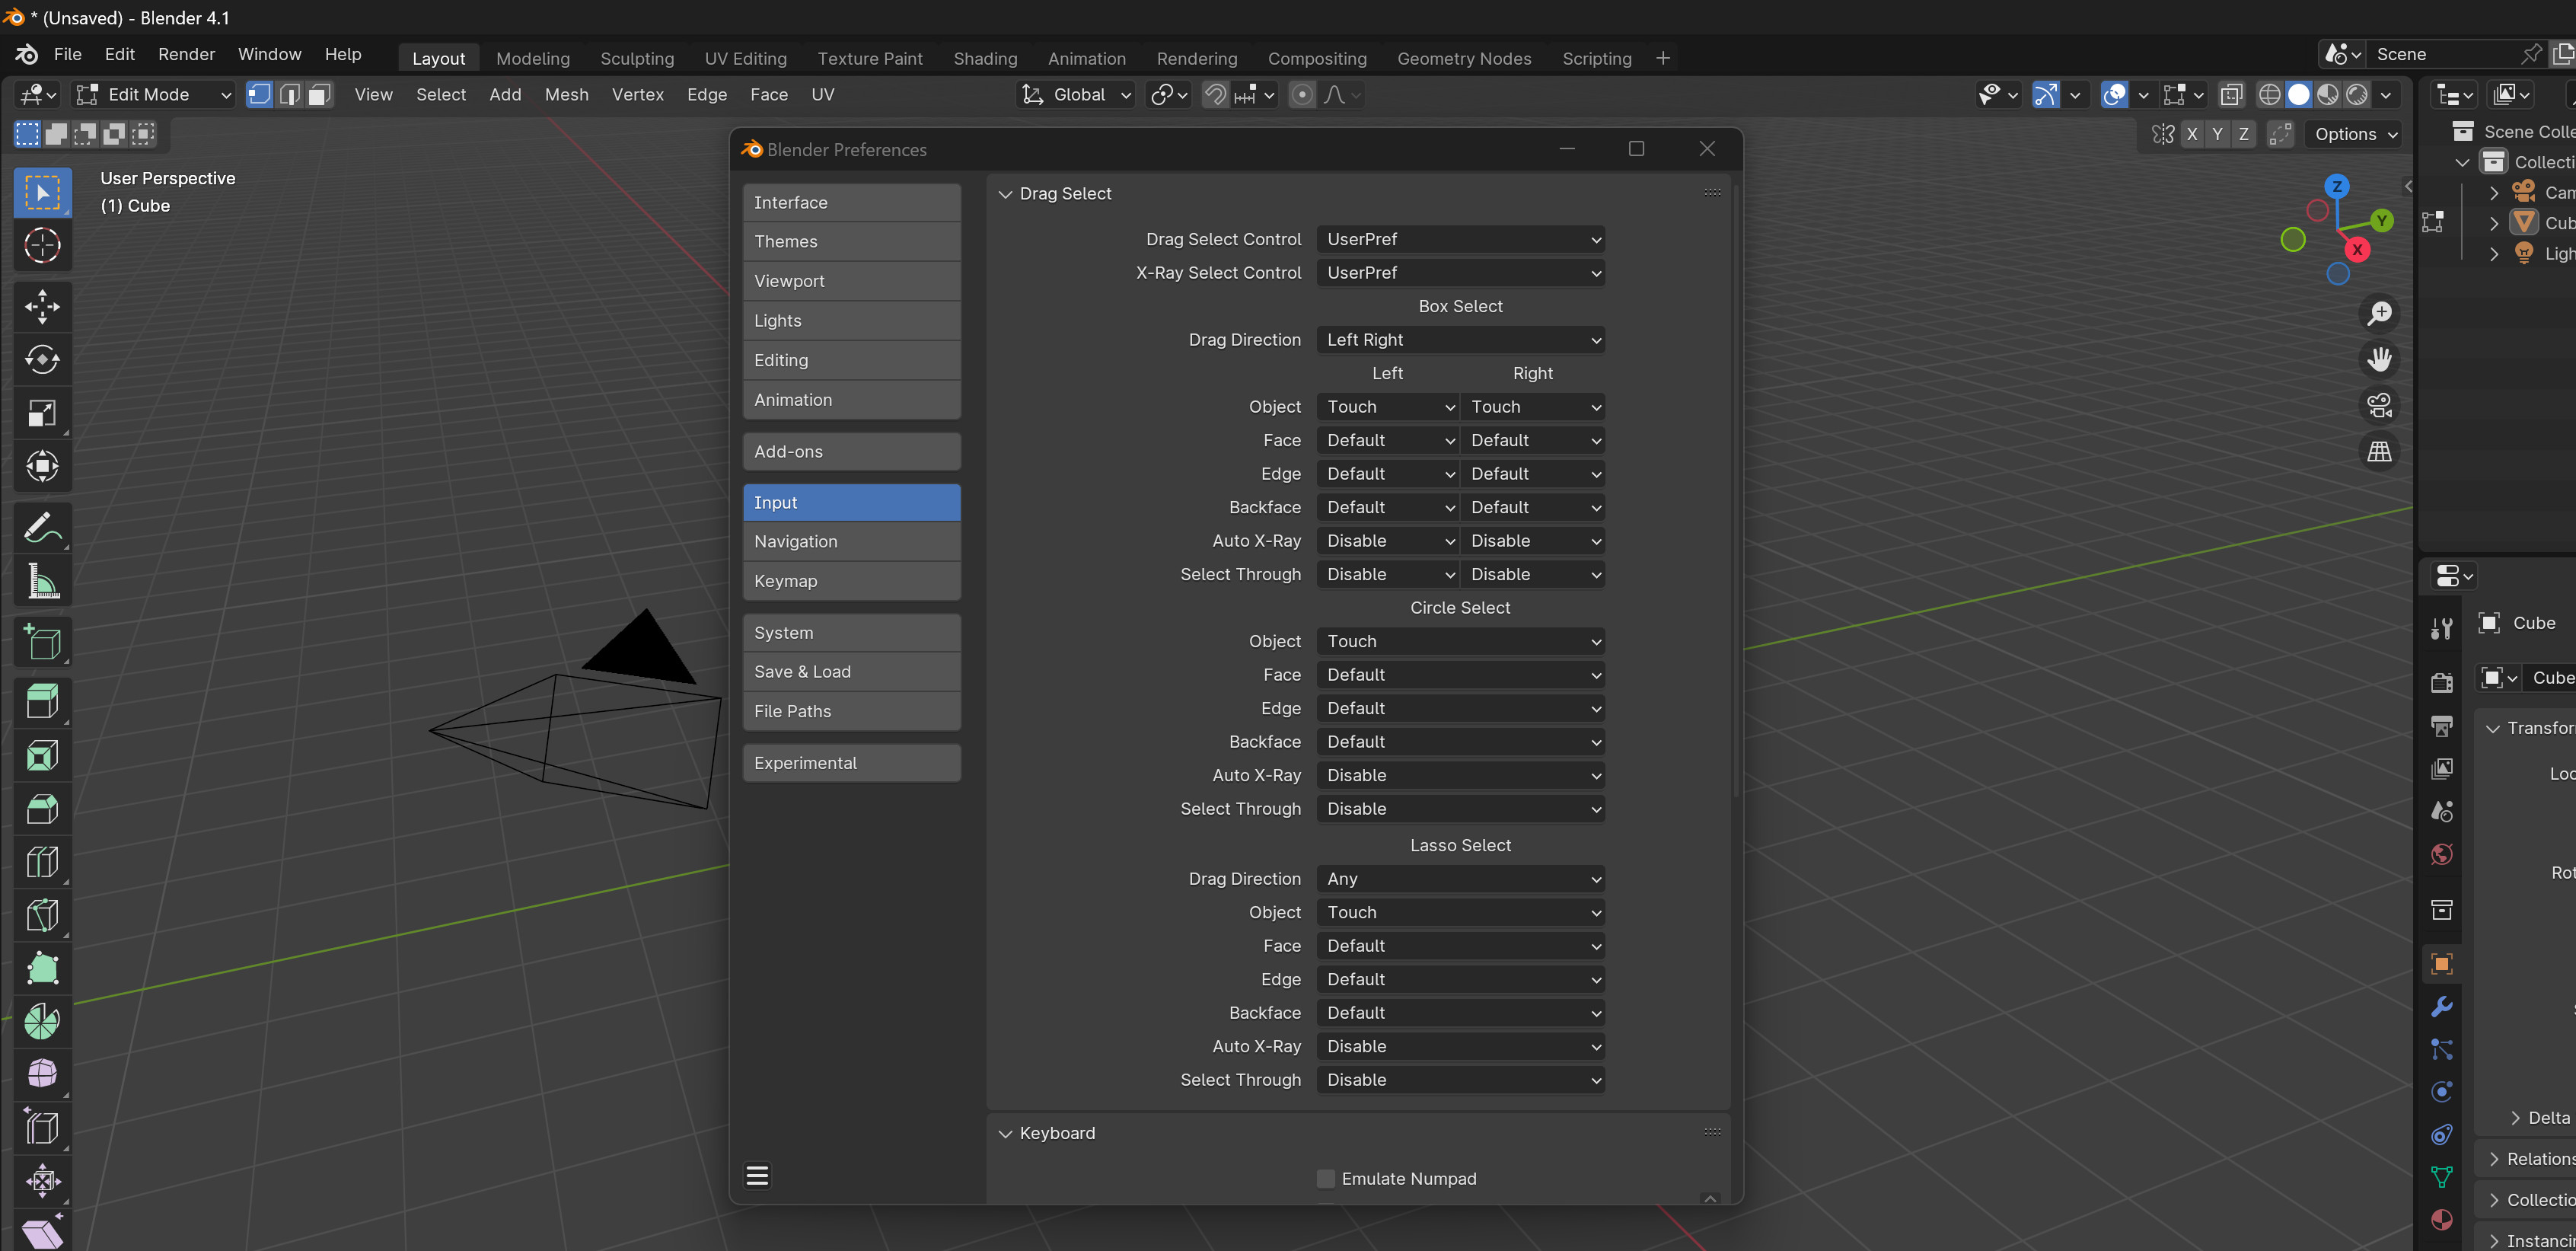
Split control assignments for each tool. Notice how box only has left and right dropdowns for the selected features according to what was chosen in the previous screenshot.
You can synchronize any combination of the 3 tools. This means that when you use an operator to change something, any other tools that are synchronized with it will do the same thing. If you are synchronizing box or lasso and they have some drag control, synchronization won’t do anything, because they are not controlled via operator. UI will reflect this by separating that tool out and greying out the dropdown in opcontrol.
The Object, Face, and Edge opcontrols have box separated and greyed out, but Backface, Auto X-Ray, and Select Through (just off screen) keep them combined since box is not using directional control for those features as defined in the screenshot earlier.
03. Mouse
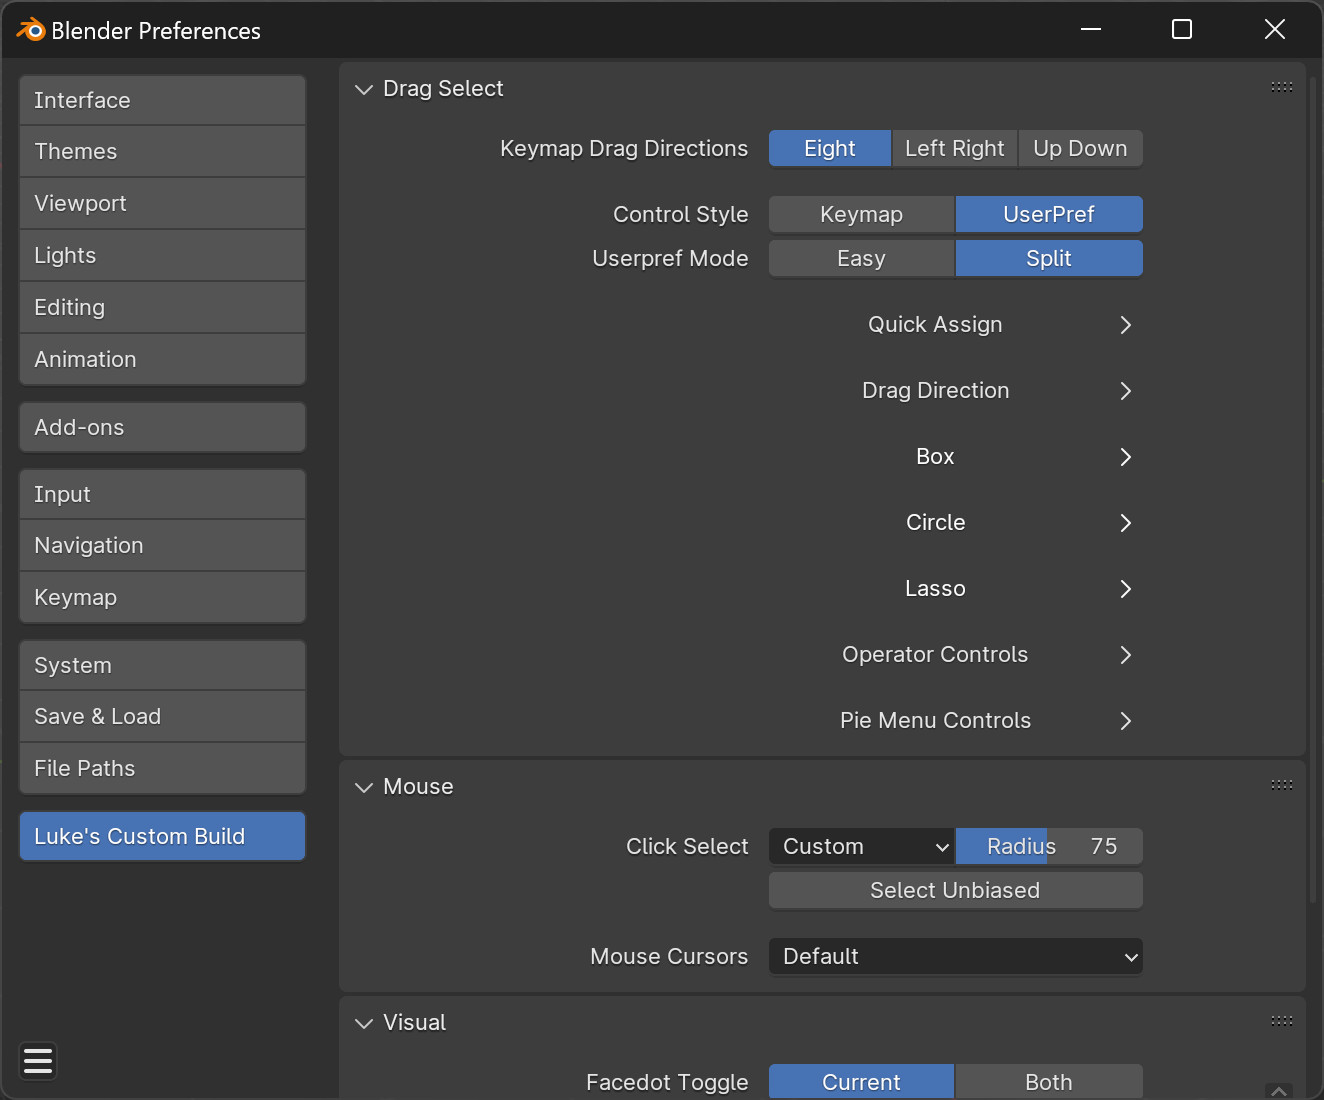
Click select mesh and there’s a huge radius for it, except faces which have none. This will fix that, and allow you to choose how large the radius is.
75 is the default, can go as high as 150. Select Unbiased is something that is borderline useful. There’s a small bias, I think it’s 5 pixels, that Blender gives to unselected mesh so they are more likely to be selected over mesh that is currently in your selection. If this is messing with something for you, turn this feature on to remove that bias.
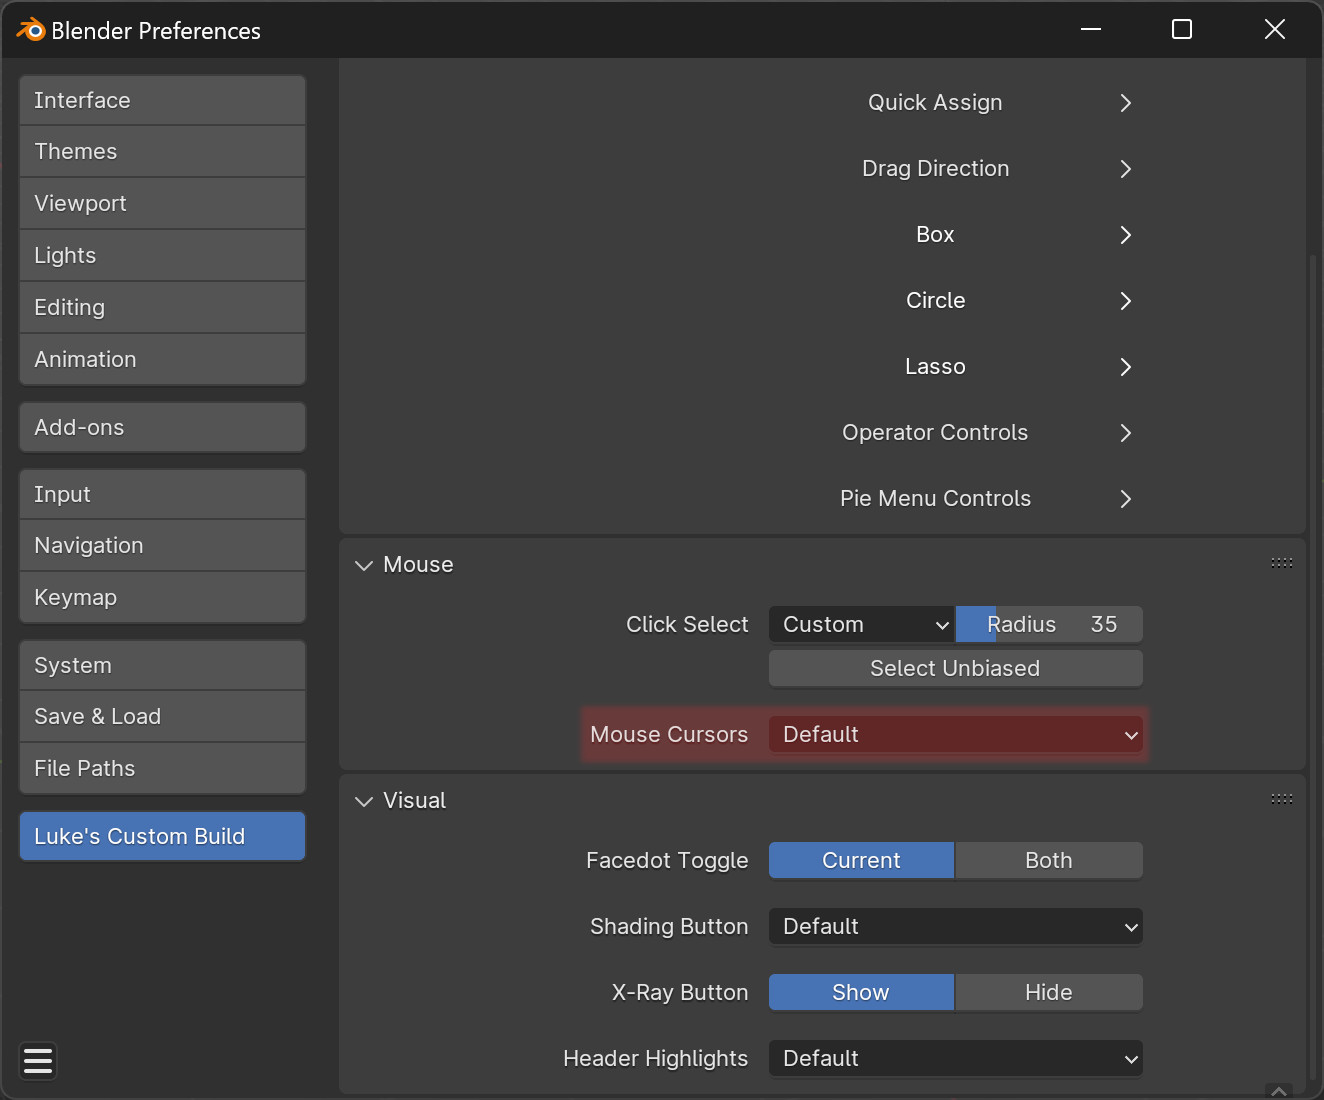
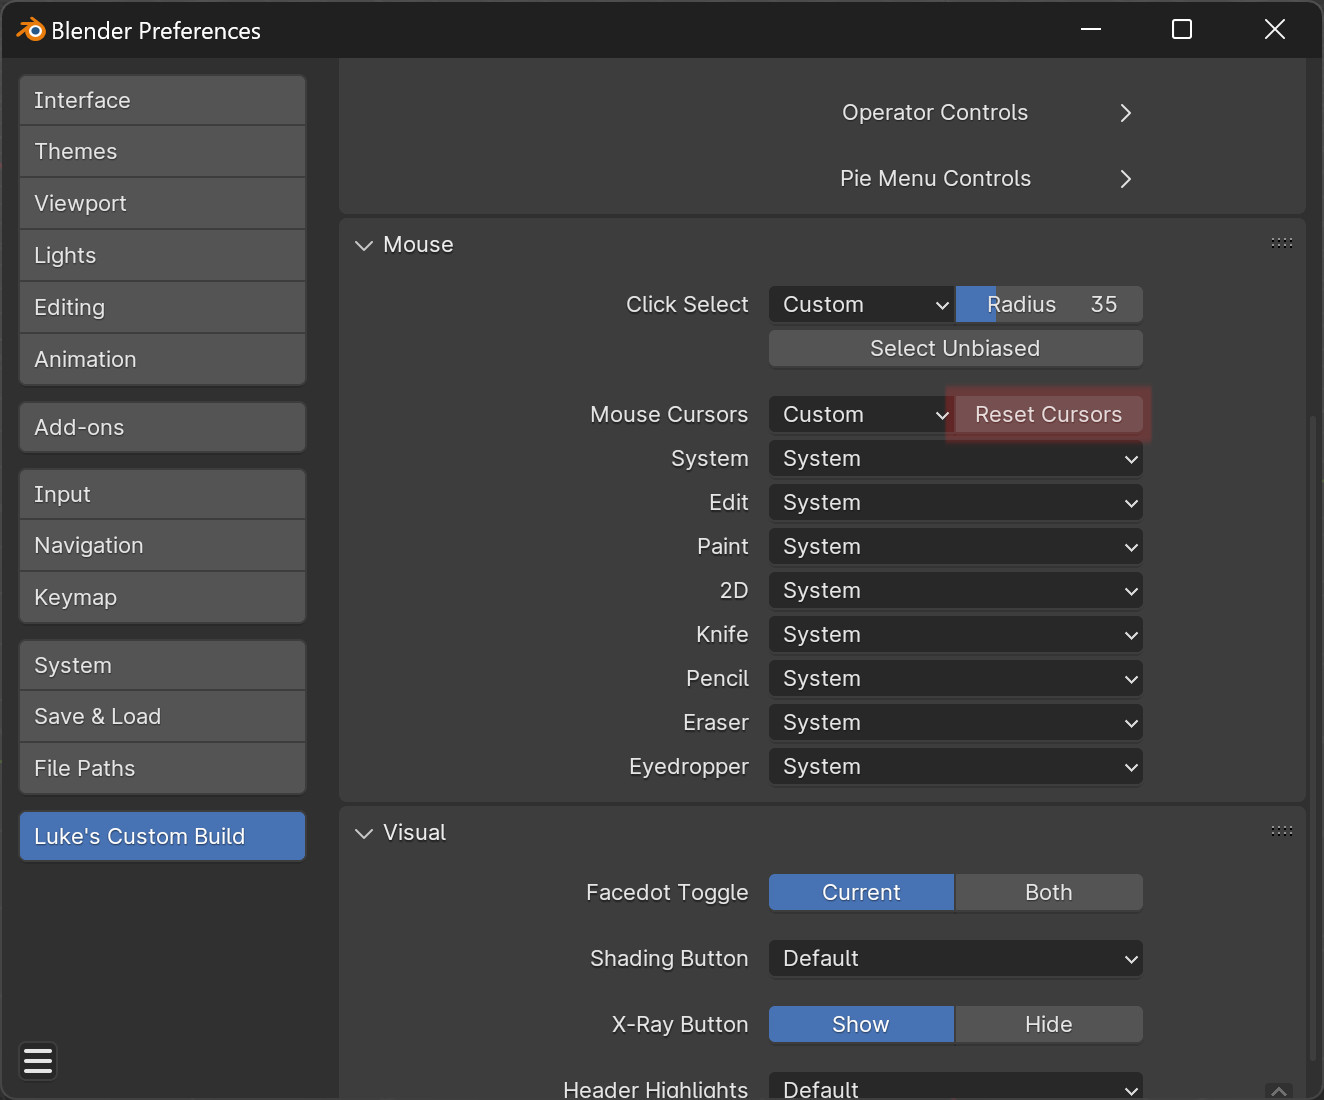
You can change the mouse cursors. In Mac and Linux you won’t get the full benefit for now. Unless you are using Windows, any new cursors I’ve made won’t do anything. They will turn whatever cursor into the system cursor rather than the cursor I’ve created.
When you first turn this feature on, you’ll probably want to hit the “reset” button unless you really want to change every single cursor into something else.
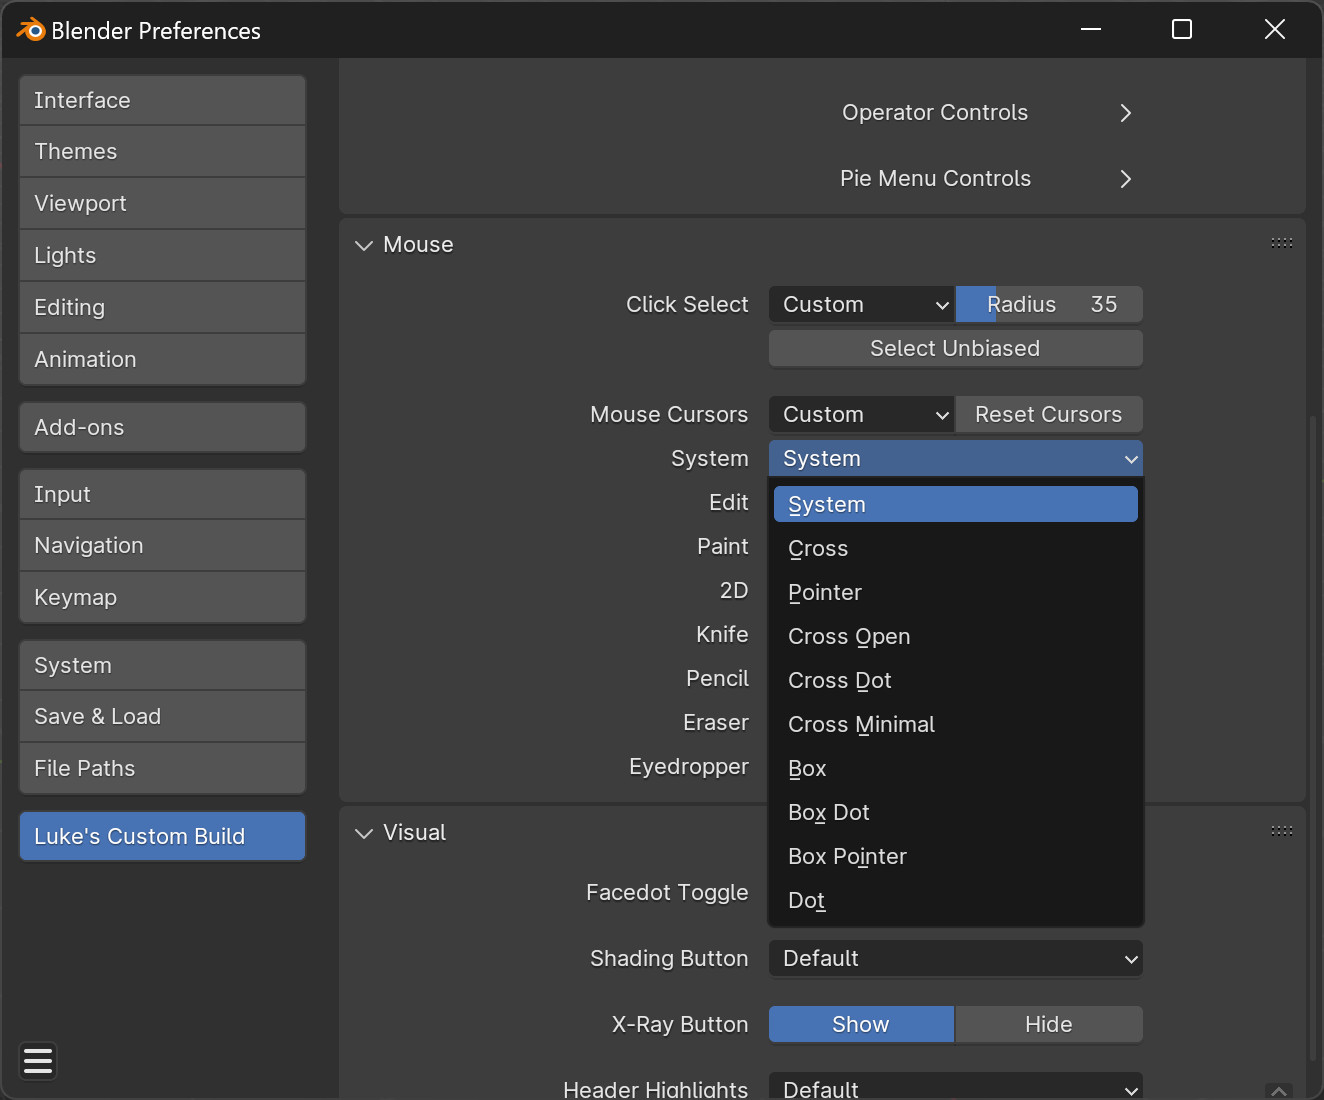
These are the default cursors. If you ever need to change one of them back to default without hitting the reset button, the one at the top of the list is the default for that cursor type.
Possible cursor options. 2D and Paint have one additional option called “Blank” that will hide the cursor.
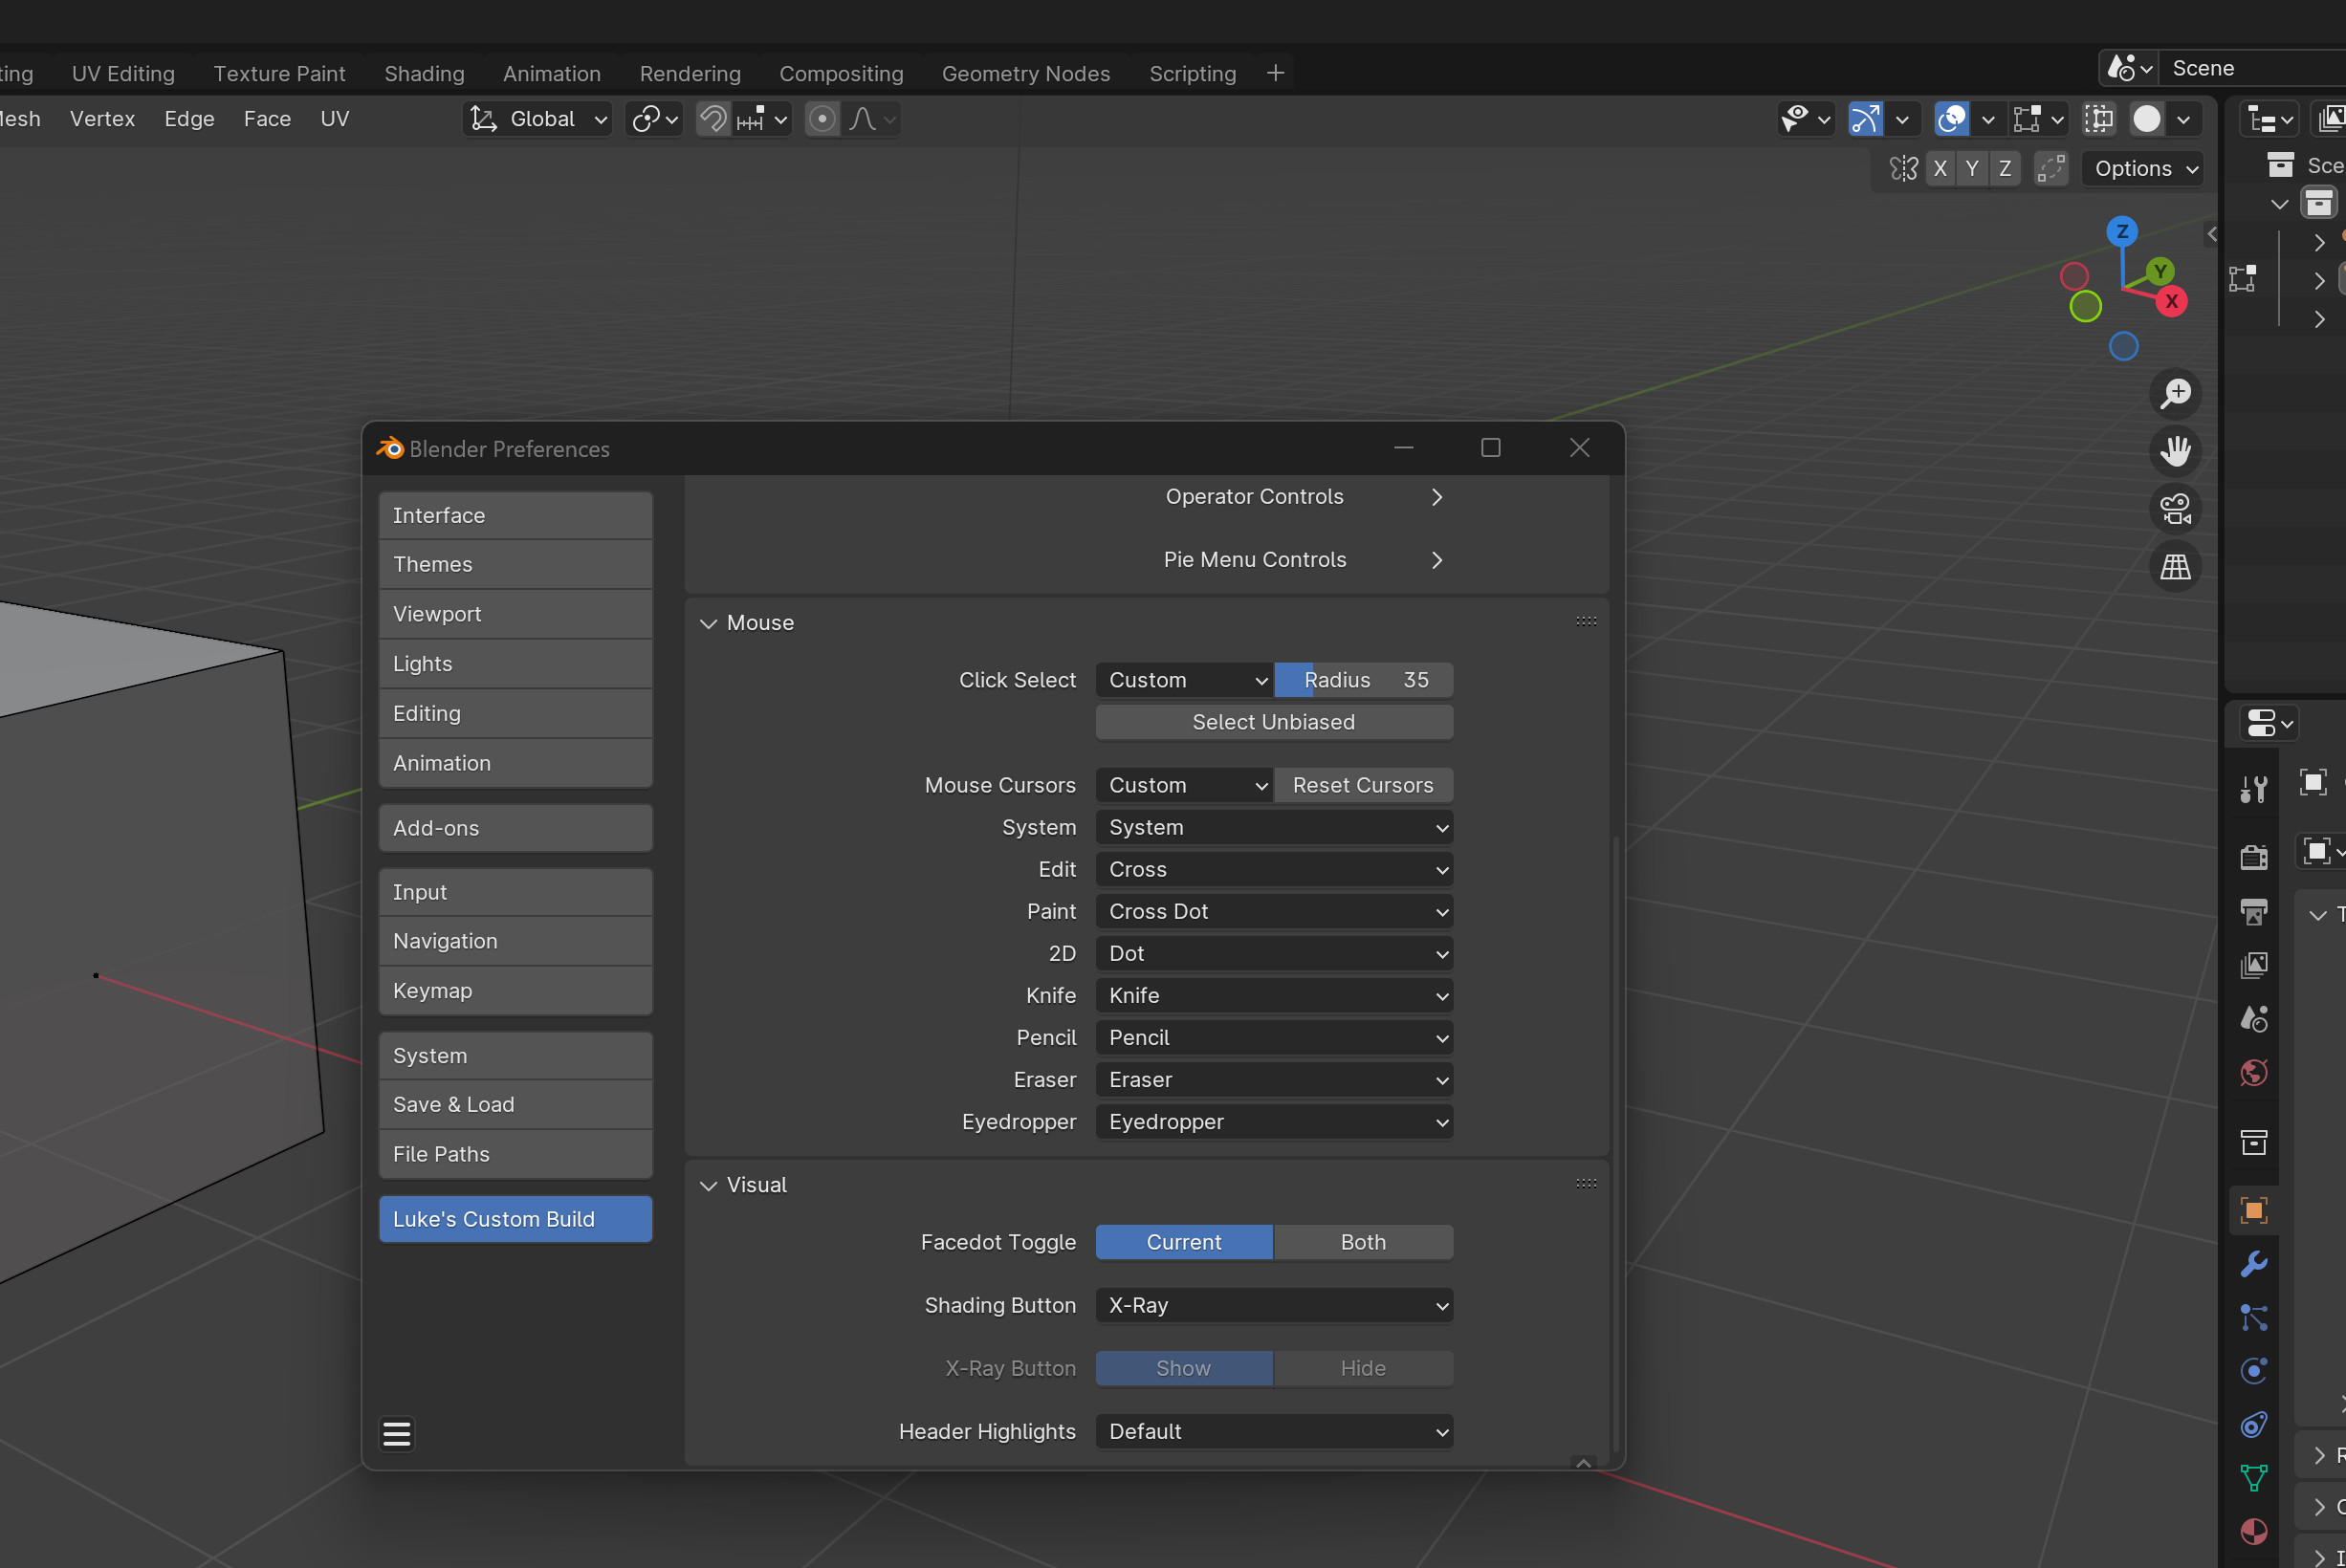
04. Visual
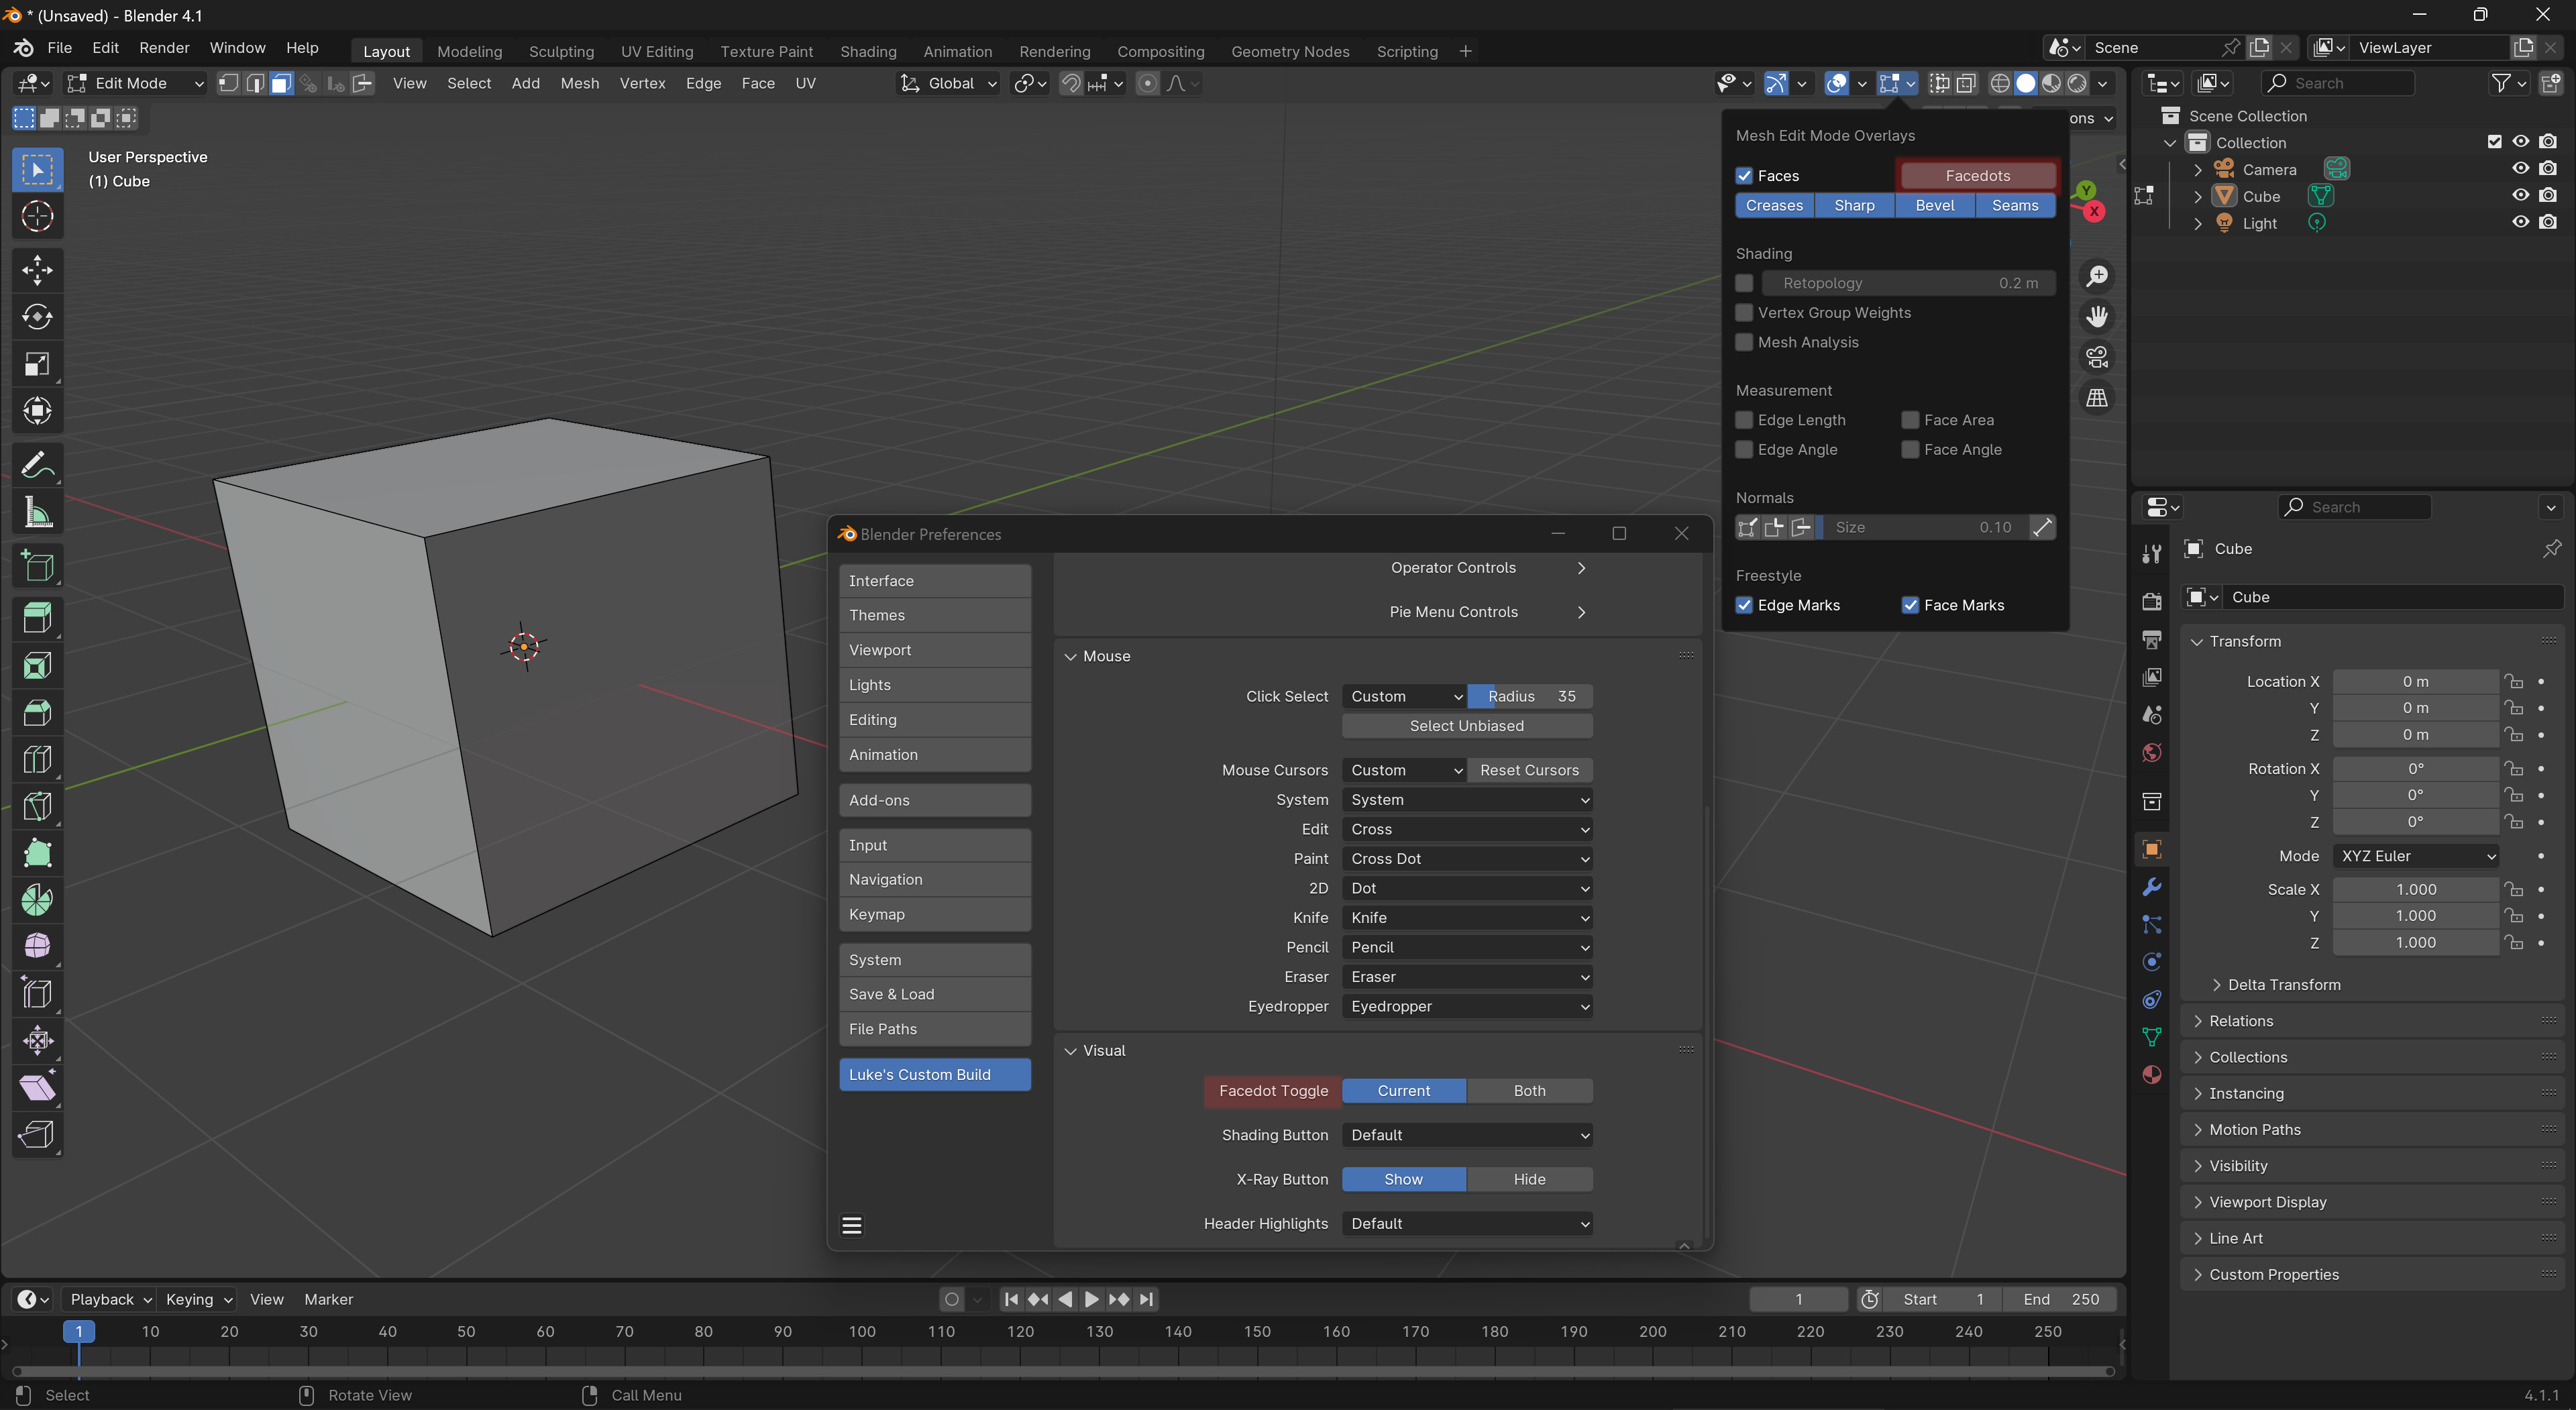
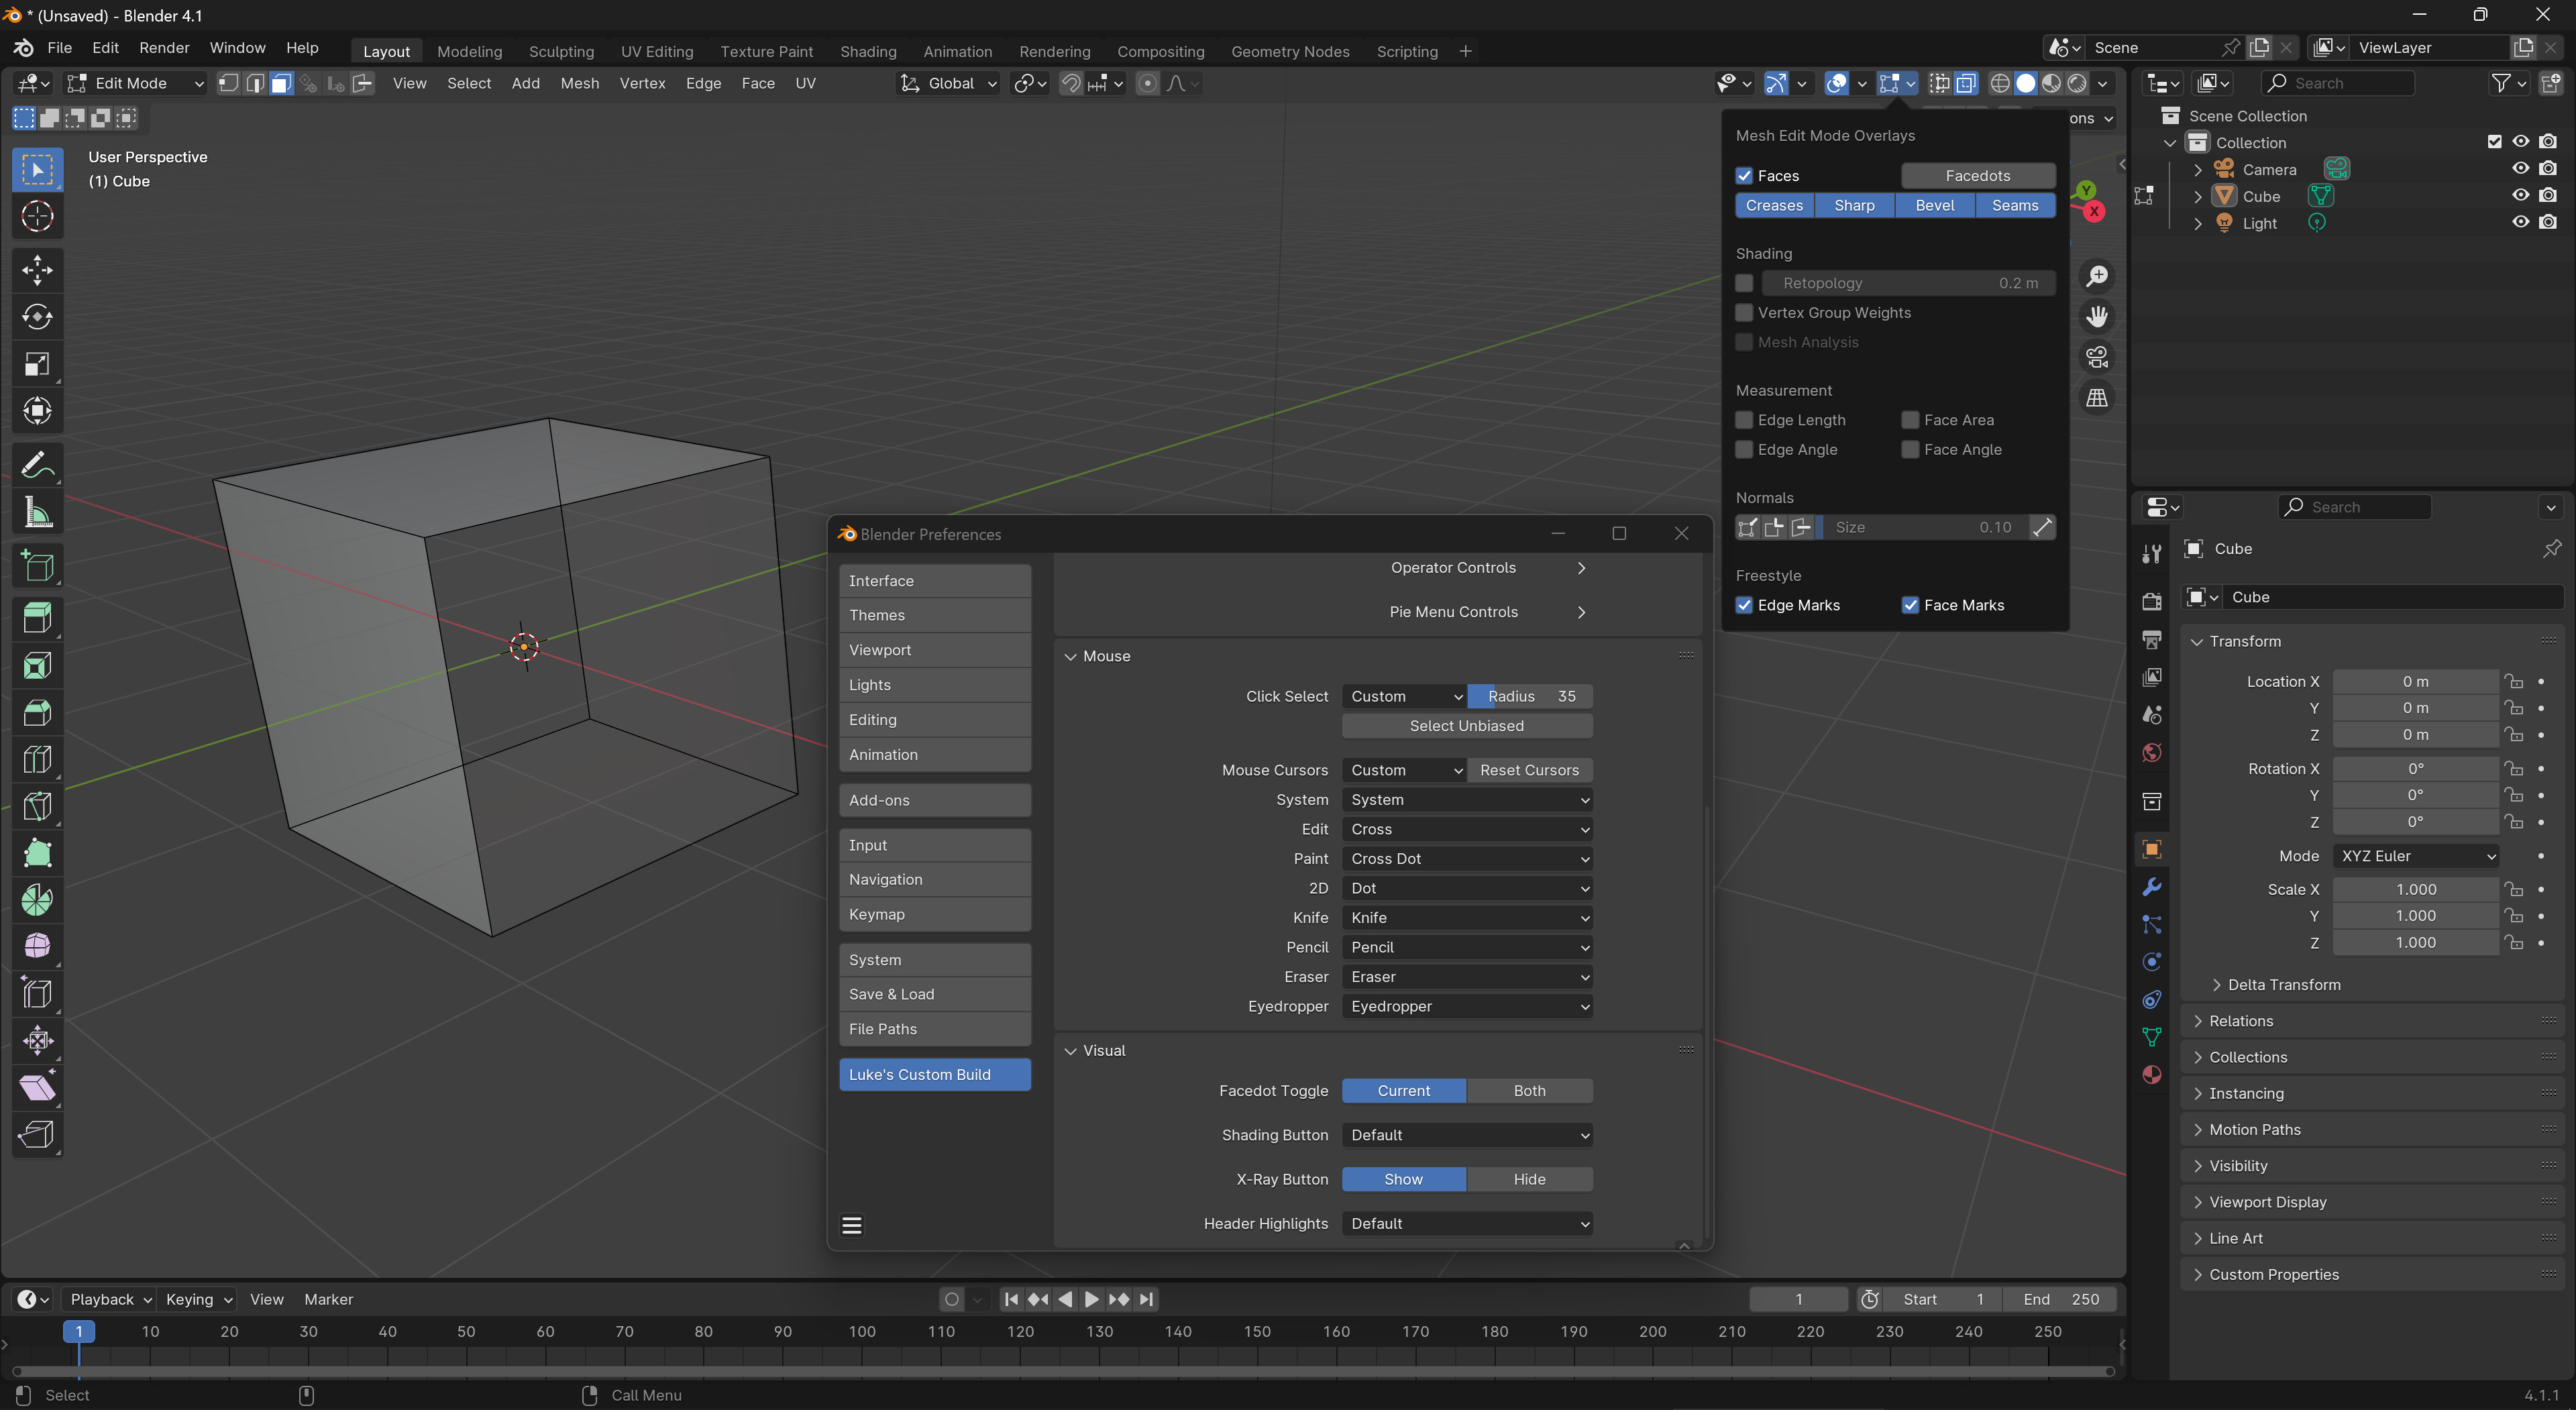
You can turn off facedots in X-Ray now. Operator is inside the overlay header. Two modes, either toggle both Solid and X-Ray and keep them synchronized, or only turn off facedots in whichever of those 2 shading modes you are currently using. Solid means anything besides X-Ray. Default is to toggle the current shading mode’s facedots, because that isn’t going to catch anybody by surprise and is probably what most people would want.
Solid facedots on
X-Ray facedots off
The shading header is a bit excessive. 4 buttons to do 1 thing? Nah.
3 modes to choose from. Default leaves things the way Blender does it. X-Ray mode will combine the 4 shading buttons with the X-Ray button. It’s the X-Ray button with a different icon that changes with shading mode, and is attached to the shading popover. The X-Ray Button setting (next row in userprefs) will be disabled because the X-Ray button is “hidden” in this mode, from a certain point of view.
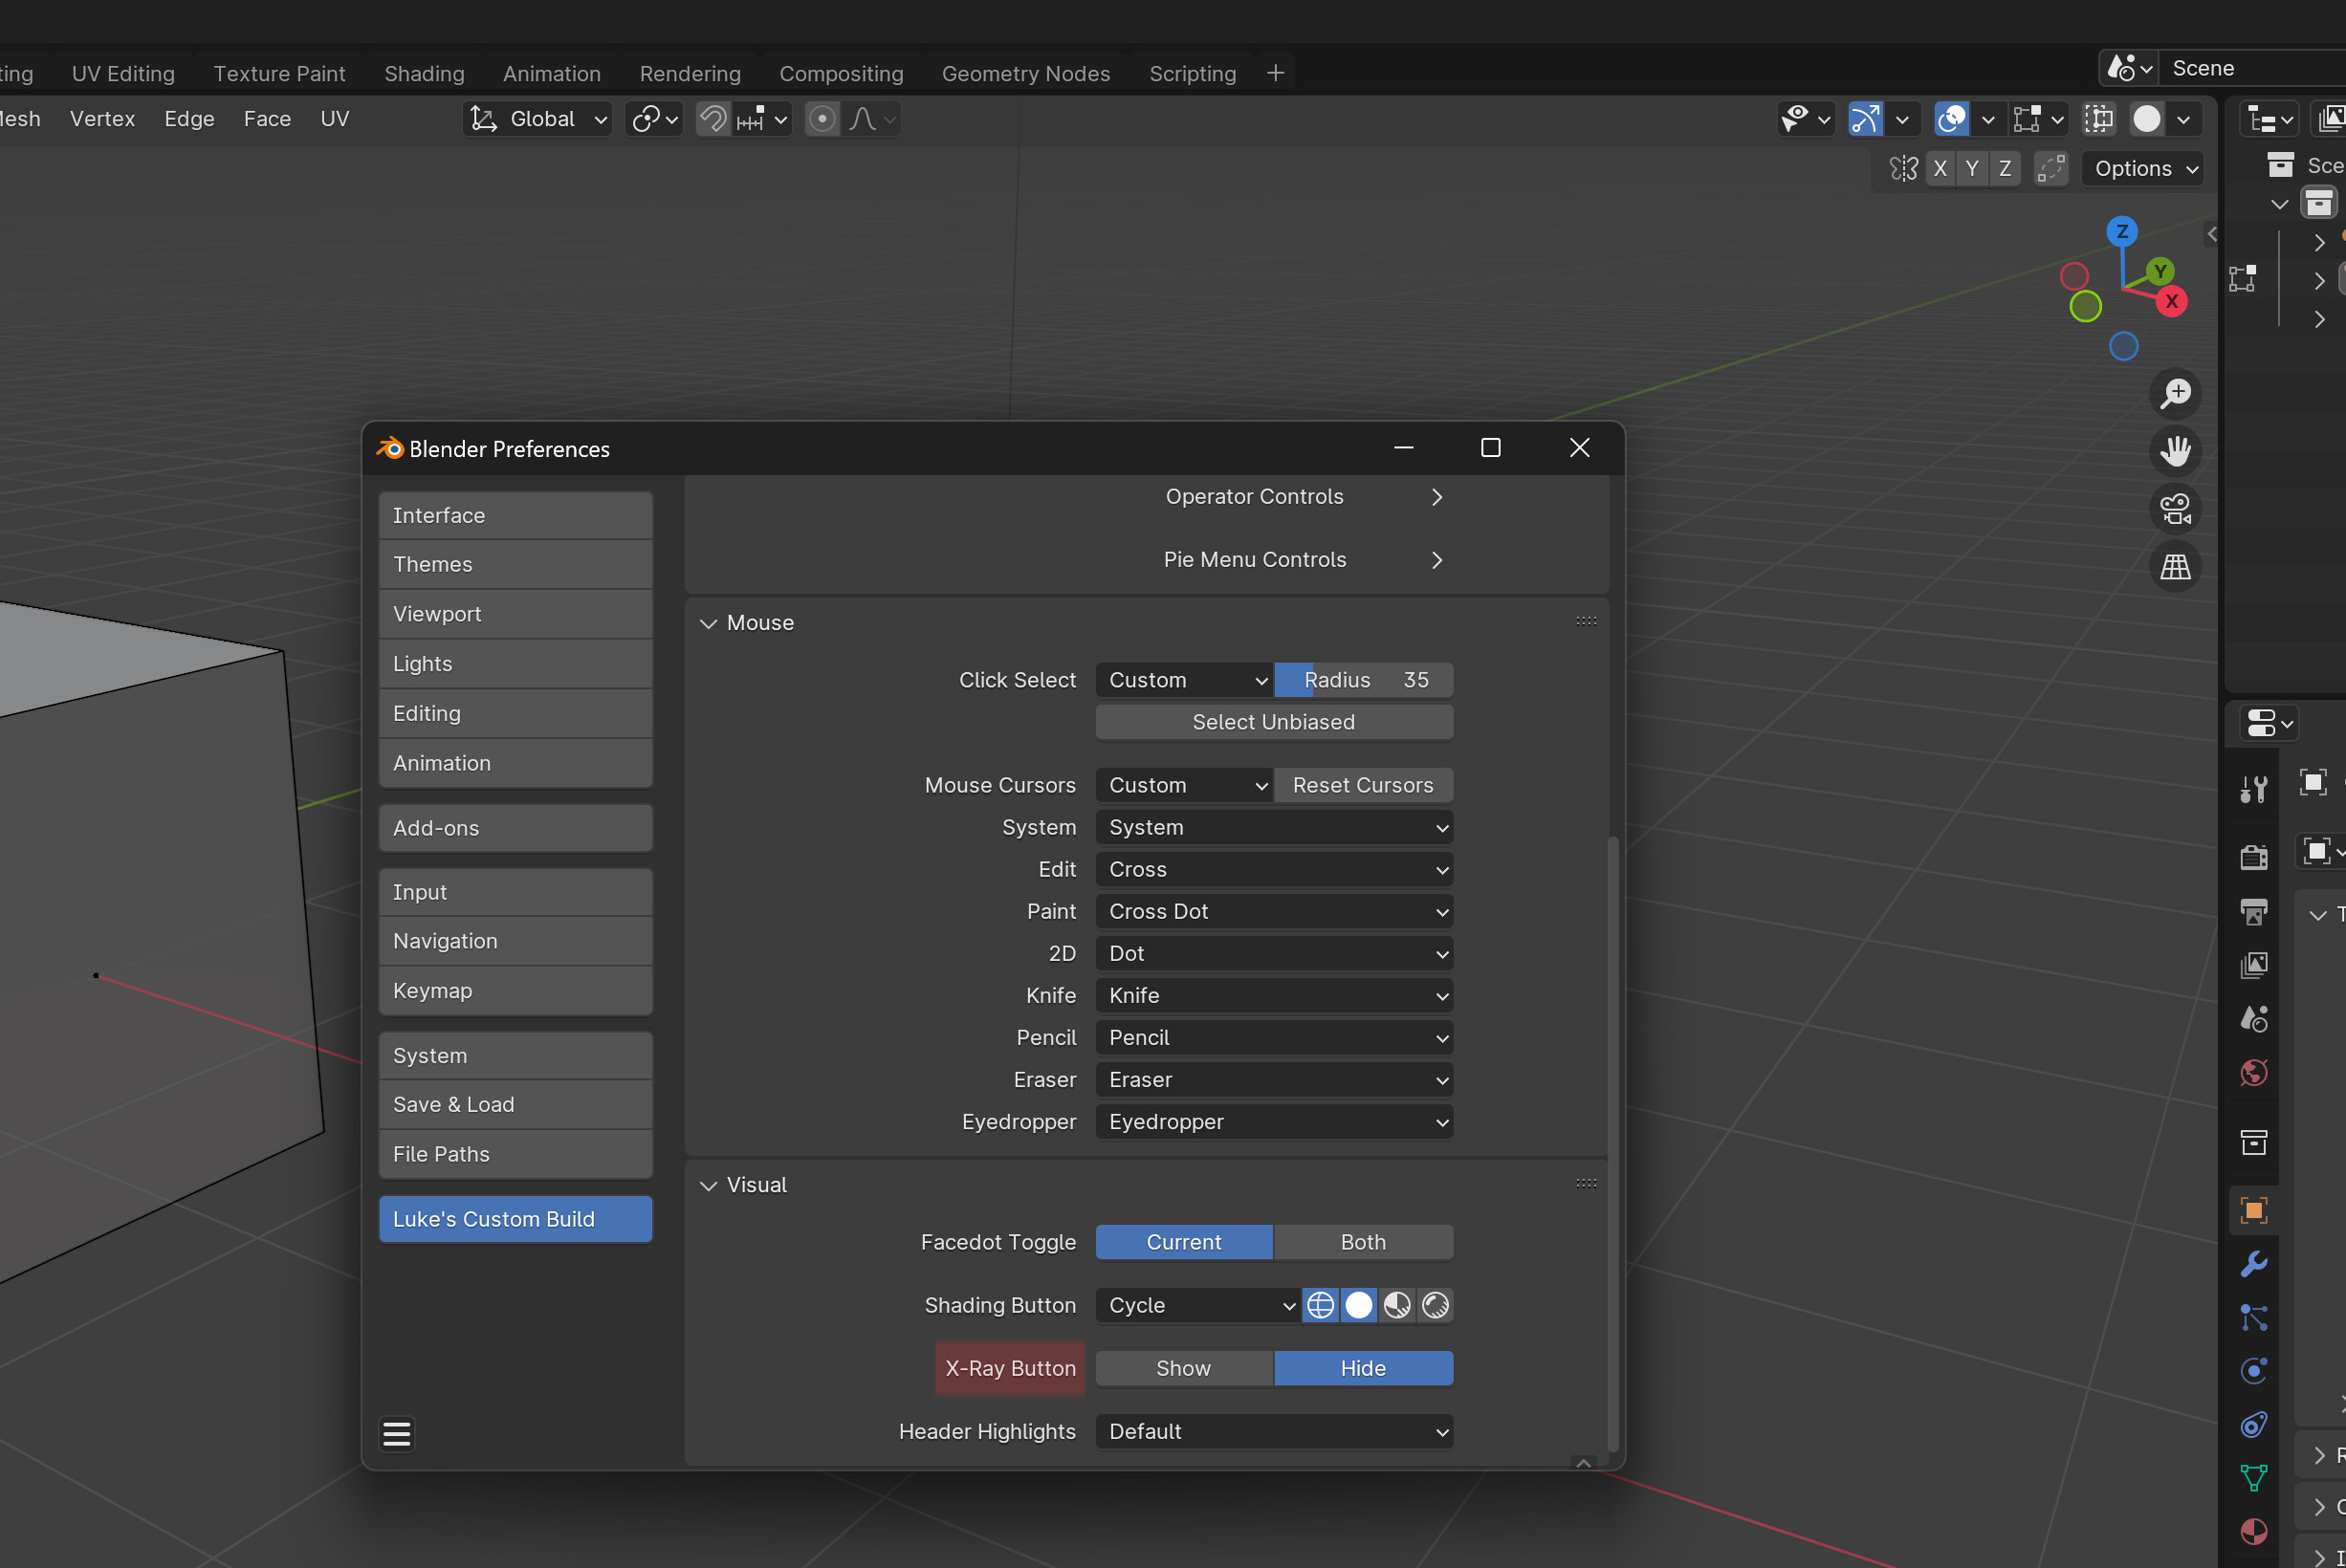
The 3rd mode is called “Cycle”. It will cycle through your choice of shading modes. Pick them by clicking their icon that shows up next to the mode dropdown in userprefs. When you click the header icon, it switches to the next shading mode in the cycle.
If applicable, you can hide the X-Ray header button.
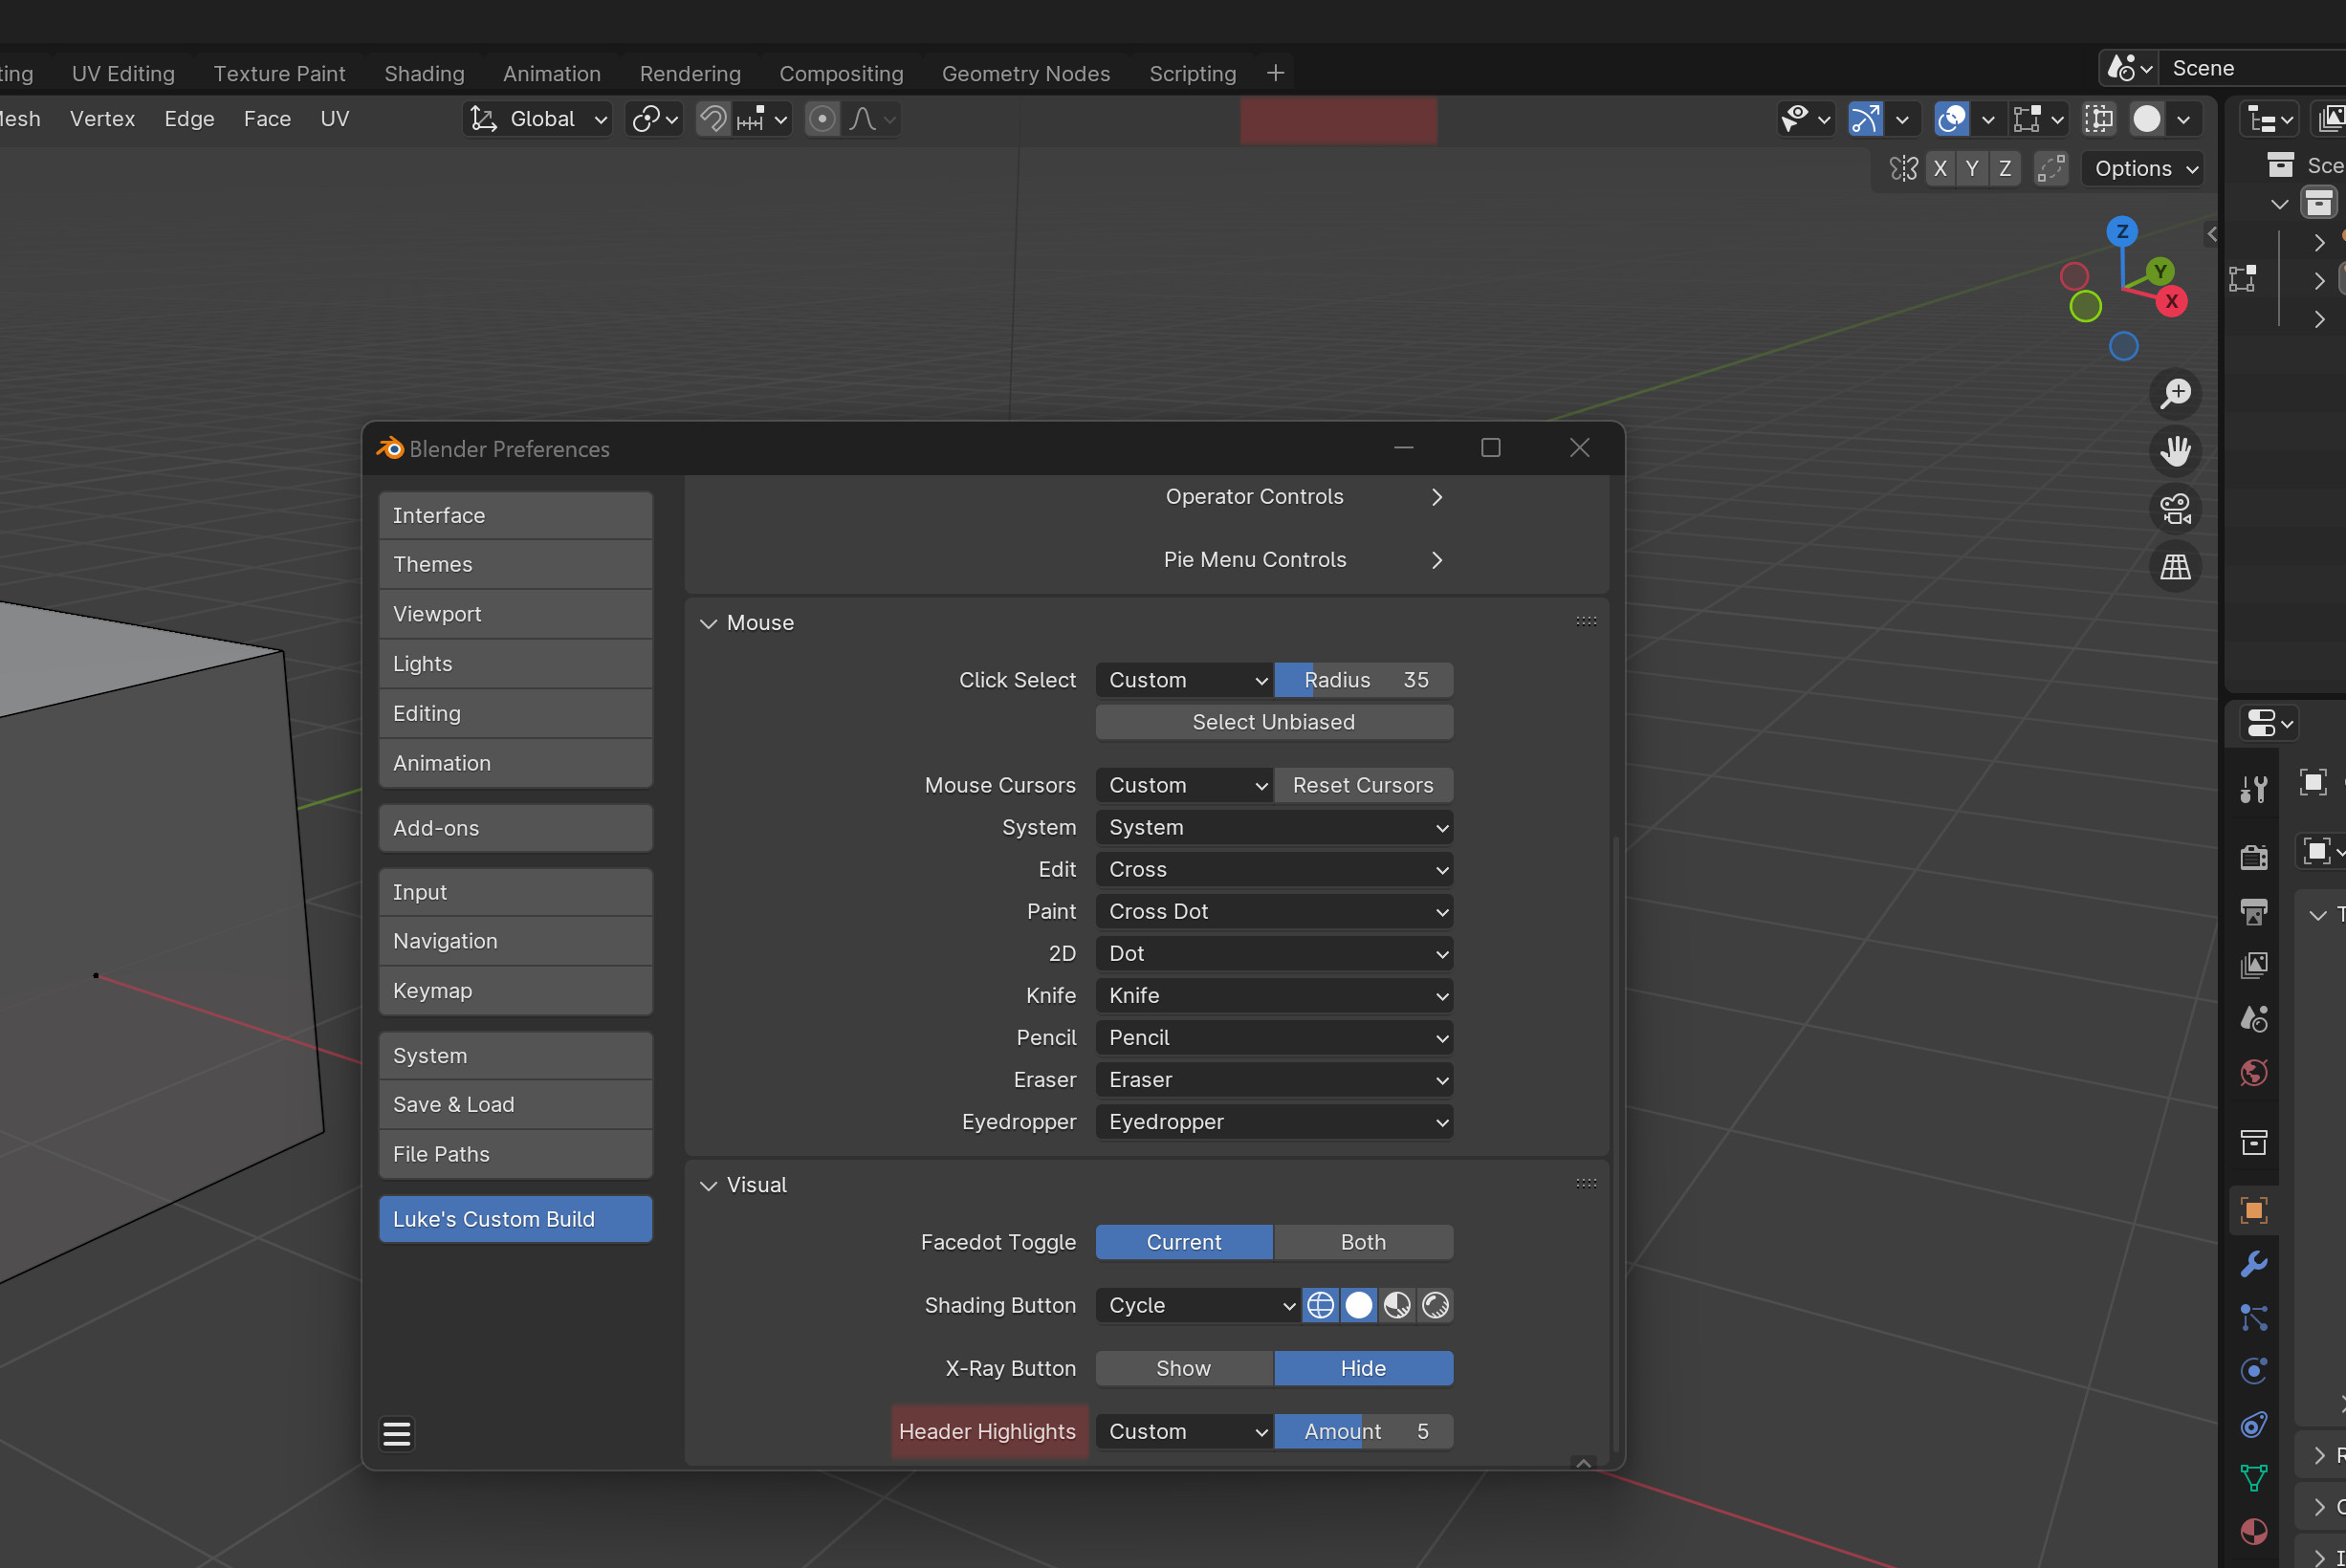
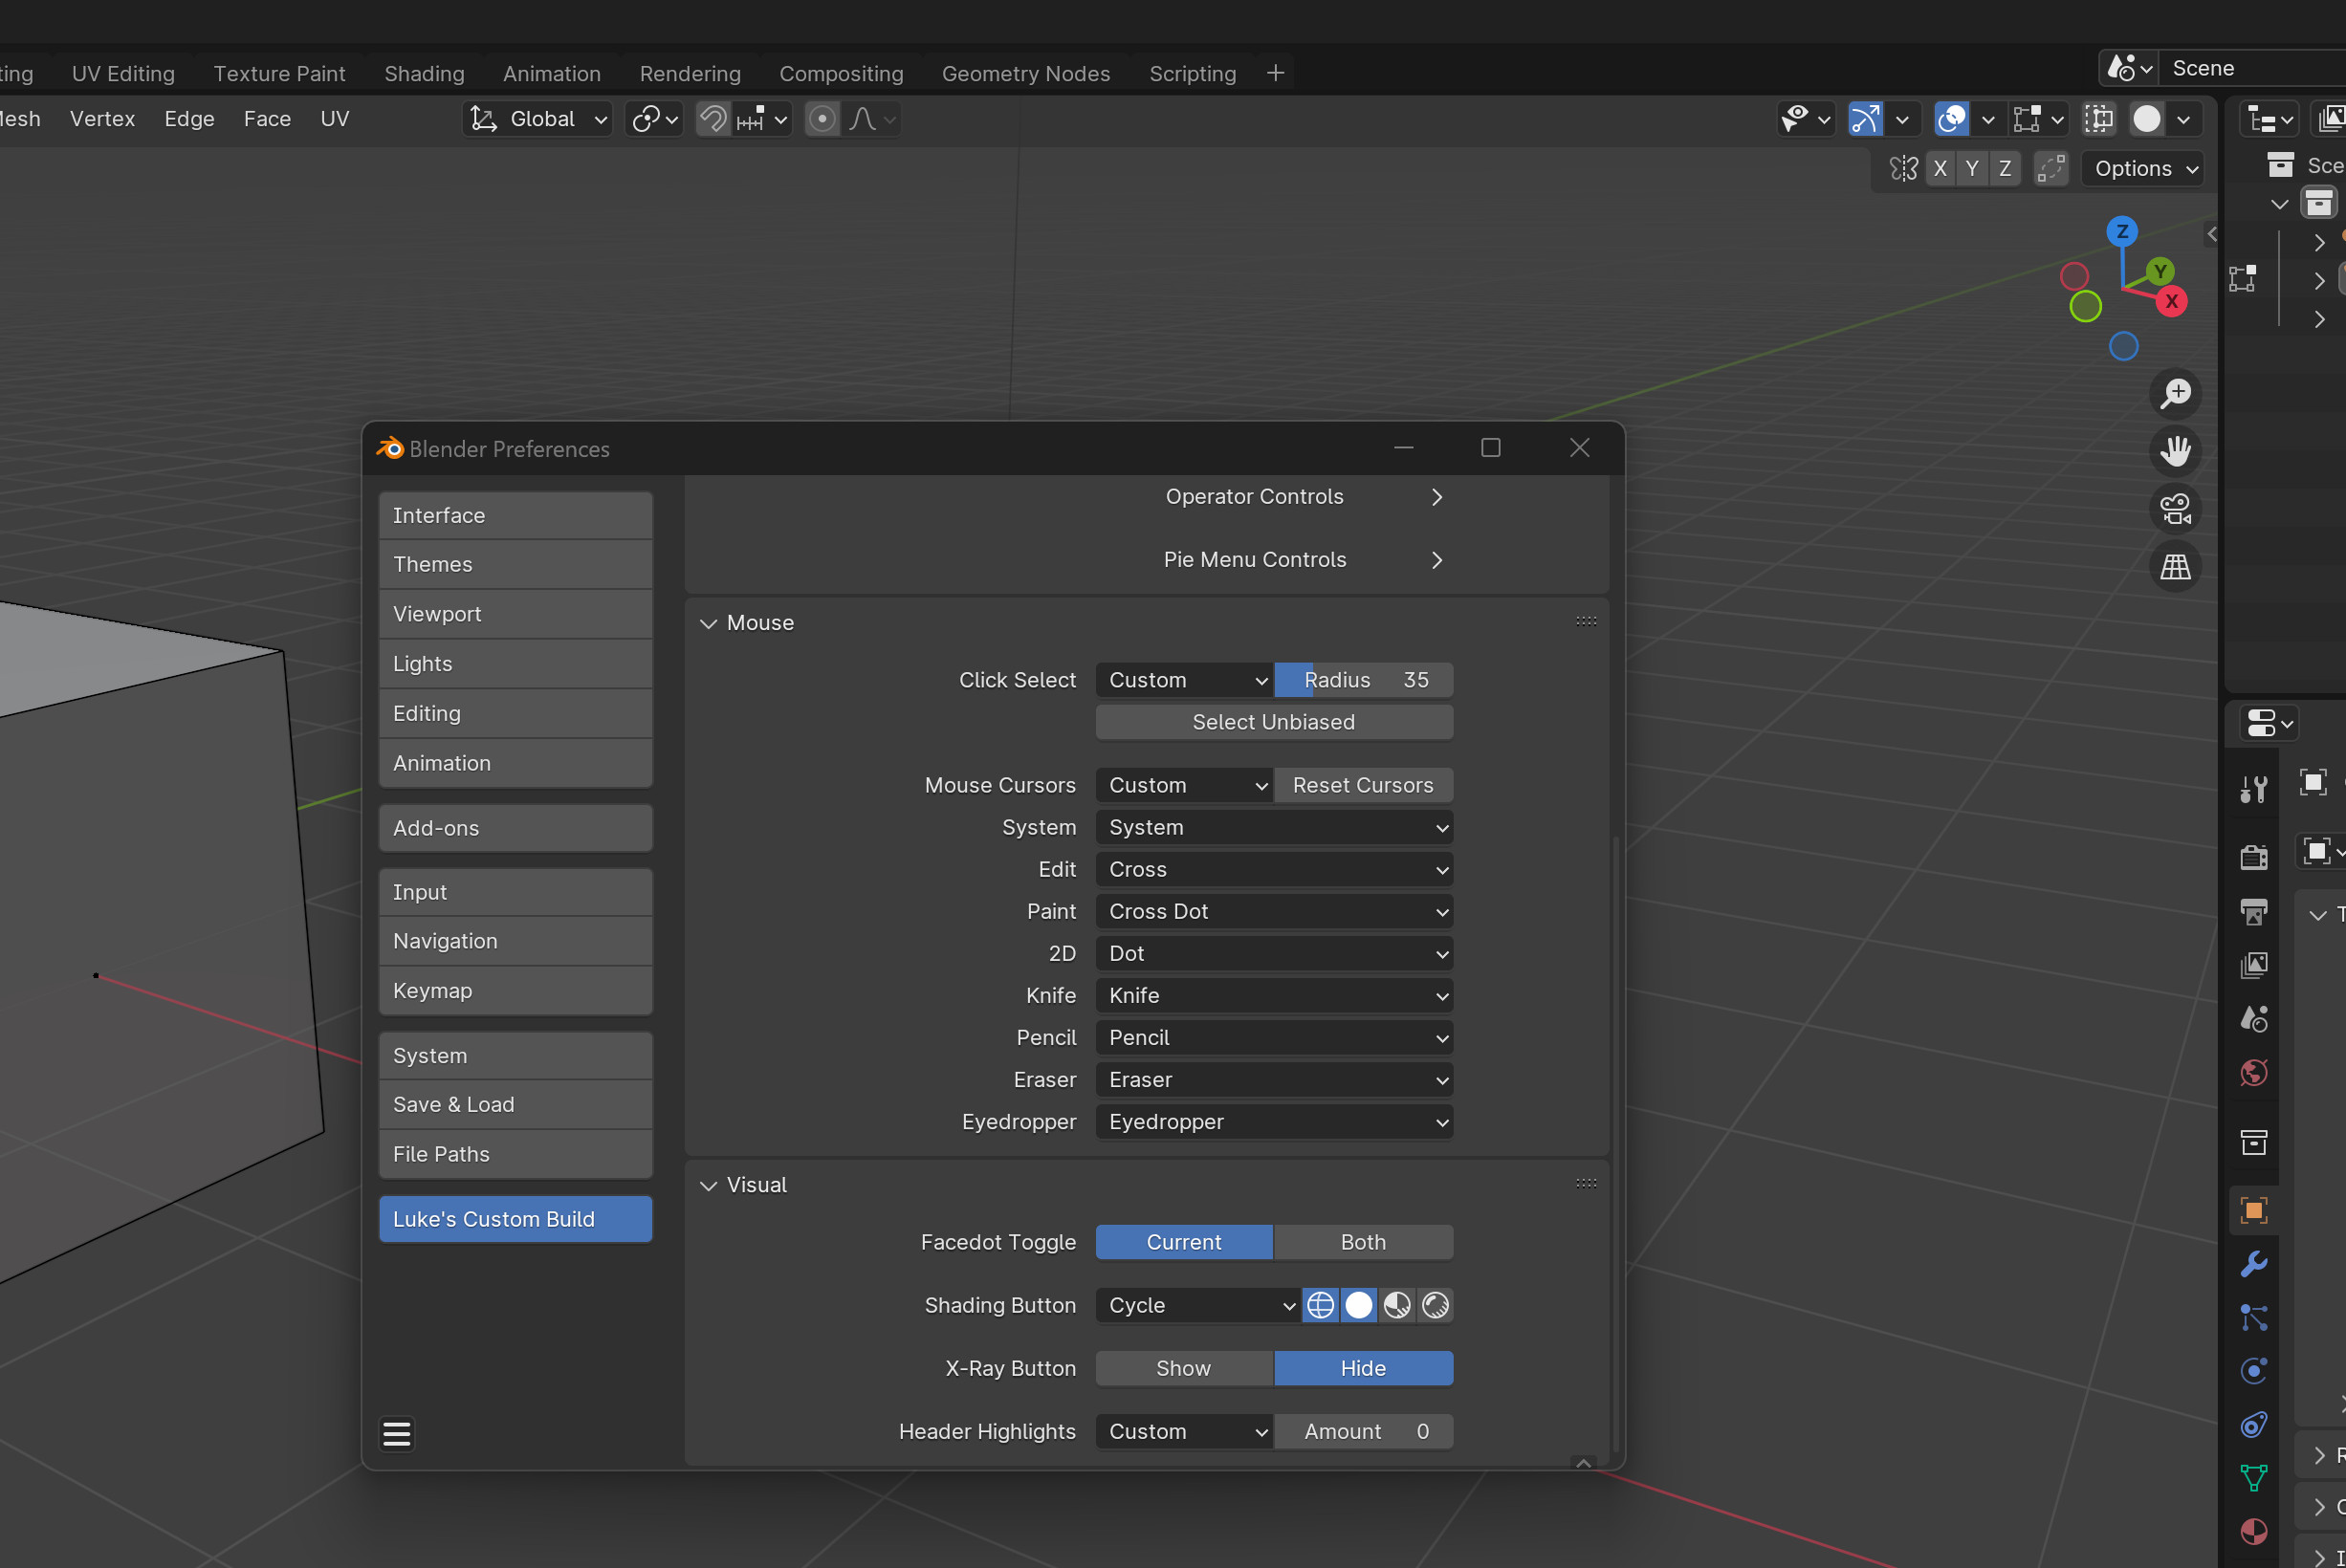
I don’t like header highlights. They make the active window’s header brighter. It’s that horizontal strip at the top there. Default value is 5.
Highlights off
Highlights twice as bright
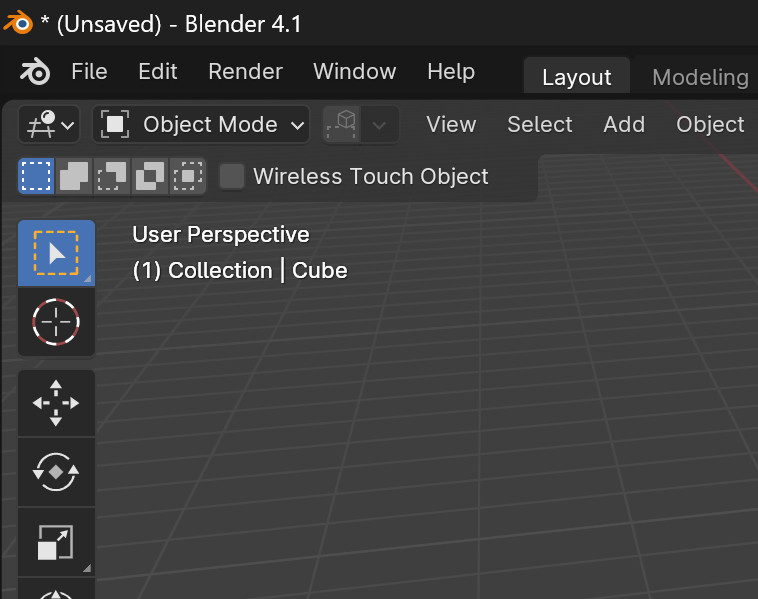
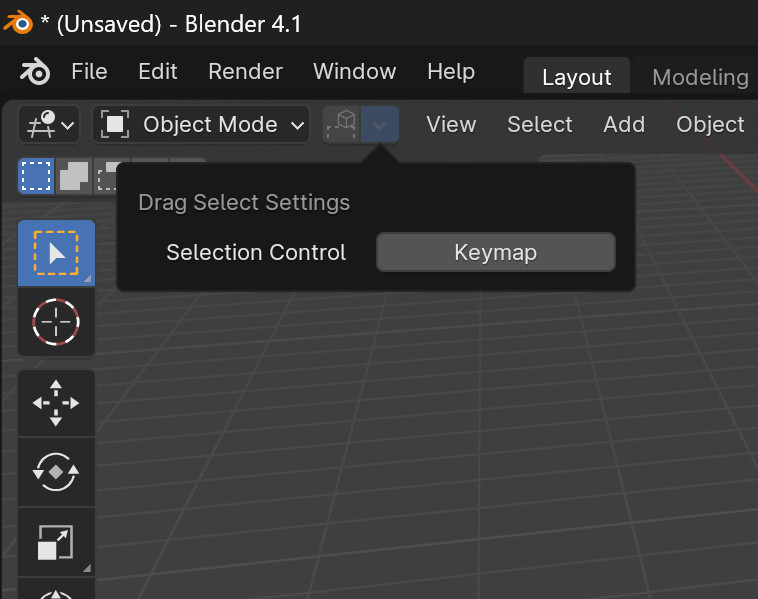
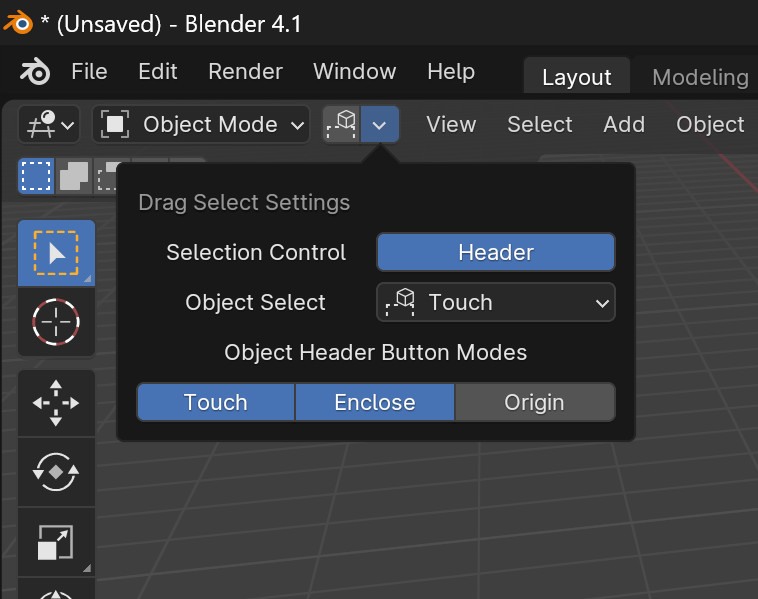

 . Also it somehow messed up the selection functionality for my vanilla Blender 4.1, since they share the config file, so I had to reset everything.
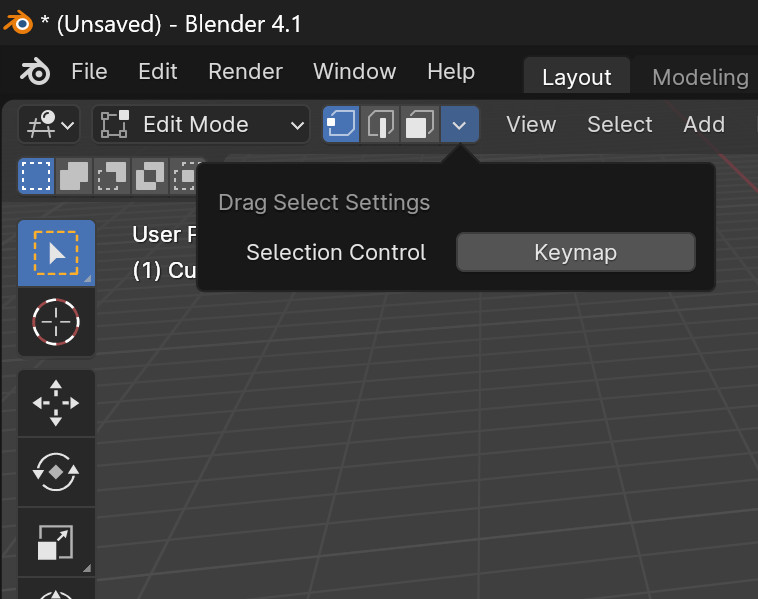
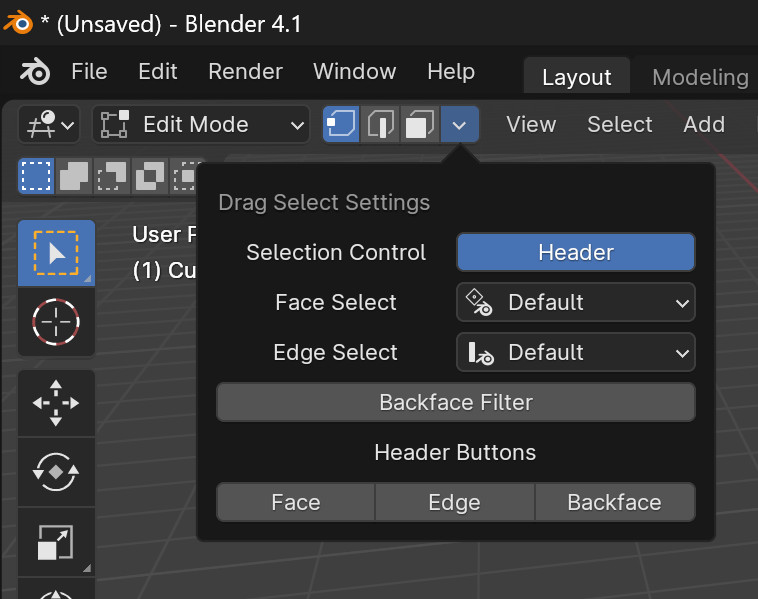
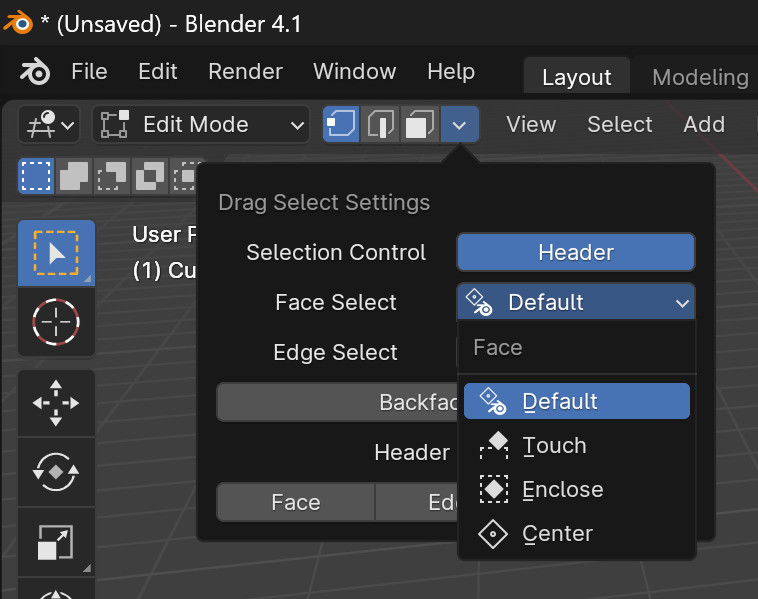
 )? If there are multiple mutually exclusive choices like Keymap/Header, then there should be 2 buttons.