I couldn’t find it by searching, so I need your help. I’m sorry. I’m using a translator, so my English may be hard to understand.
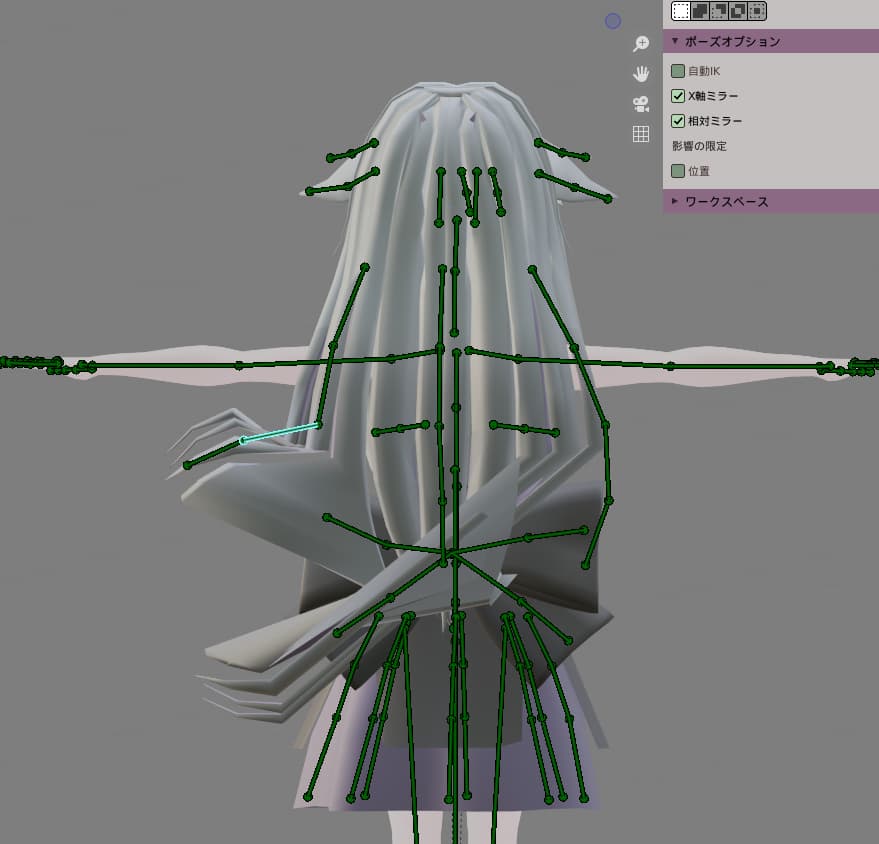
I used a mirror modifier to create the back hair.
I applied weight paint to it, but when I move it in pose mode, the other side bends unnaturally like this.
I would like the back hair to move naturally X-mirrored, not bent unnaturally like this. (Or I’d like it to follow the bones I’ve placed in the other hair if possible.
Did it fail because I used a mirror modifier to create the hair?
I would like you to solve this hair problem.
The file for this model is as follows.
This model was created by adding hair and clothes in Blender based on the Vroid prototype.
I’d be happy to take a look at this file, but your hosting site looks like Japanese, littered with a bunch of advertisements that read “download now” that don’t actually give me the file (presumably they give me malware). And I don’t understand Japanese very well, even if I’m okay at navigating sites like this when they’re in English. Perhaps you could host somewhere else? Or point out where I should click to download the file?
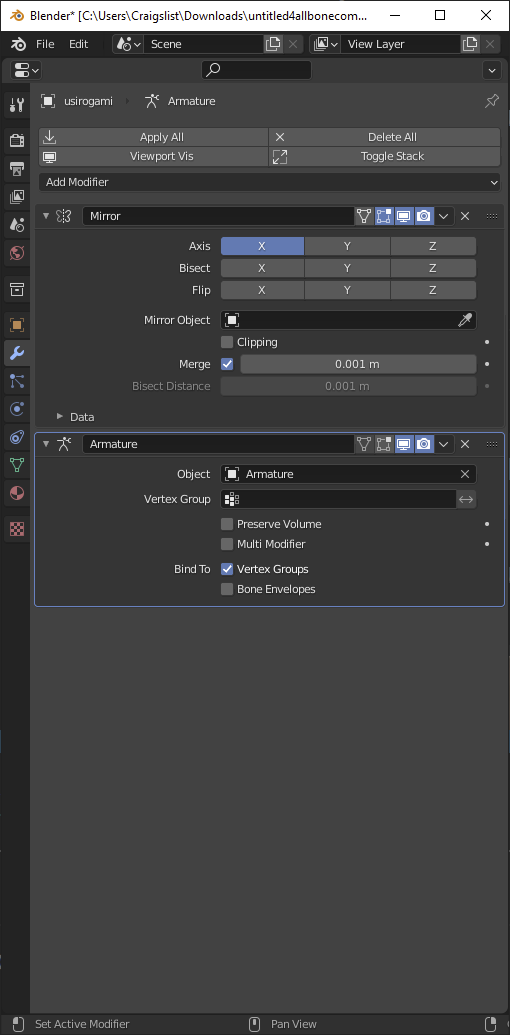
Done right, a mirror modifier should not cause any problems (mirror before/above armature, properly named bones/vertex groups).
Thanks for your reply!
I’m really sorry for the inconvenience to you, it was a famous site in Japan.
I uploaded it to google drive, but can you see it here?
If you use the mirror modifier in the right way, you won’t have any problems, right? Thank you for telling me.
I’m really new to blender, so I didn’t know what exactly “placing a mirror before/after the armature” meant… If you could let me know, that would be great.
Your modifiers exist in a particular order, which is the order in which the modifiers are evaluated. Your mirror modifier is above the armature modifier in the stack, which is how it should be, so no problem there:
You can change the order by dragging and dropping one modifier to a different position in the stack. Here, you shouldn’t. But you should know that order matters for the future.
The main issue is that your bones aren’t named in a way that your mirror modifier can understand. You have kami_yoko_migi2 paired with kami_yoko_higari2. But Blender doesn’t understand Japanese any better than I do. Try kami_yoko_2.R and kami_yoko_2.L. .R for right and .L for left. There is some forgiveness, .l or .L, _l or .l, but it’s English-based. (The standard is to name them based on the character’s perspective, not the onlooker, so my right hand is hand.r, and when you look at me face to face, hand.r will be to the left of hand.l from your perspective. But it’s just a standard, so you can do differently if you want, it doesn’t matter.)
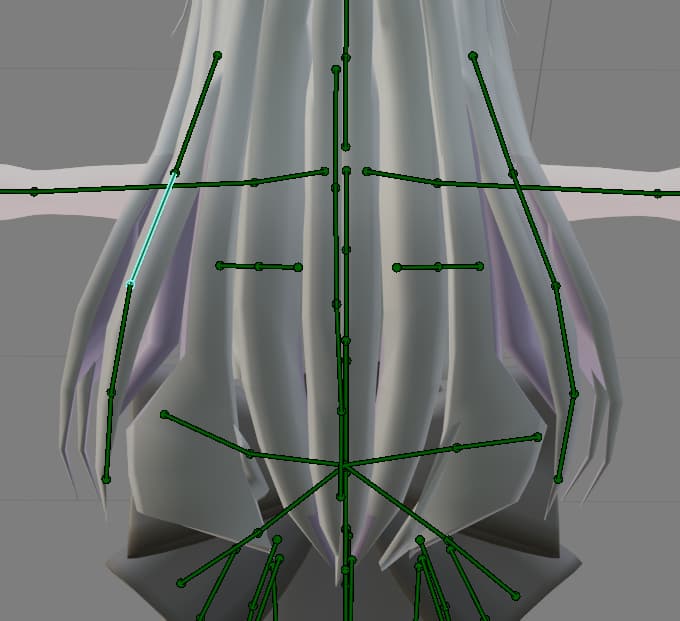
Beyond that, it seems to me that your axes aren’t quite mirrored. You should, in edit mode on your armature, select one side of your bones and use the “symmetrize” operation to make the axes on the other side match.
Thank you so much for teaching me so much! I am so grateful for your kindness .
I changed the name of the bone and symmetrized that bone as you taught me. That made my hair move symmetrically!!! Thank you so much!
Thank you so much also for telling me about the armature and mirror order.
It never occurred to me that the cause was the name of the bones. So I really appreciate your help as it would have been difficult for me to solve this on my own!